
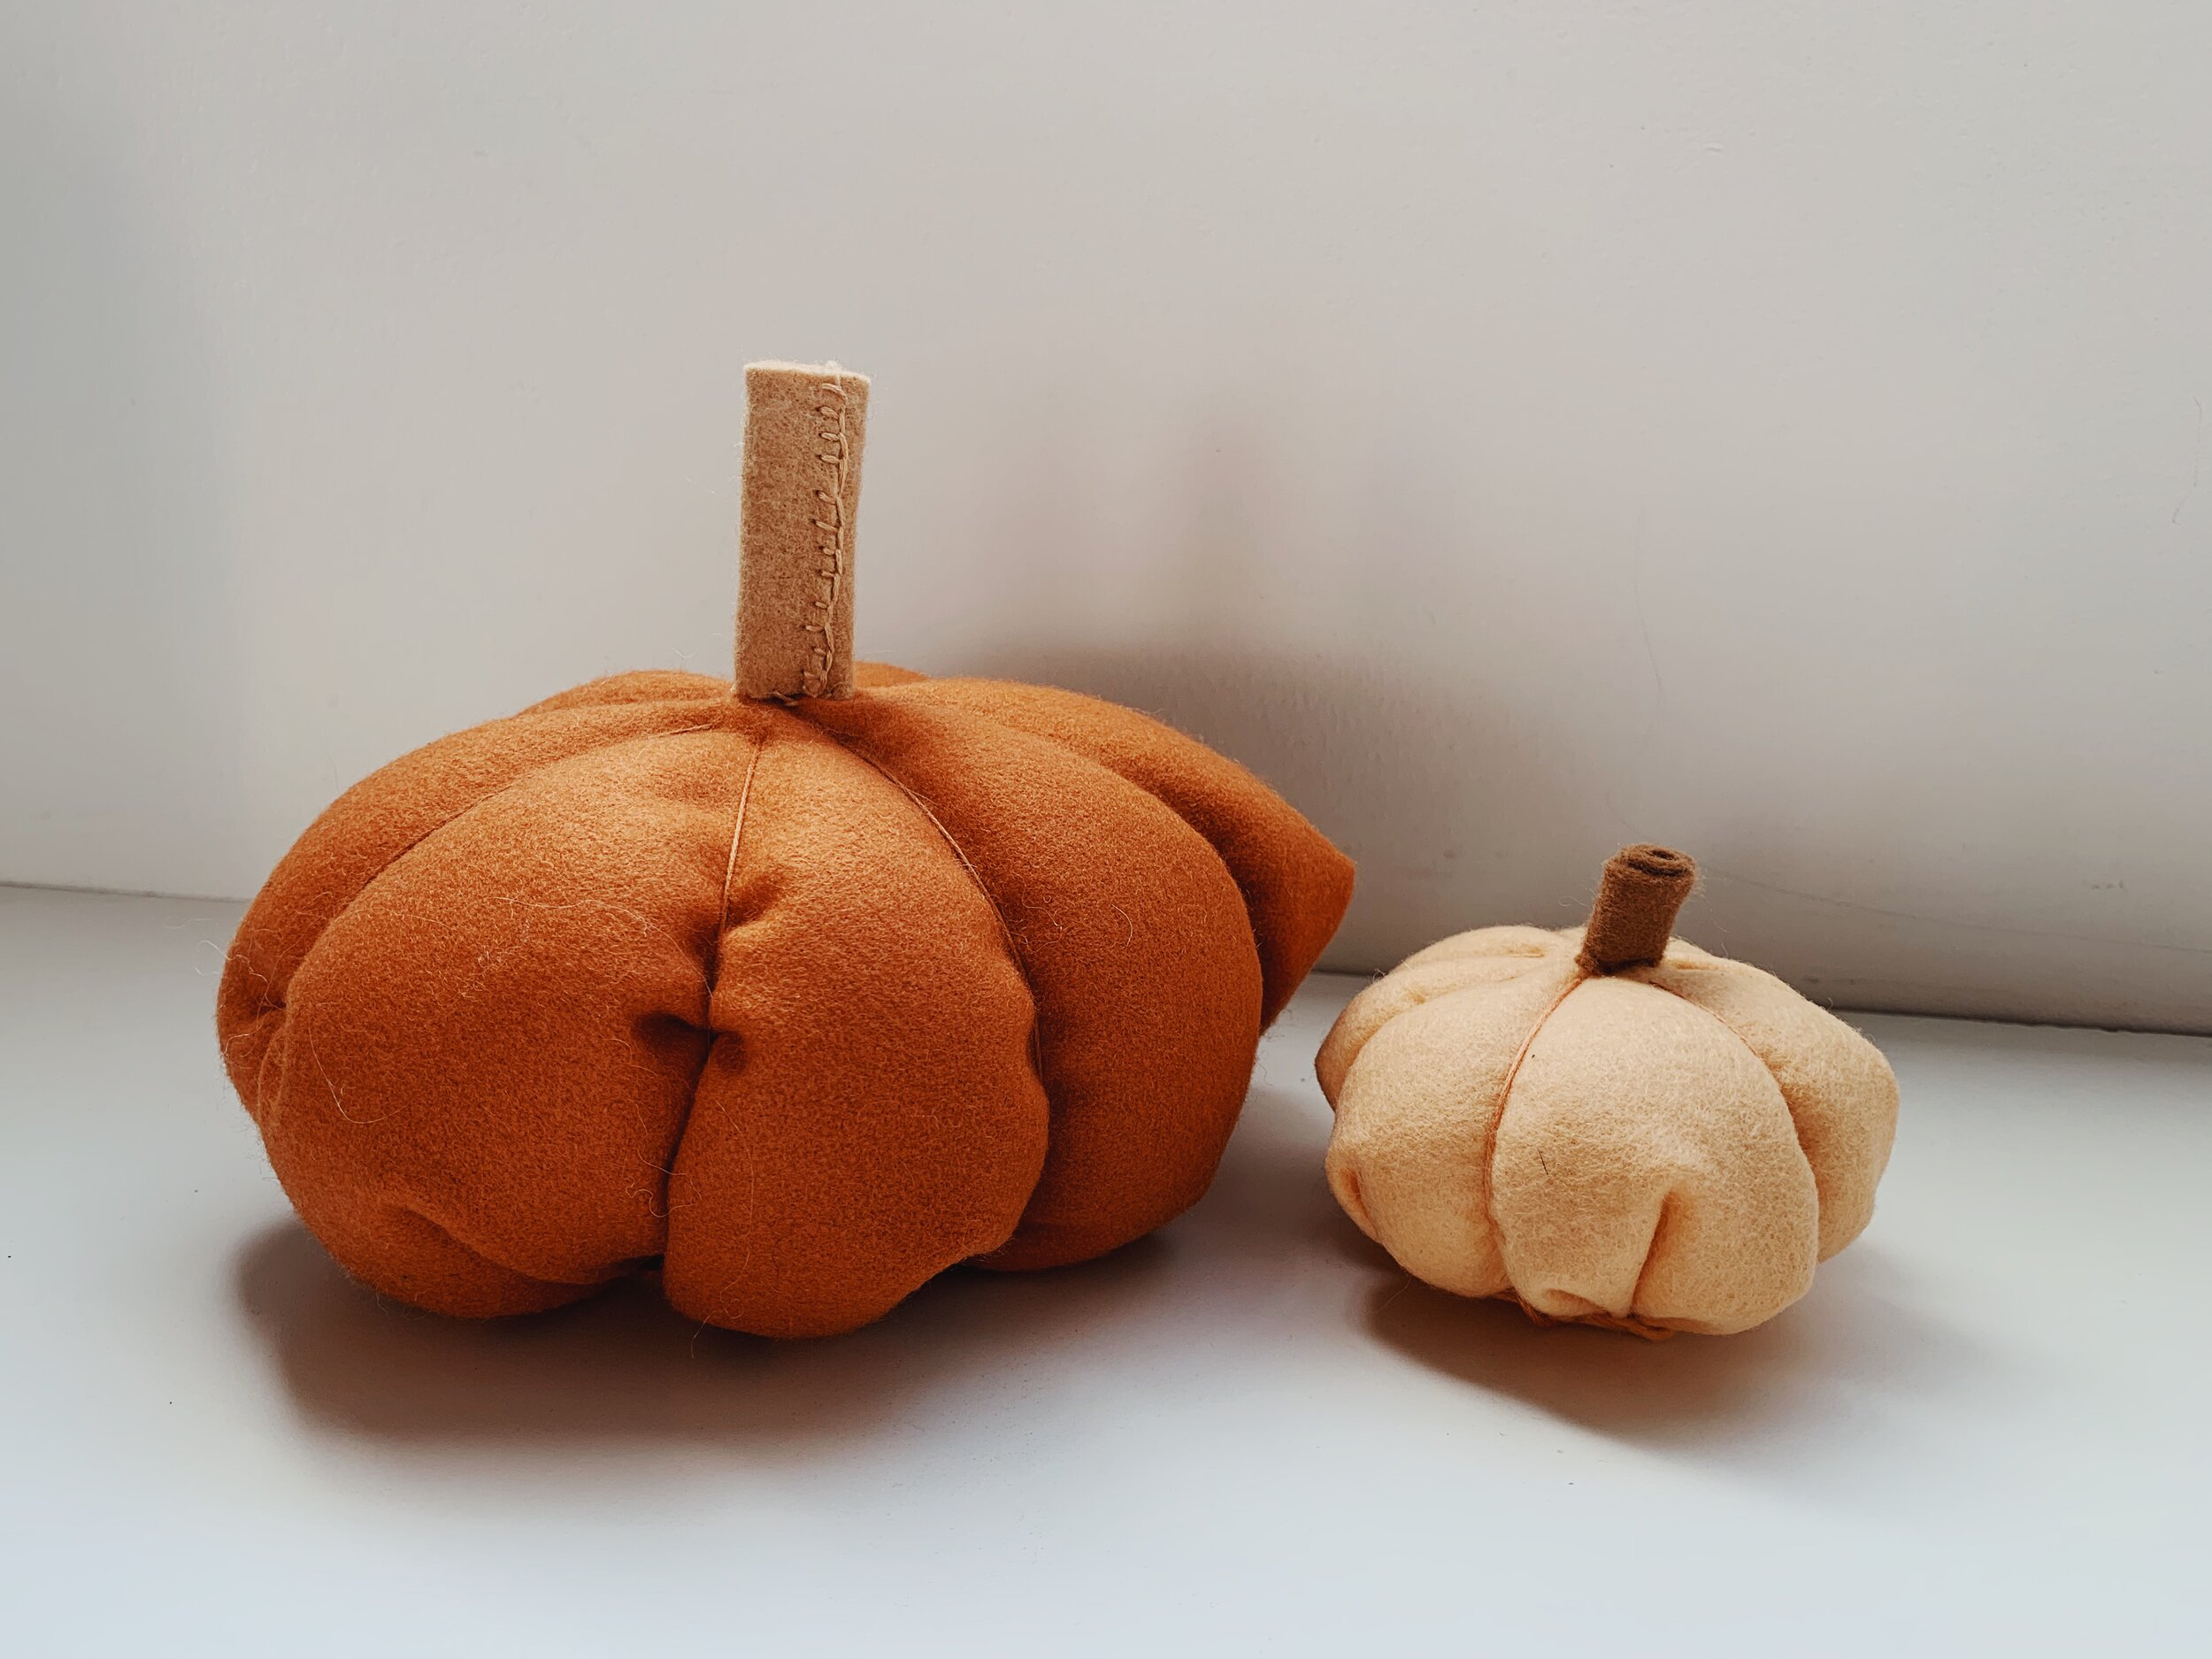
Autumn Pumpkin Tutorial
Make a soft wool pumpkin to decorate your home this autumn - and for many autumns to come!


Depending on age and skill level, many to all of these steps can be done by even the smallest of hands! Young children can bring great focus to a simple running stitch, and friends of any age can help stuff the pumpkin.
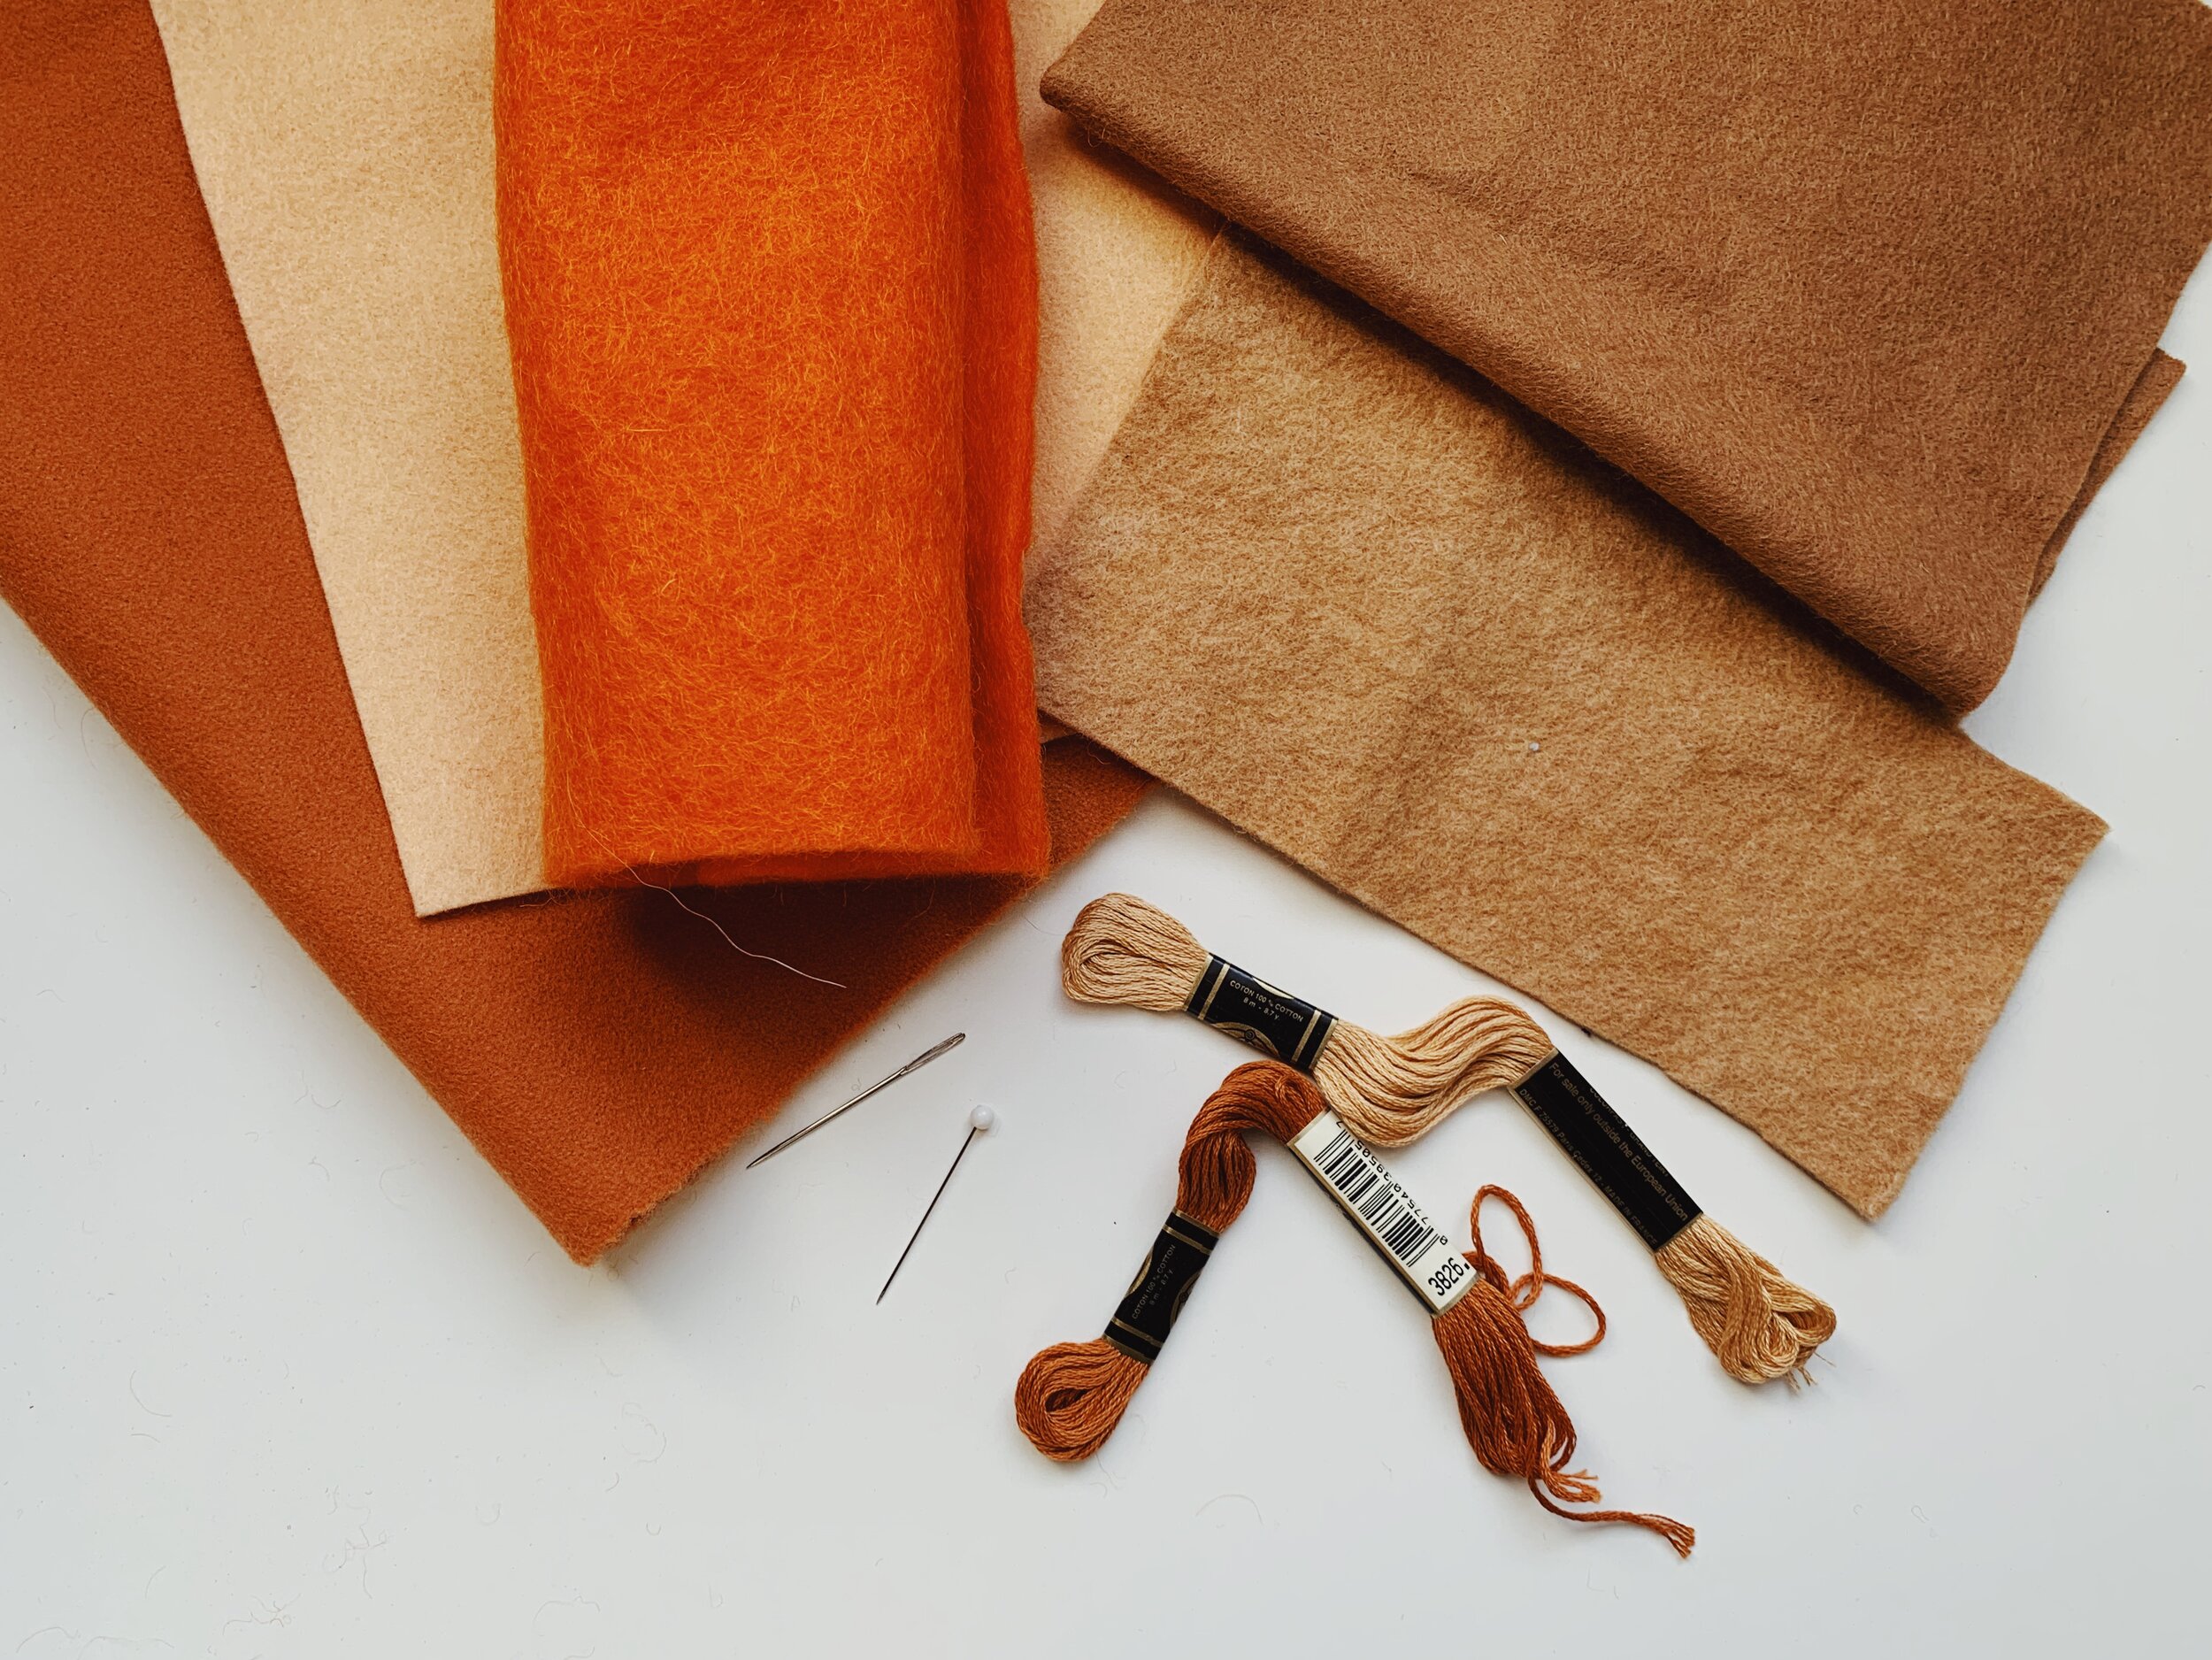
These pumpkins can be made with a variety of materials! You might use contrasting embroidery thread, polyester felt, fabric scraps for stuffing… whatever you have around! It’s helpful for both the thread and the fabric you work with to be thick and sturdy.
Materials Needed:
Felt (scraps work fine!)
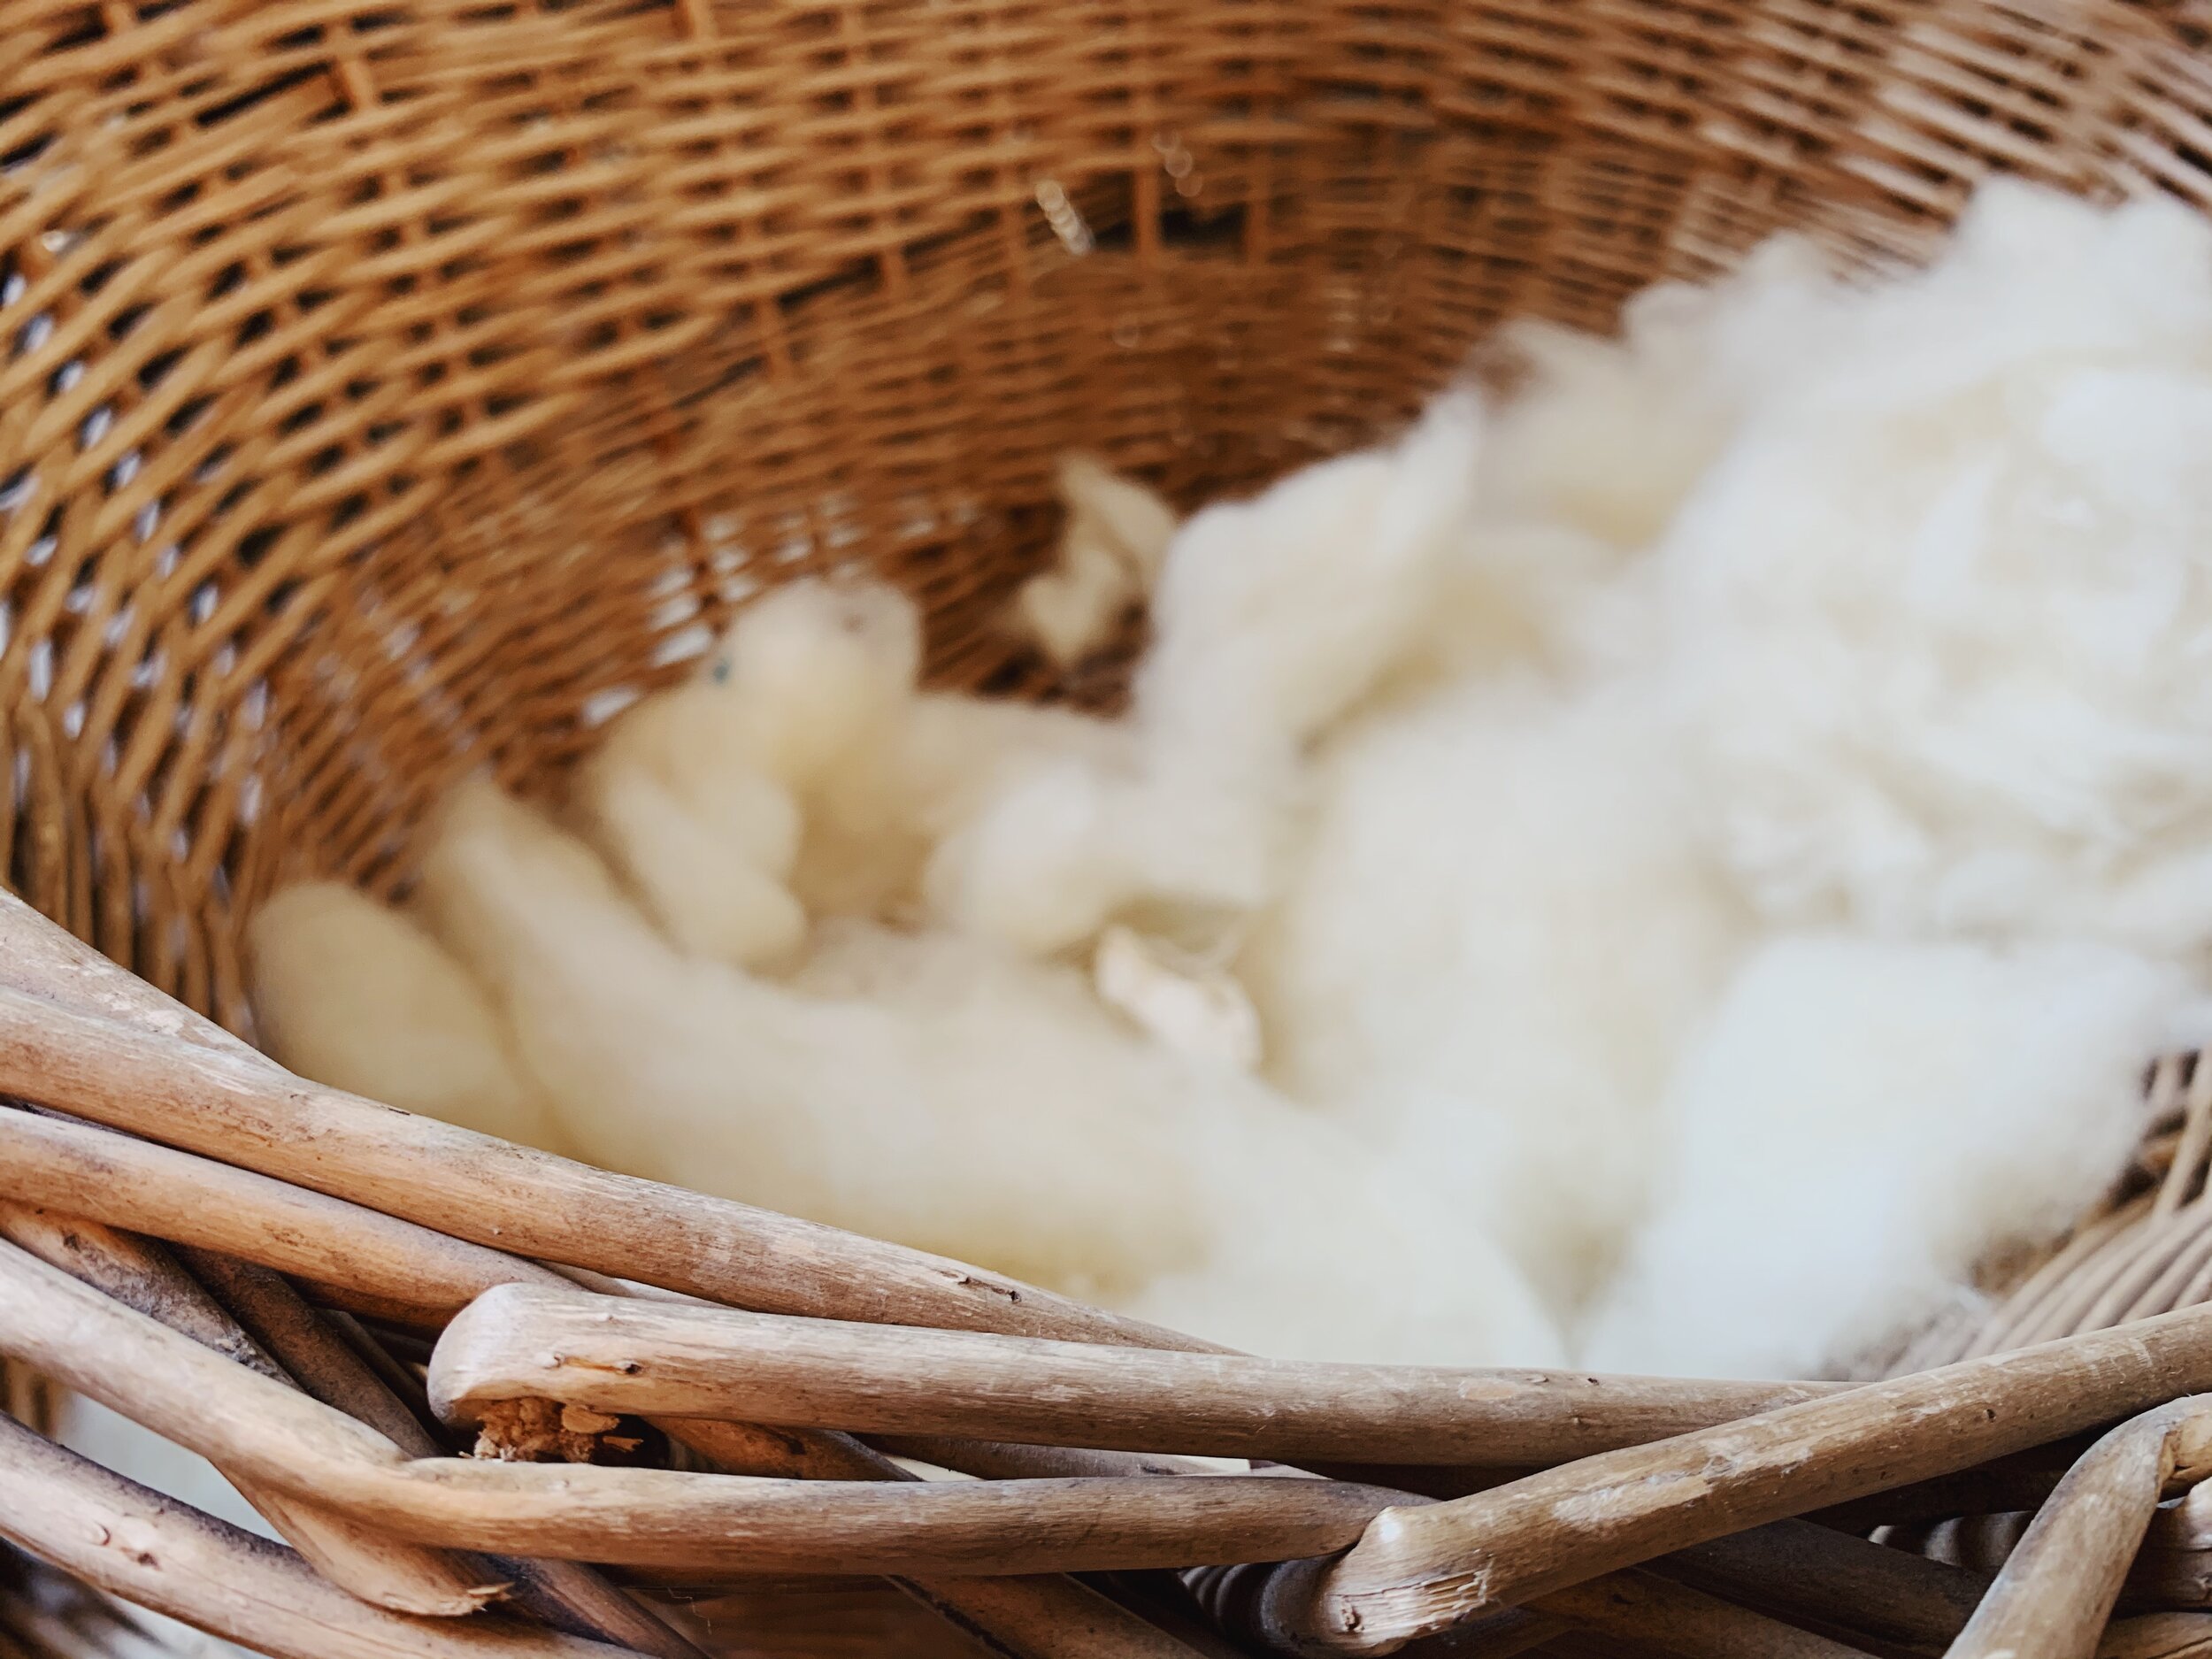
Stuffing
Embroidery thread to match your felt
Embroidery needle
Straight pin
Scissors
Pumpkin Tutorial:
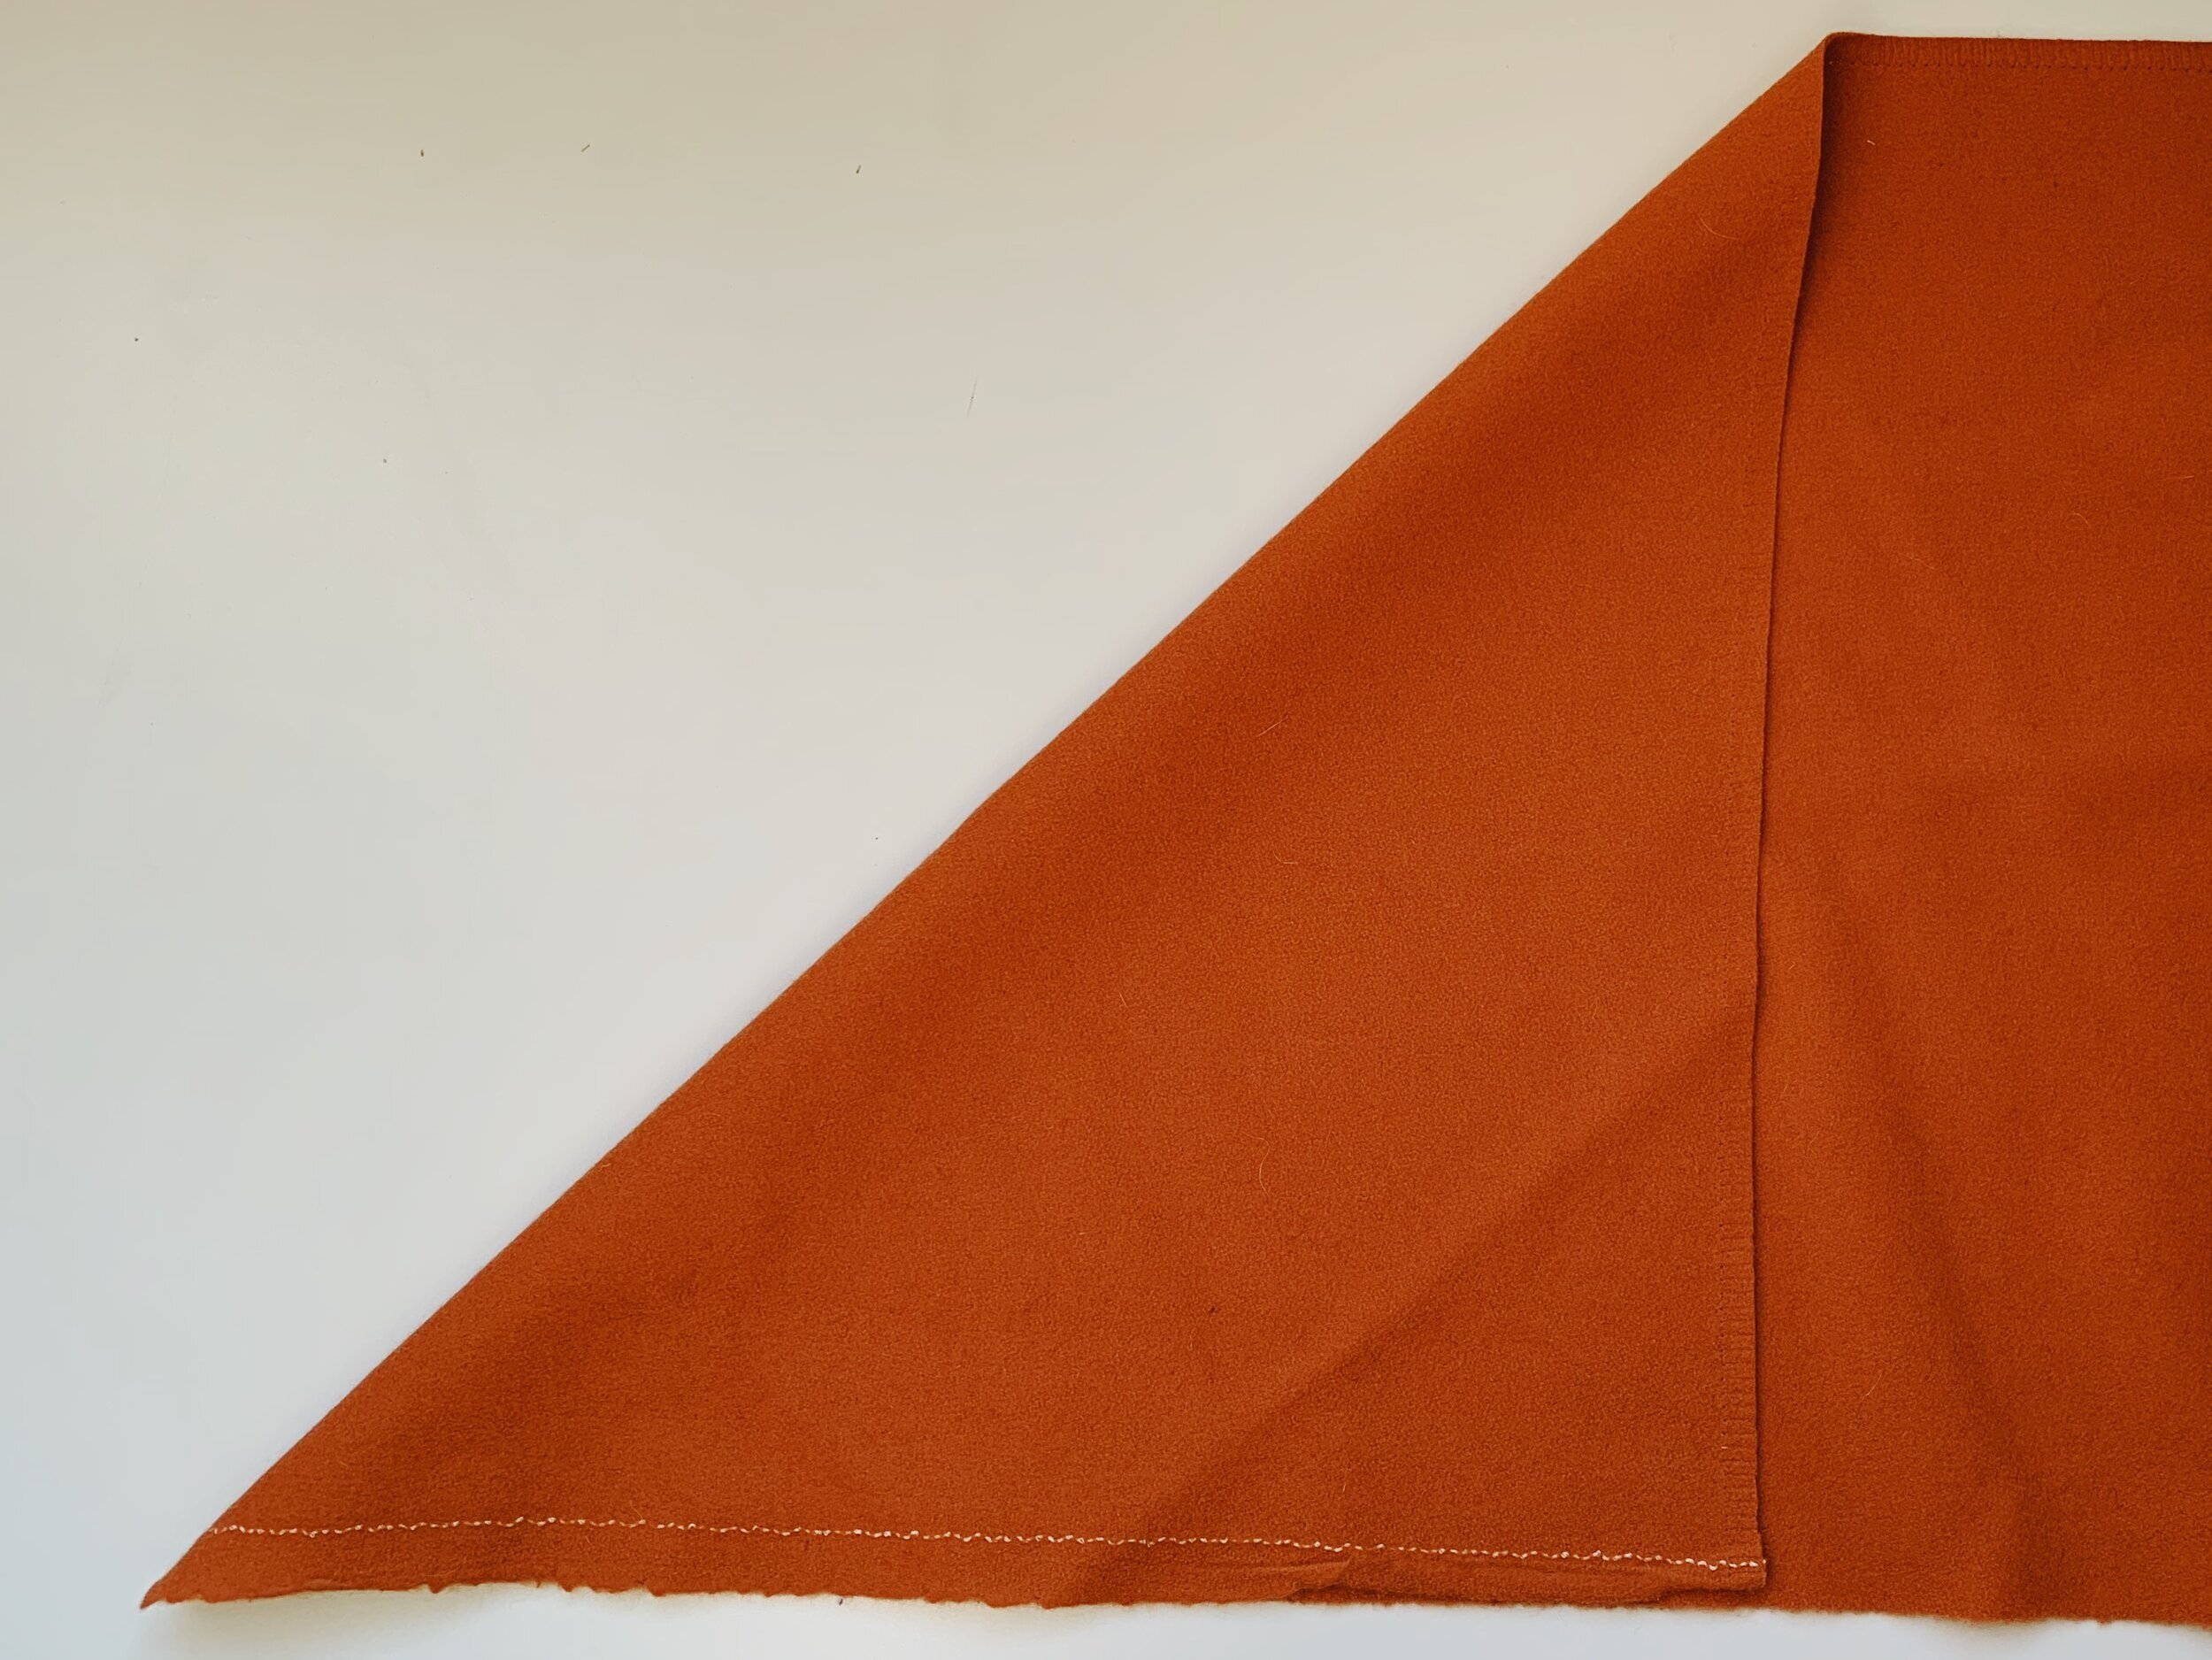
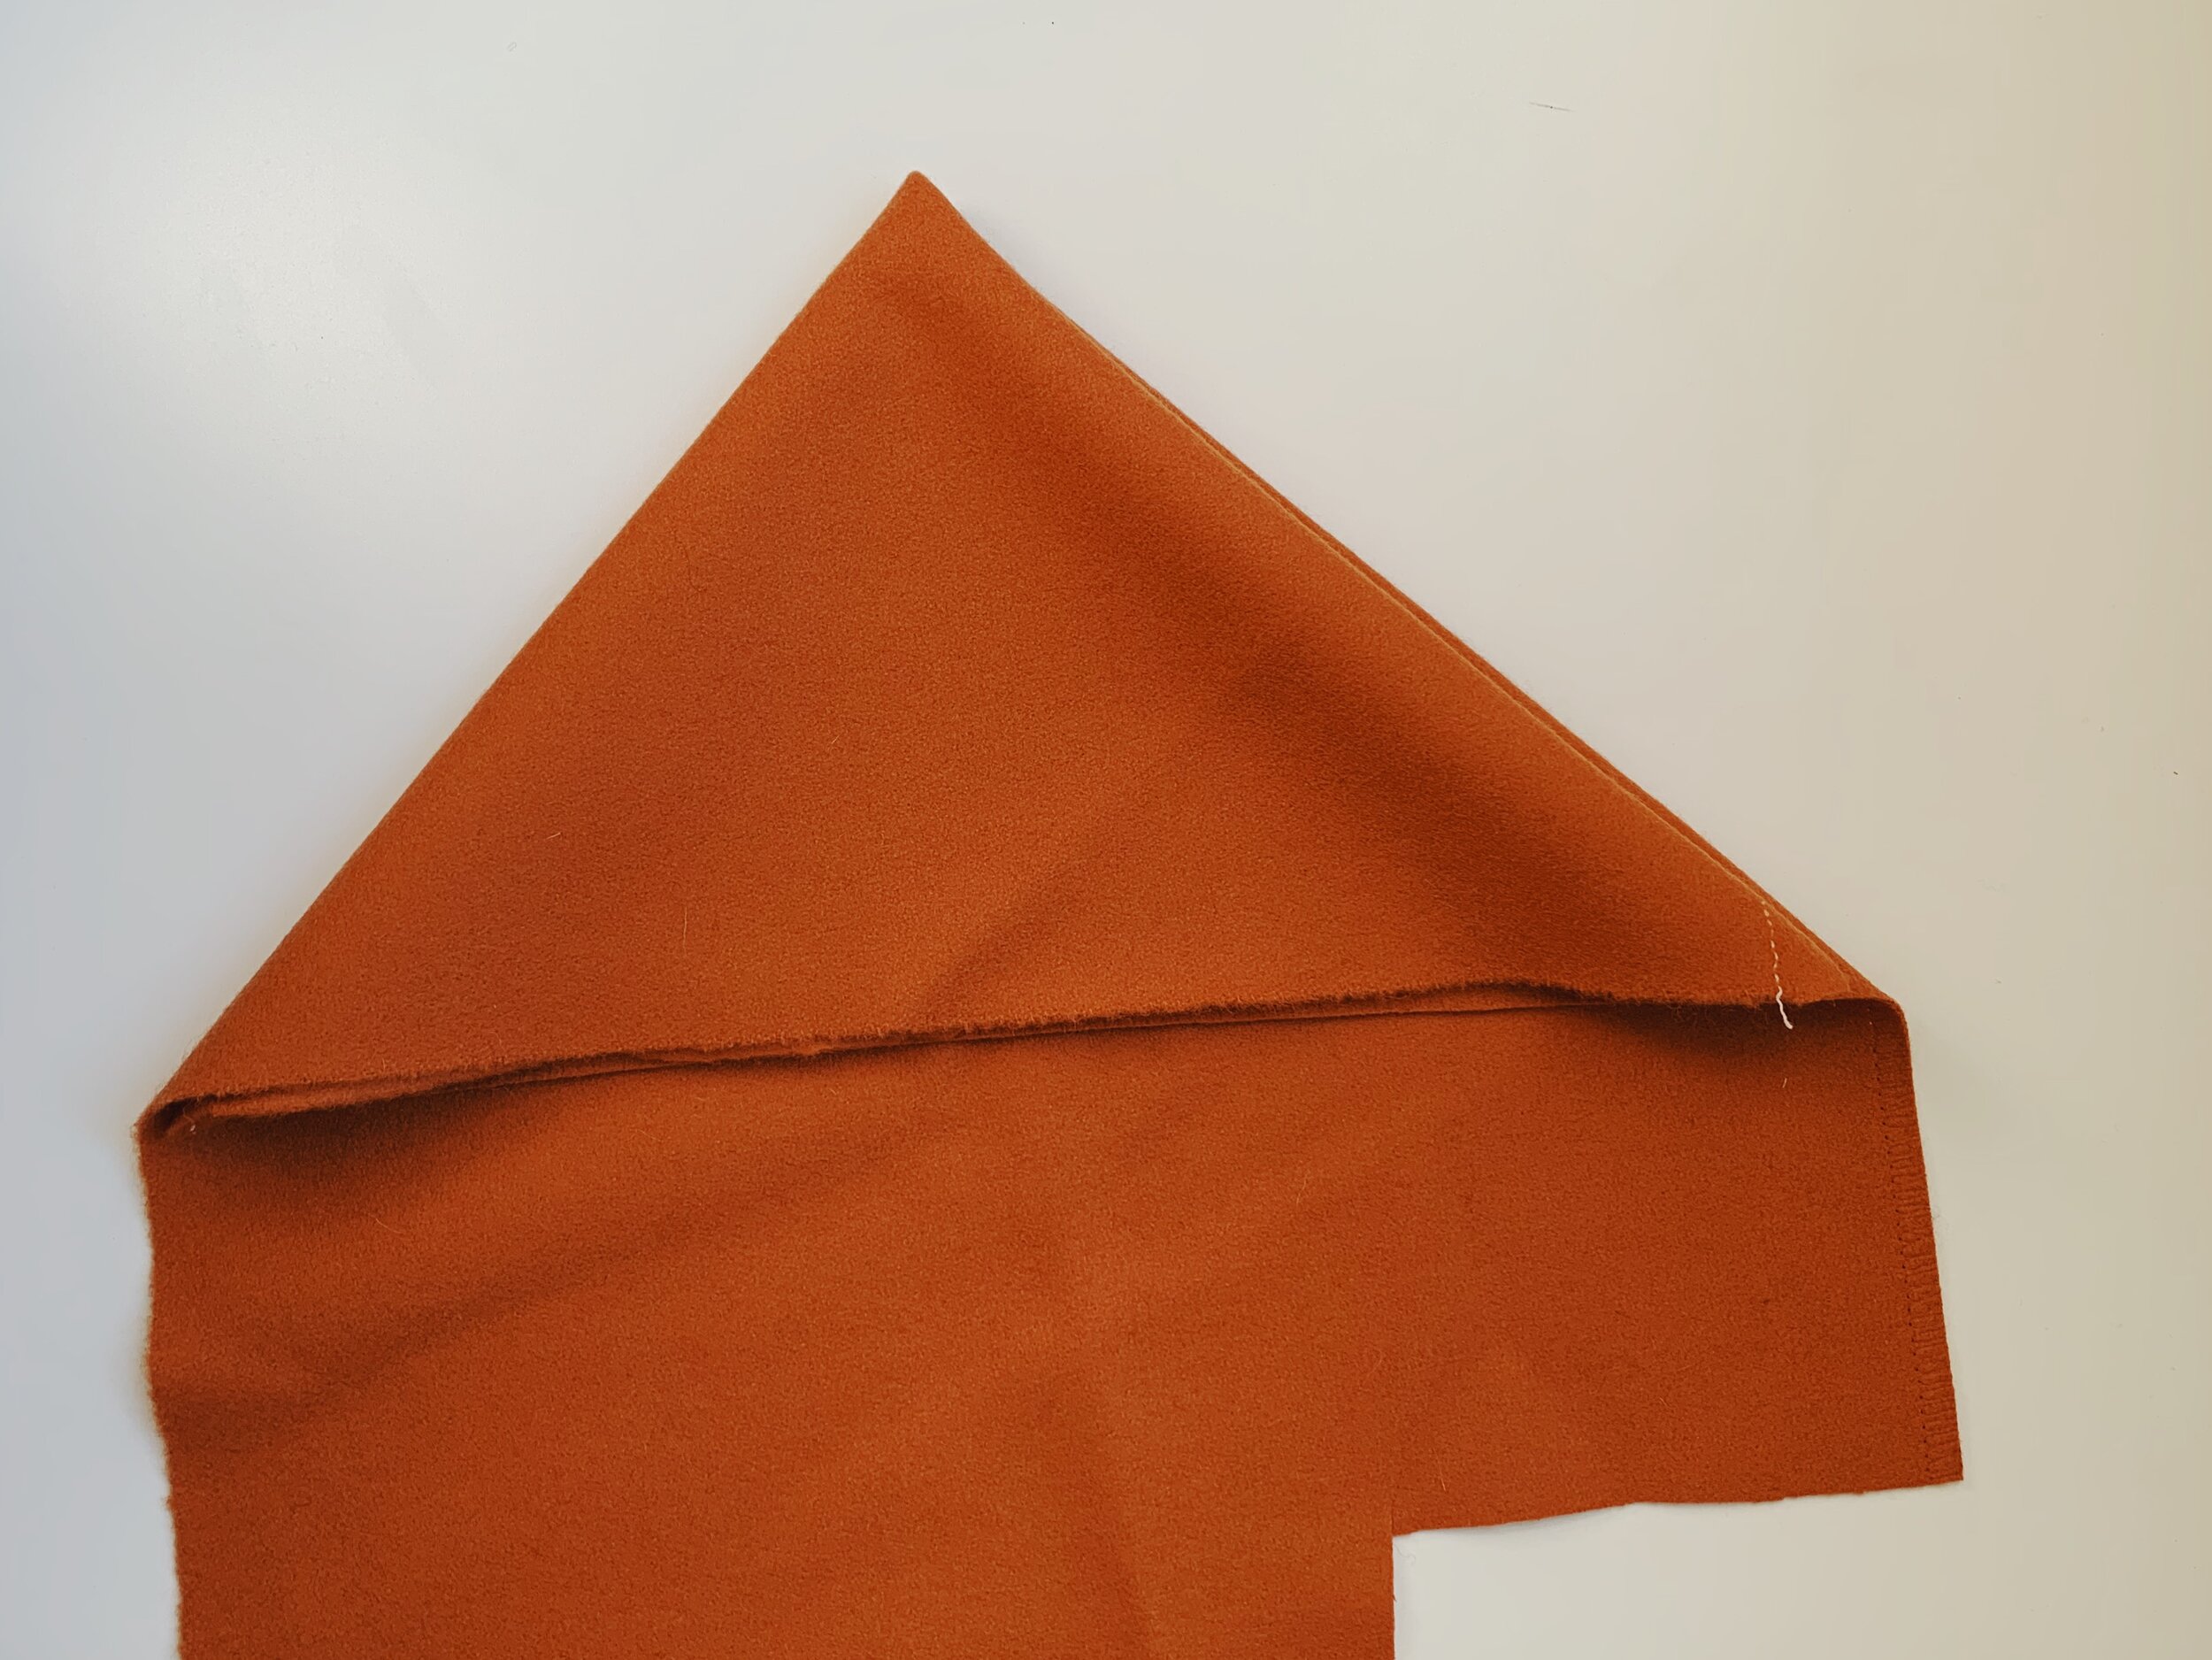
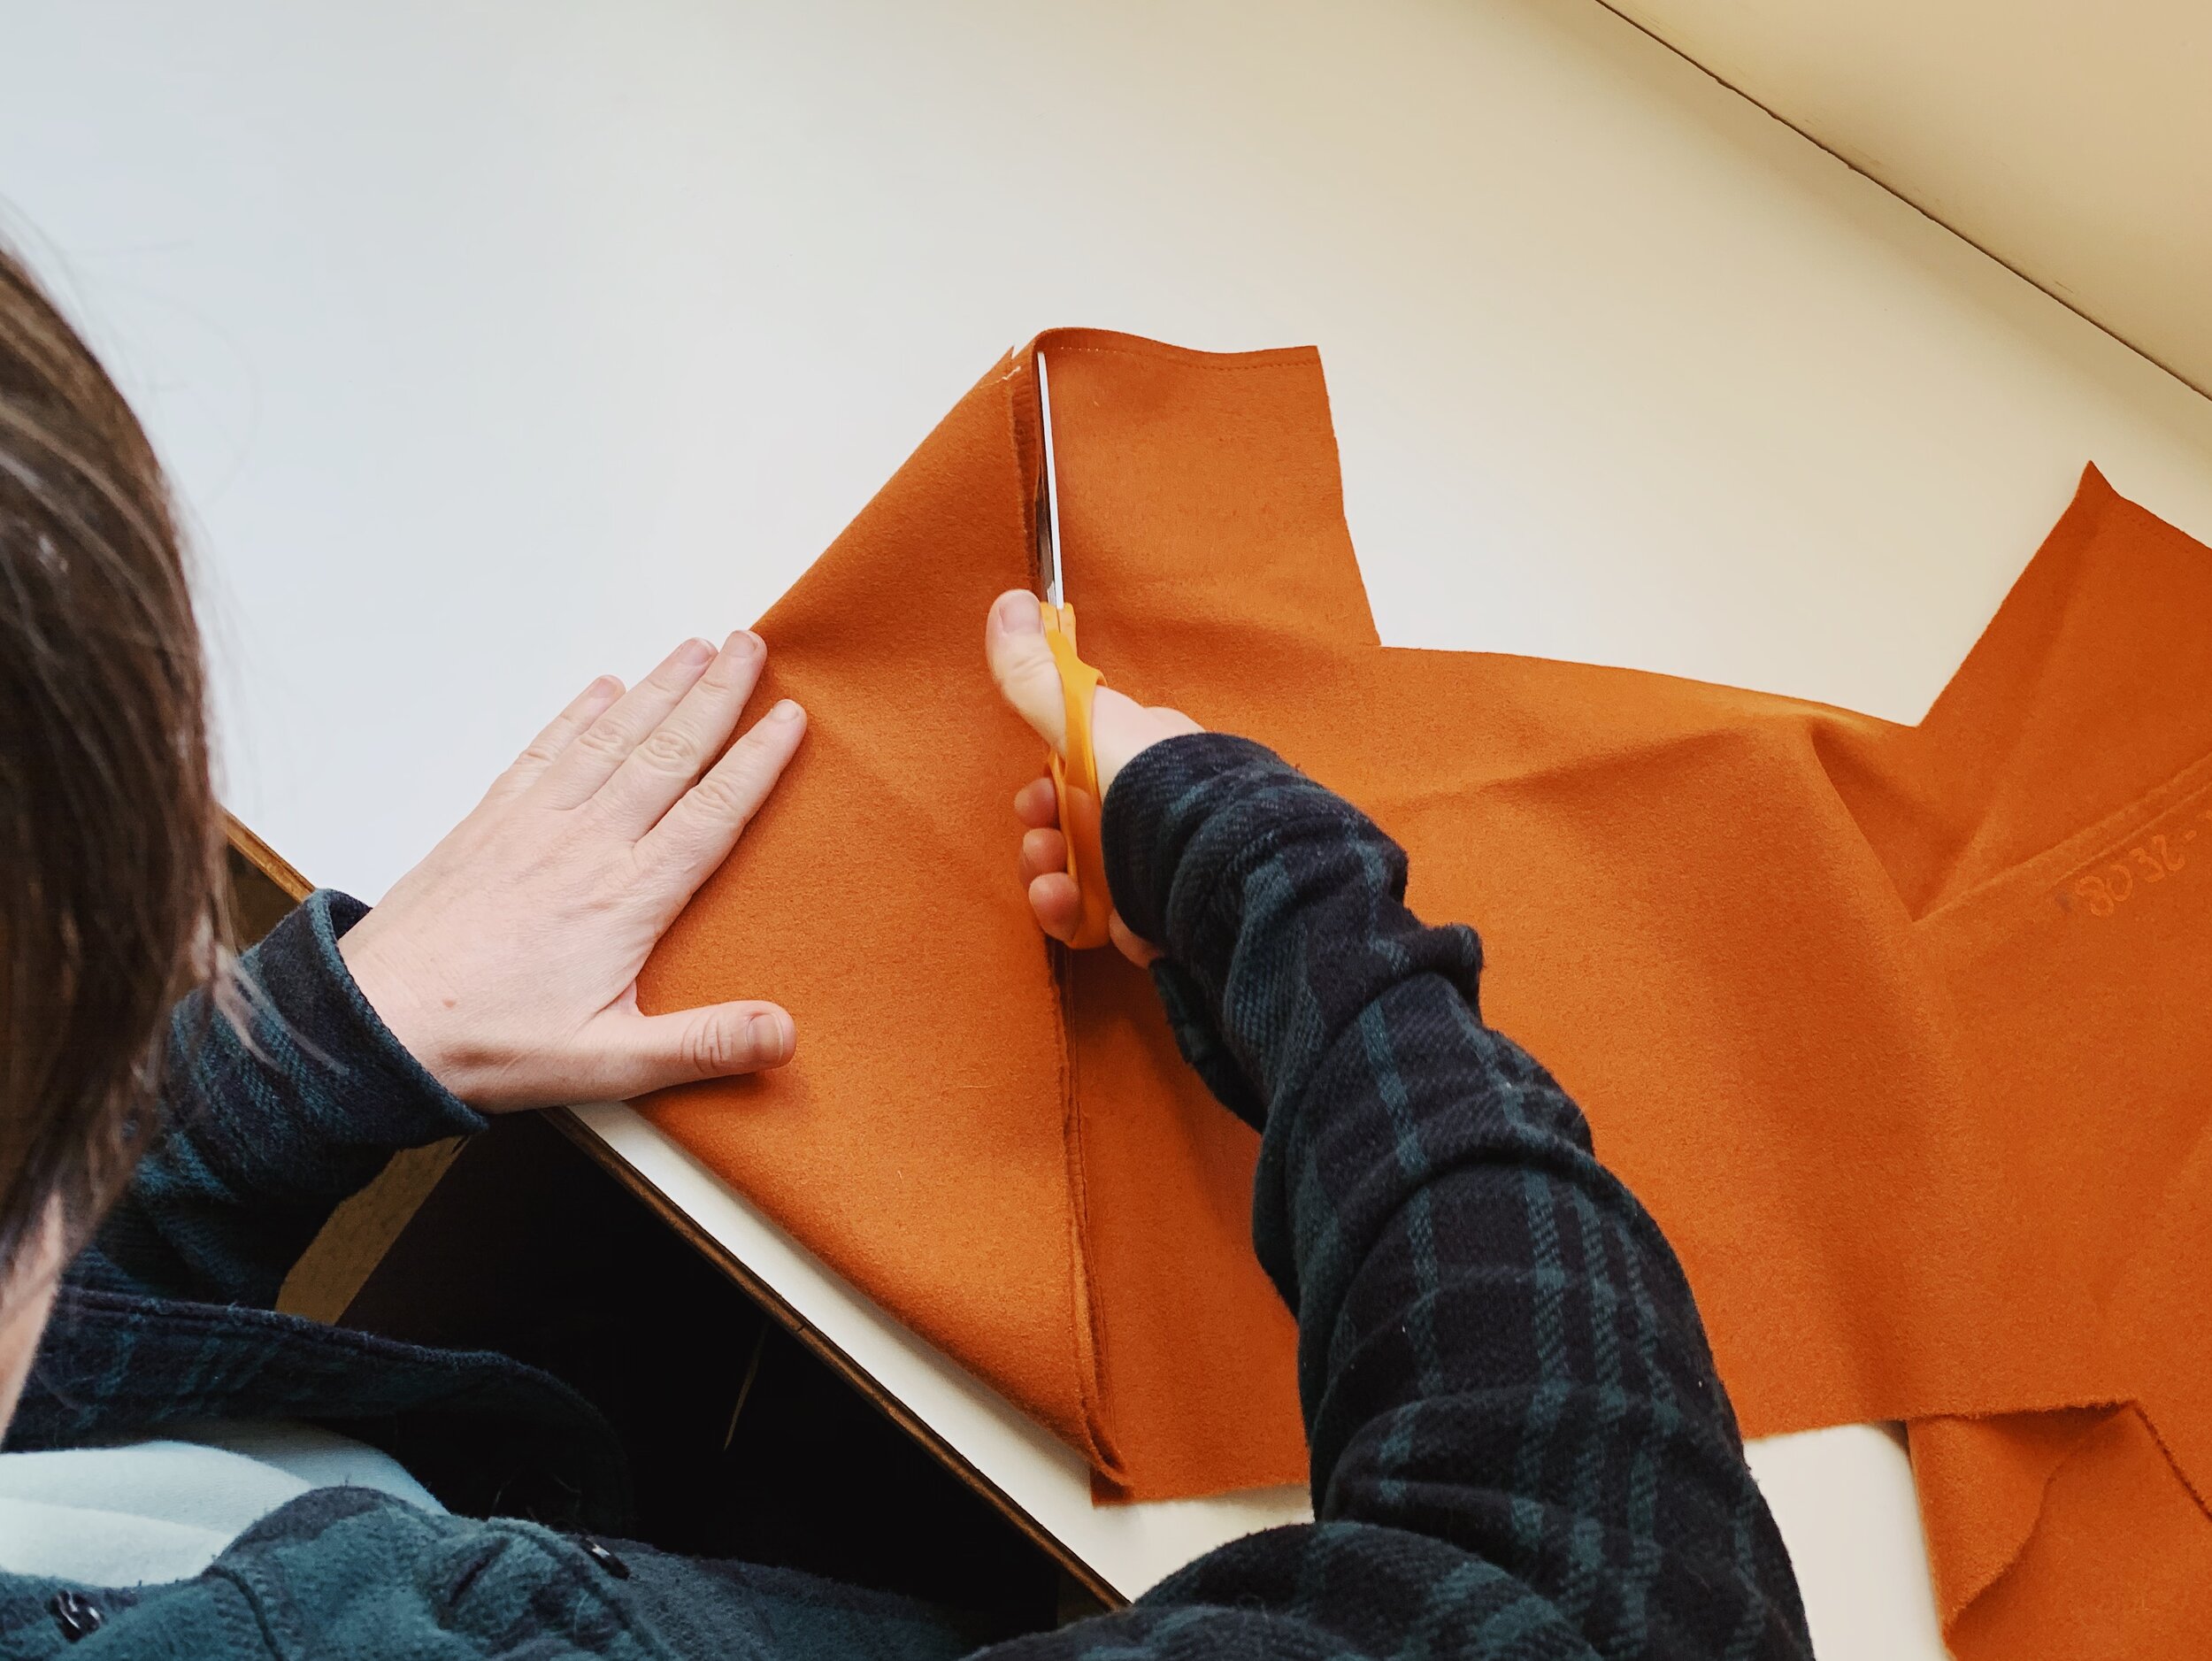
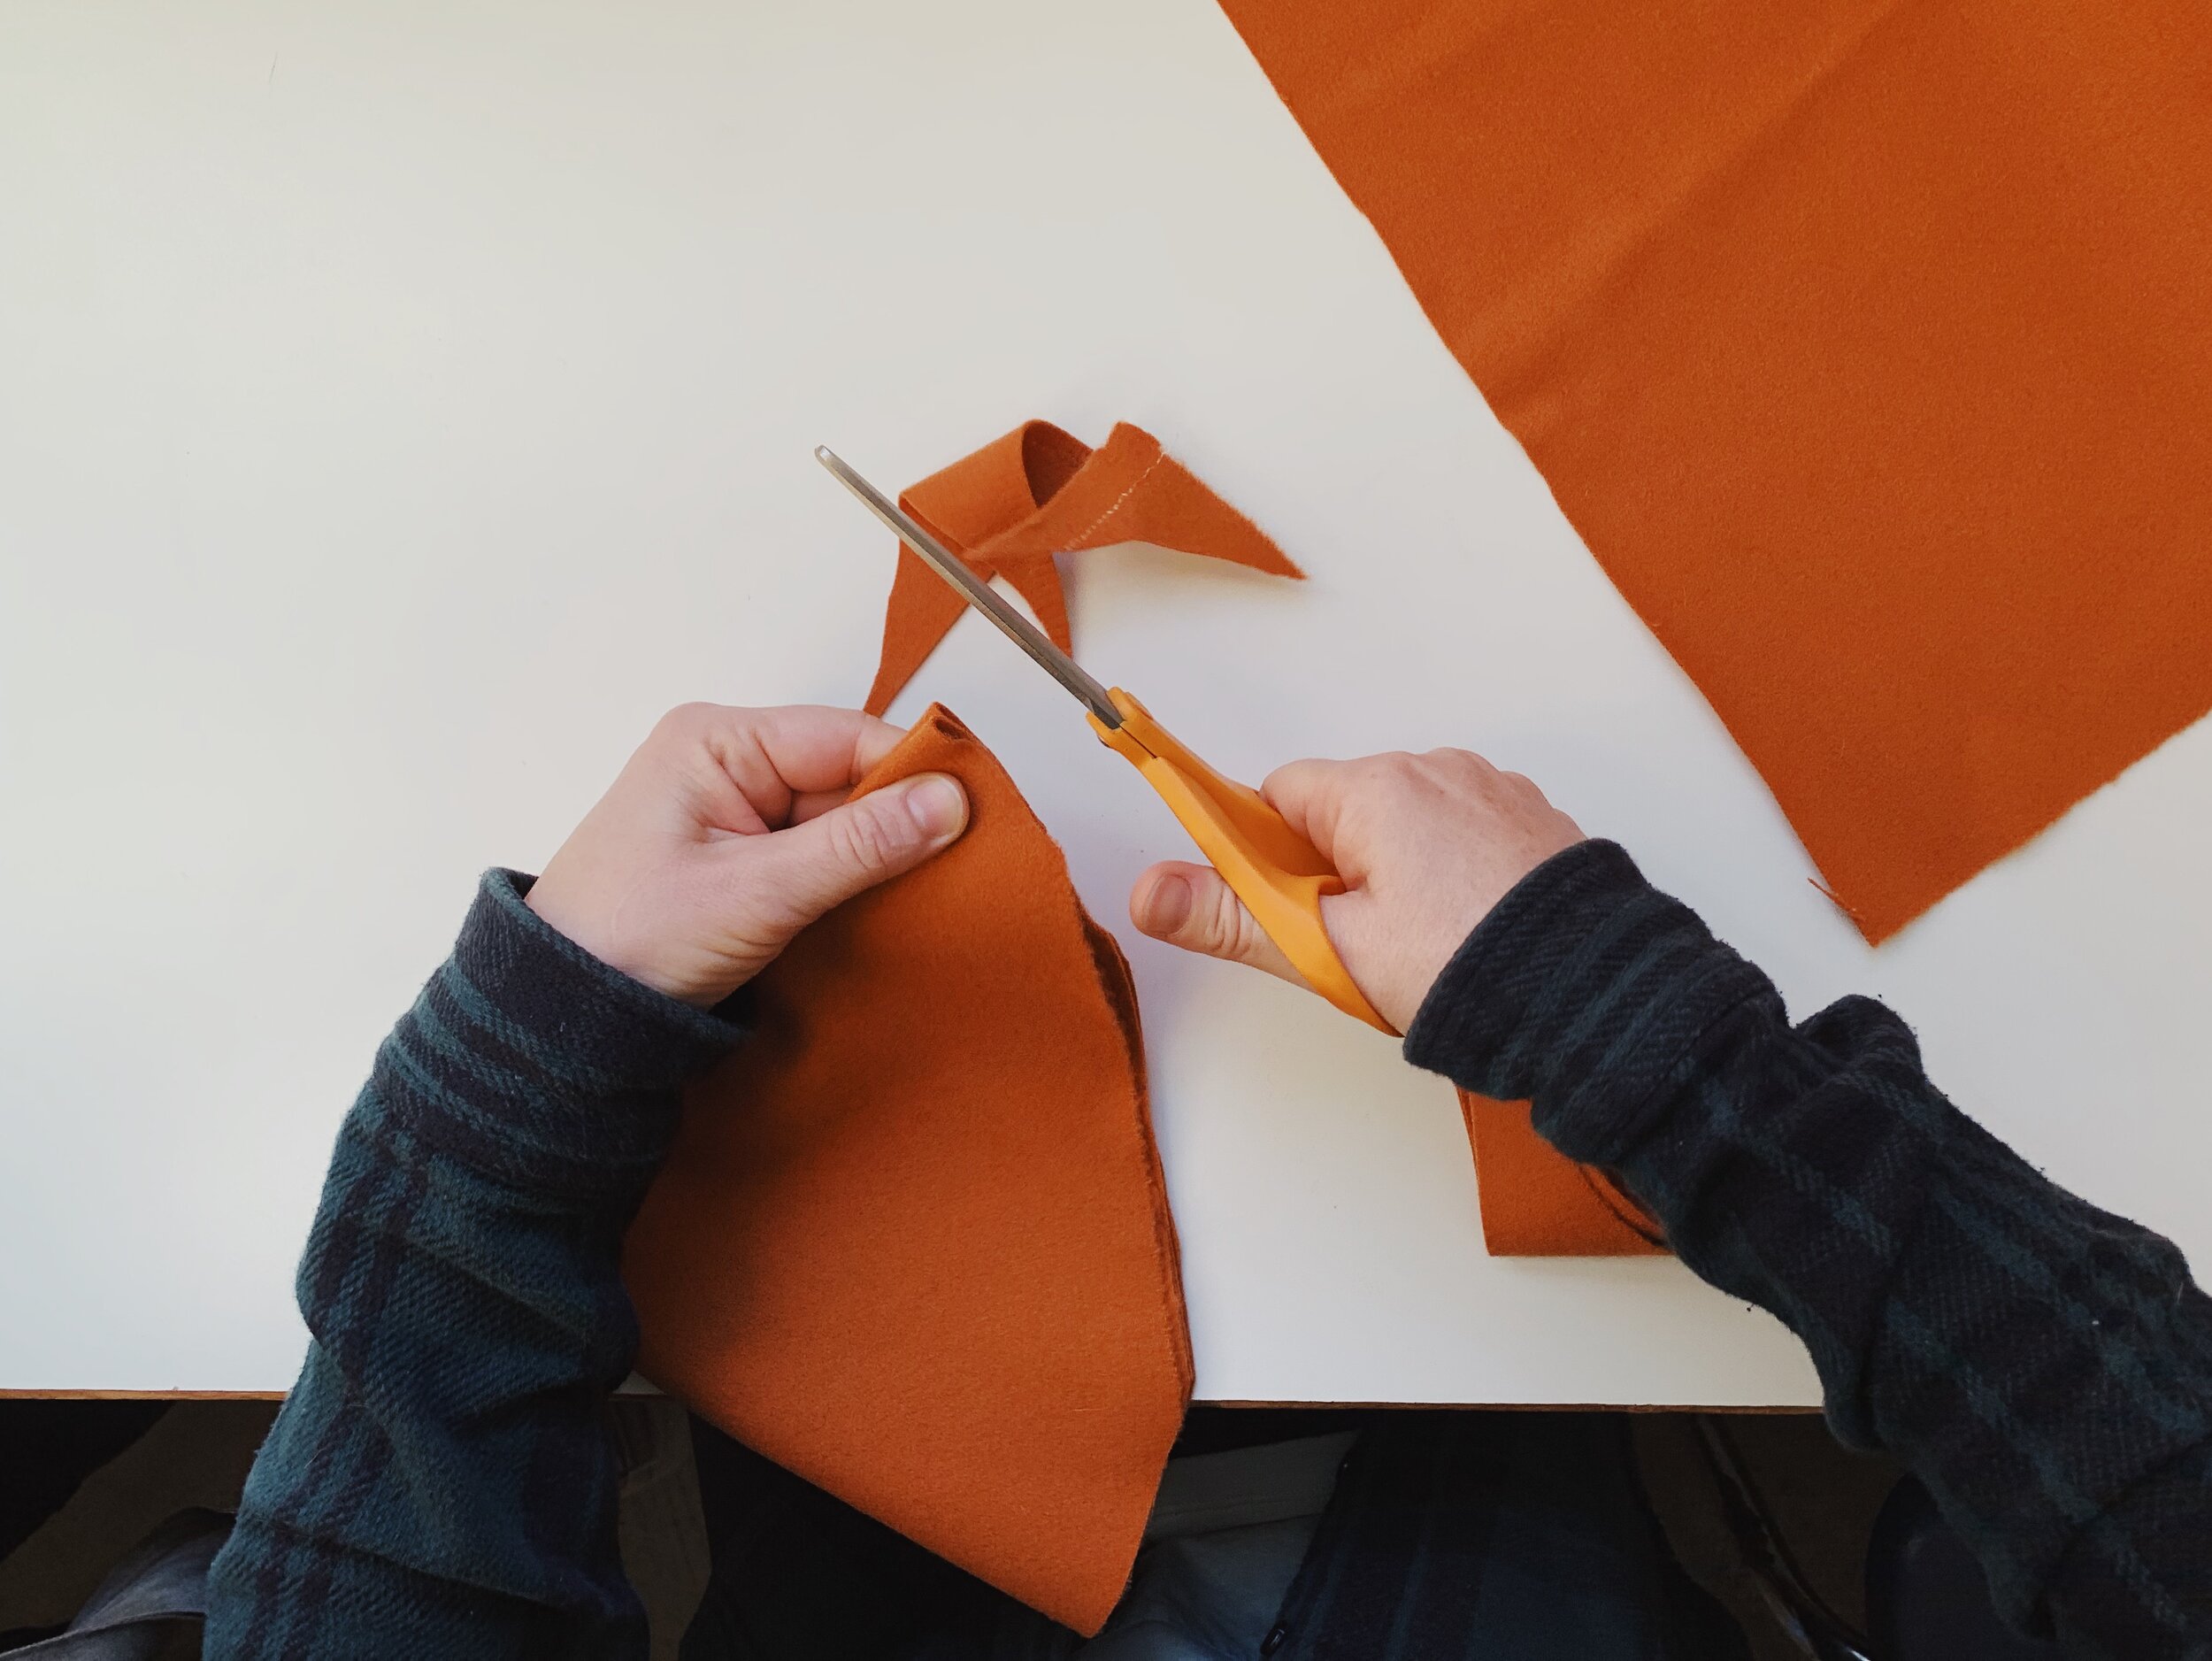
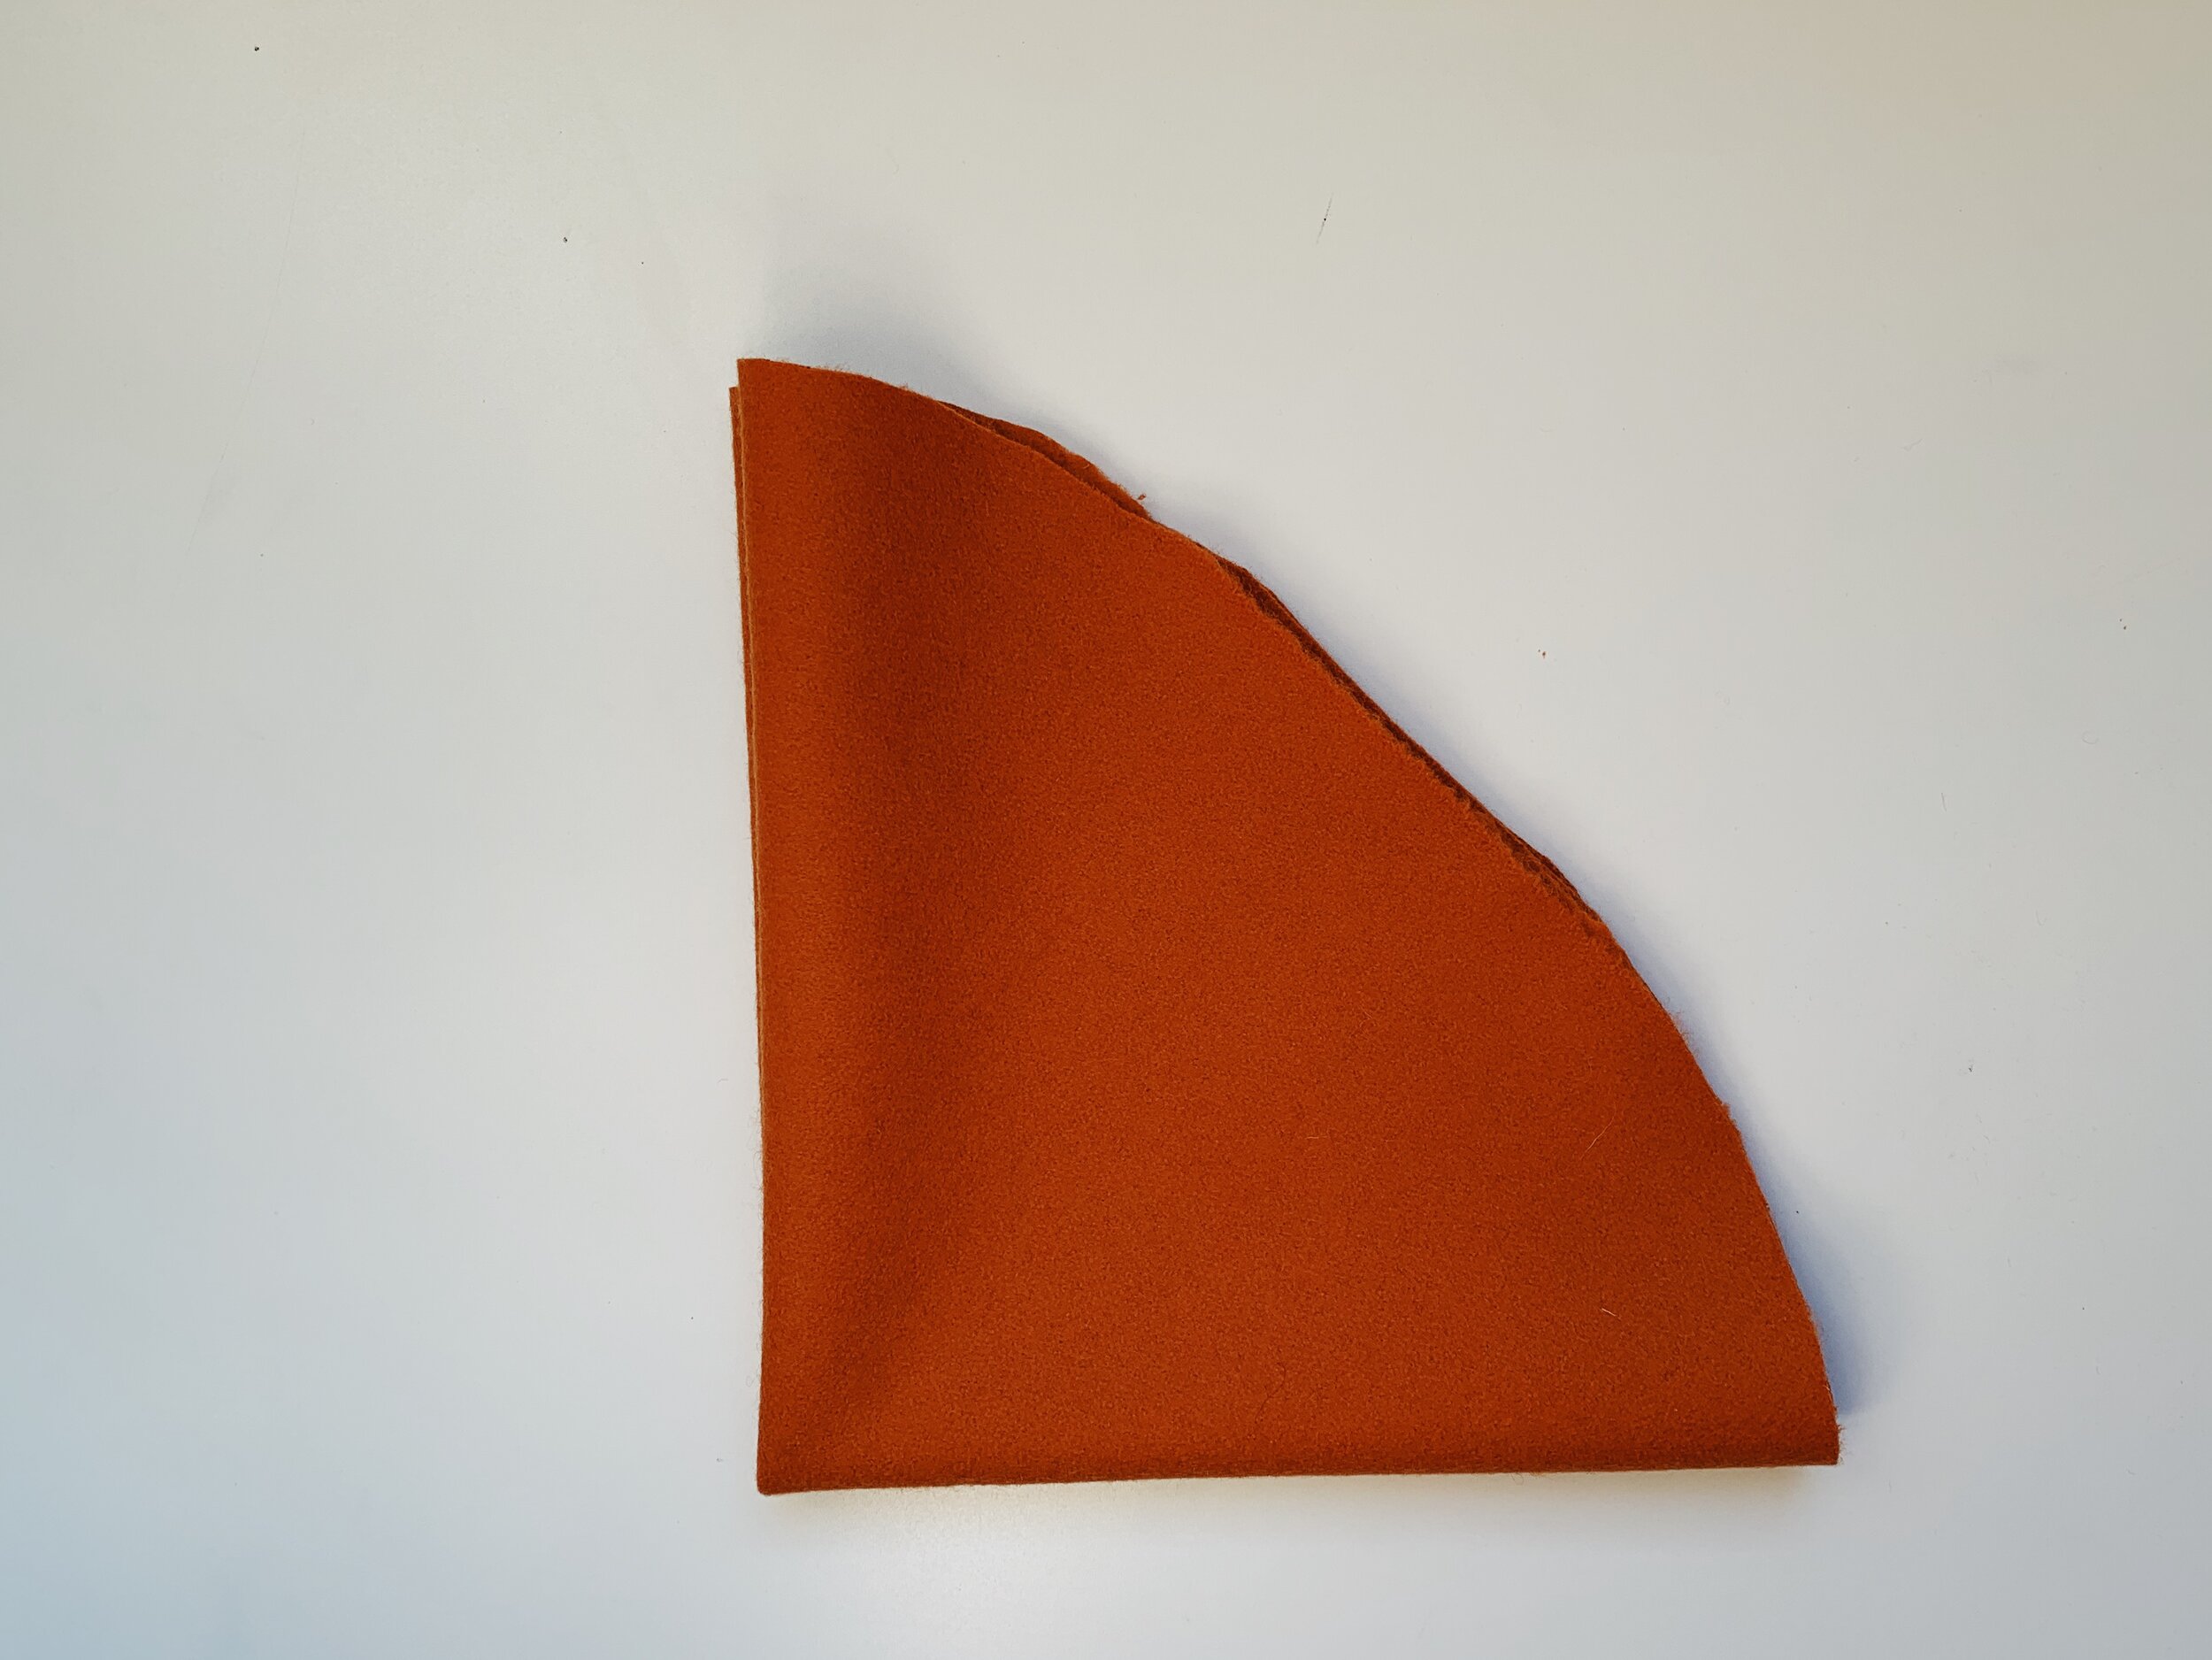
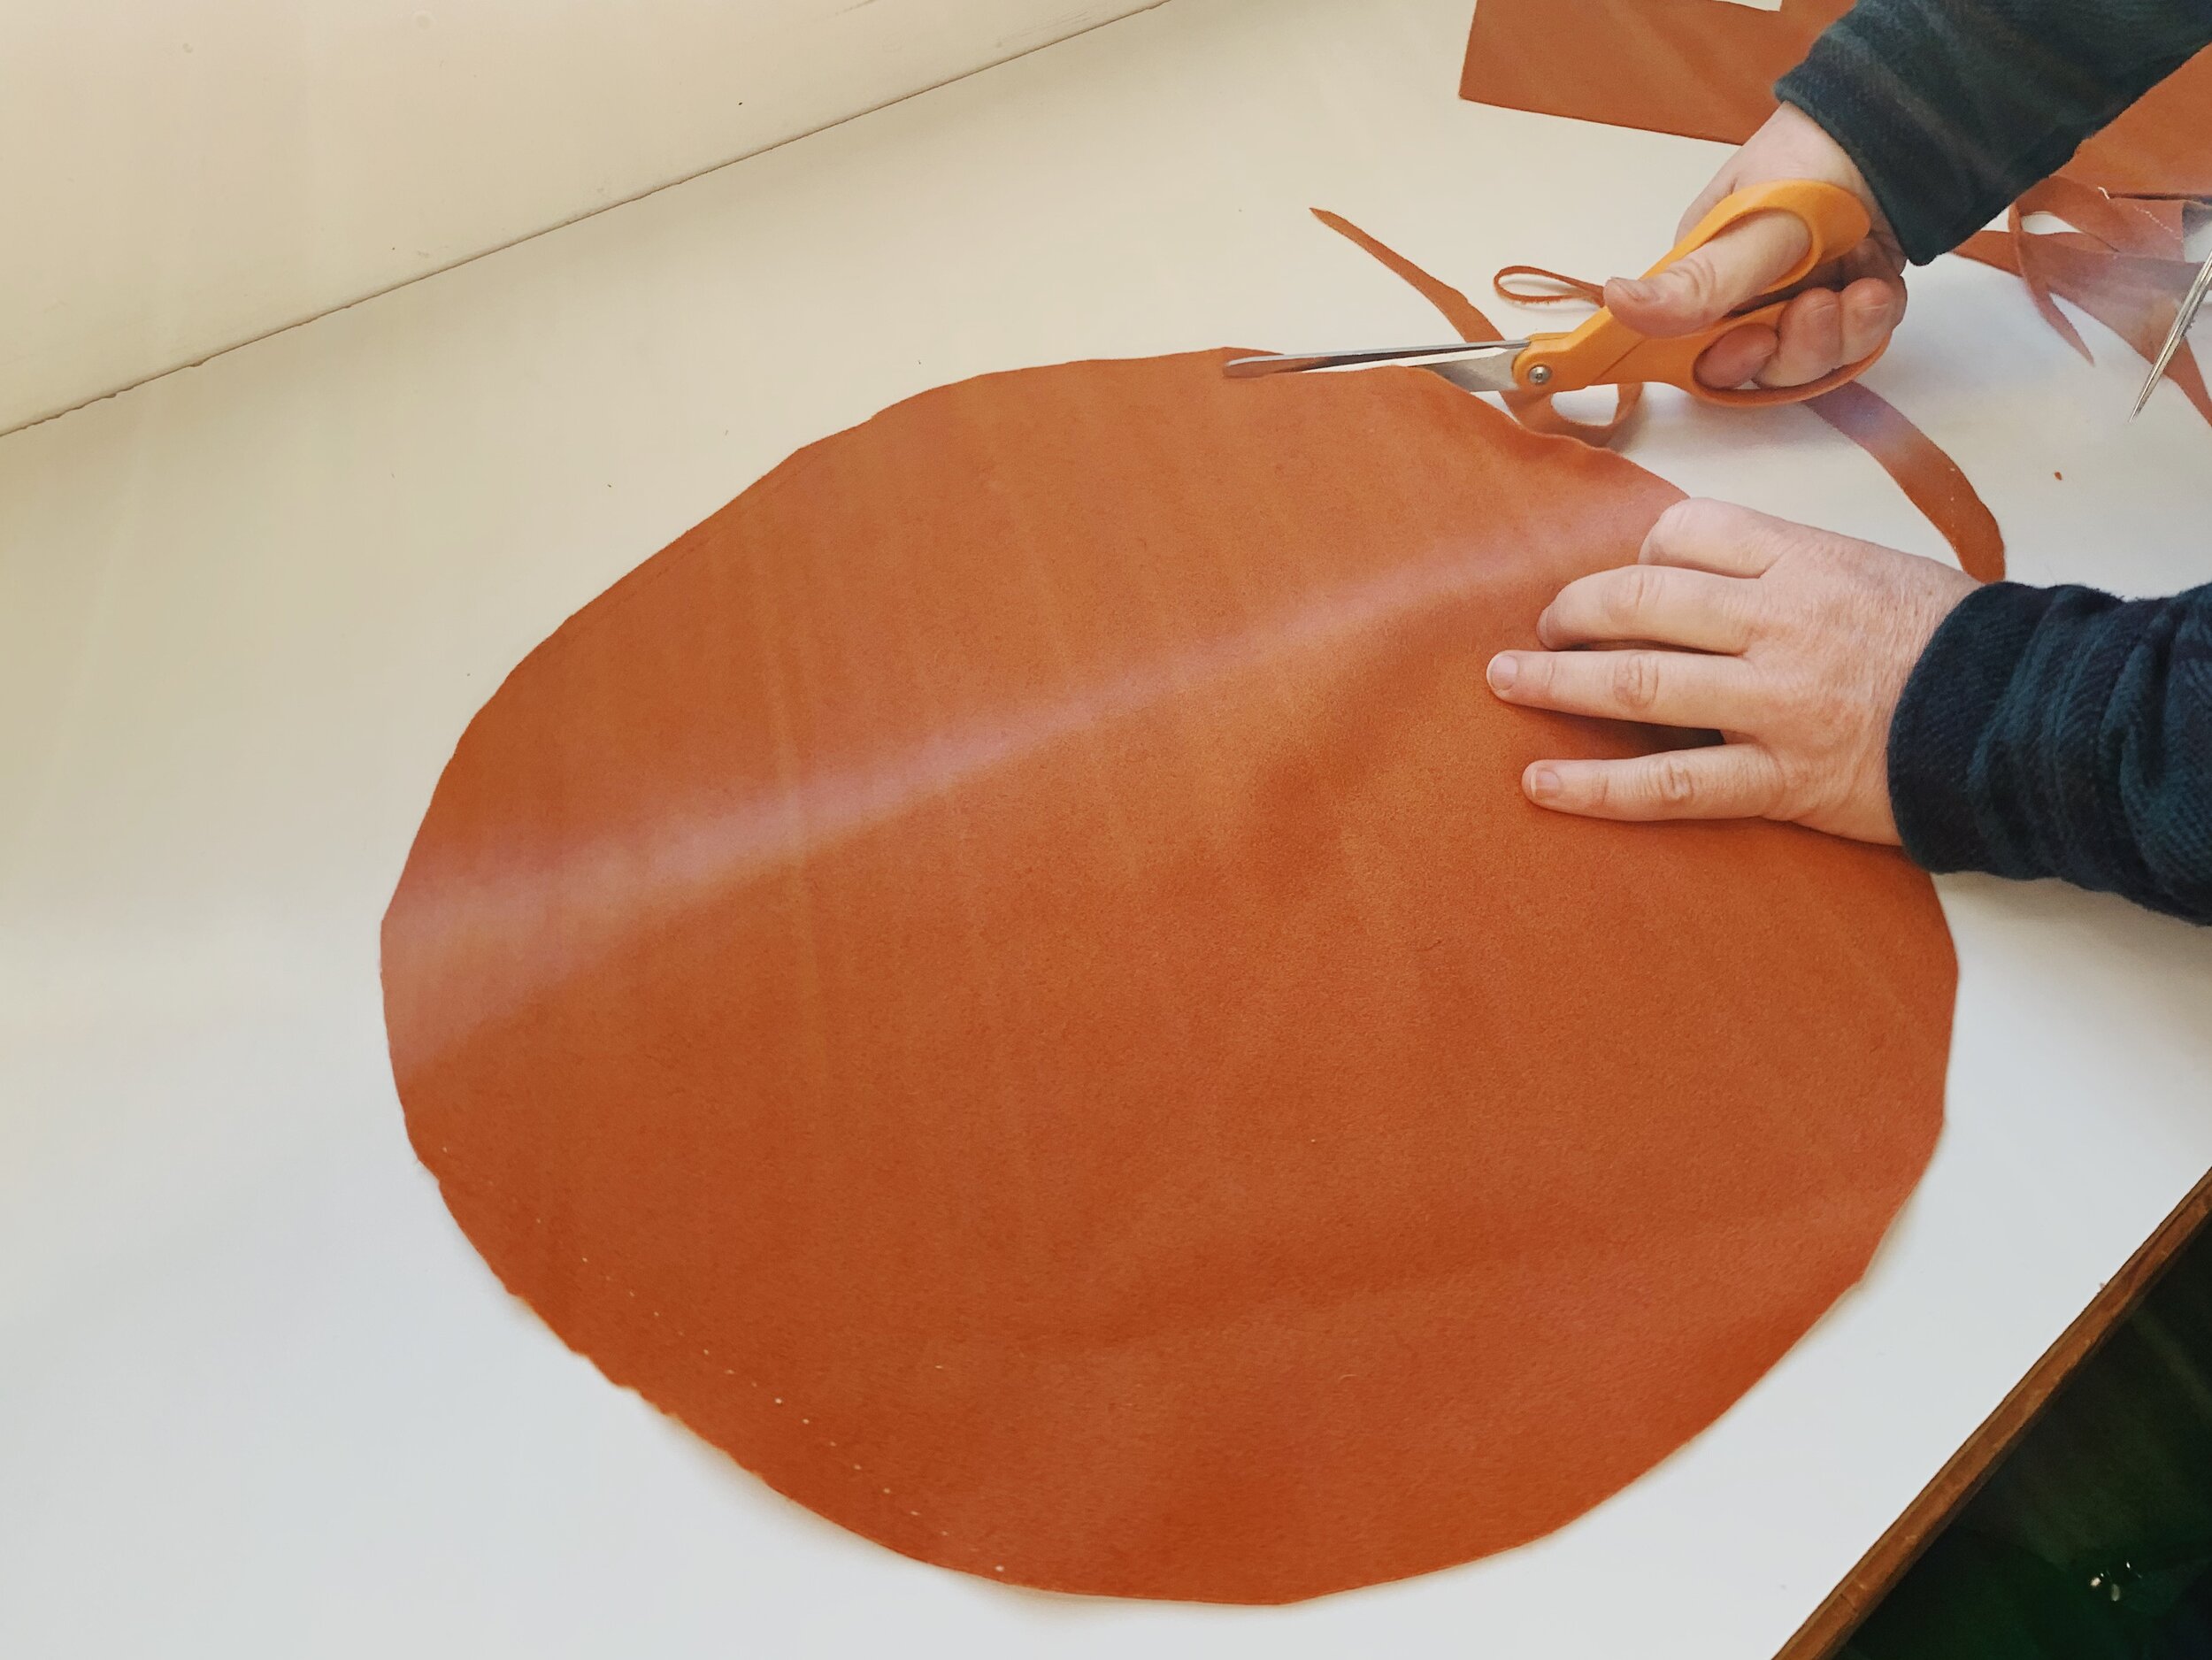
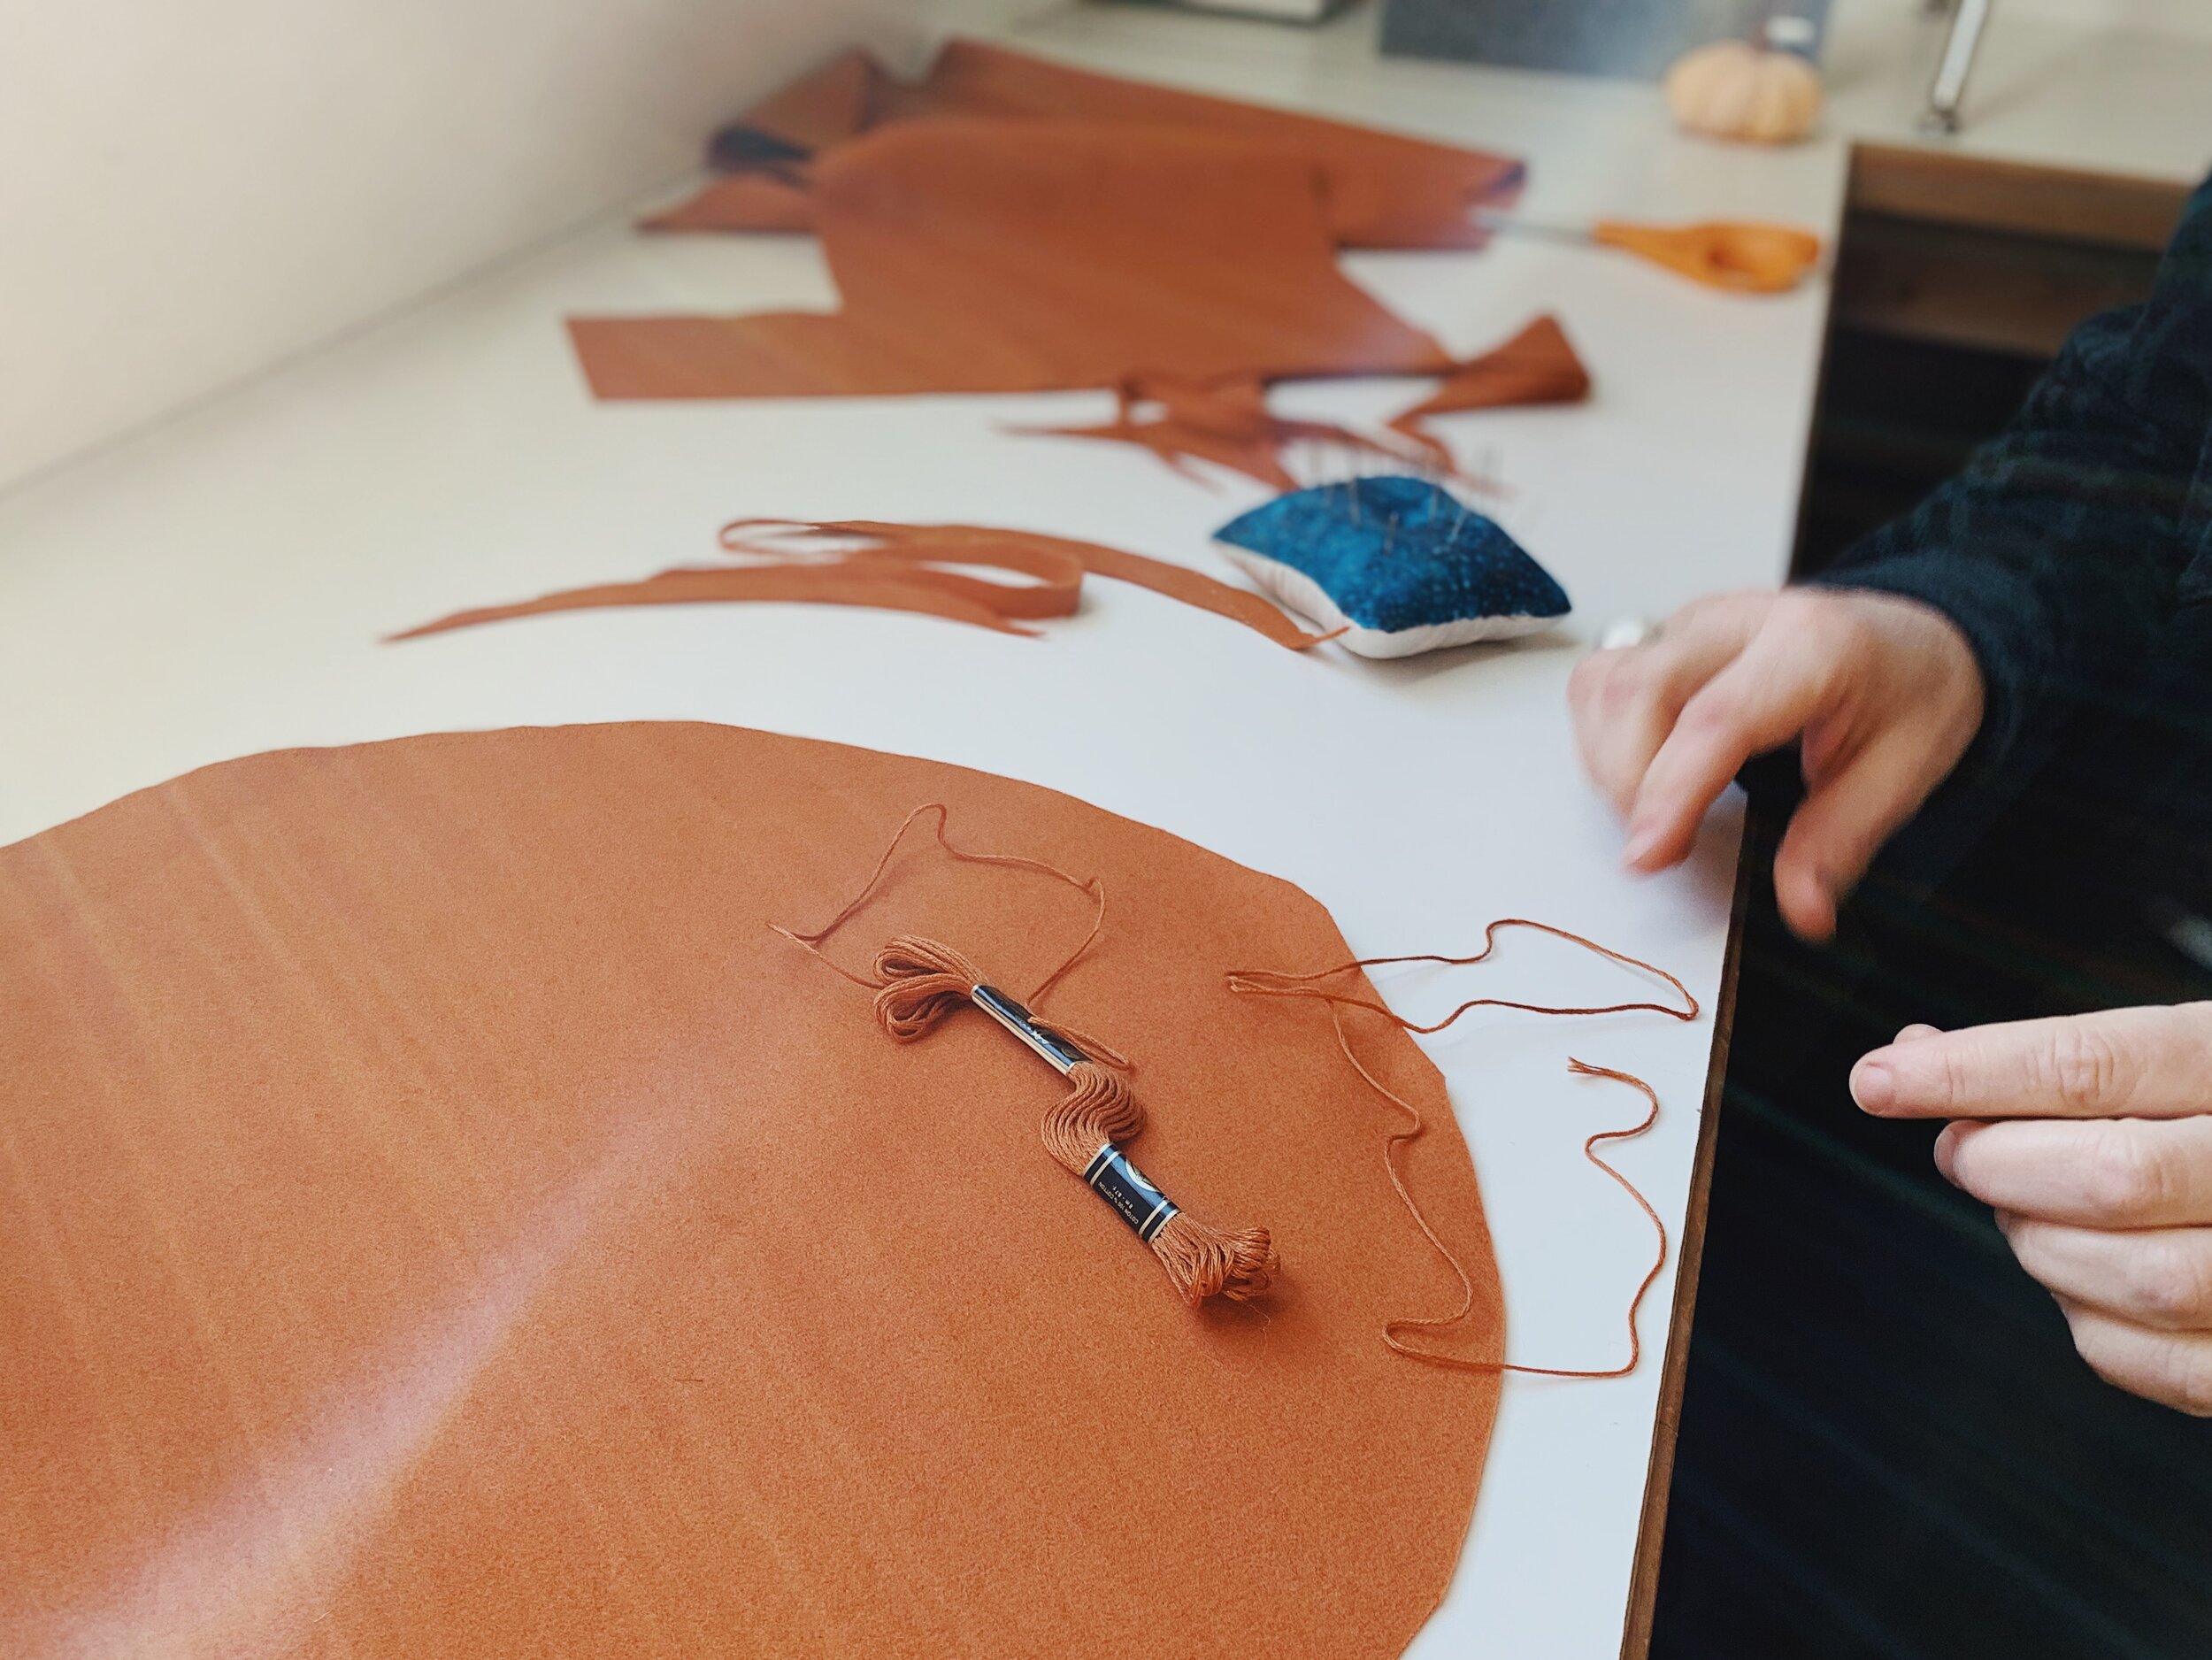
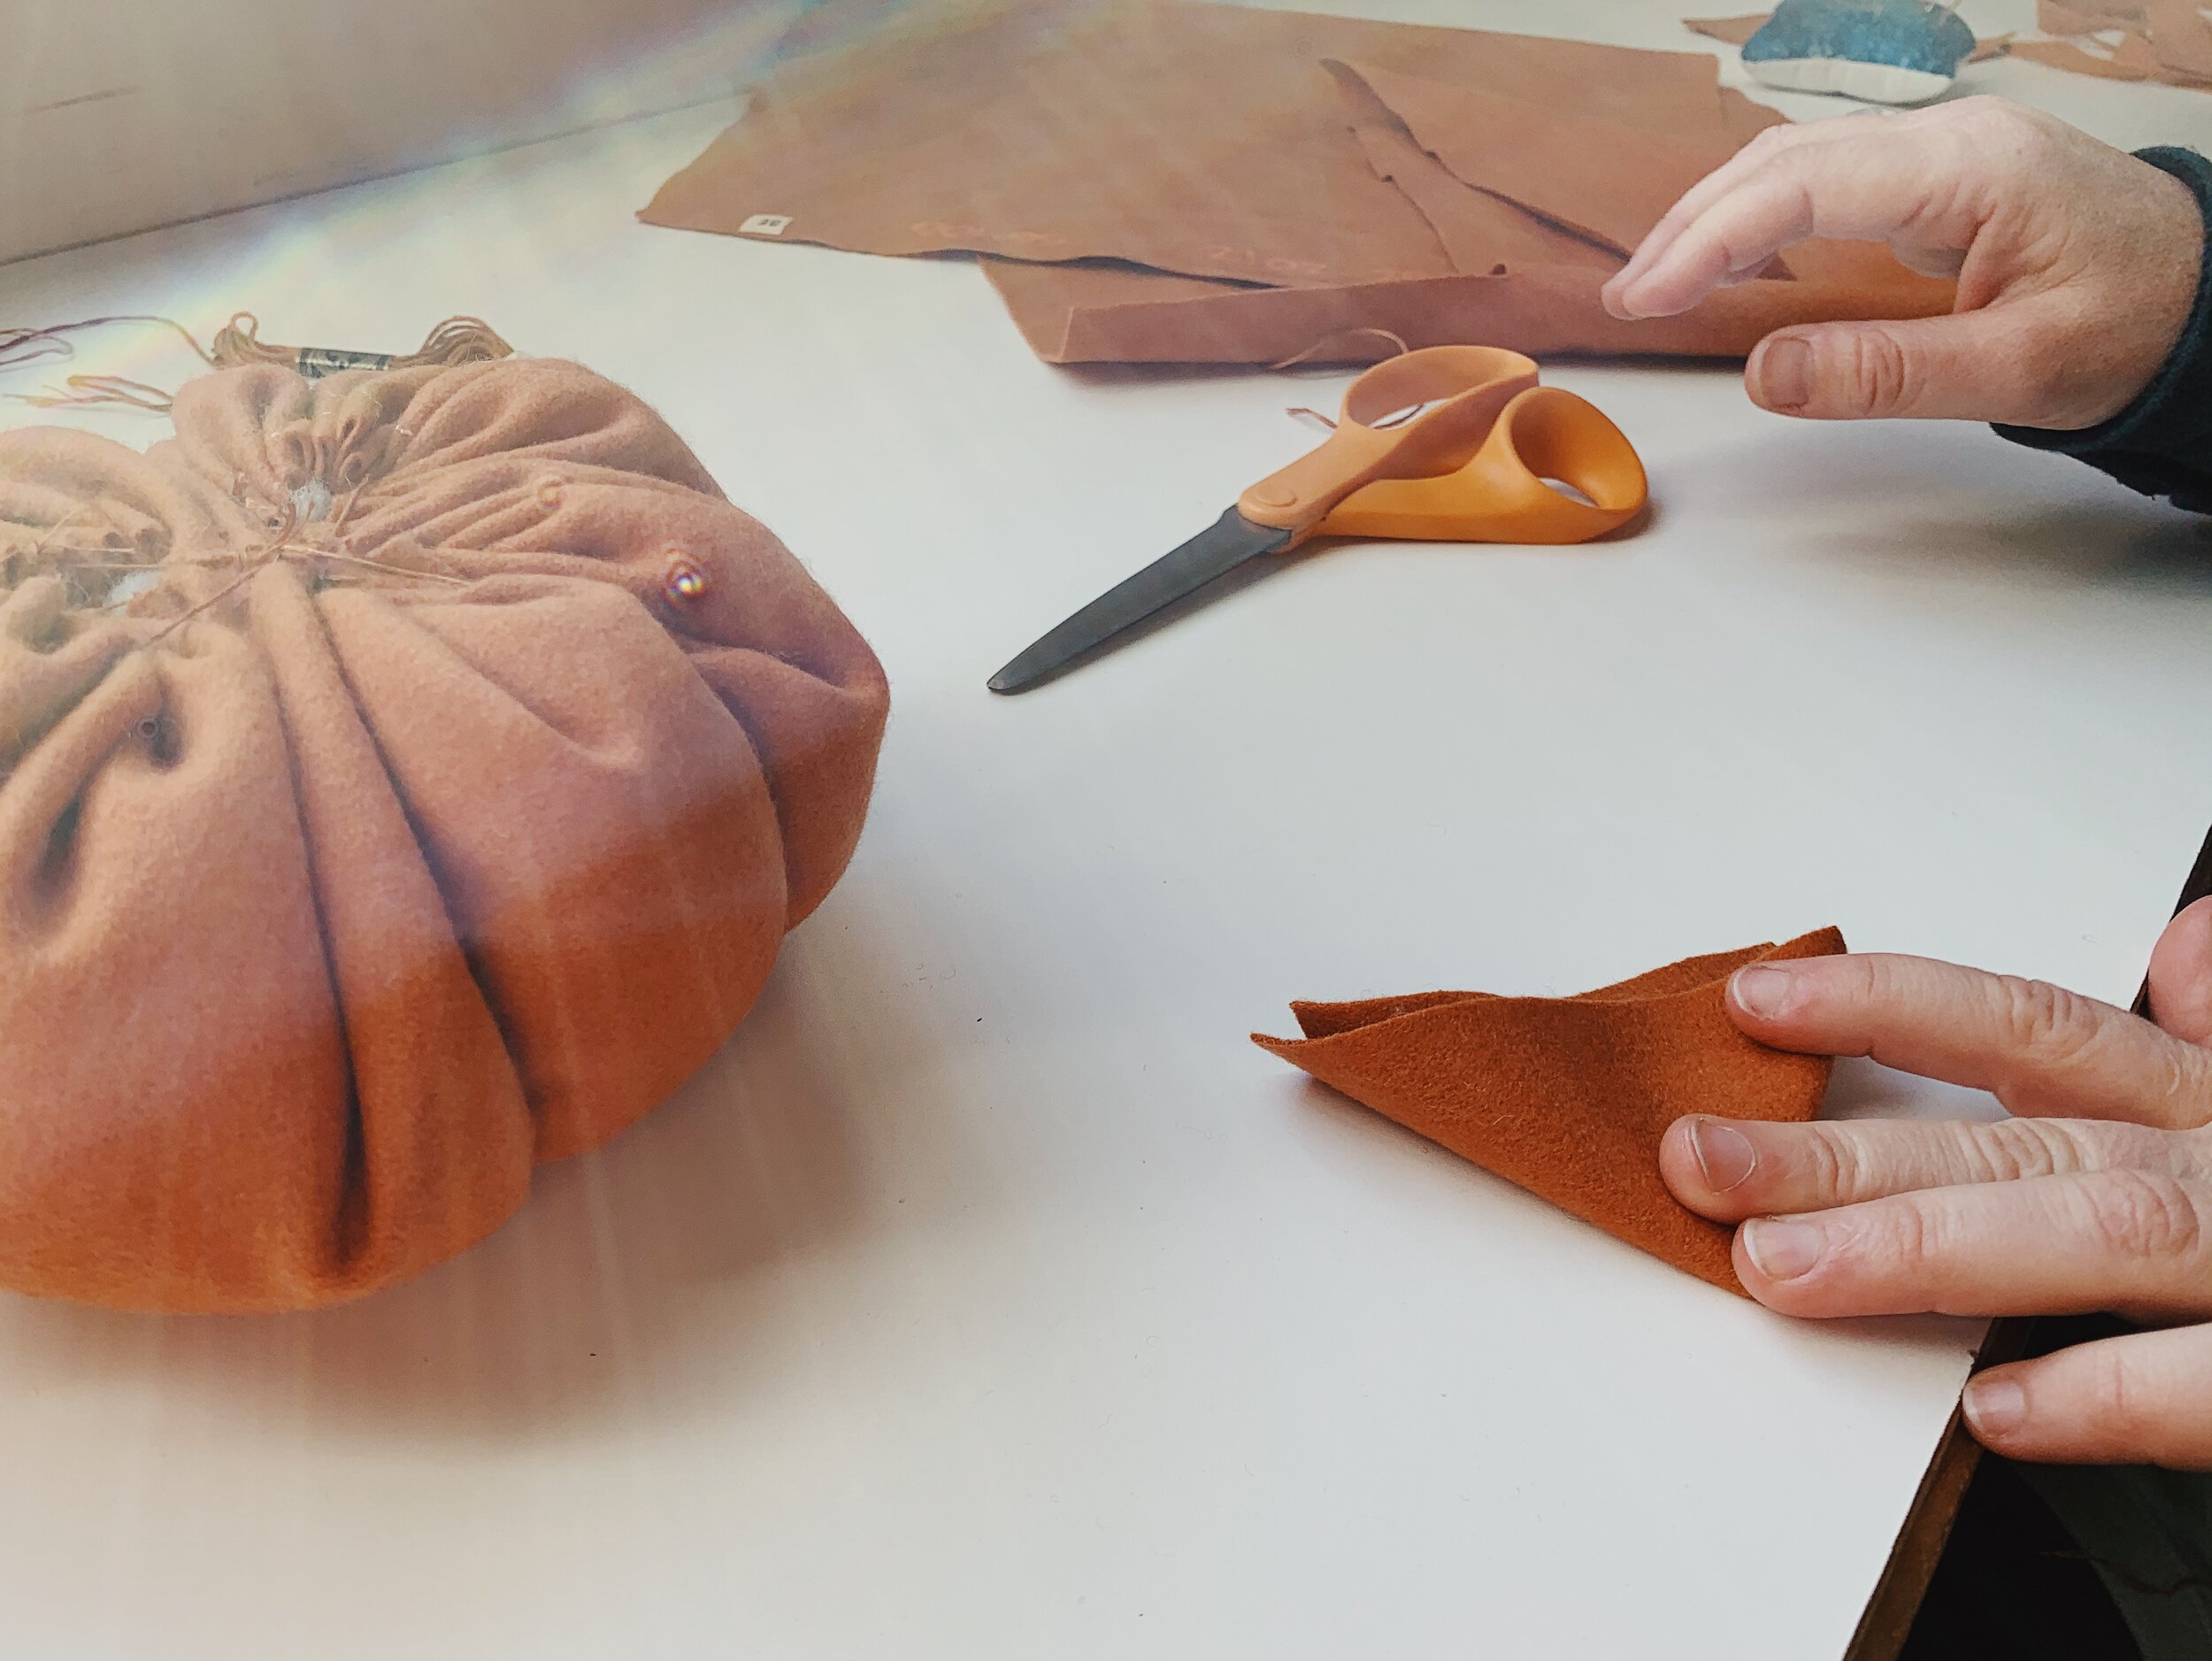
Start with a large square of felt (about 8 inches, or smaller for a small-ish pumpkin). Fold it into a triangle and then into a triangle again. Cut to round the corners (as shown). Unfold and trim as needed to make a circle.
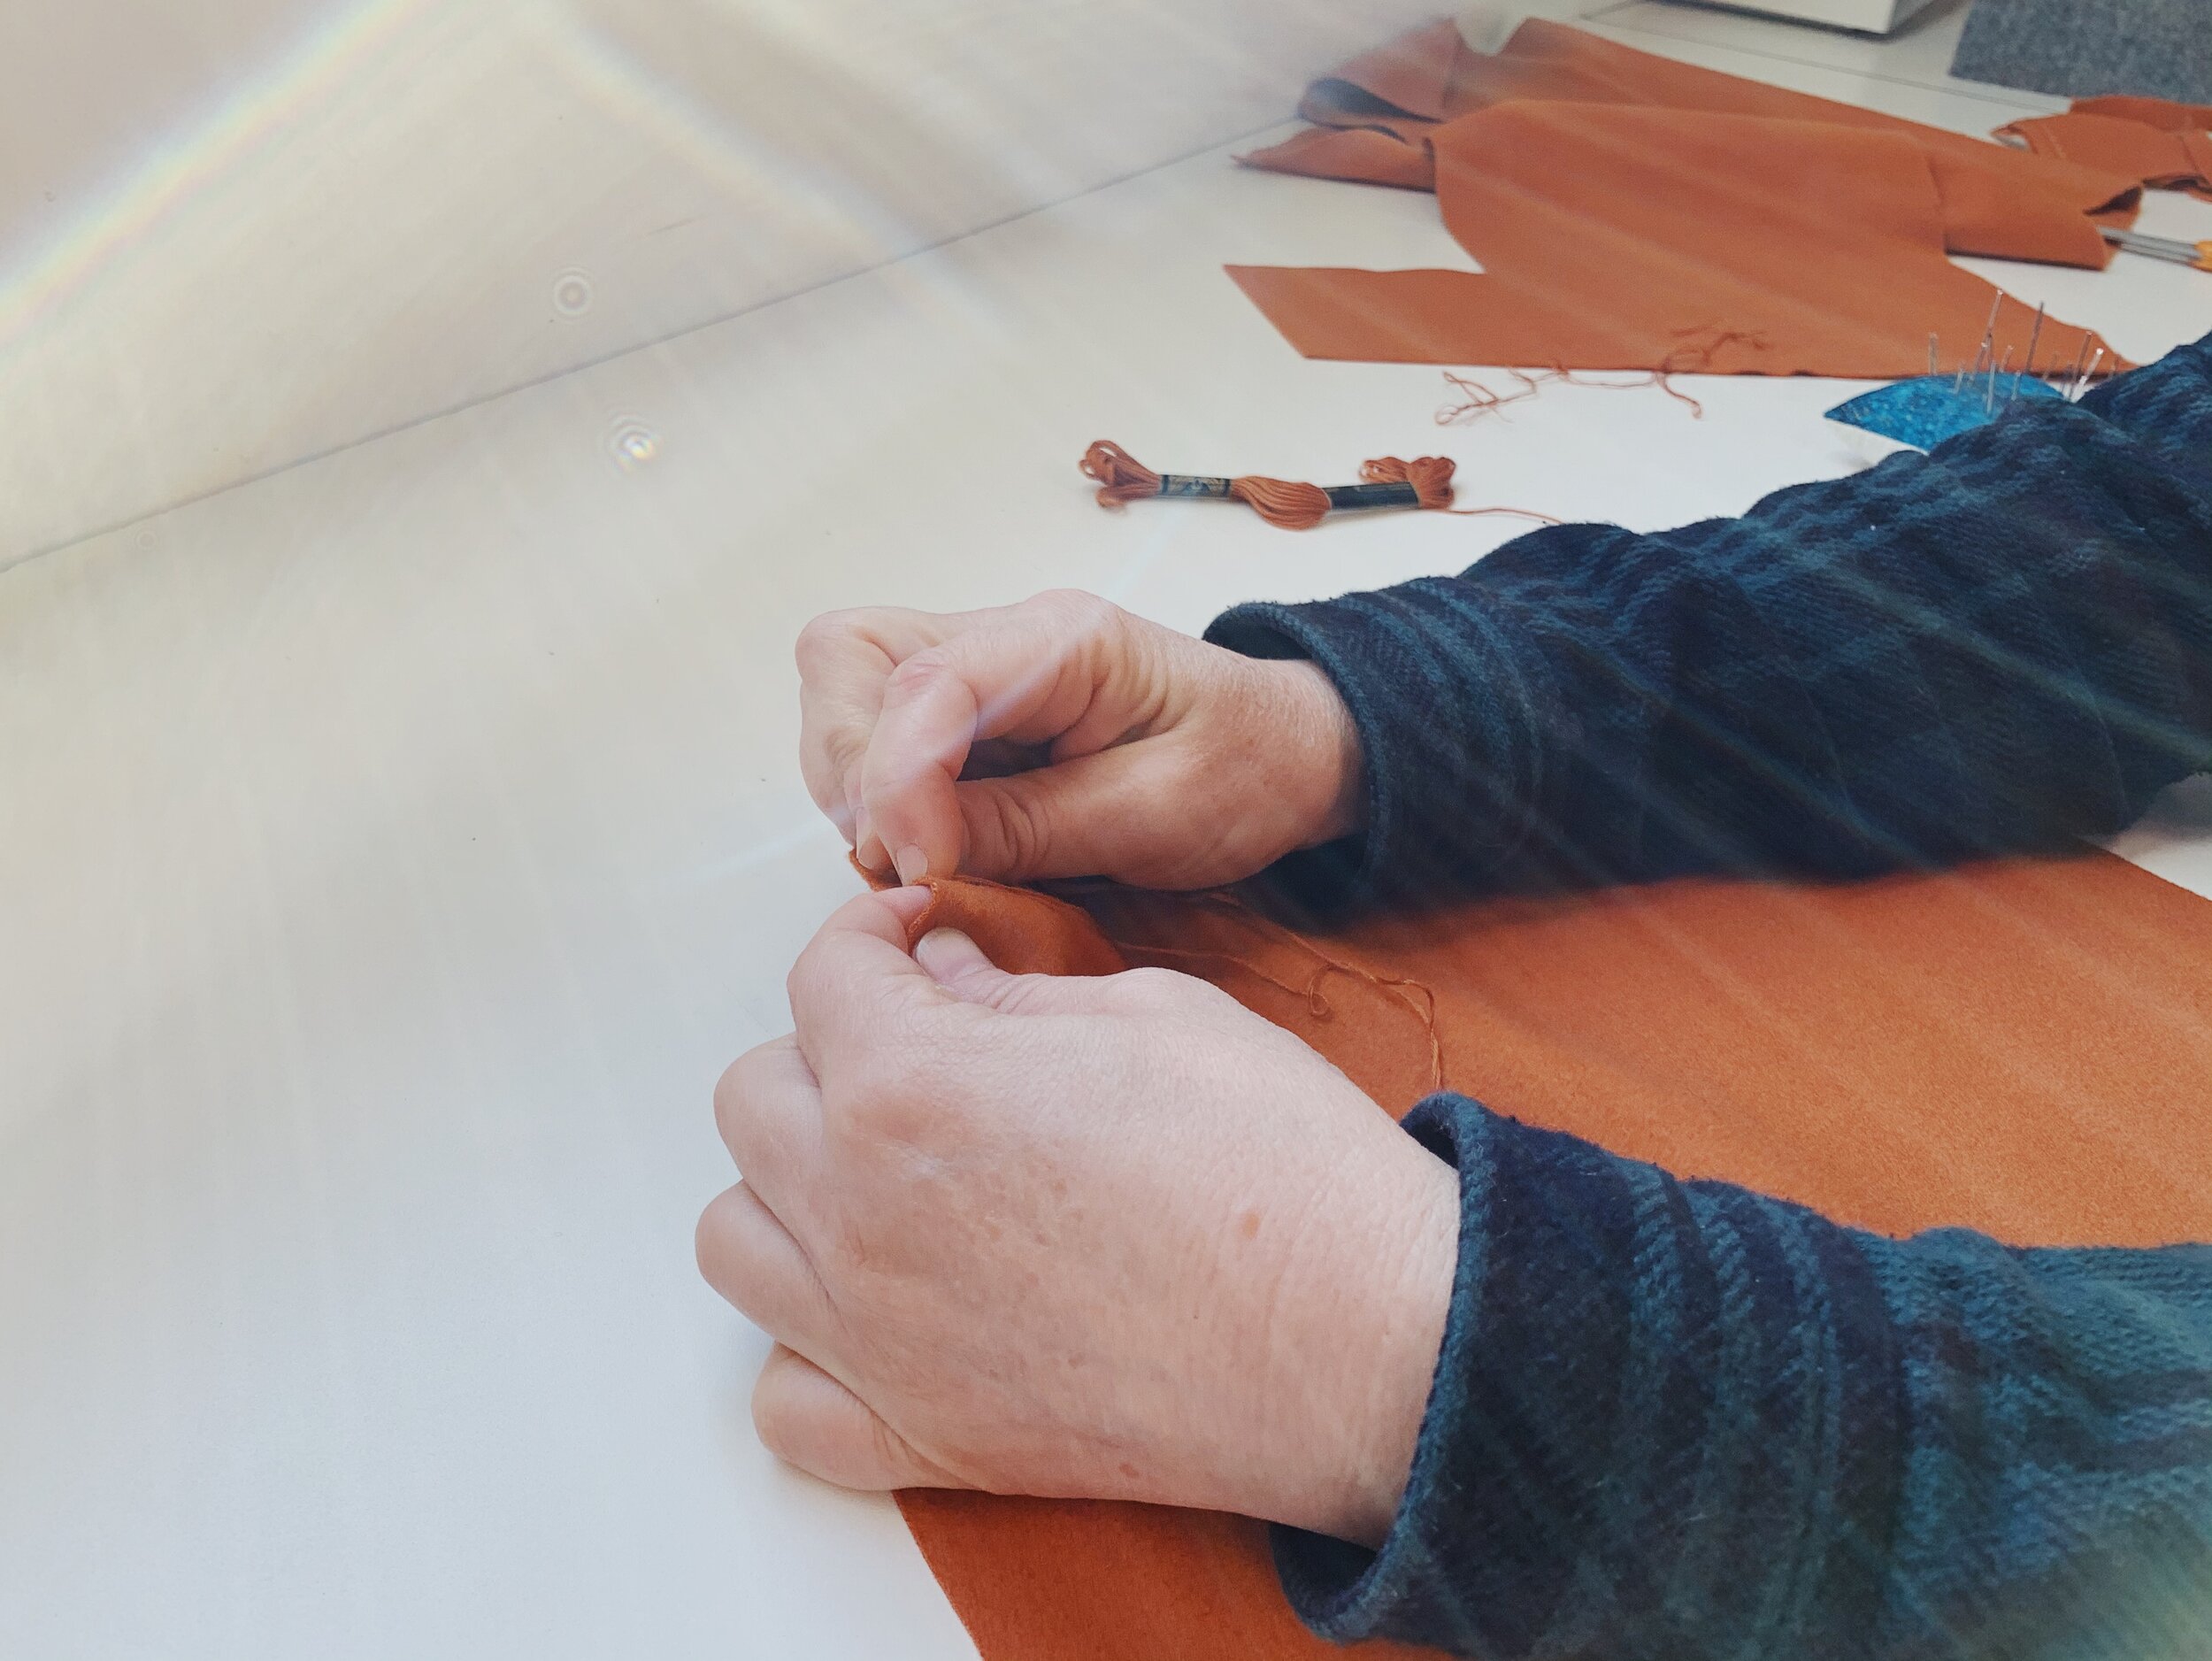
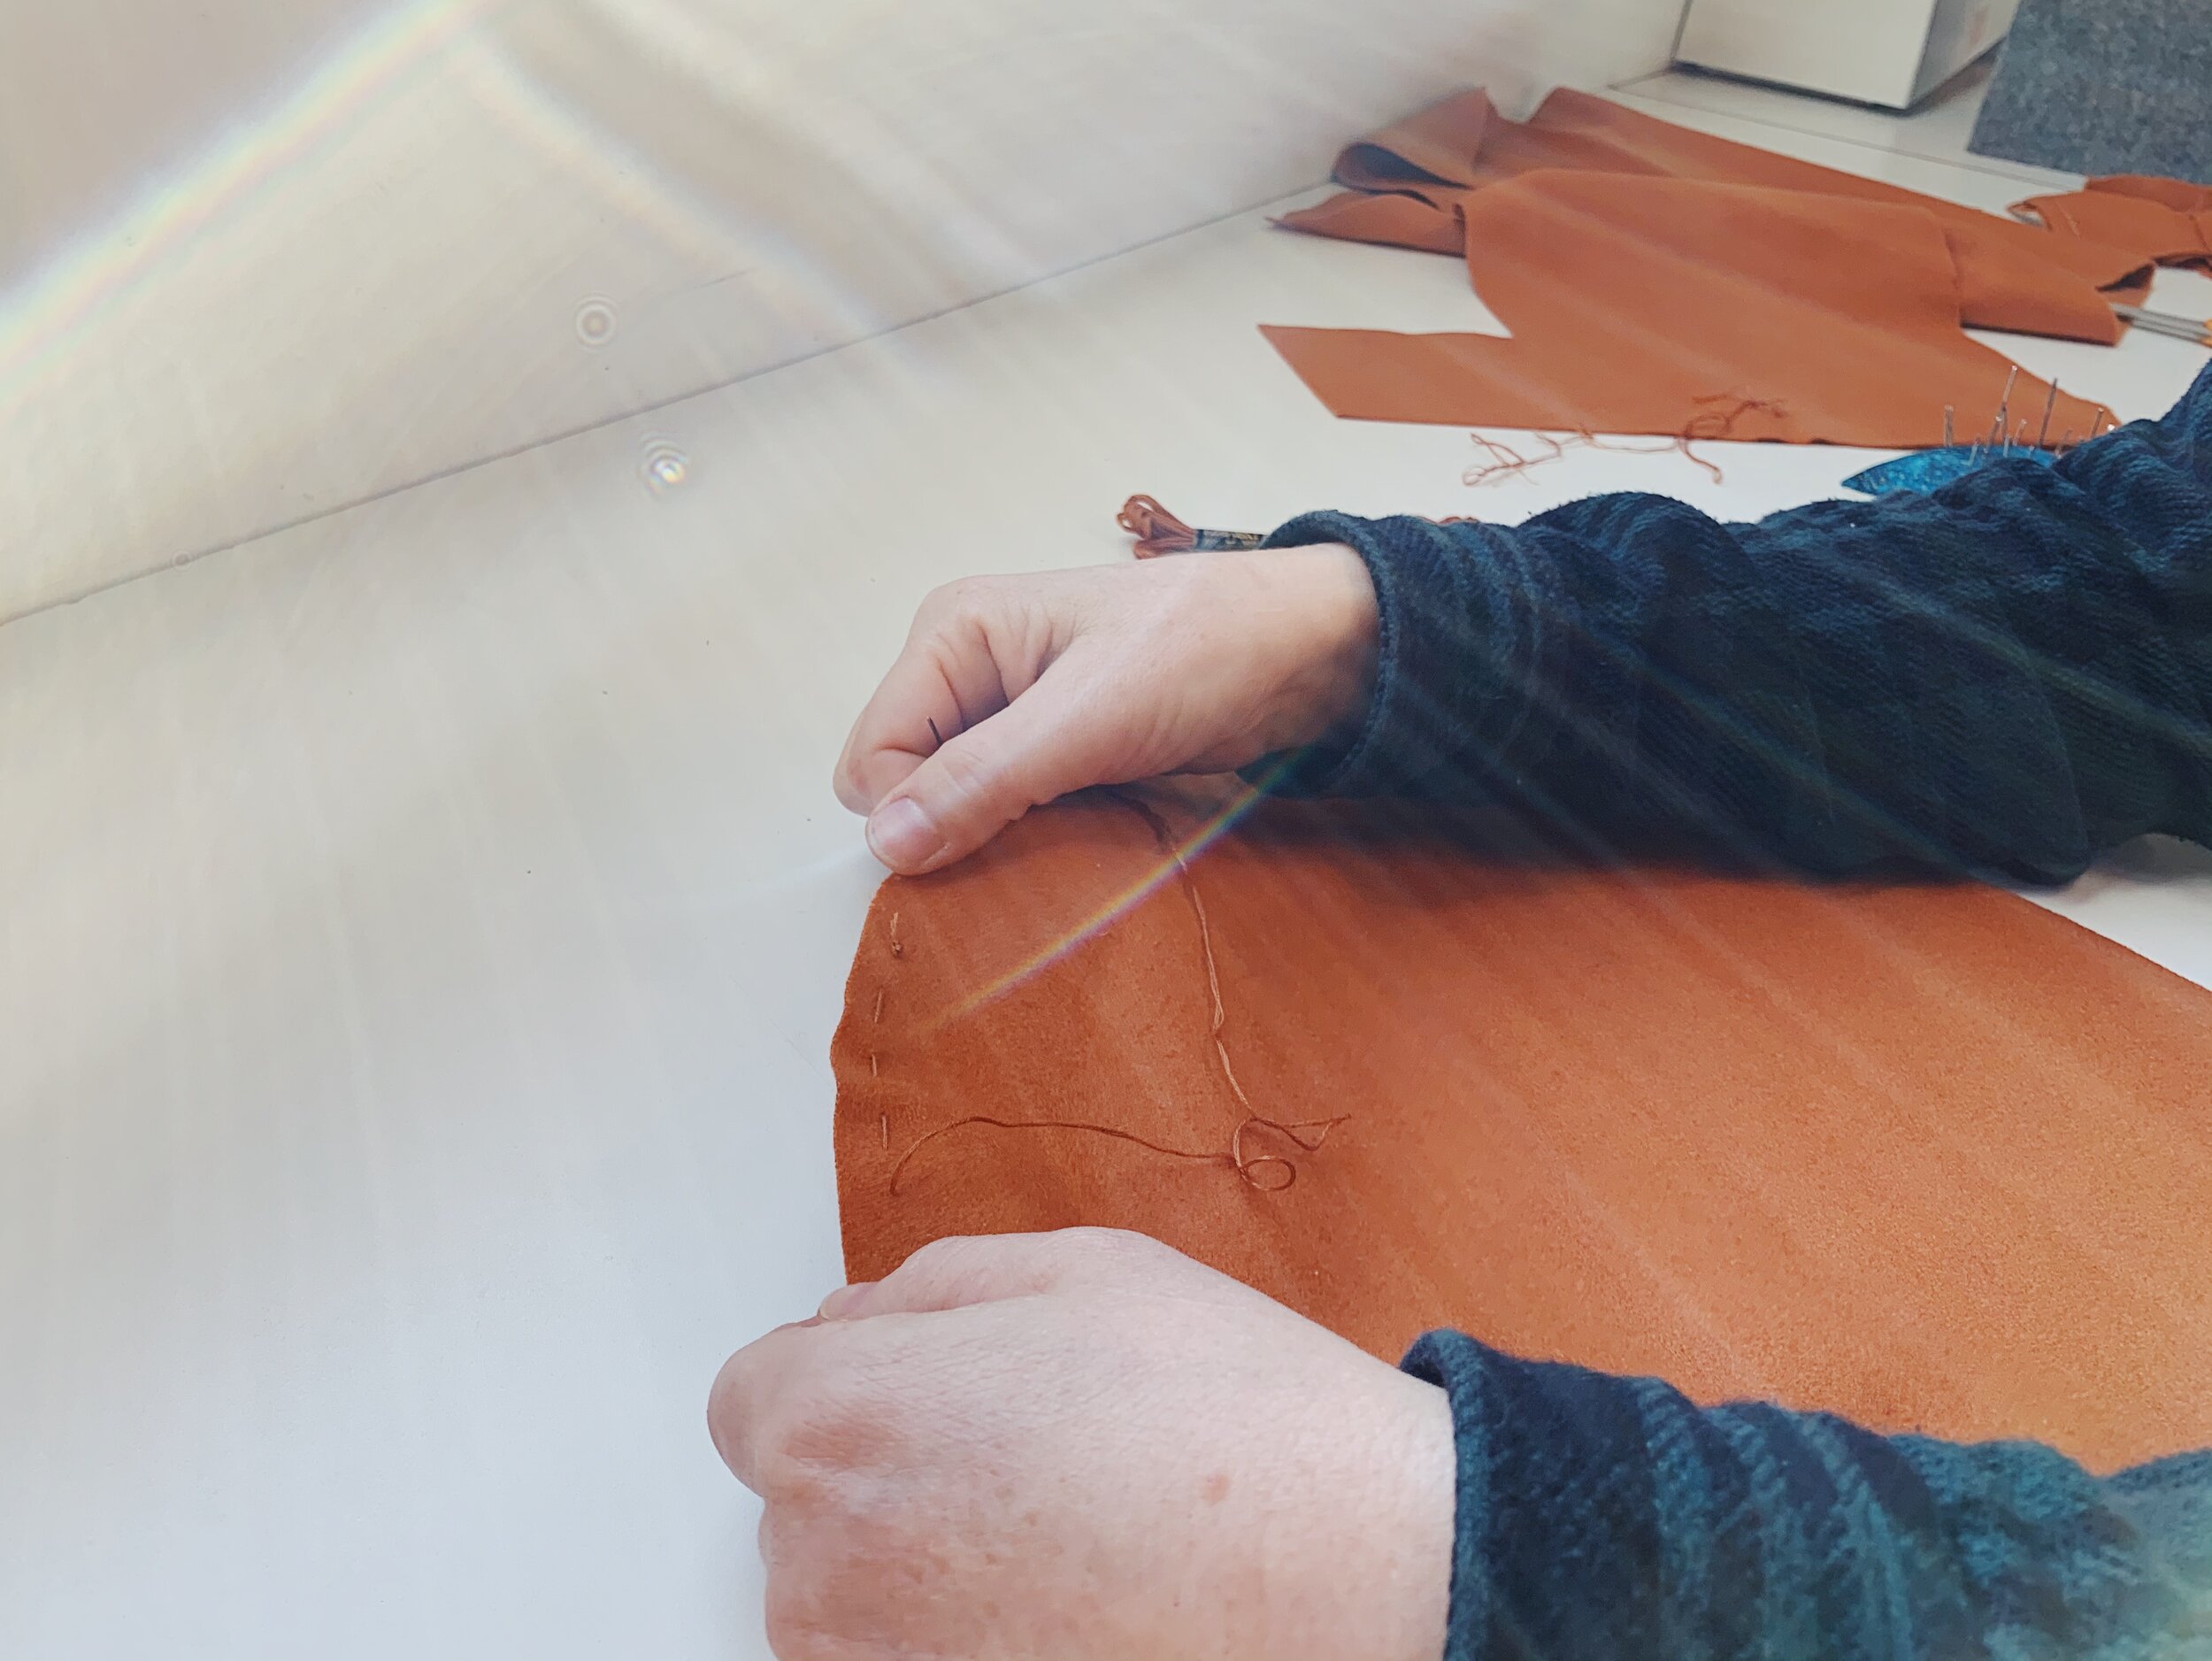
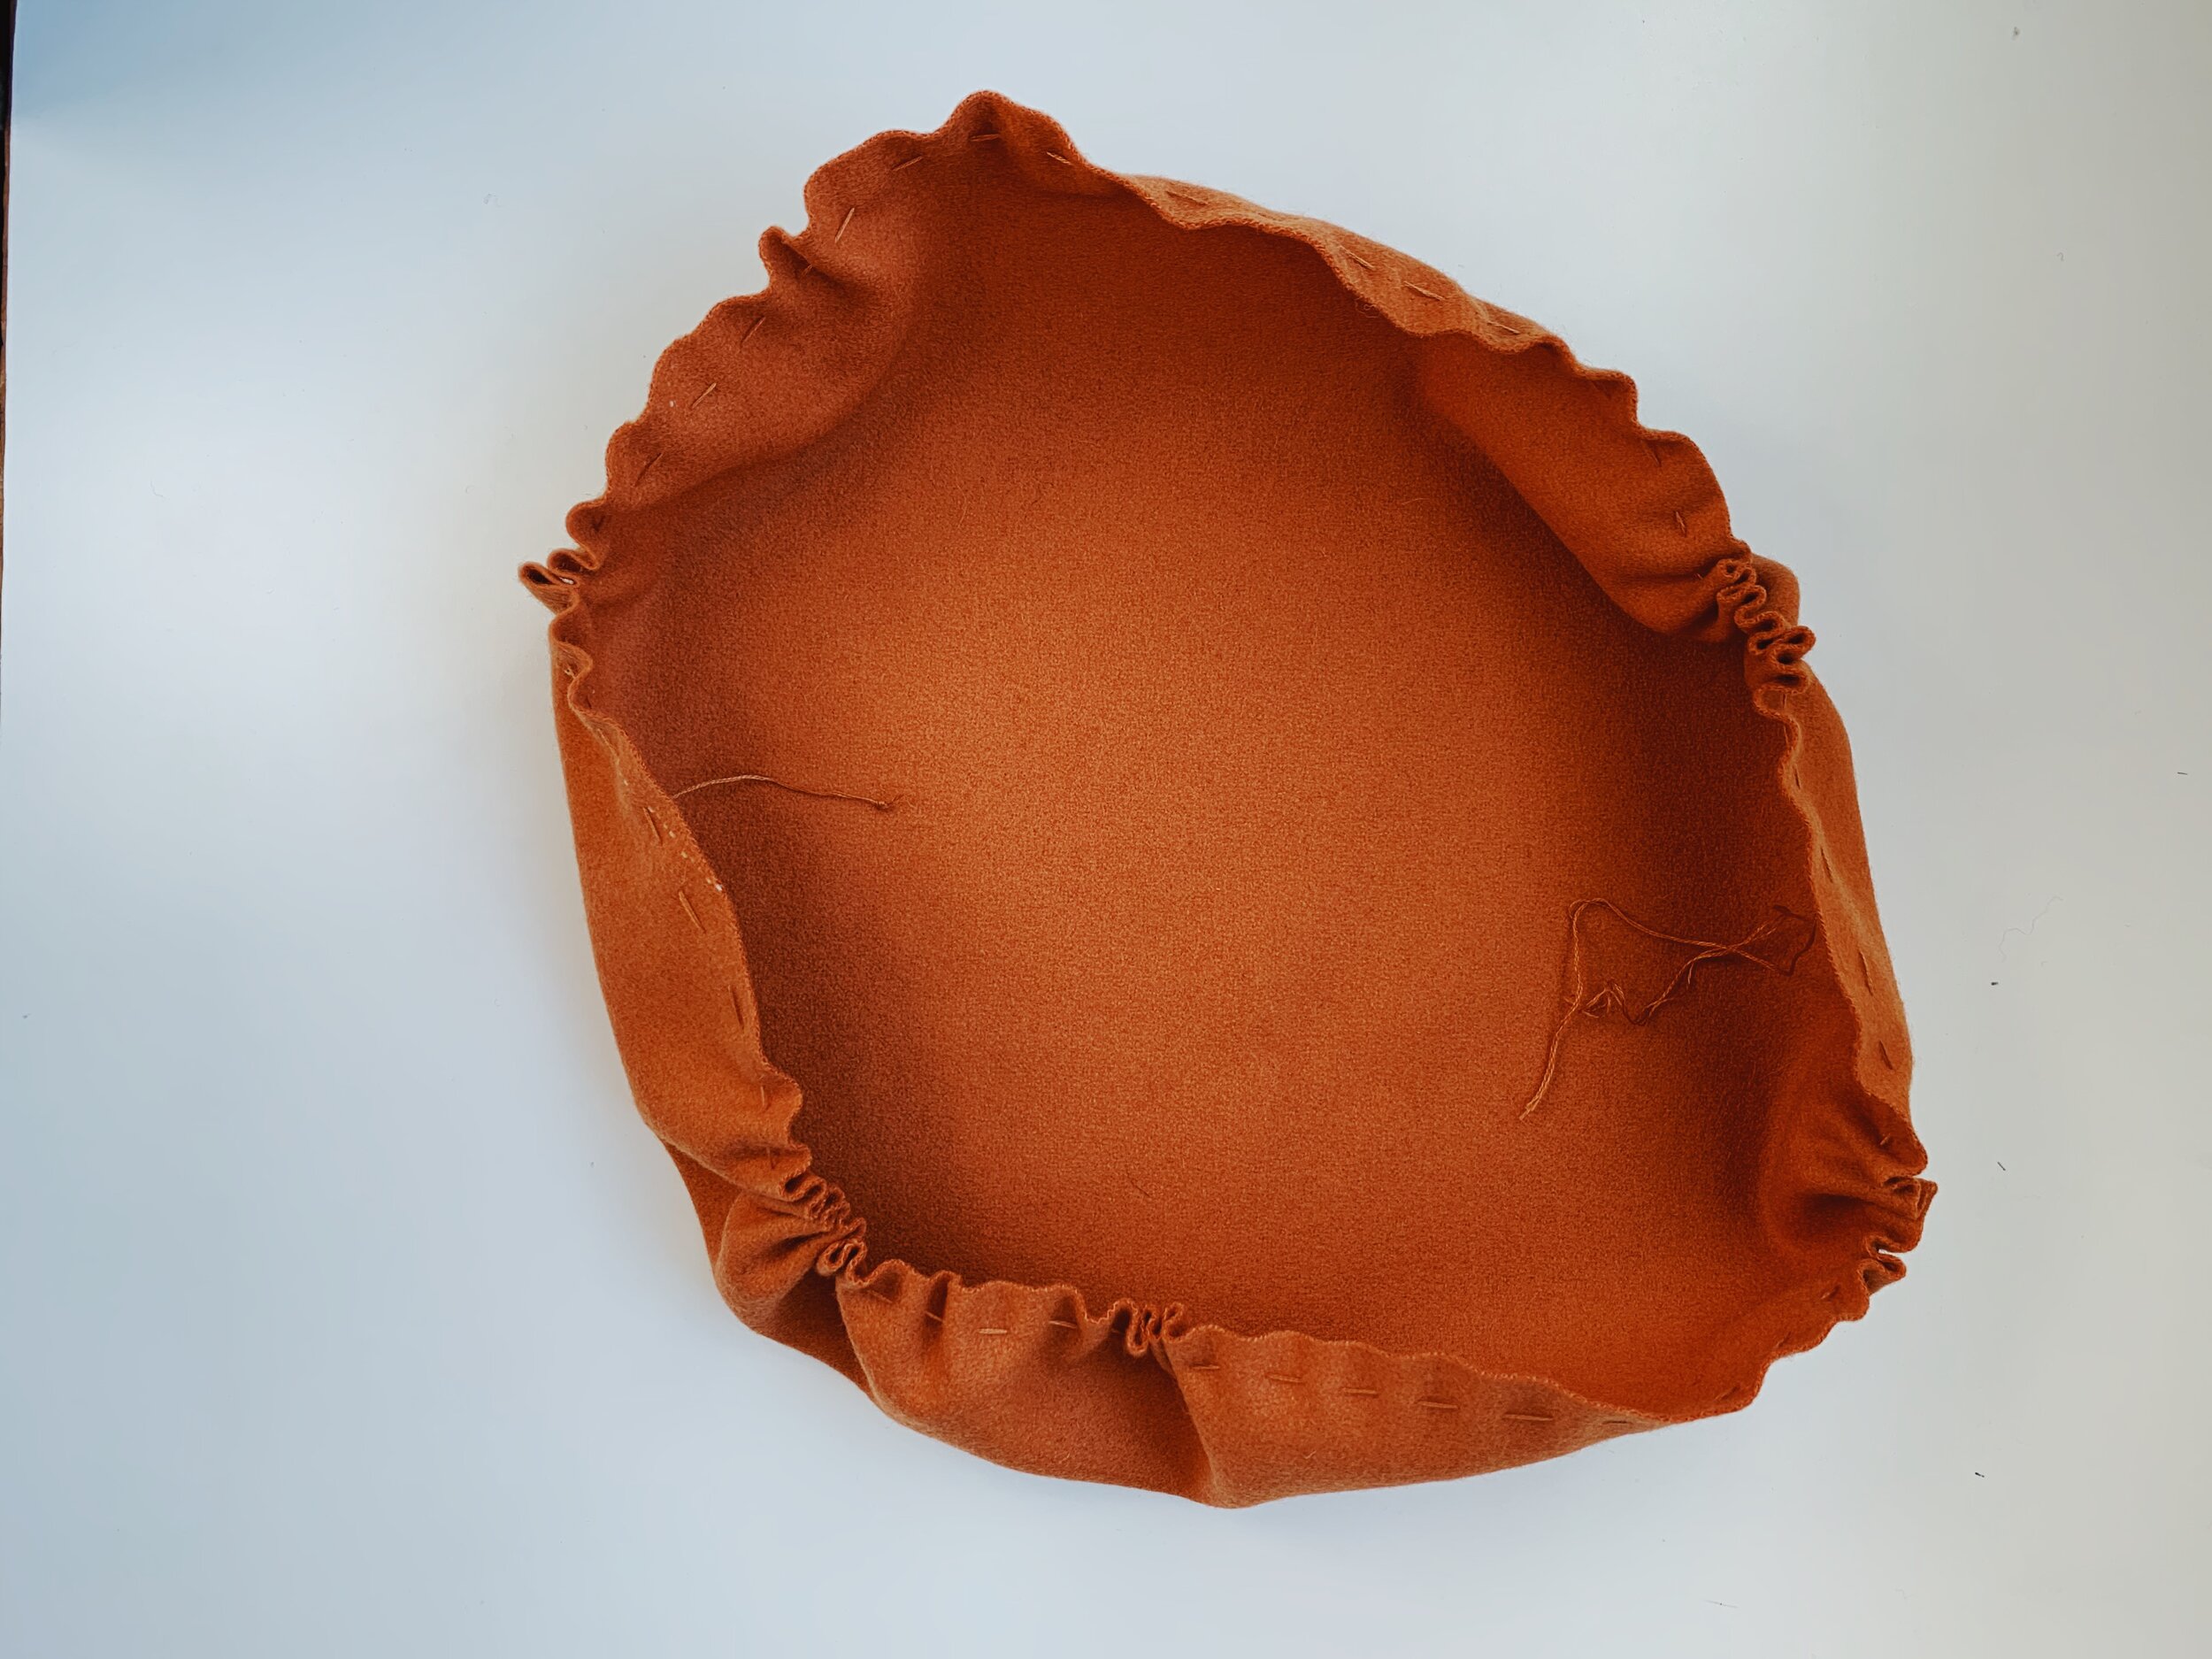
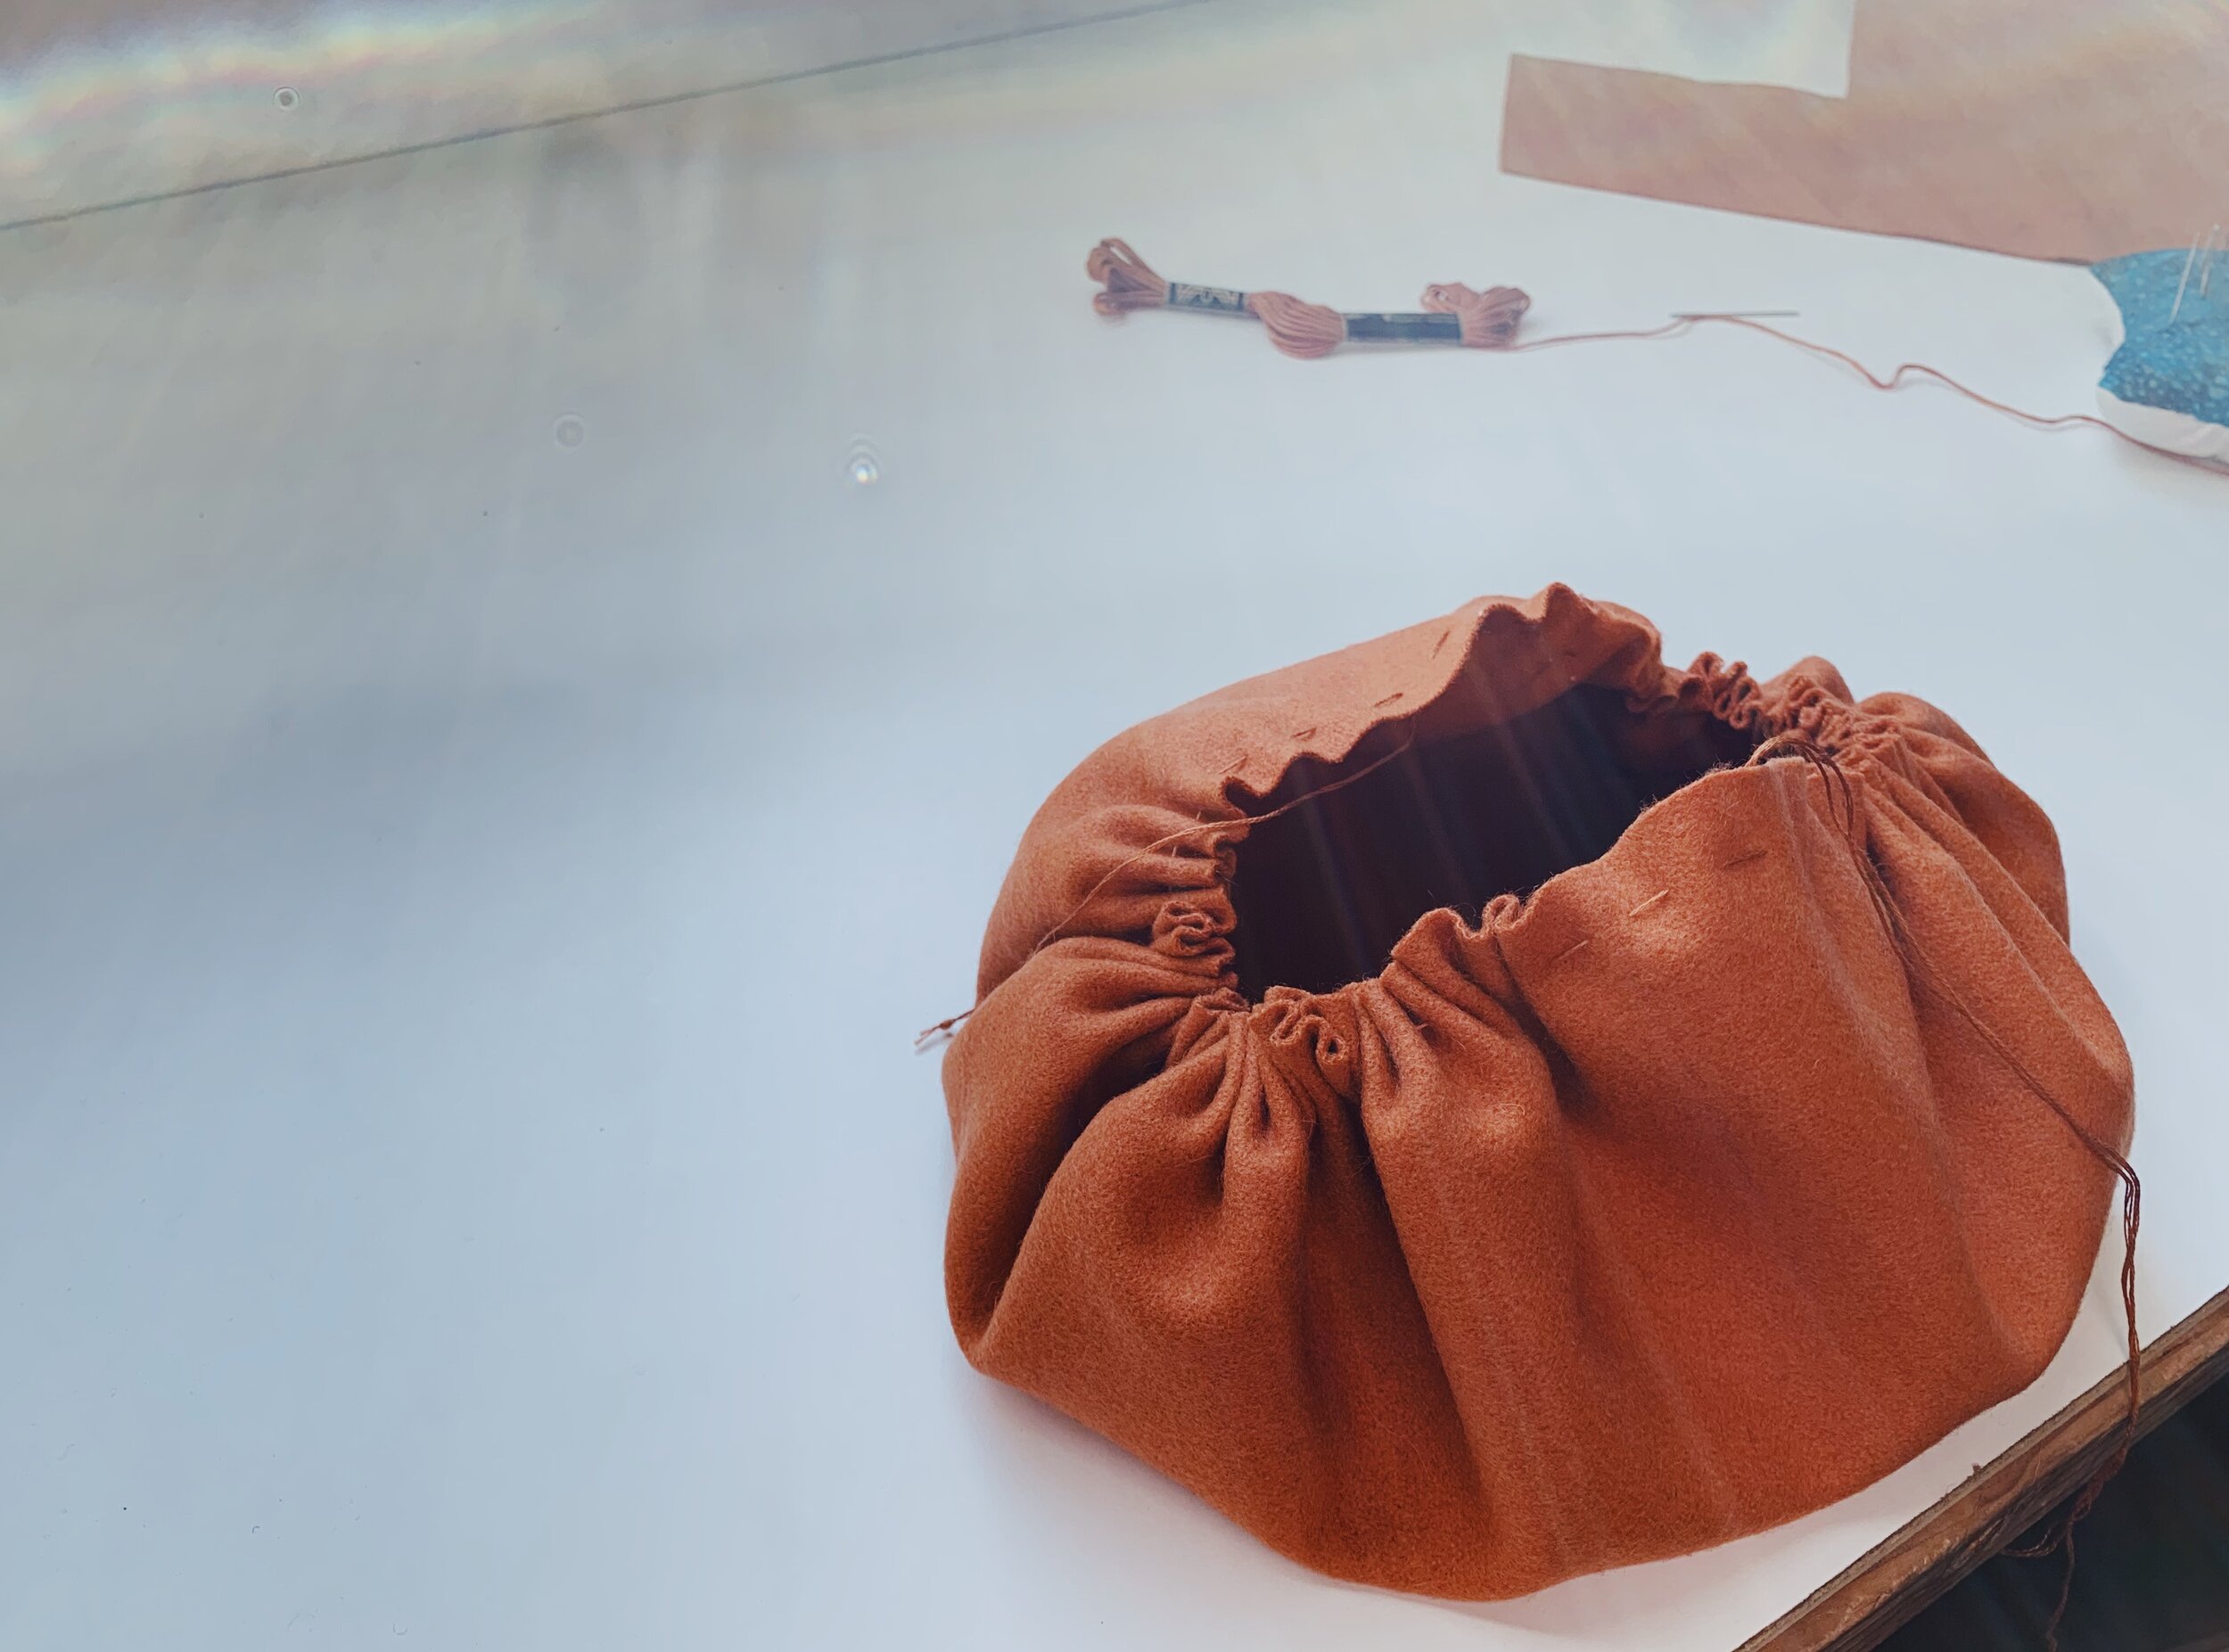
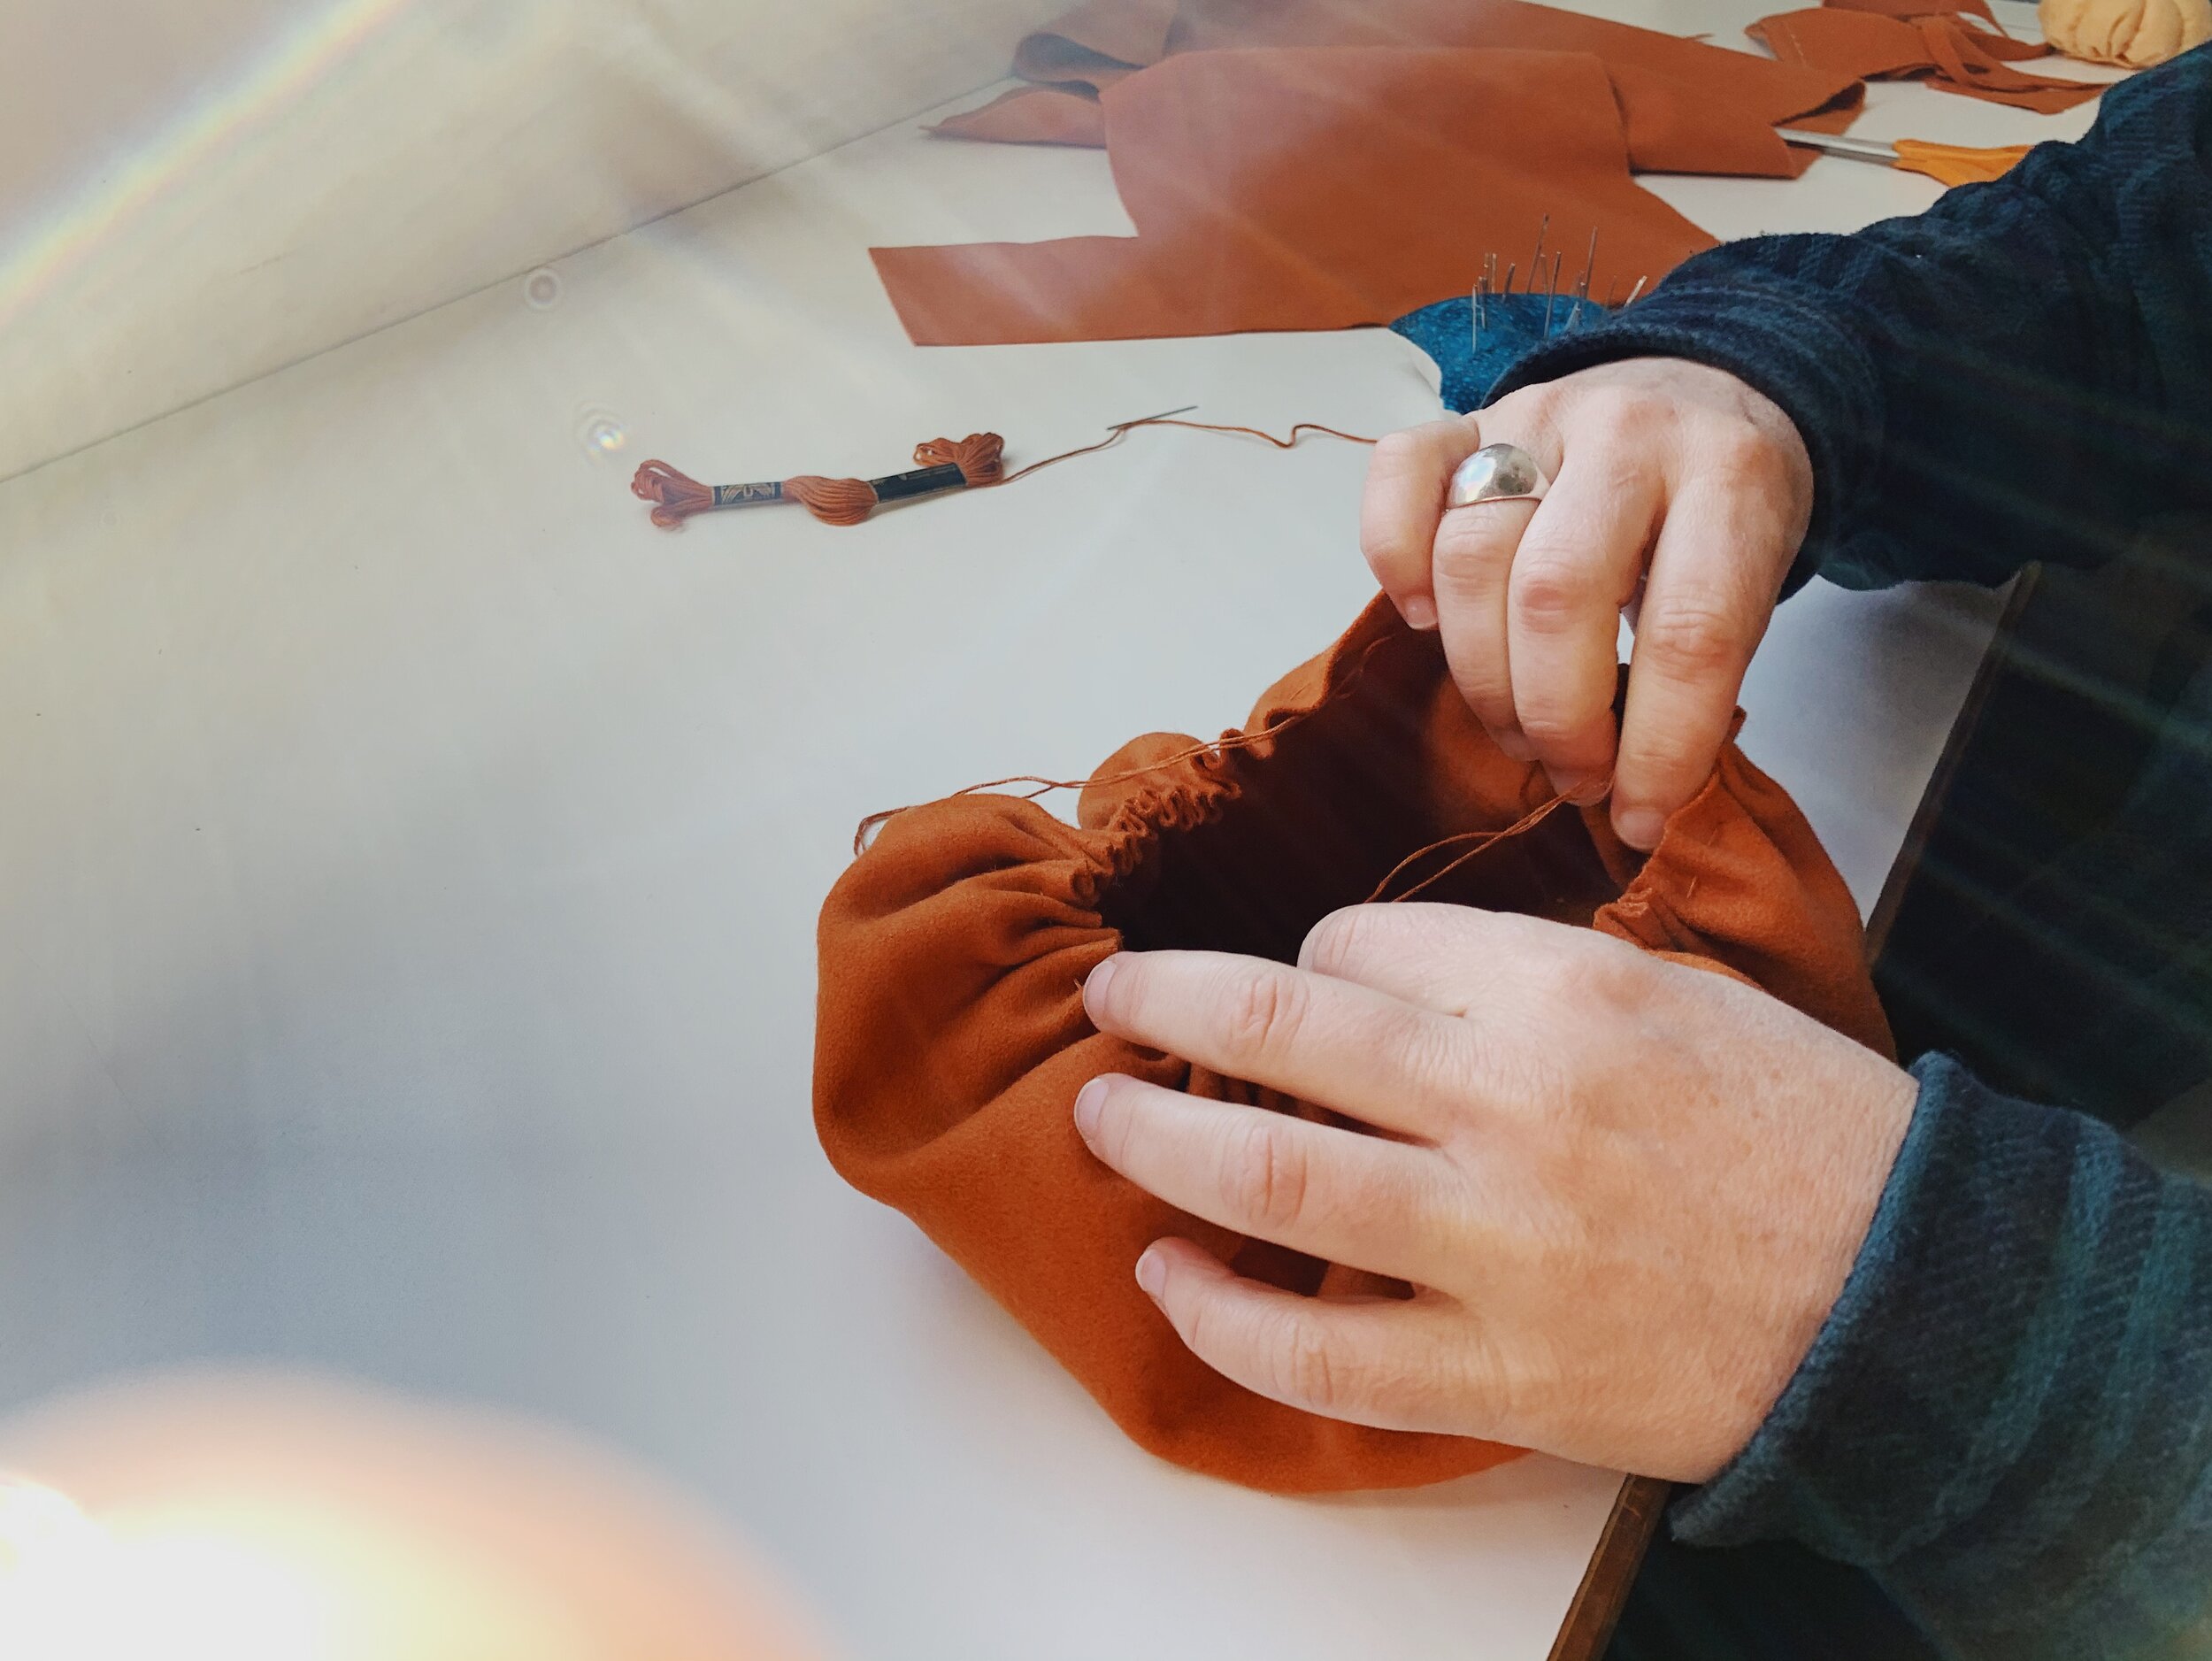
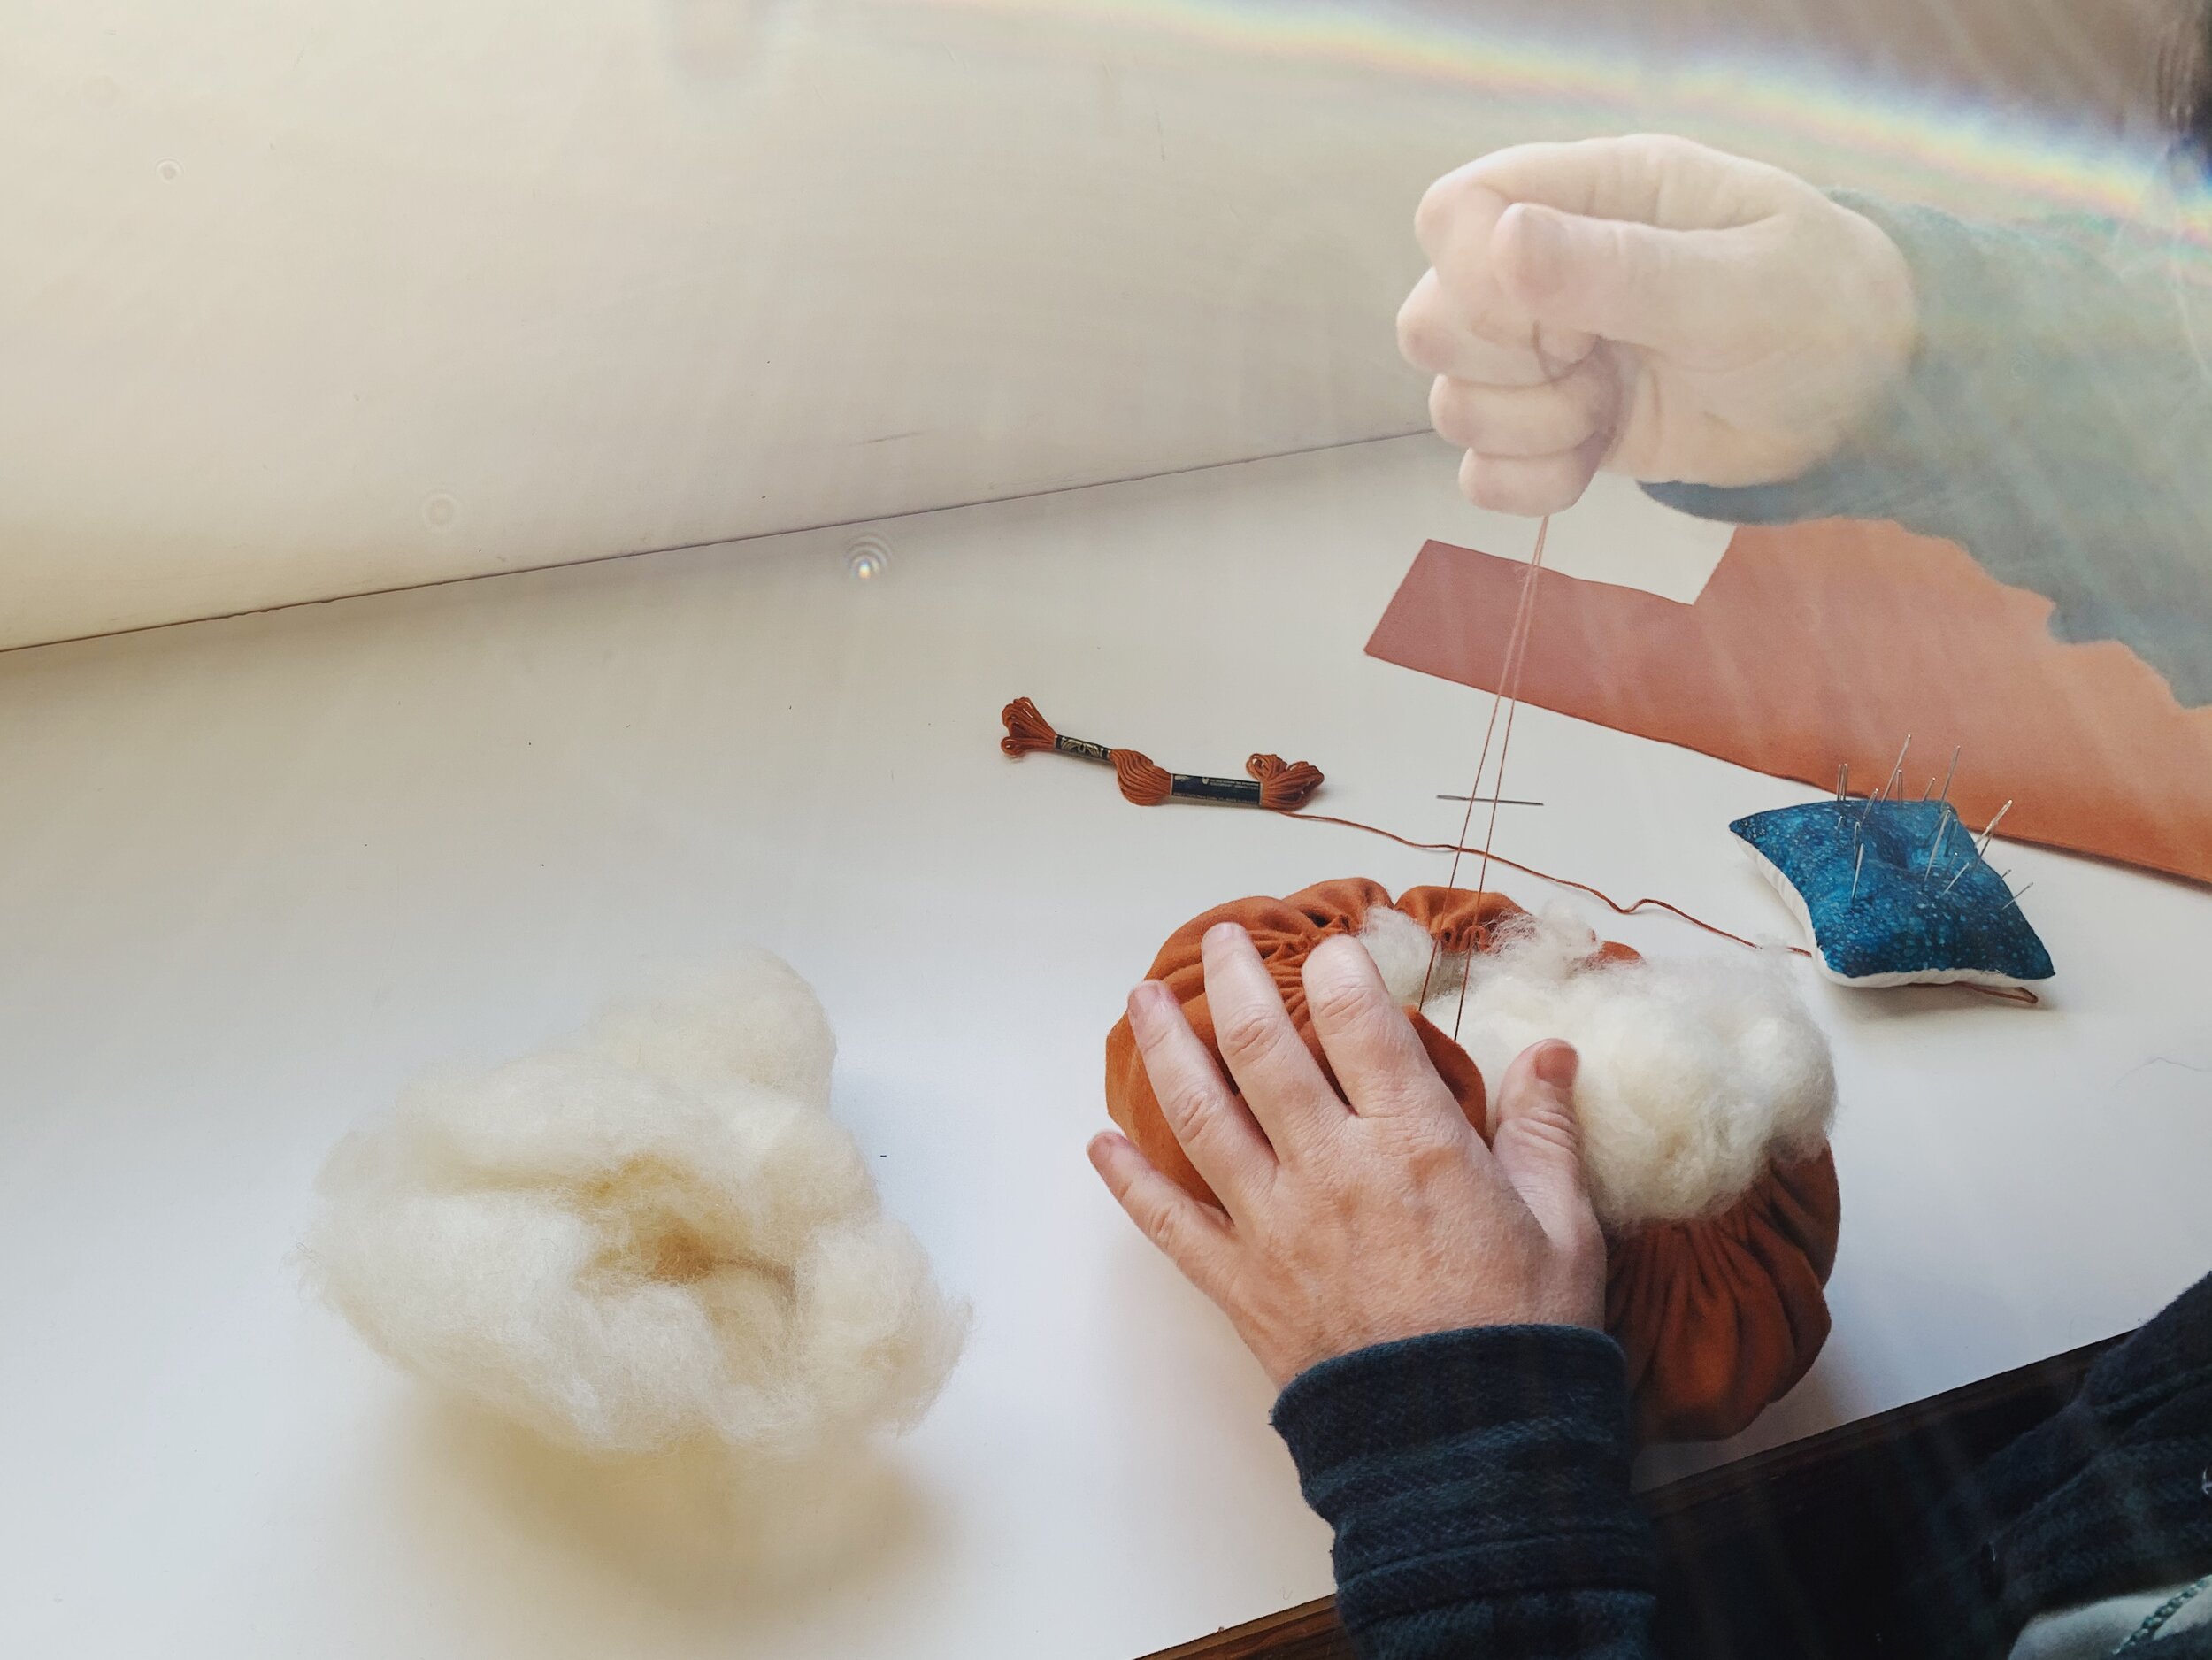
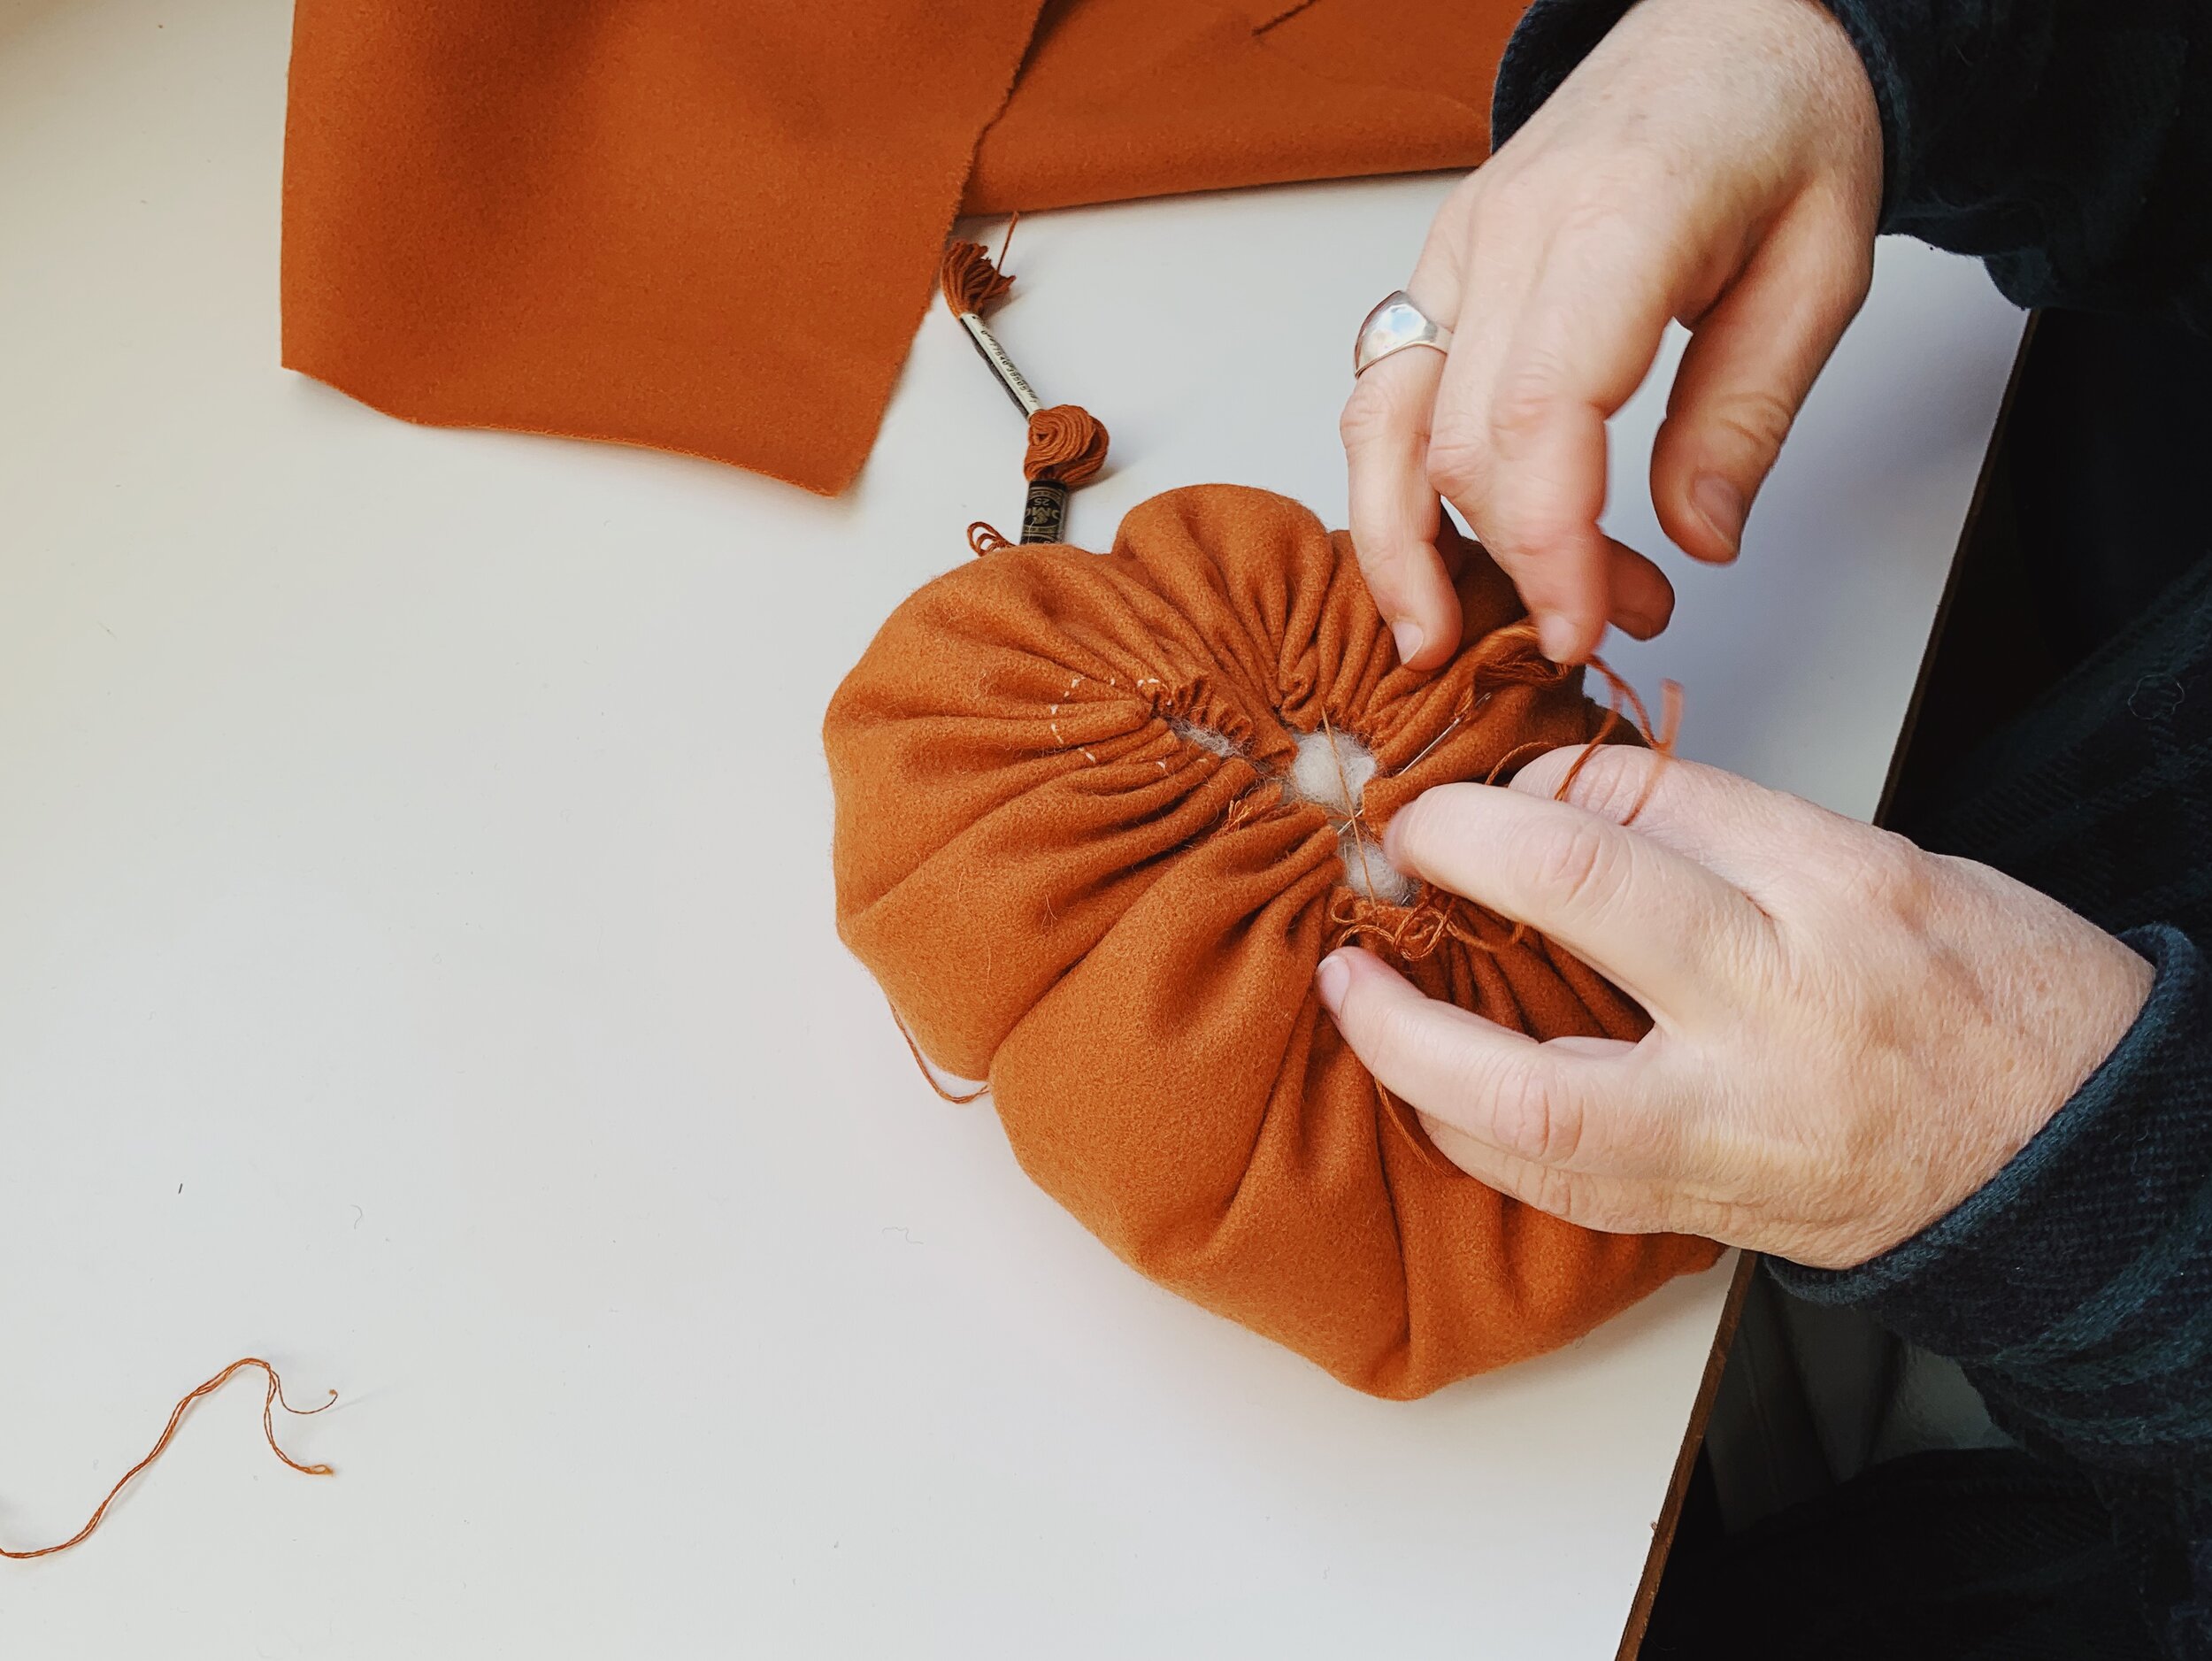
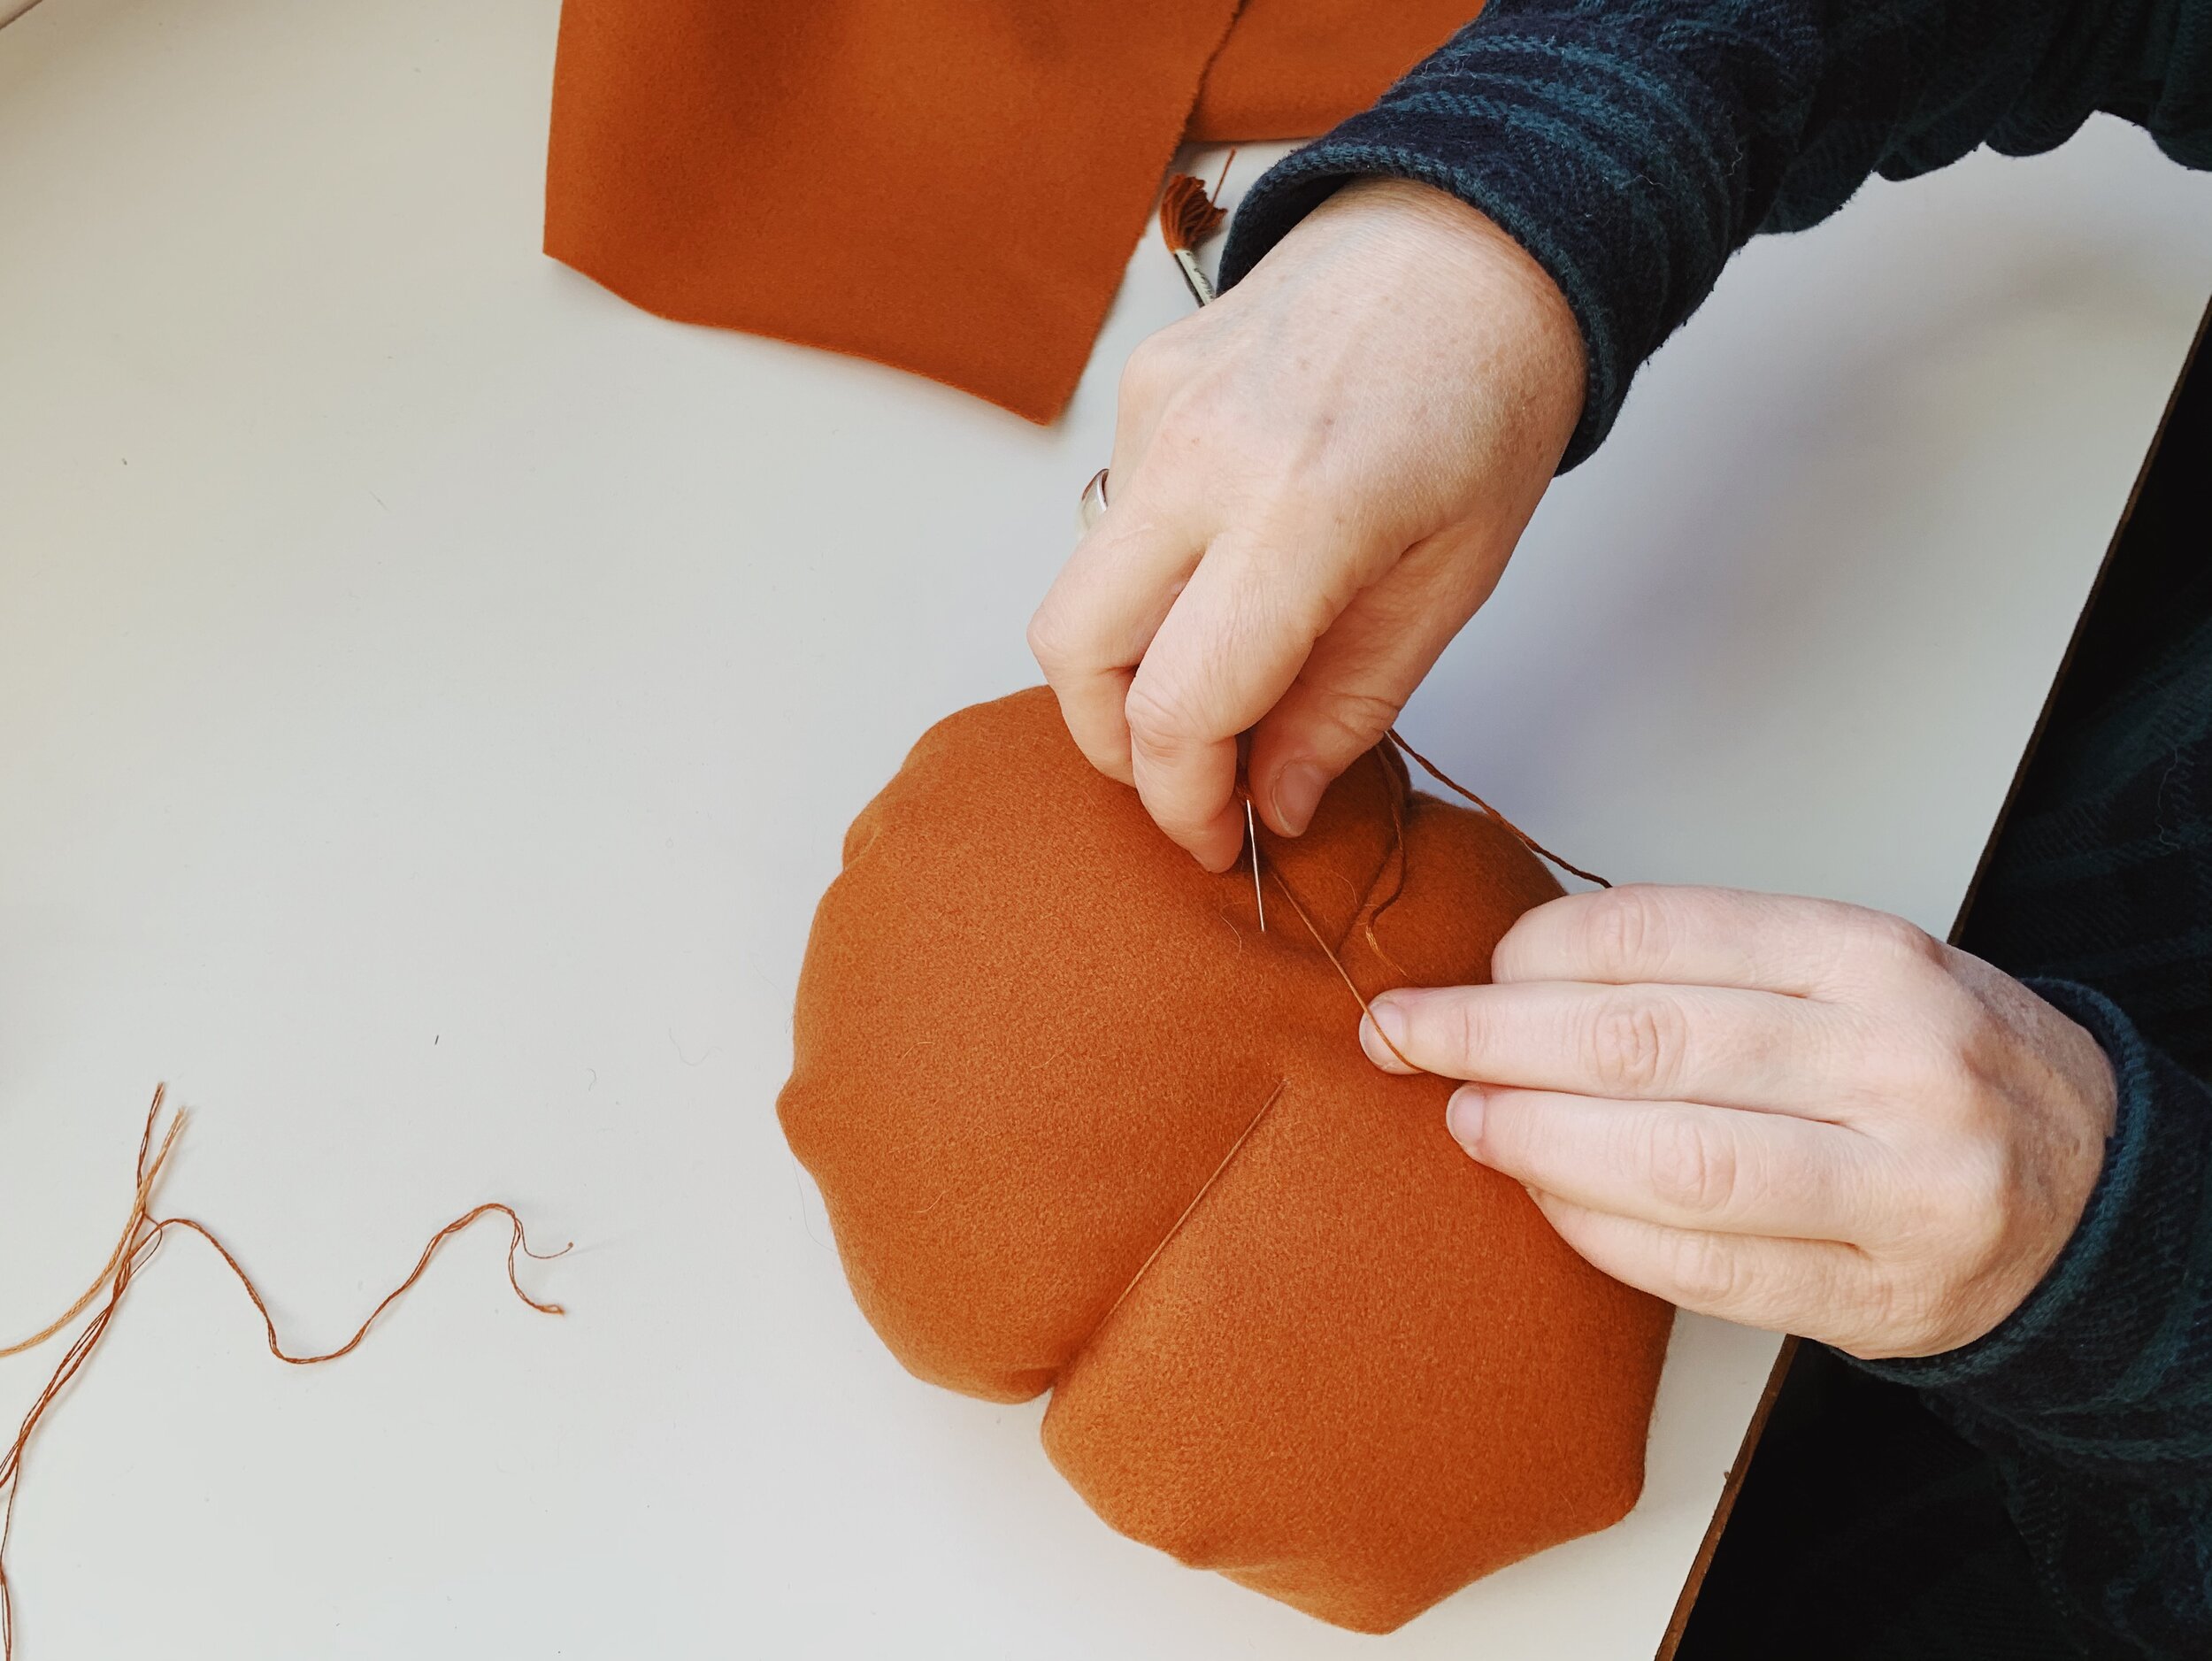
Measure and cut a length of embroidery floss that can travel around your felt circle three times. Thread the needle and knot the tail end of the embroidery floss. Using a running stitch, sew around the entire outer edge of the circle. Your stitches should be the width of your fingernail. When you’ve gone all the way around, pull thread so that the edges rise up to form an open container.
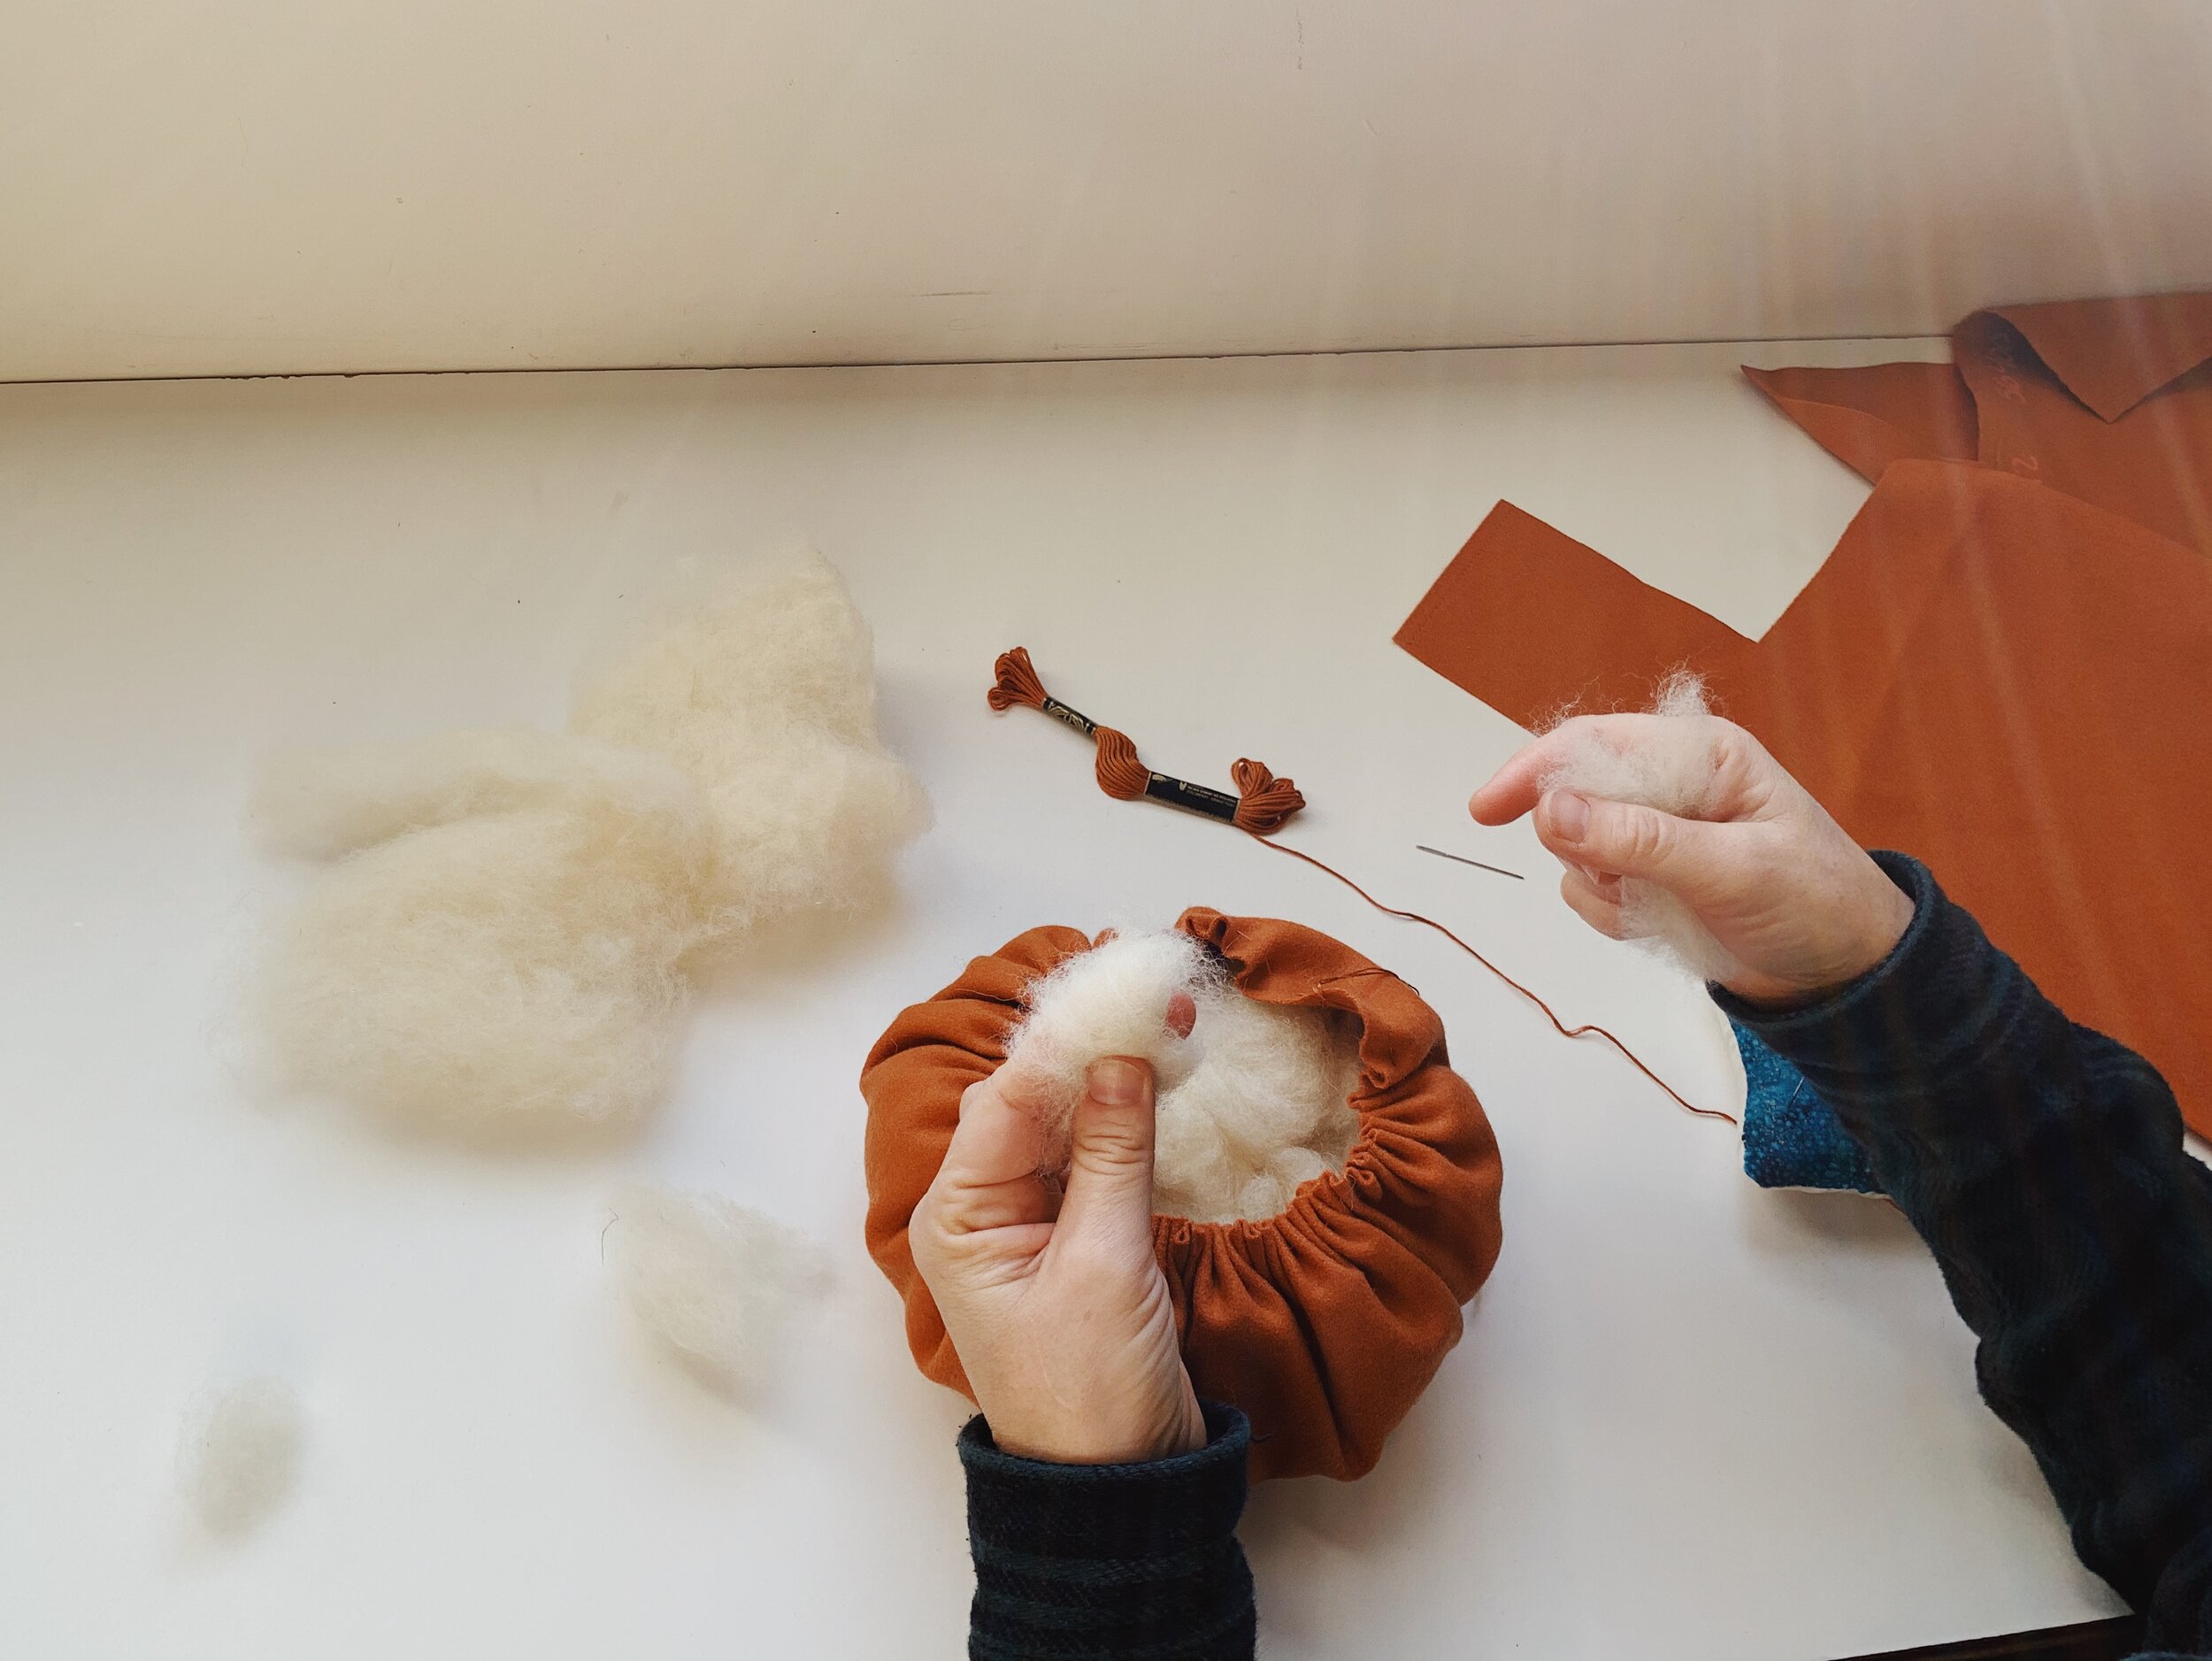
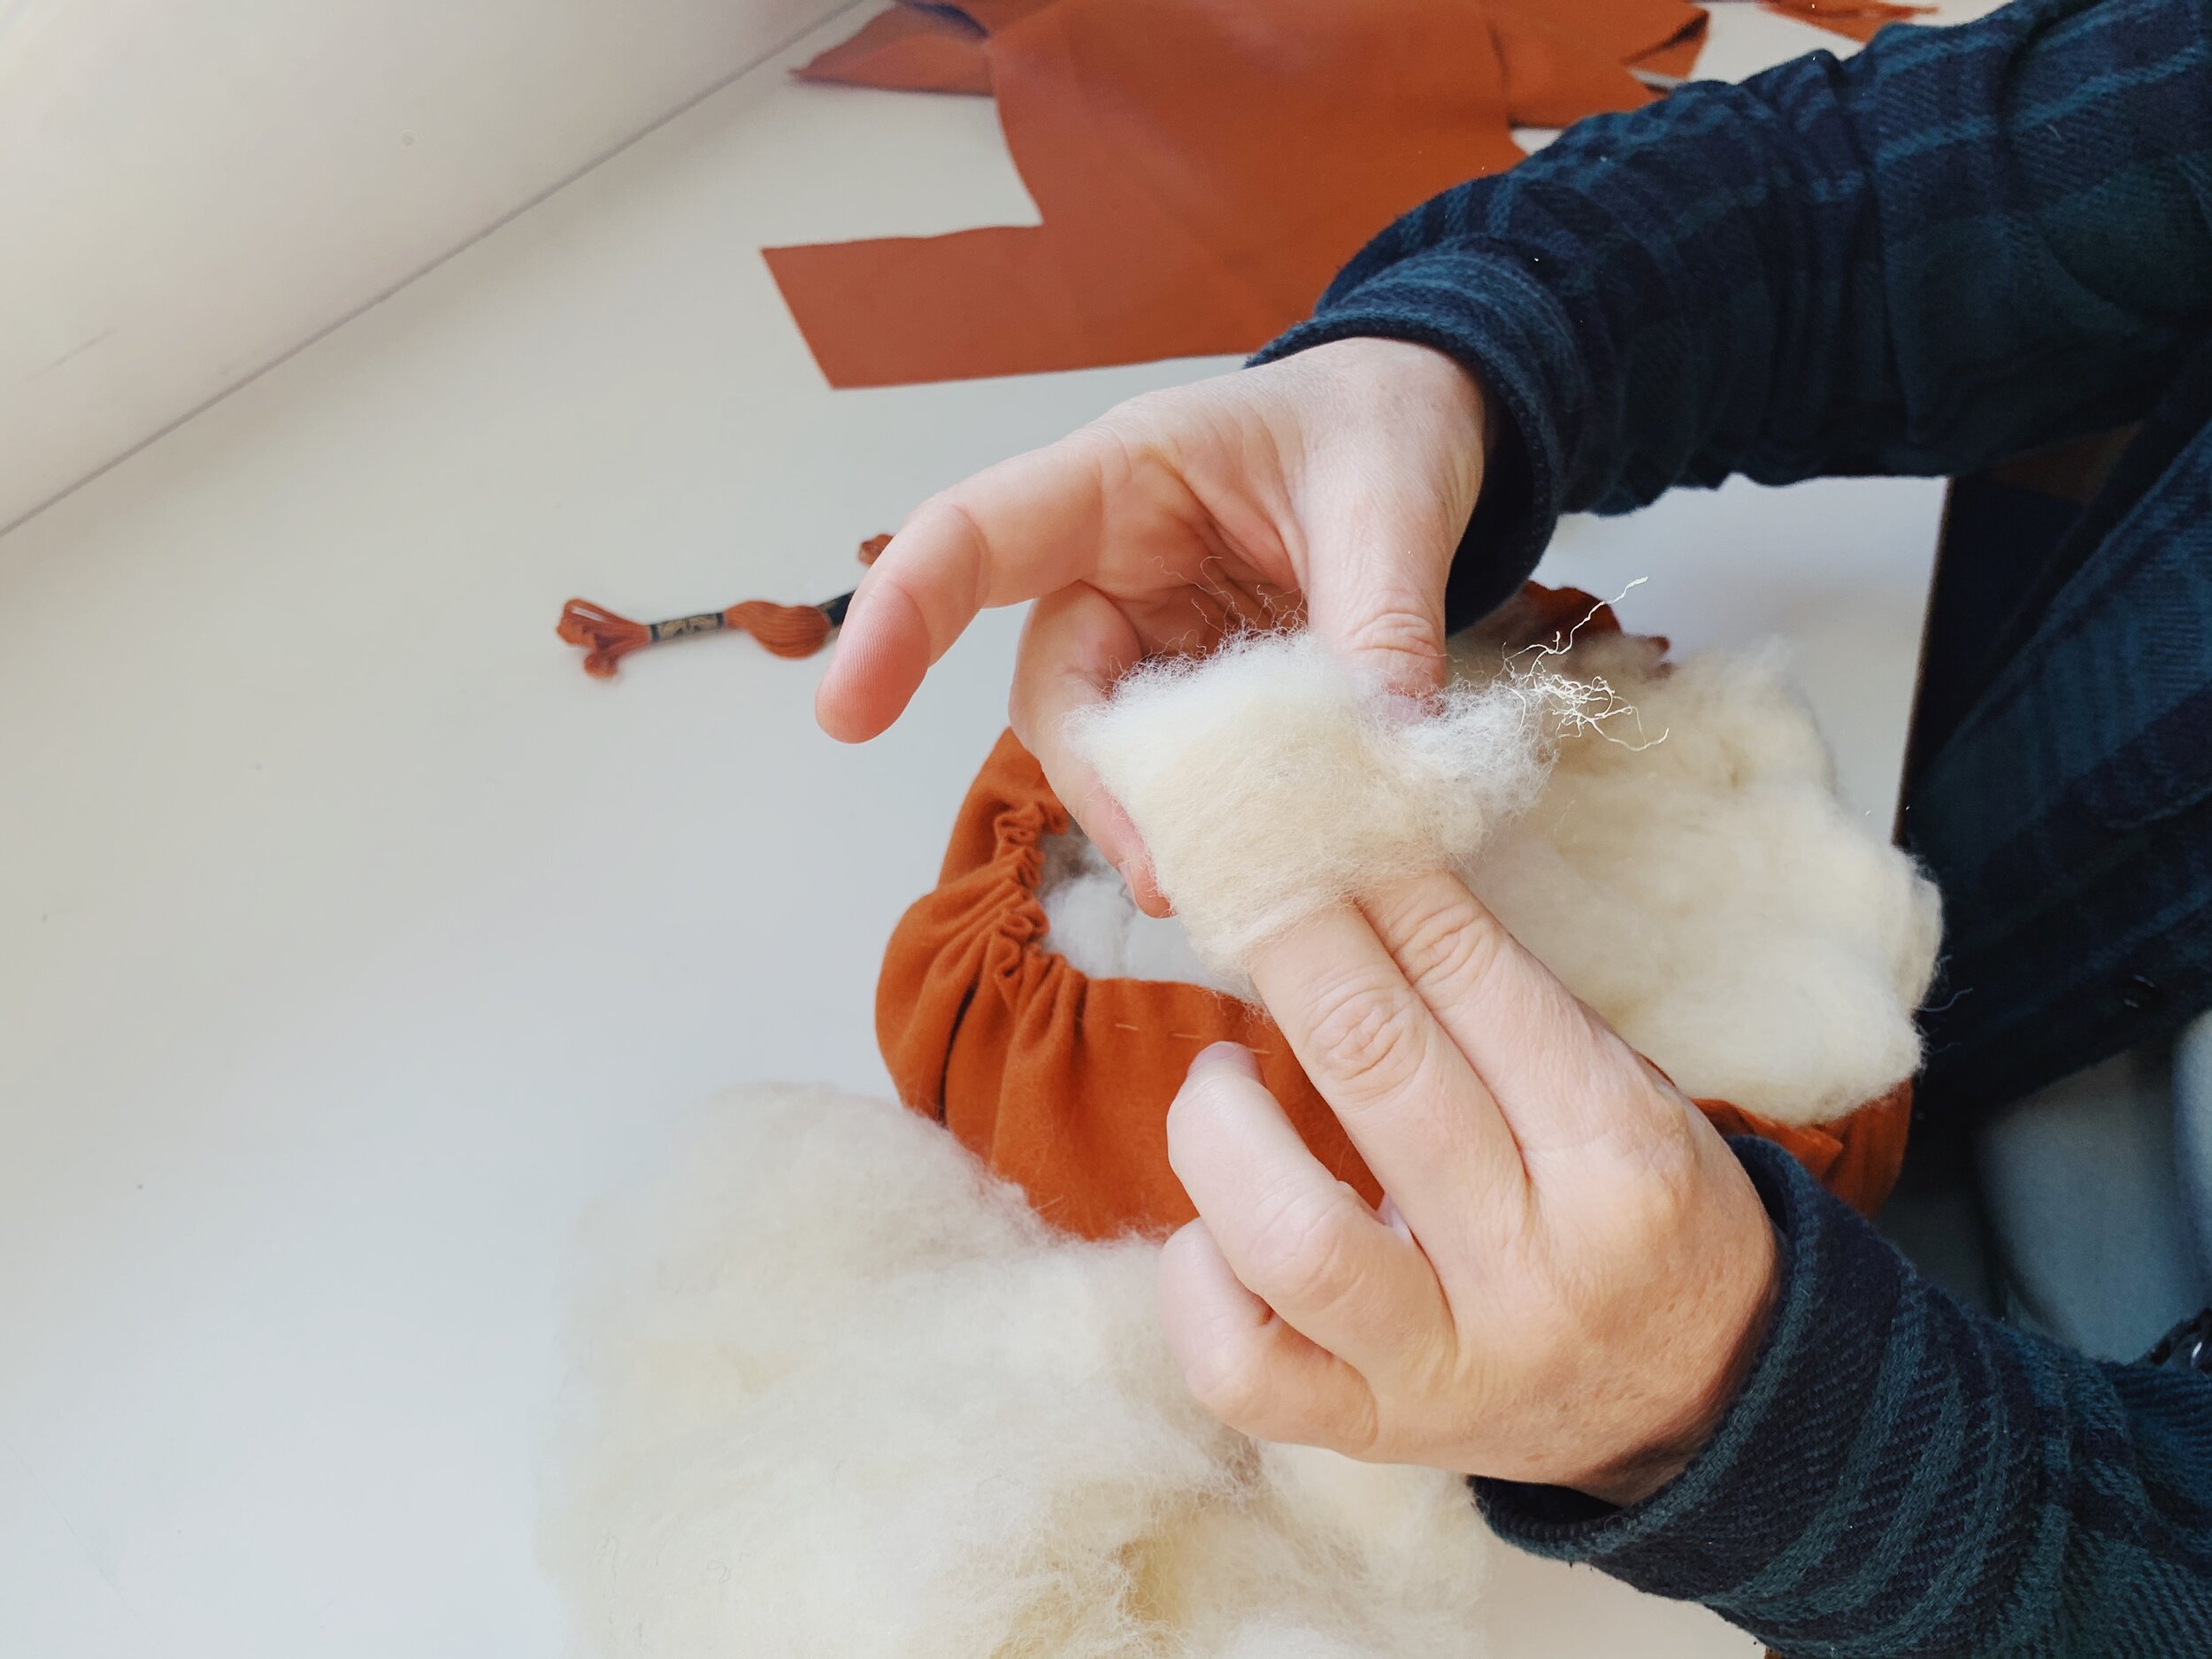
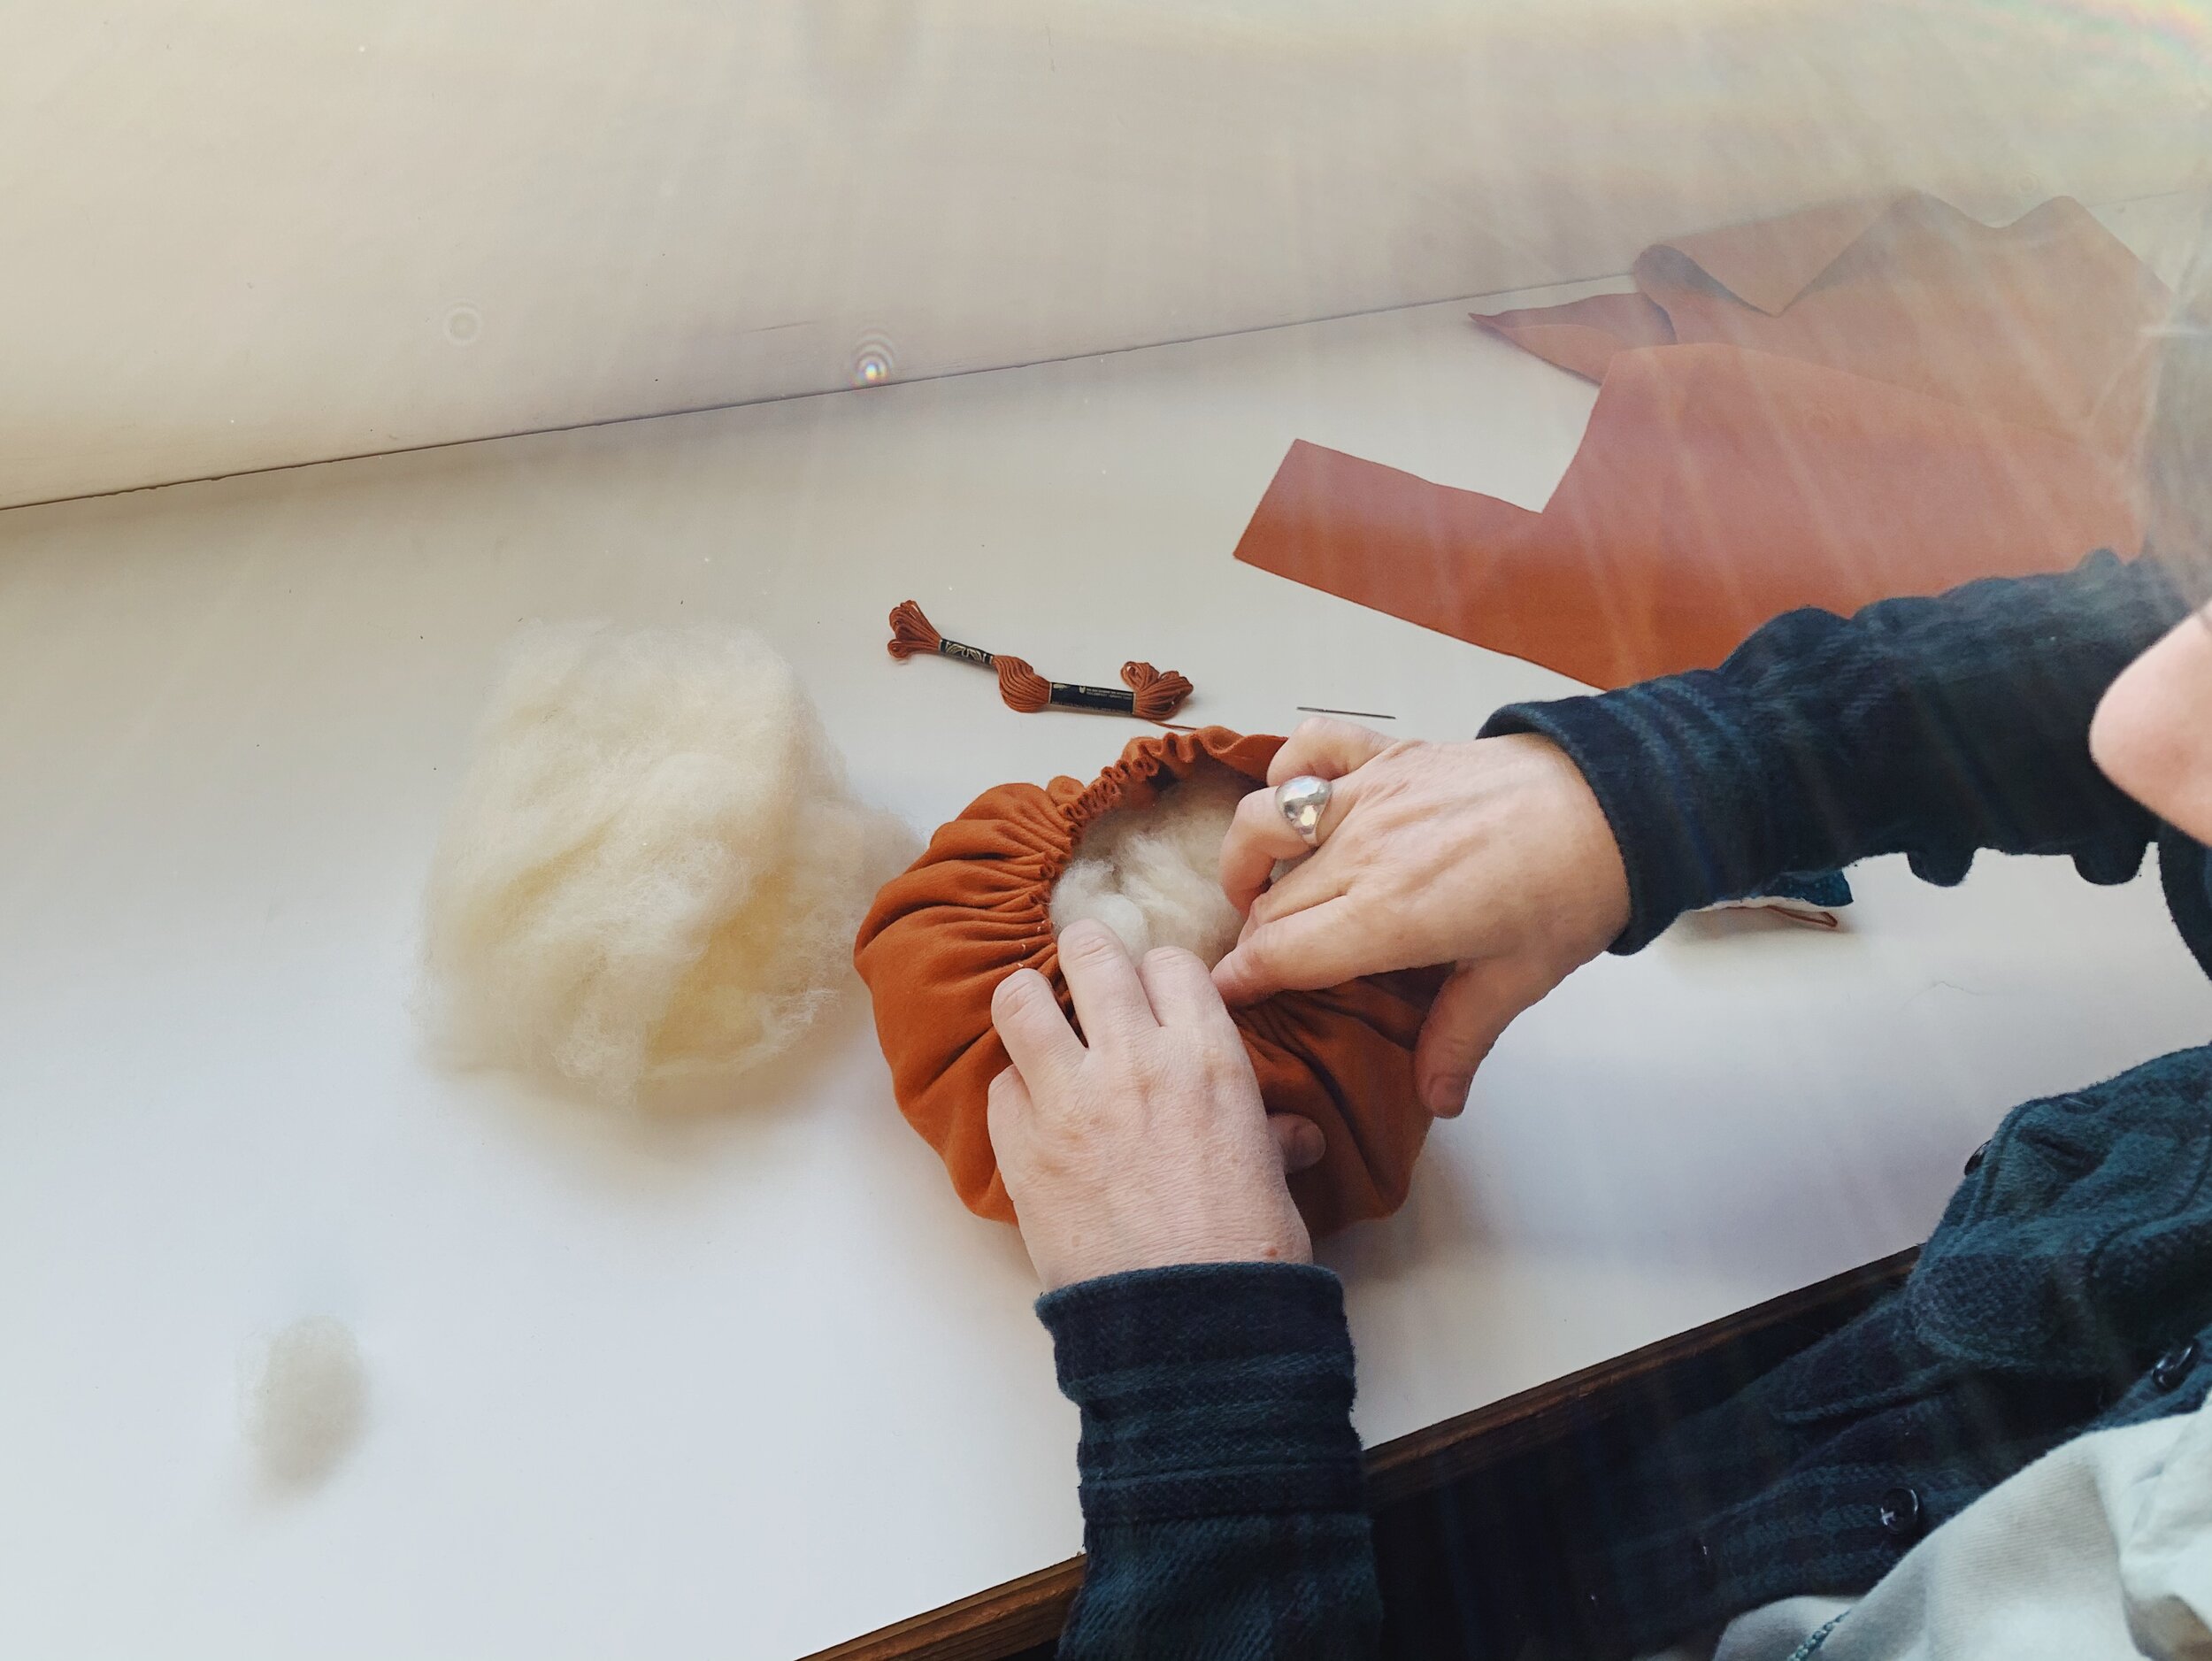
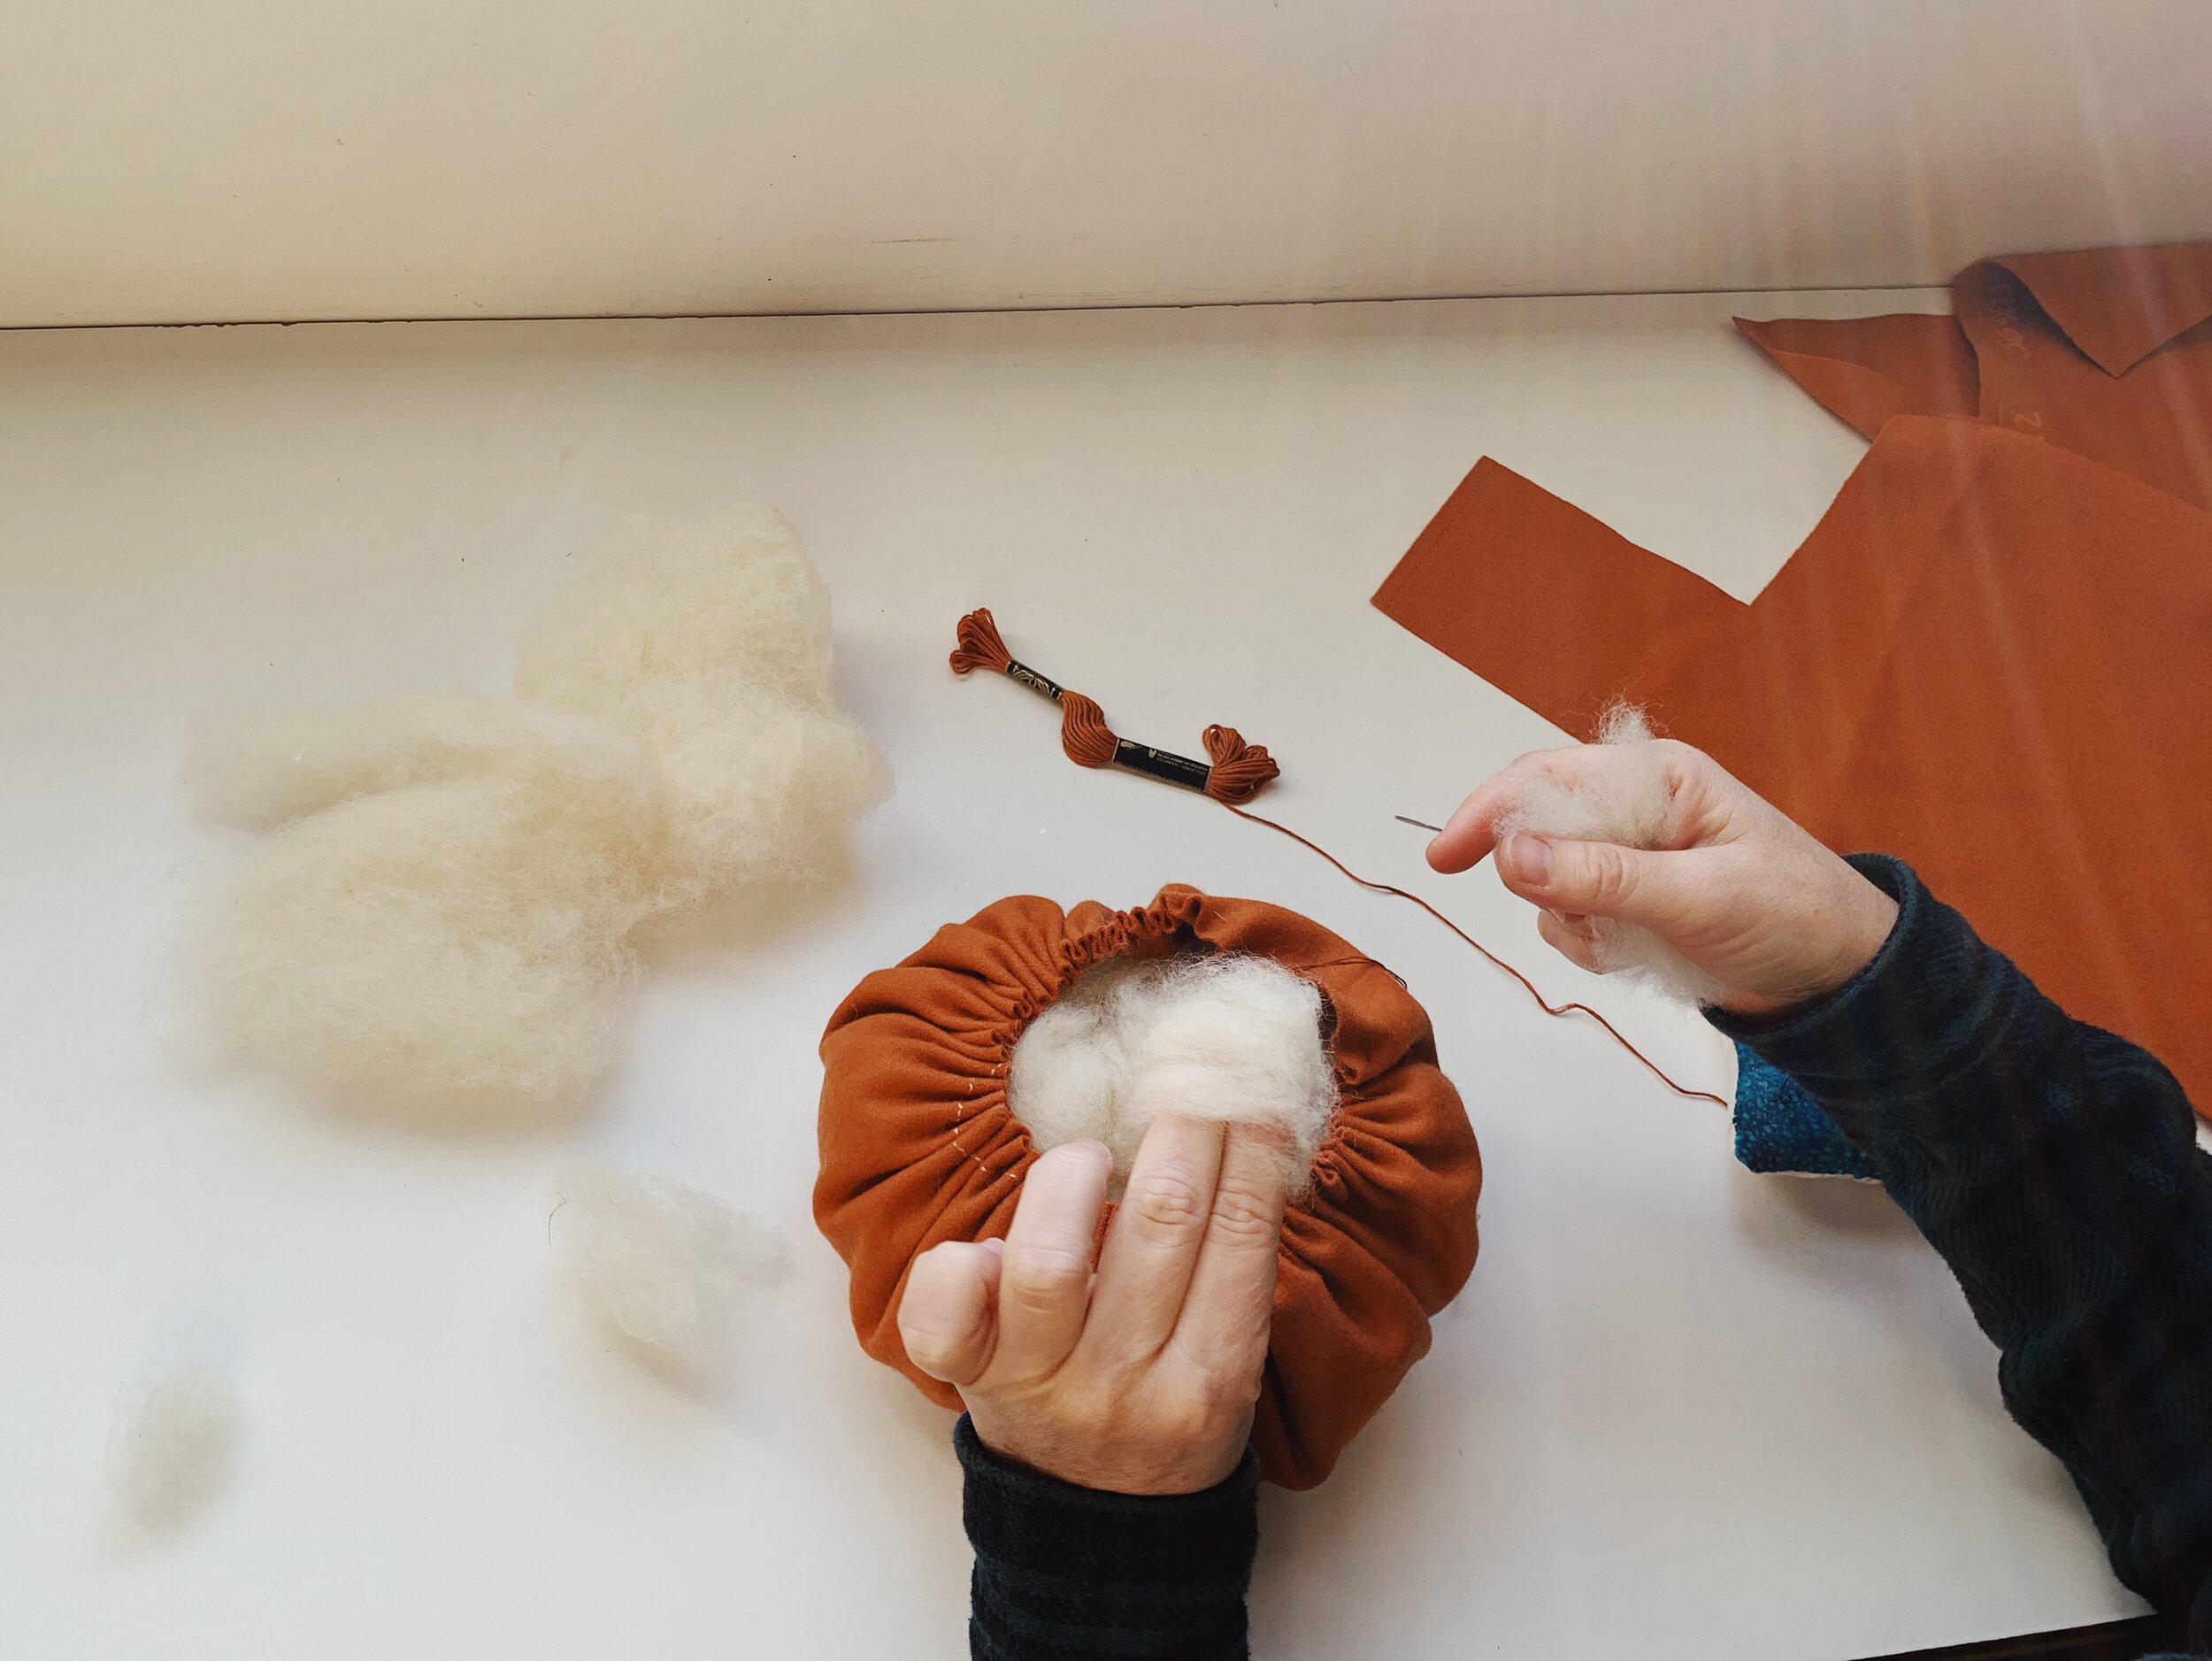
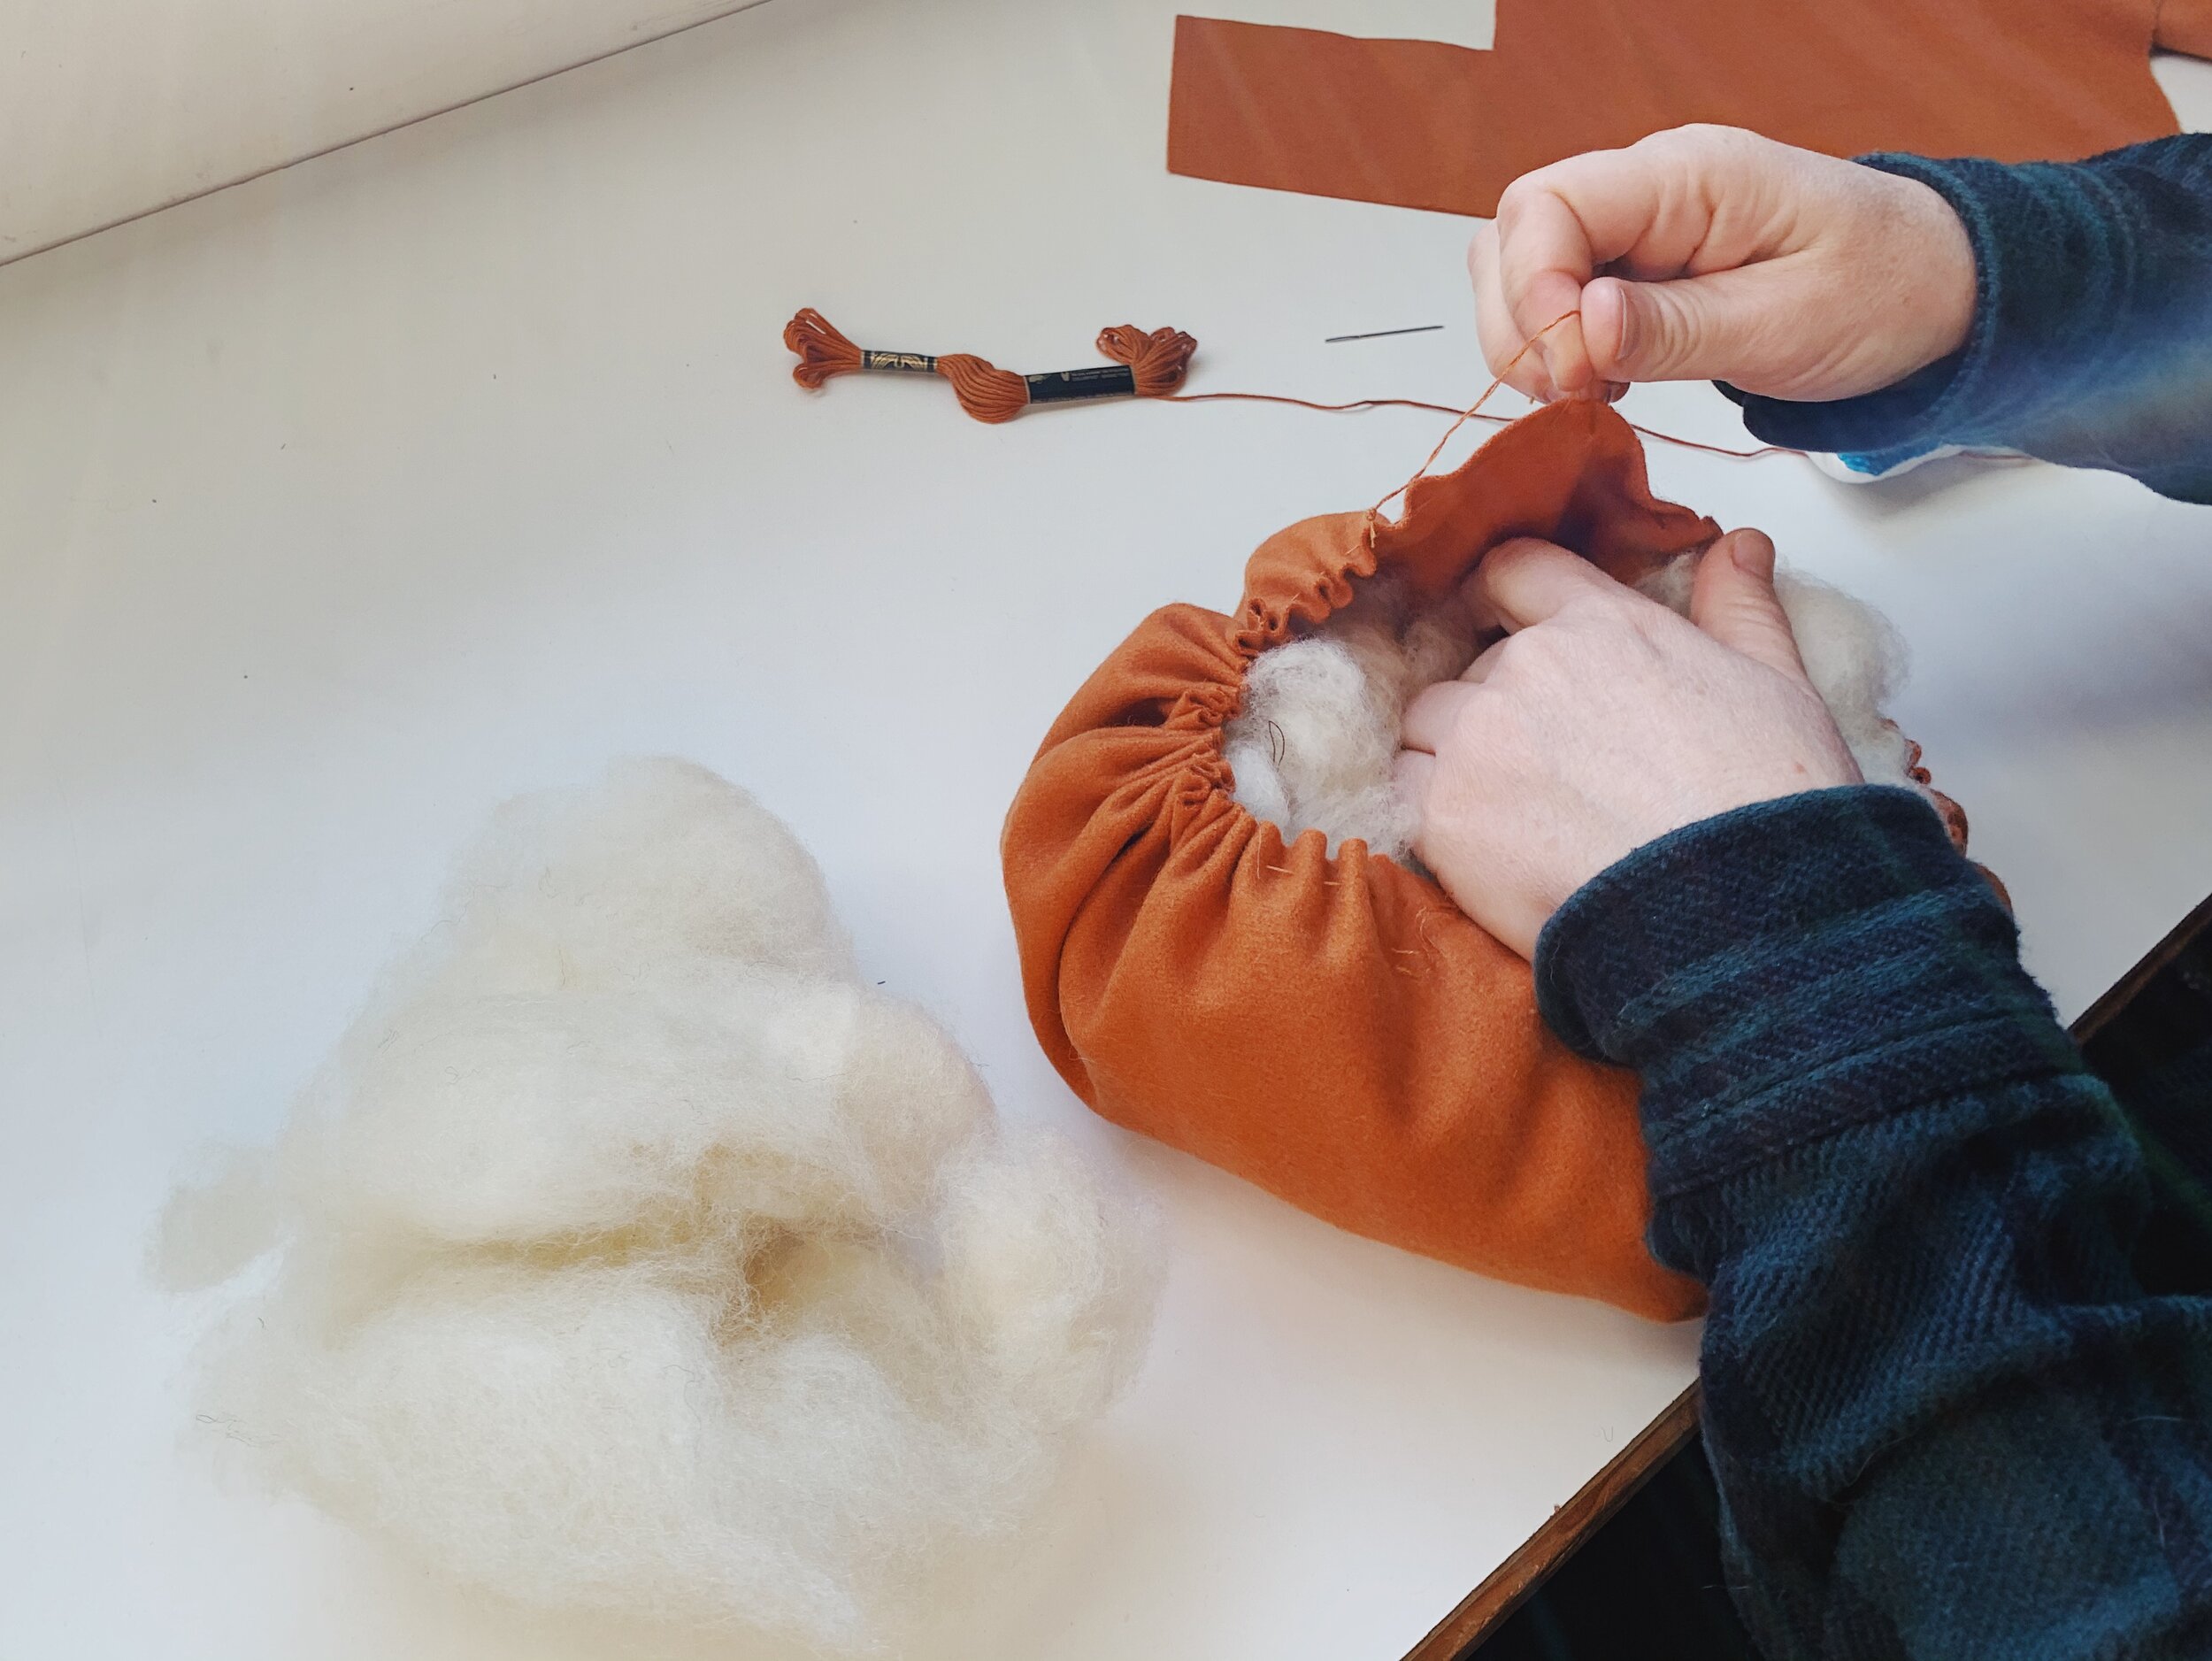
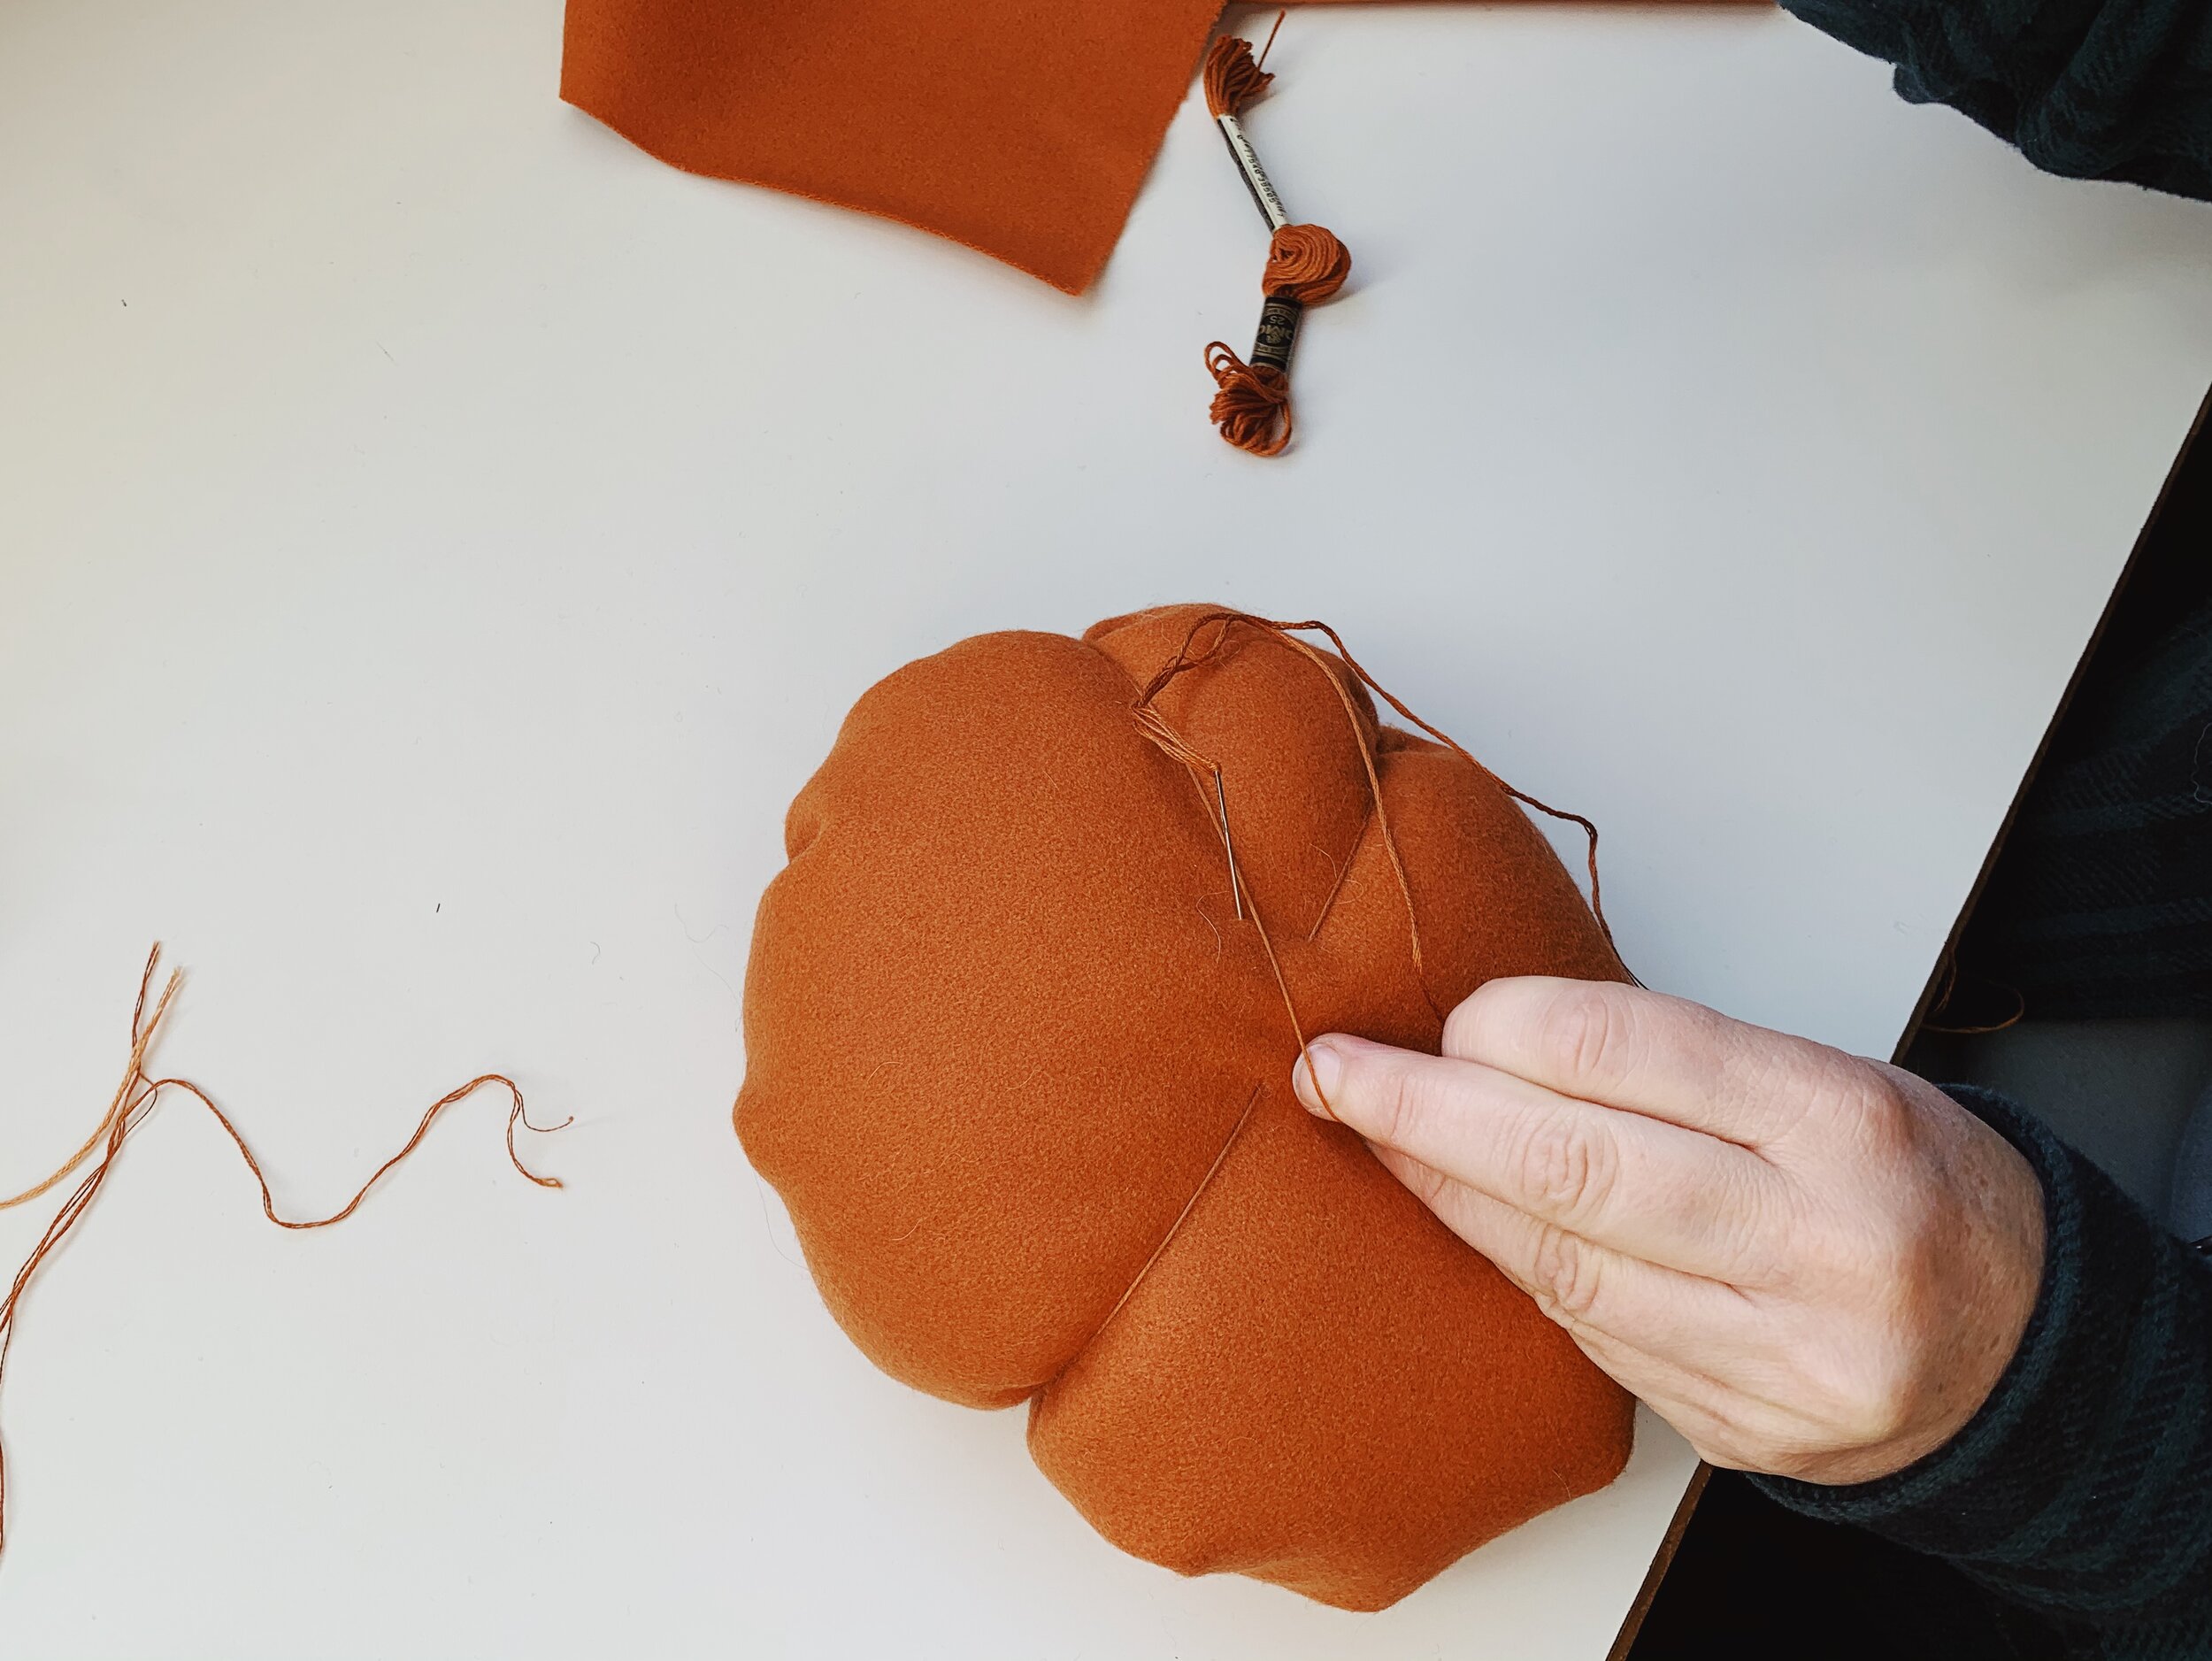
Wrap small bundles of stuffing around your fingers to form little pillows. Push these bundles of stuffing into all the creases and center of your pumpkin until full and firm. Pull thread again to close up and stitch across the opening to secure. This will be the bottom of your pumpkin and will get covered up, so it’s okay if it isn’t fancy perfect!
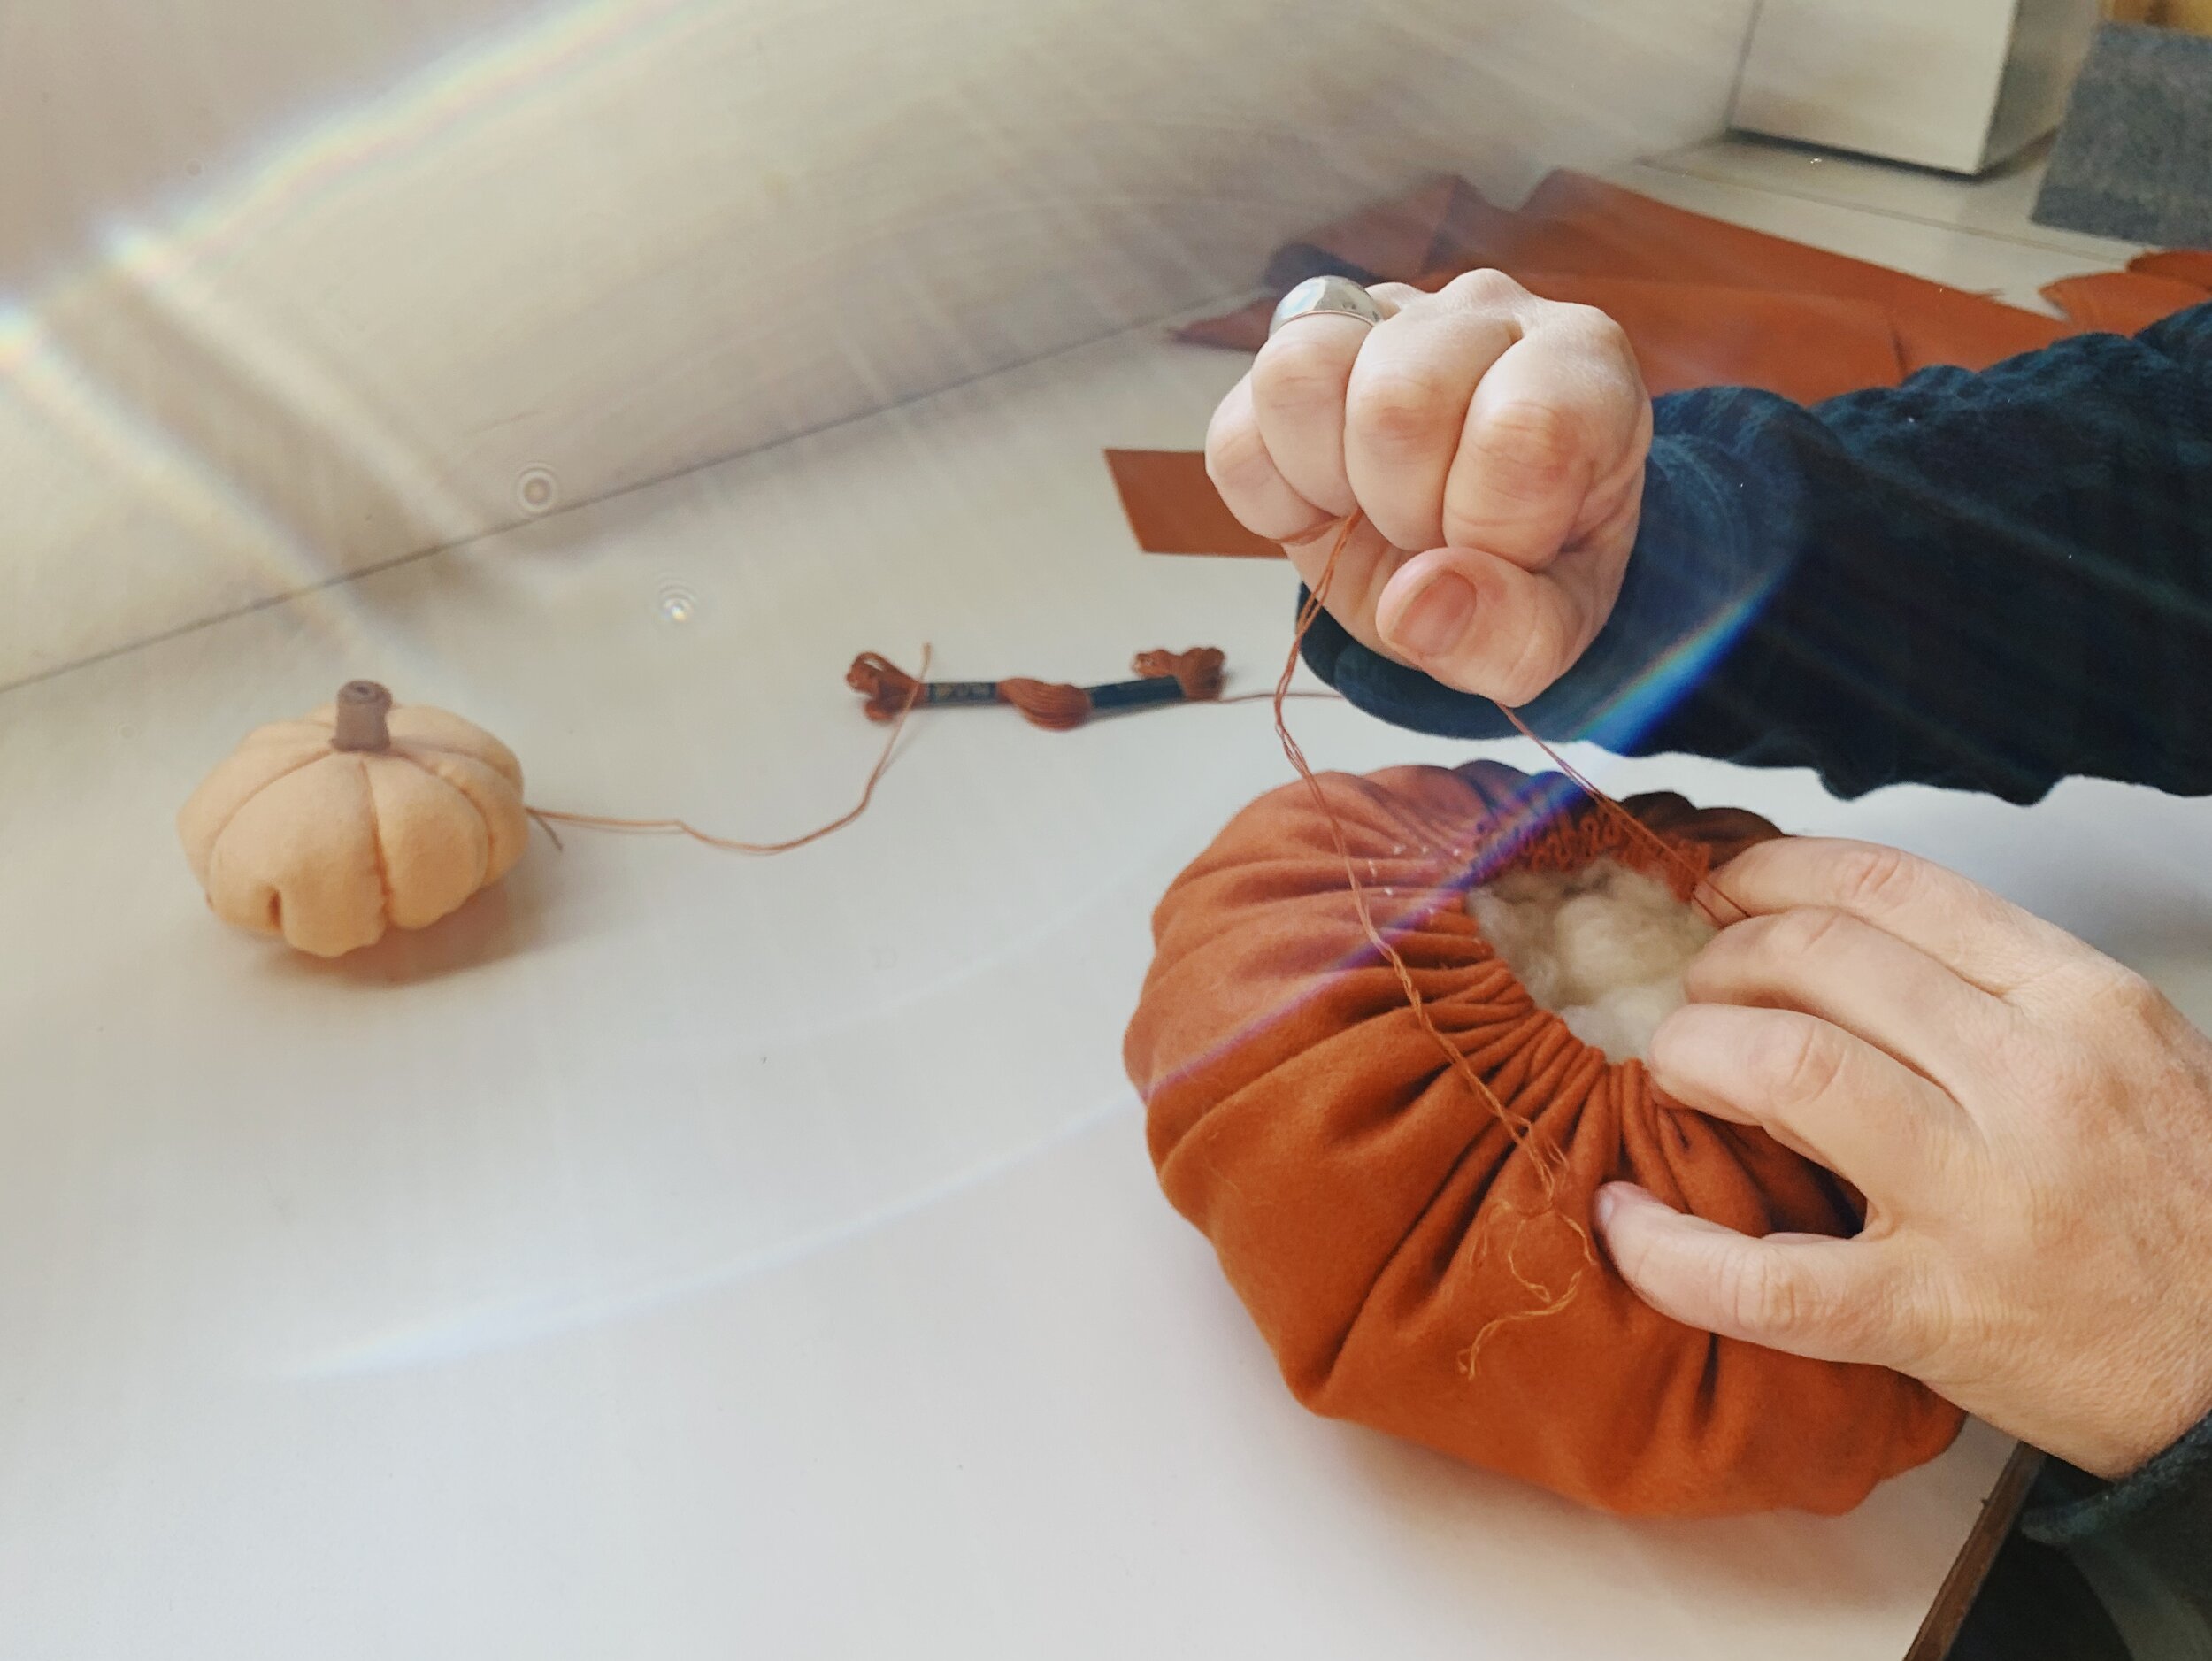
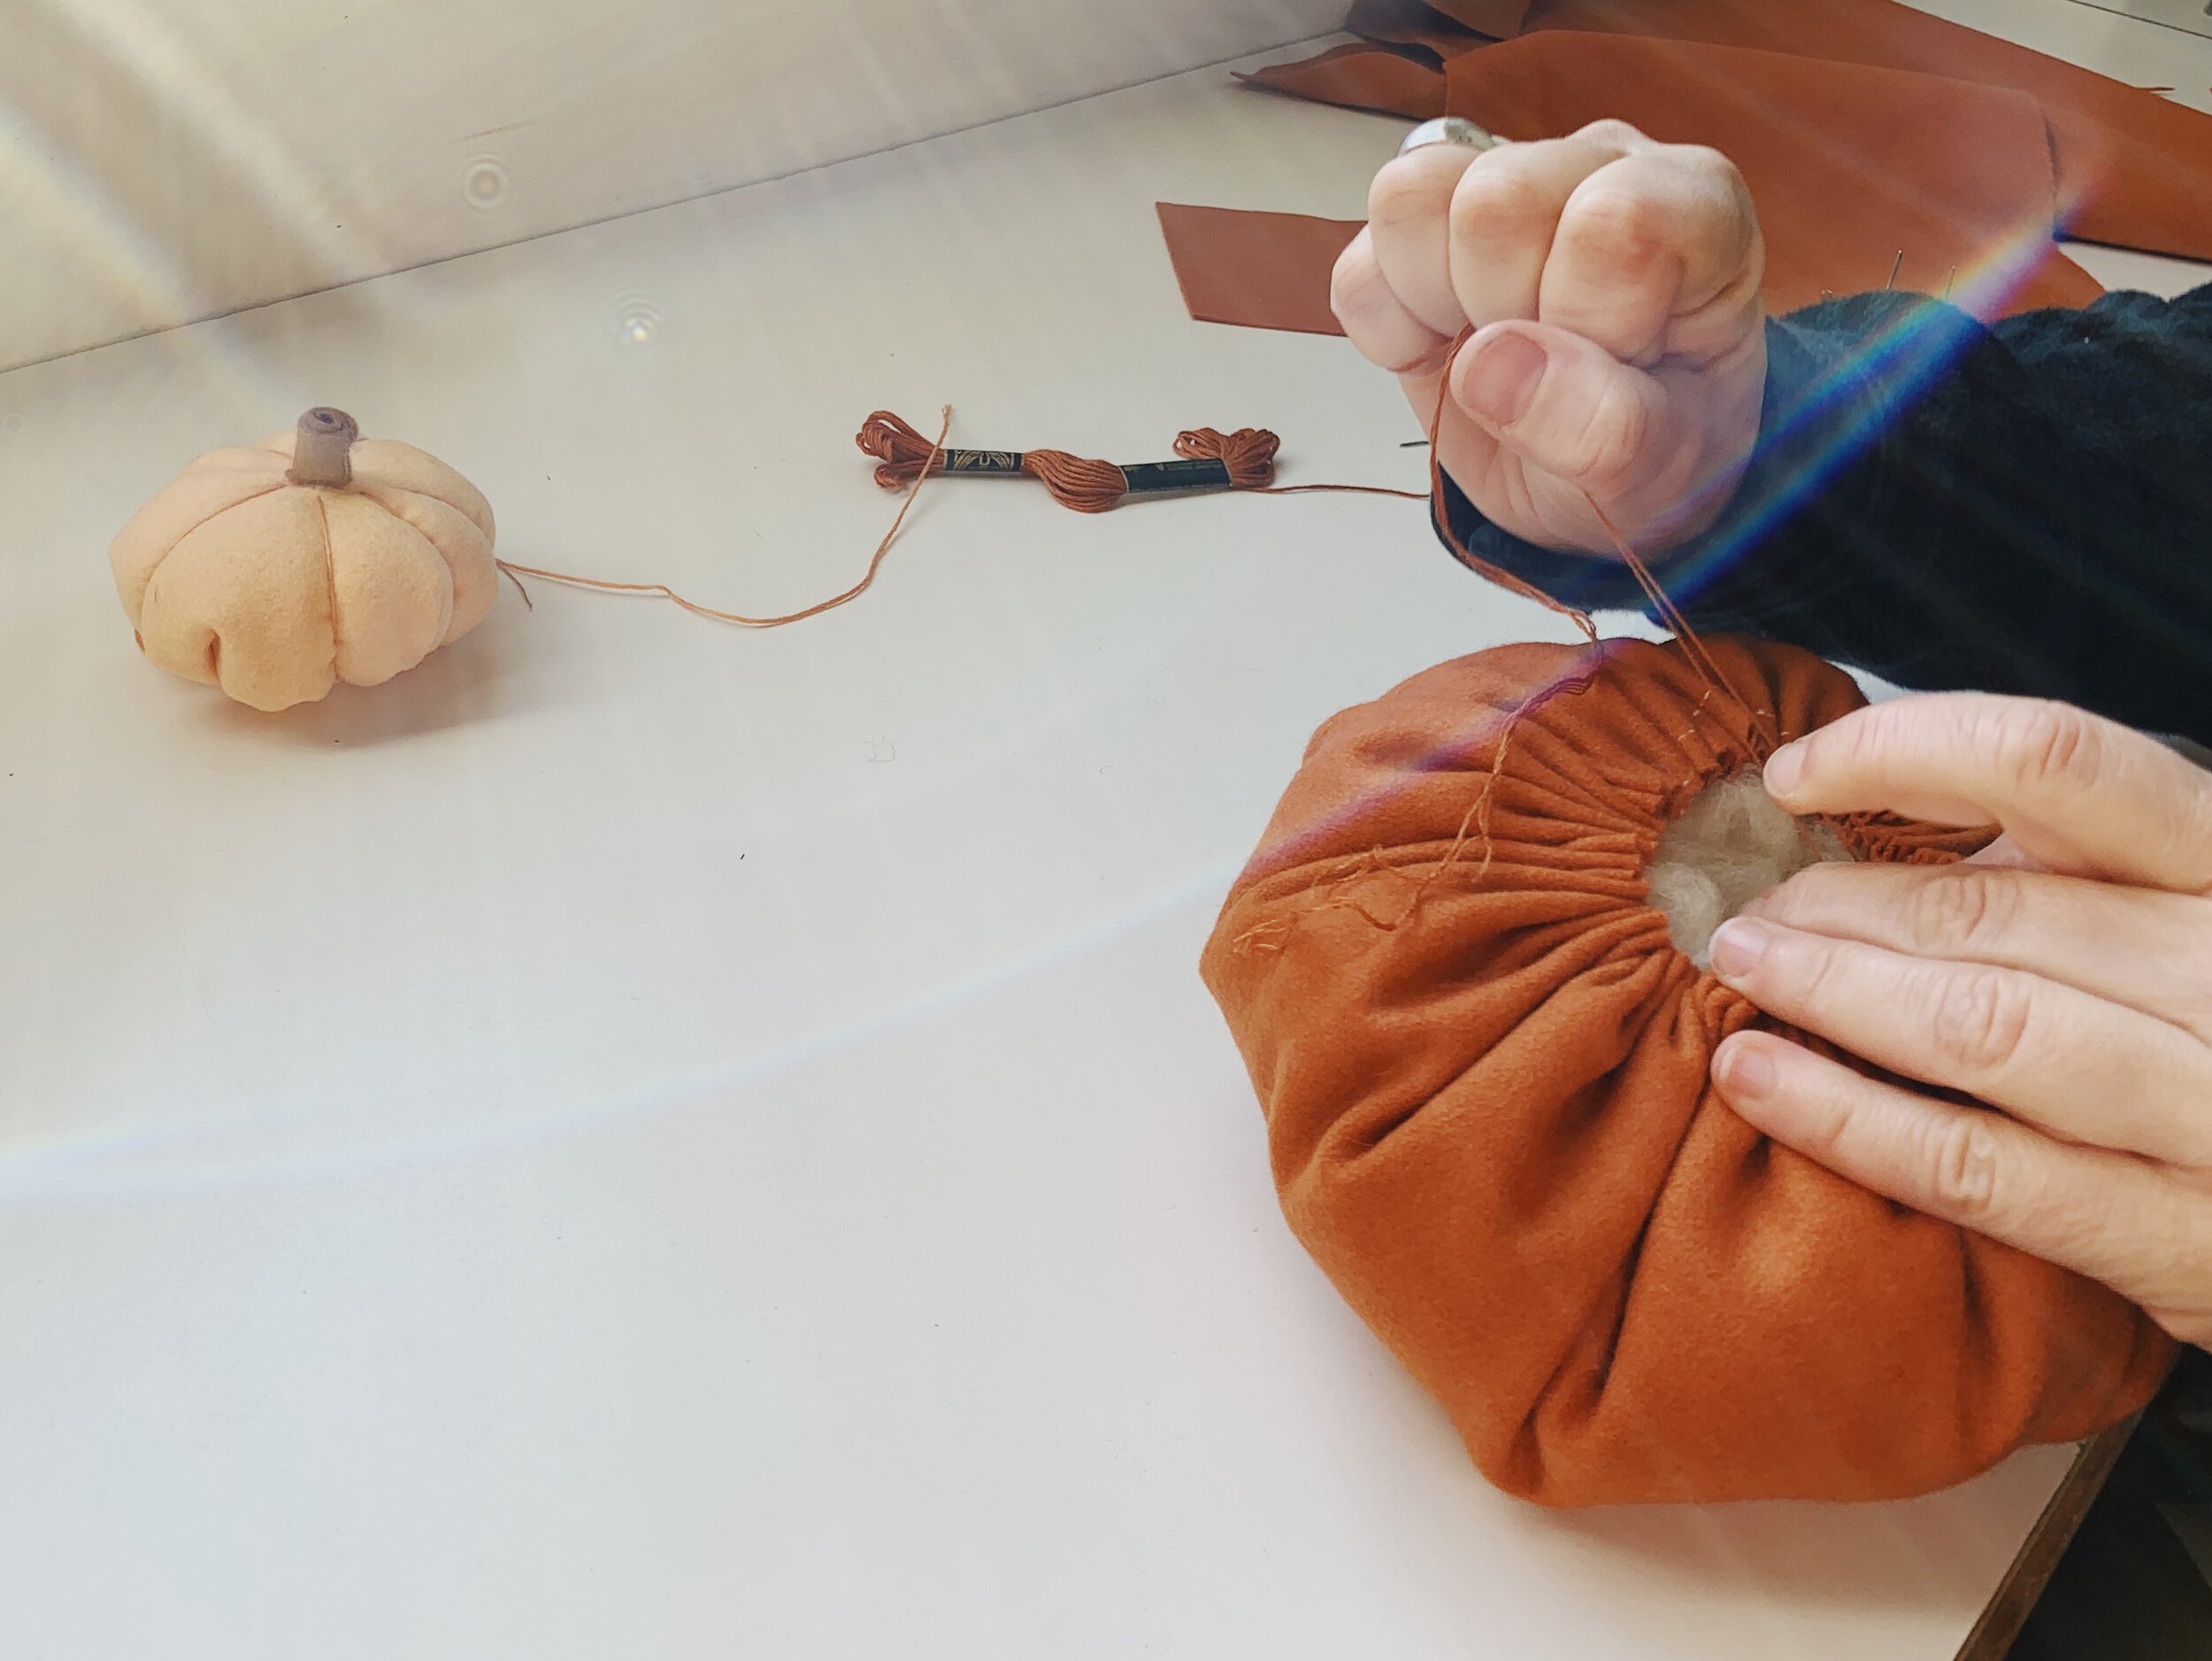
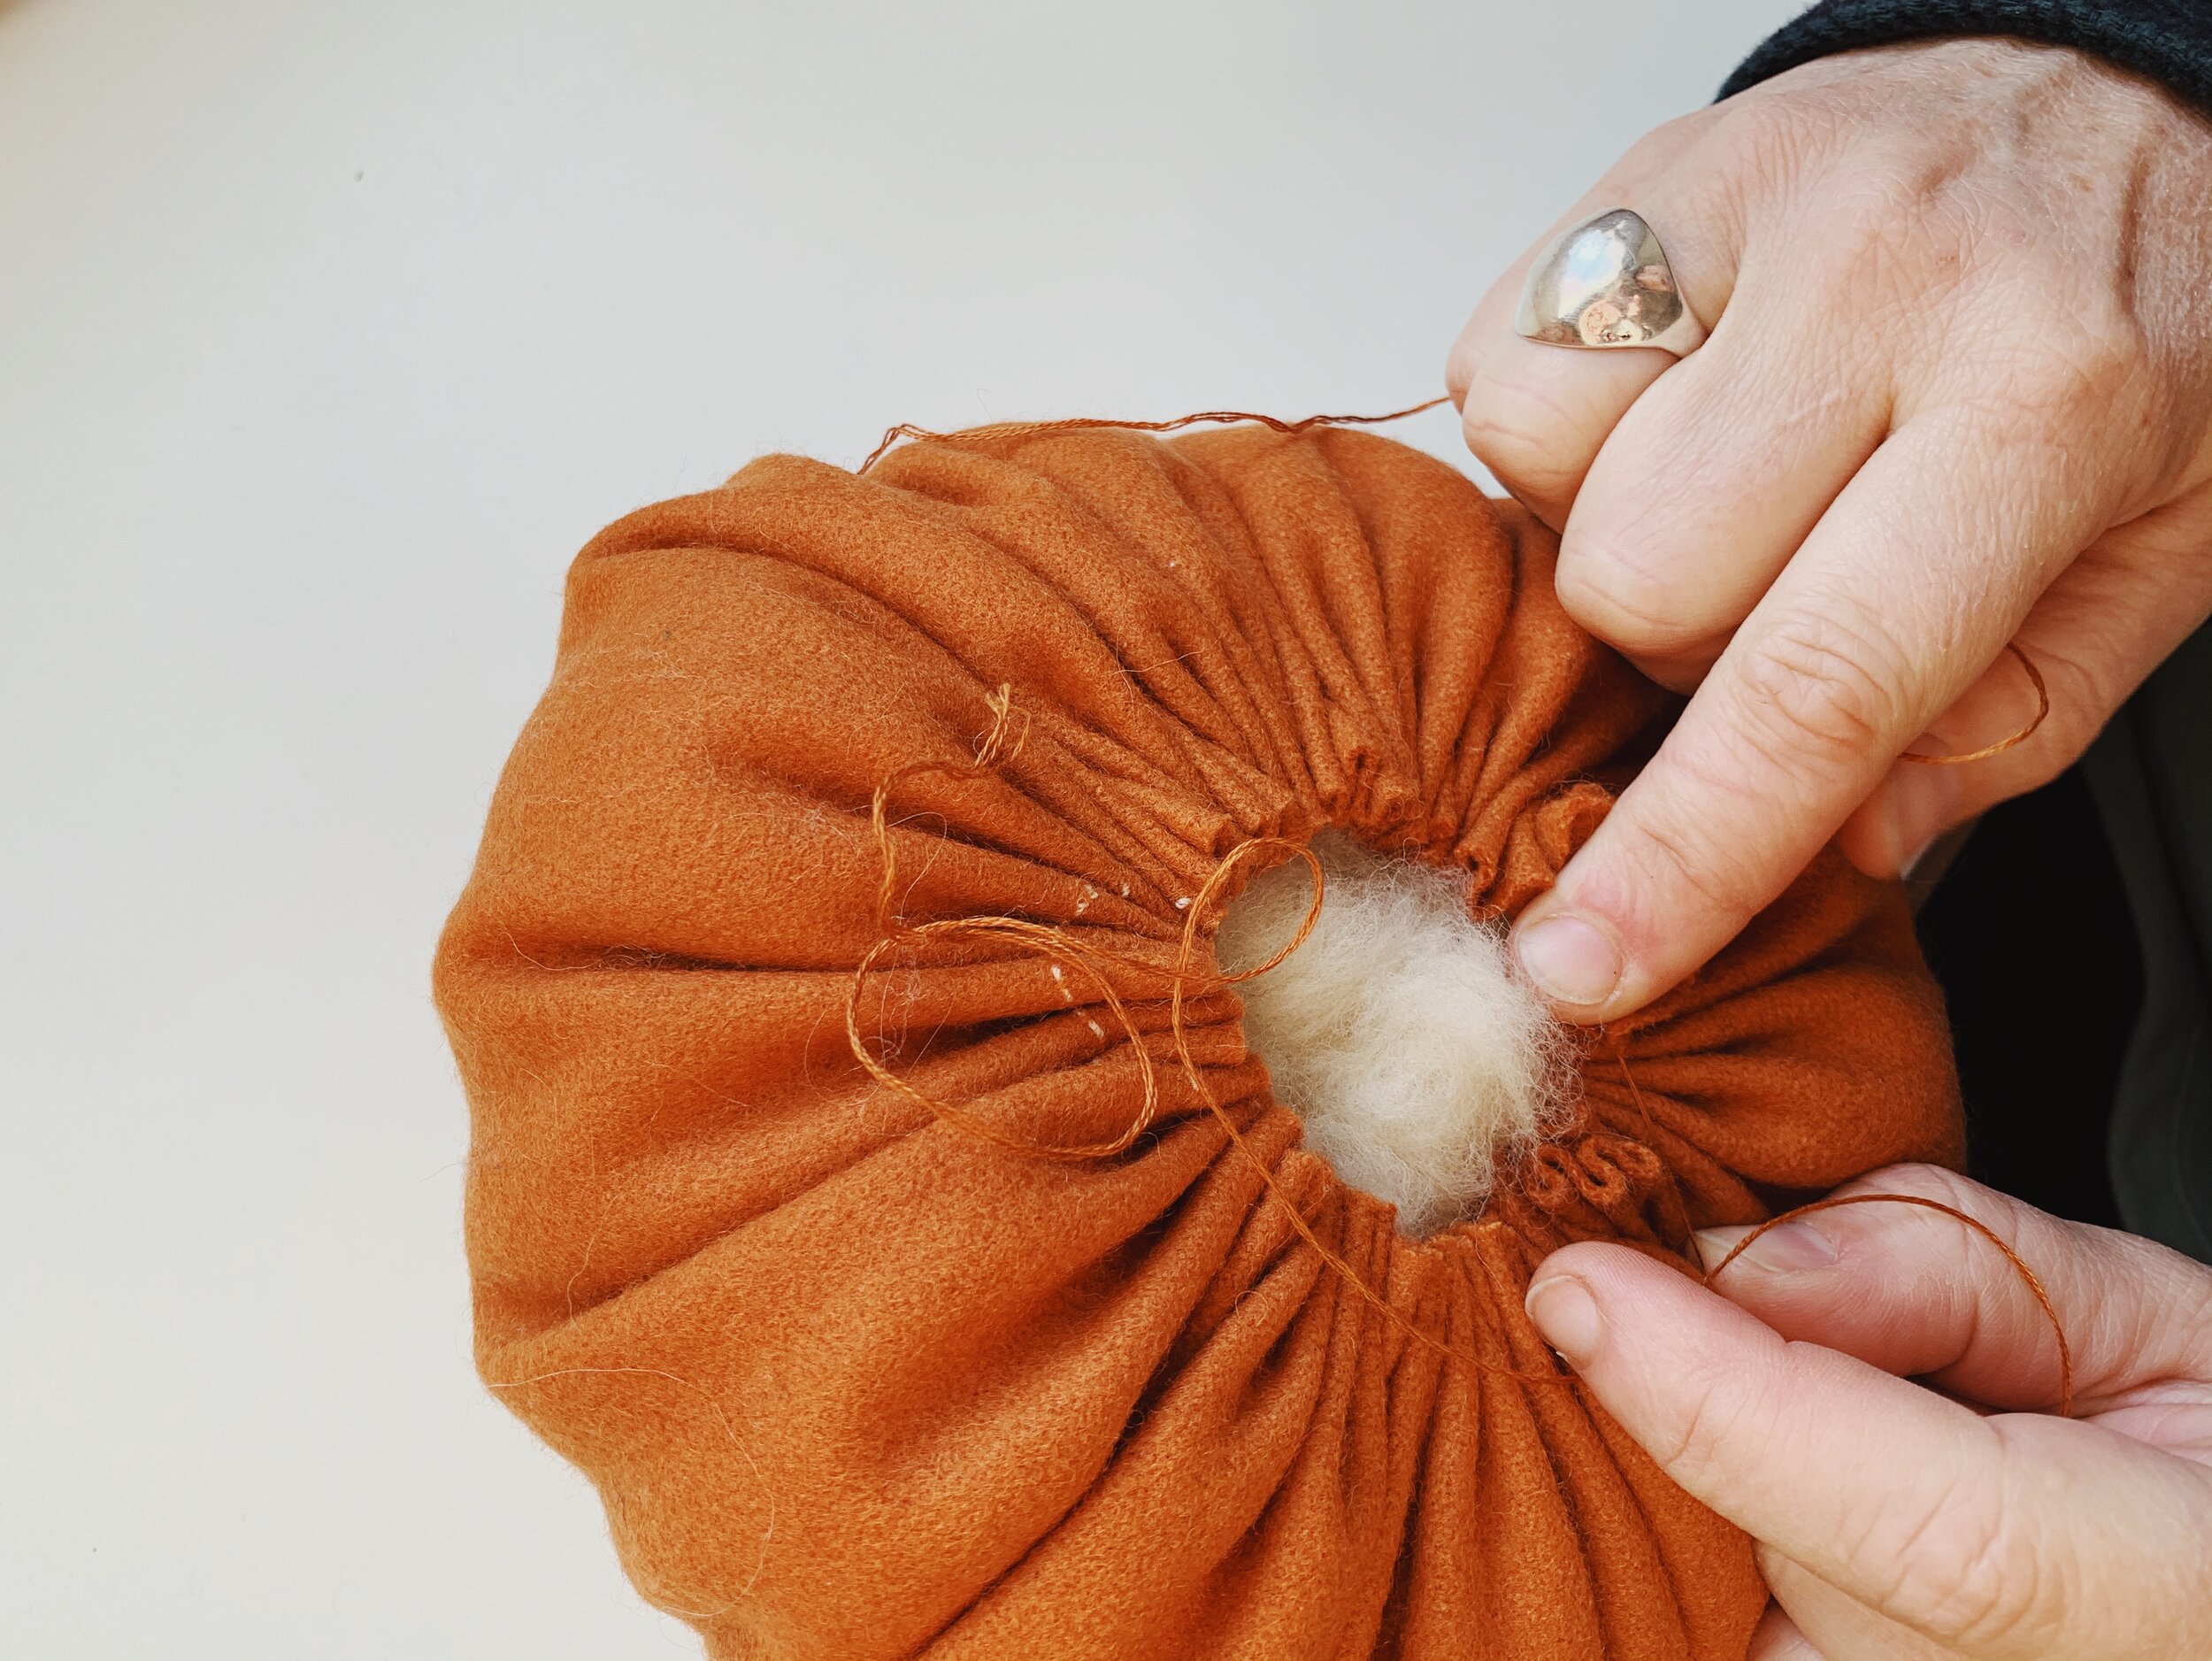
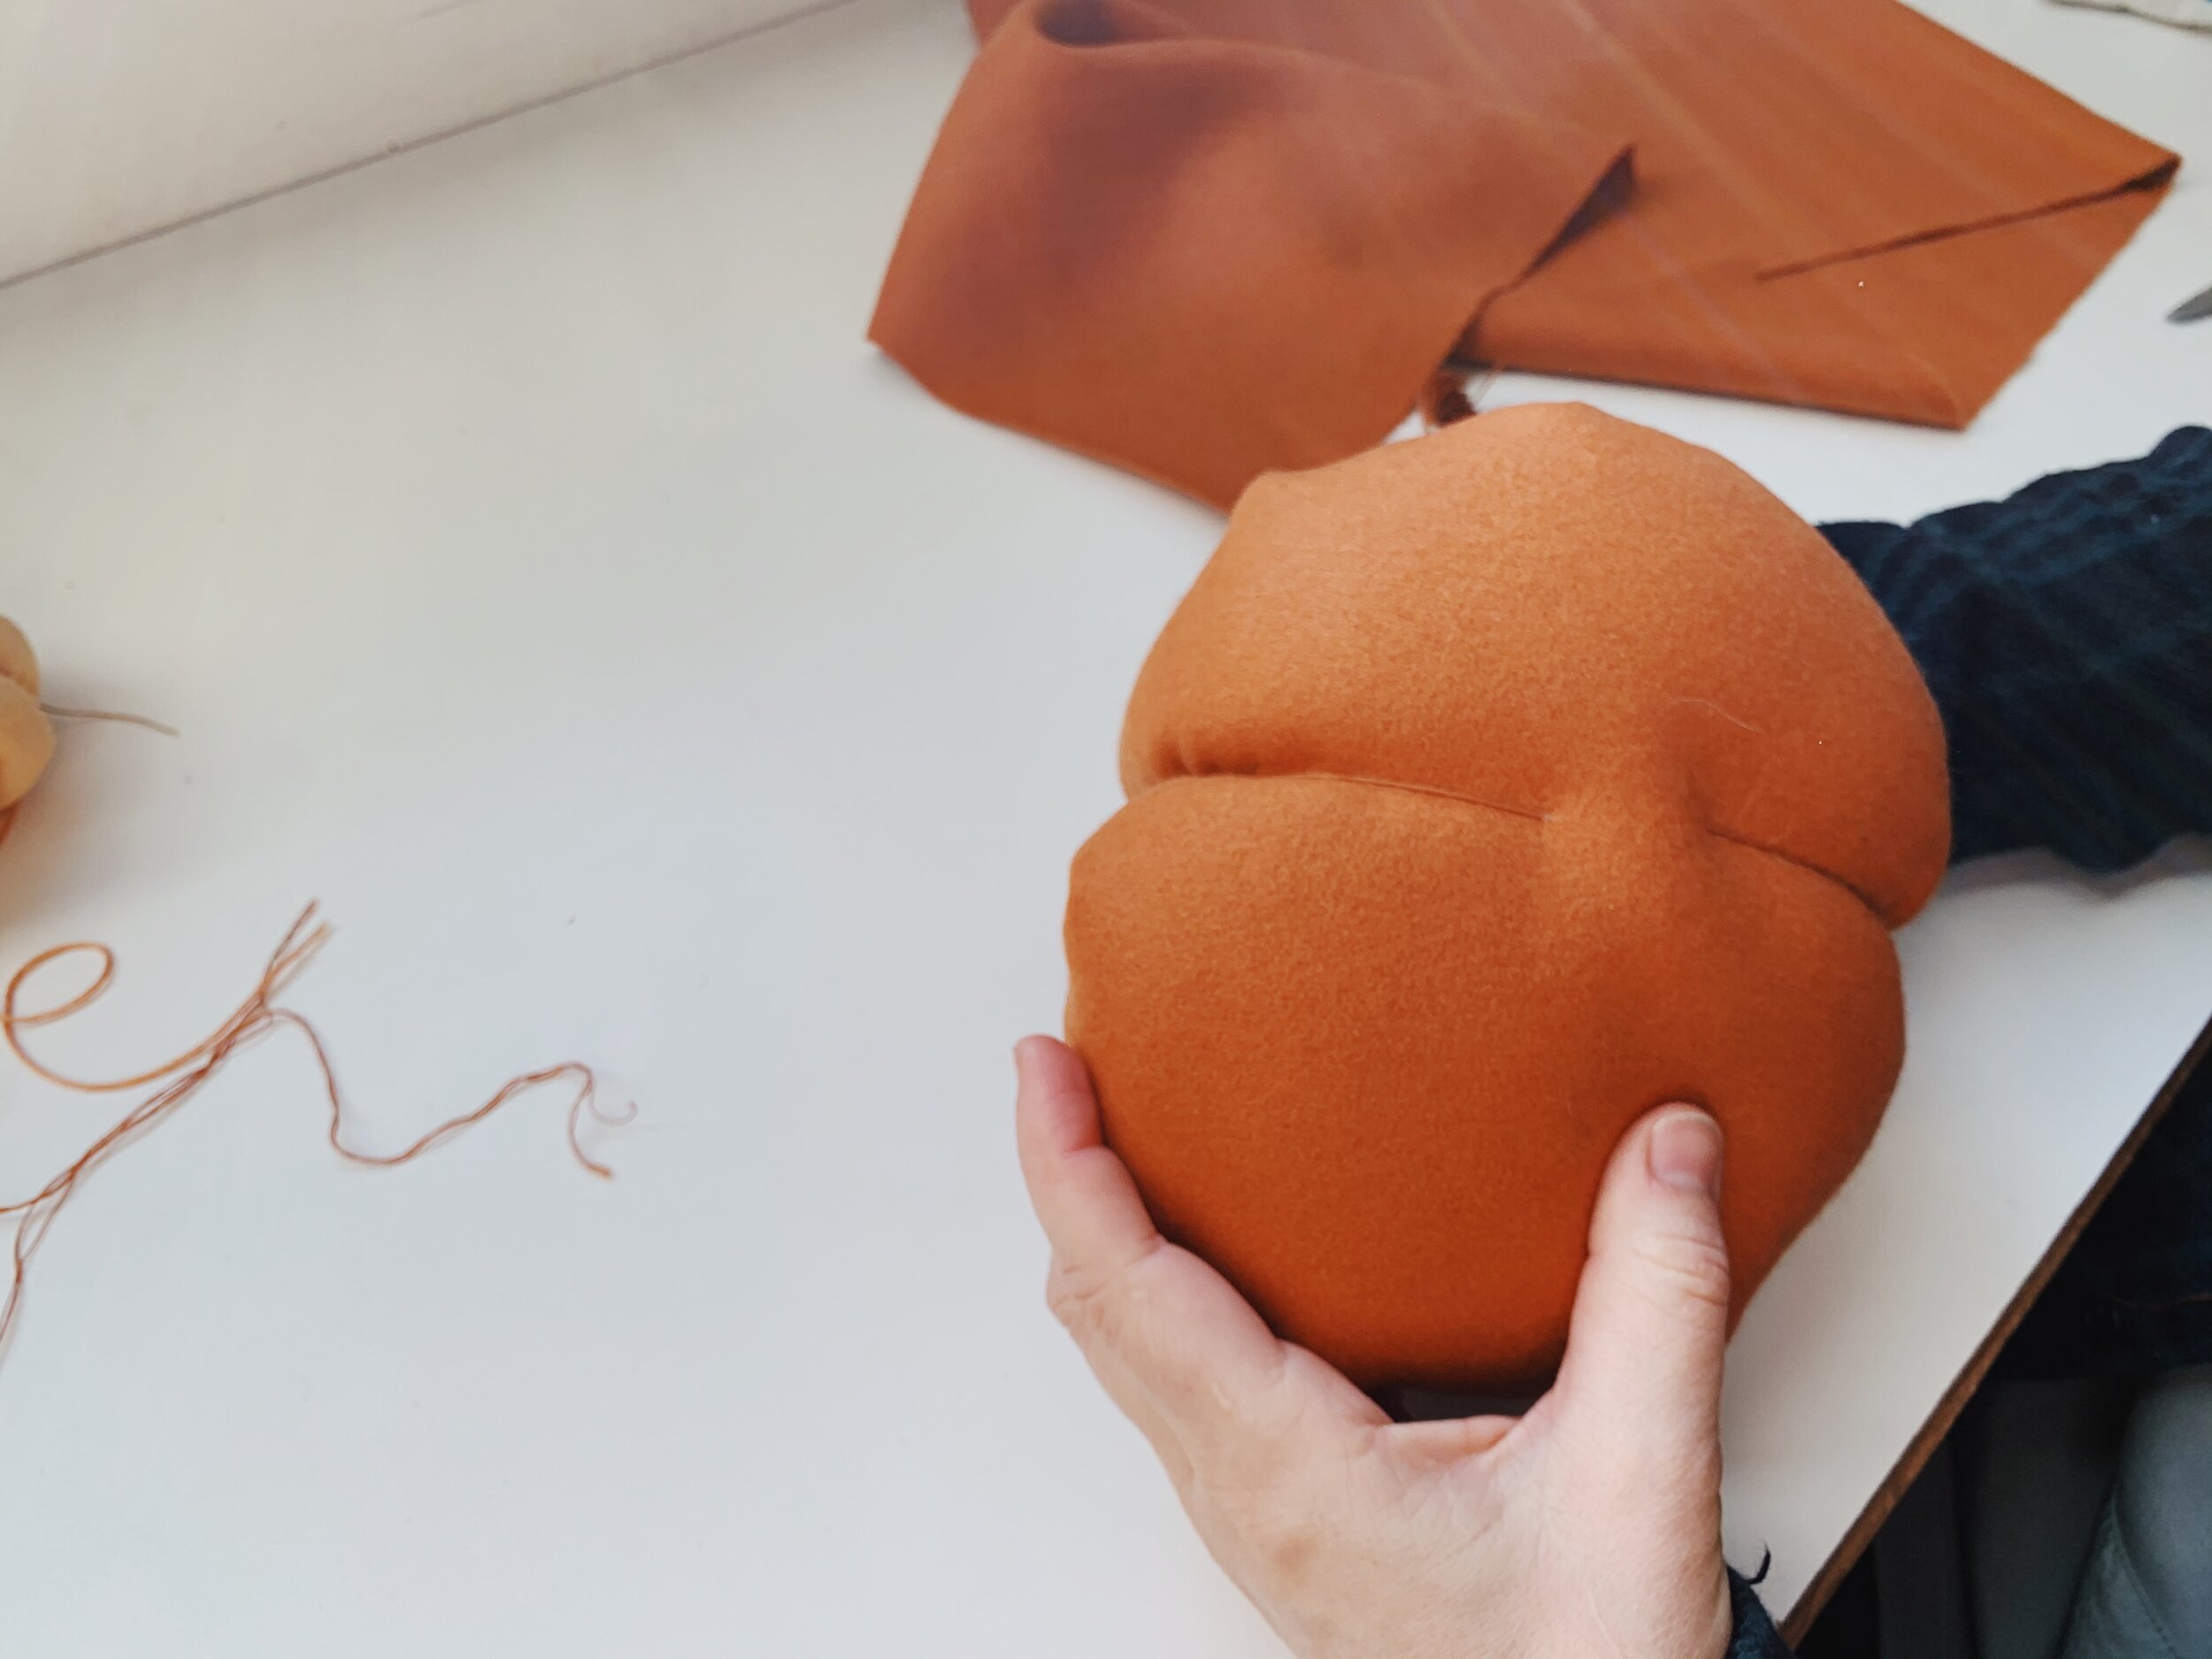
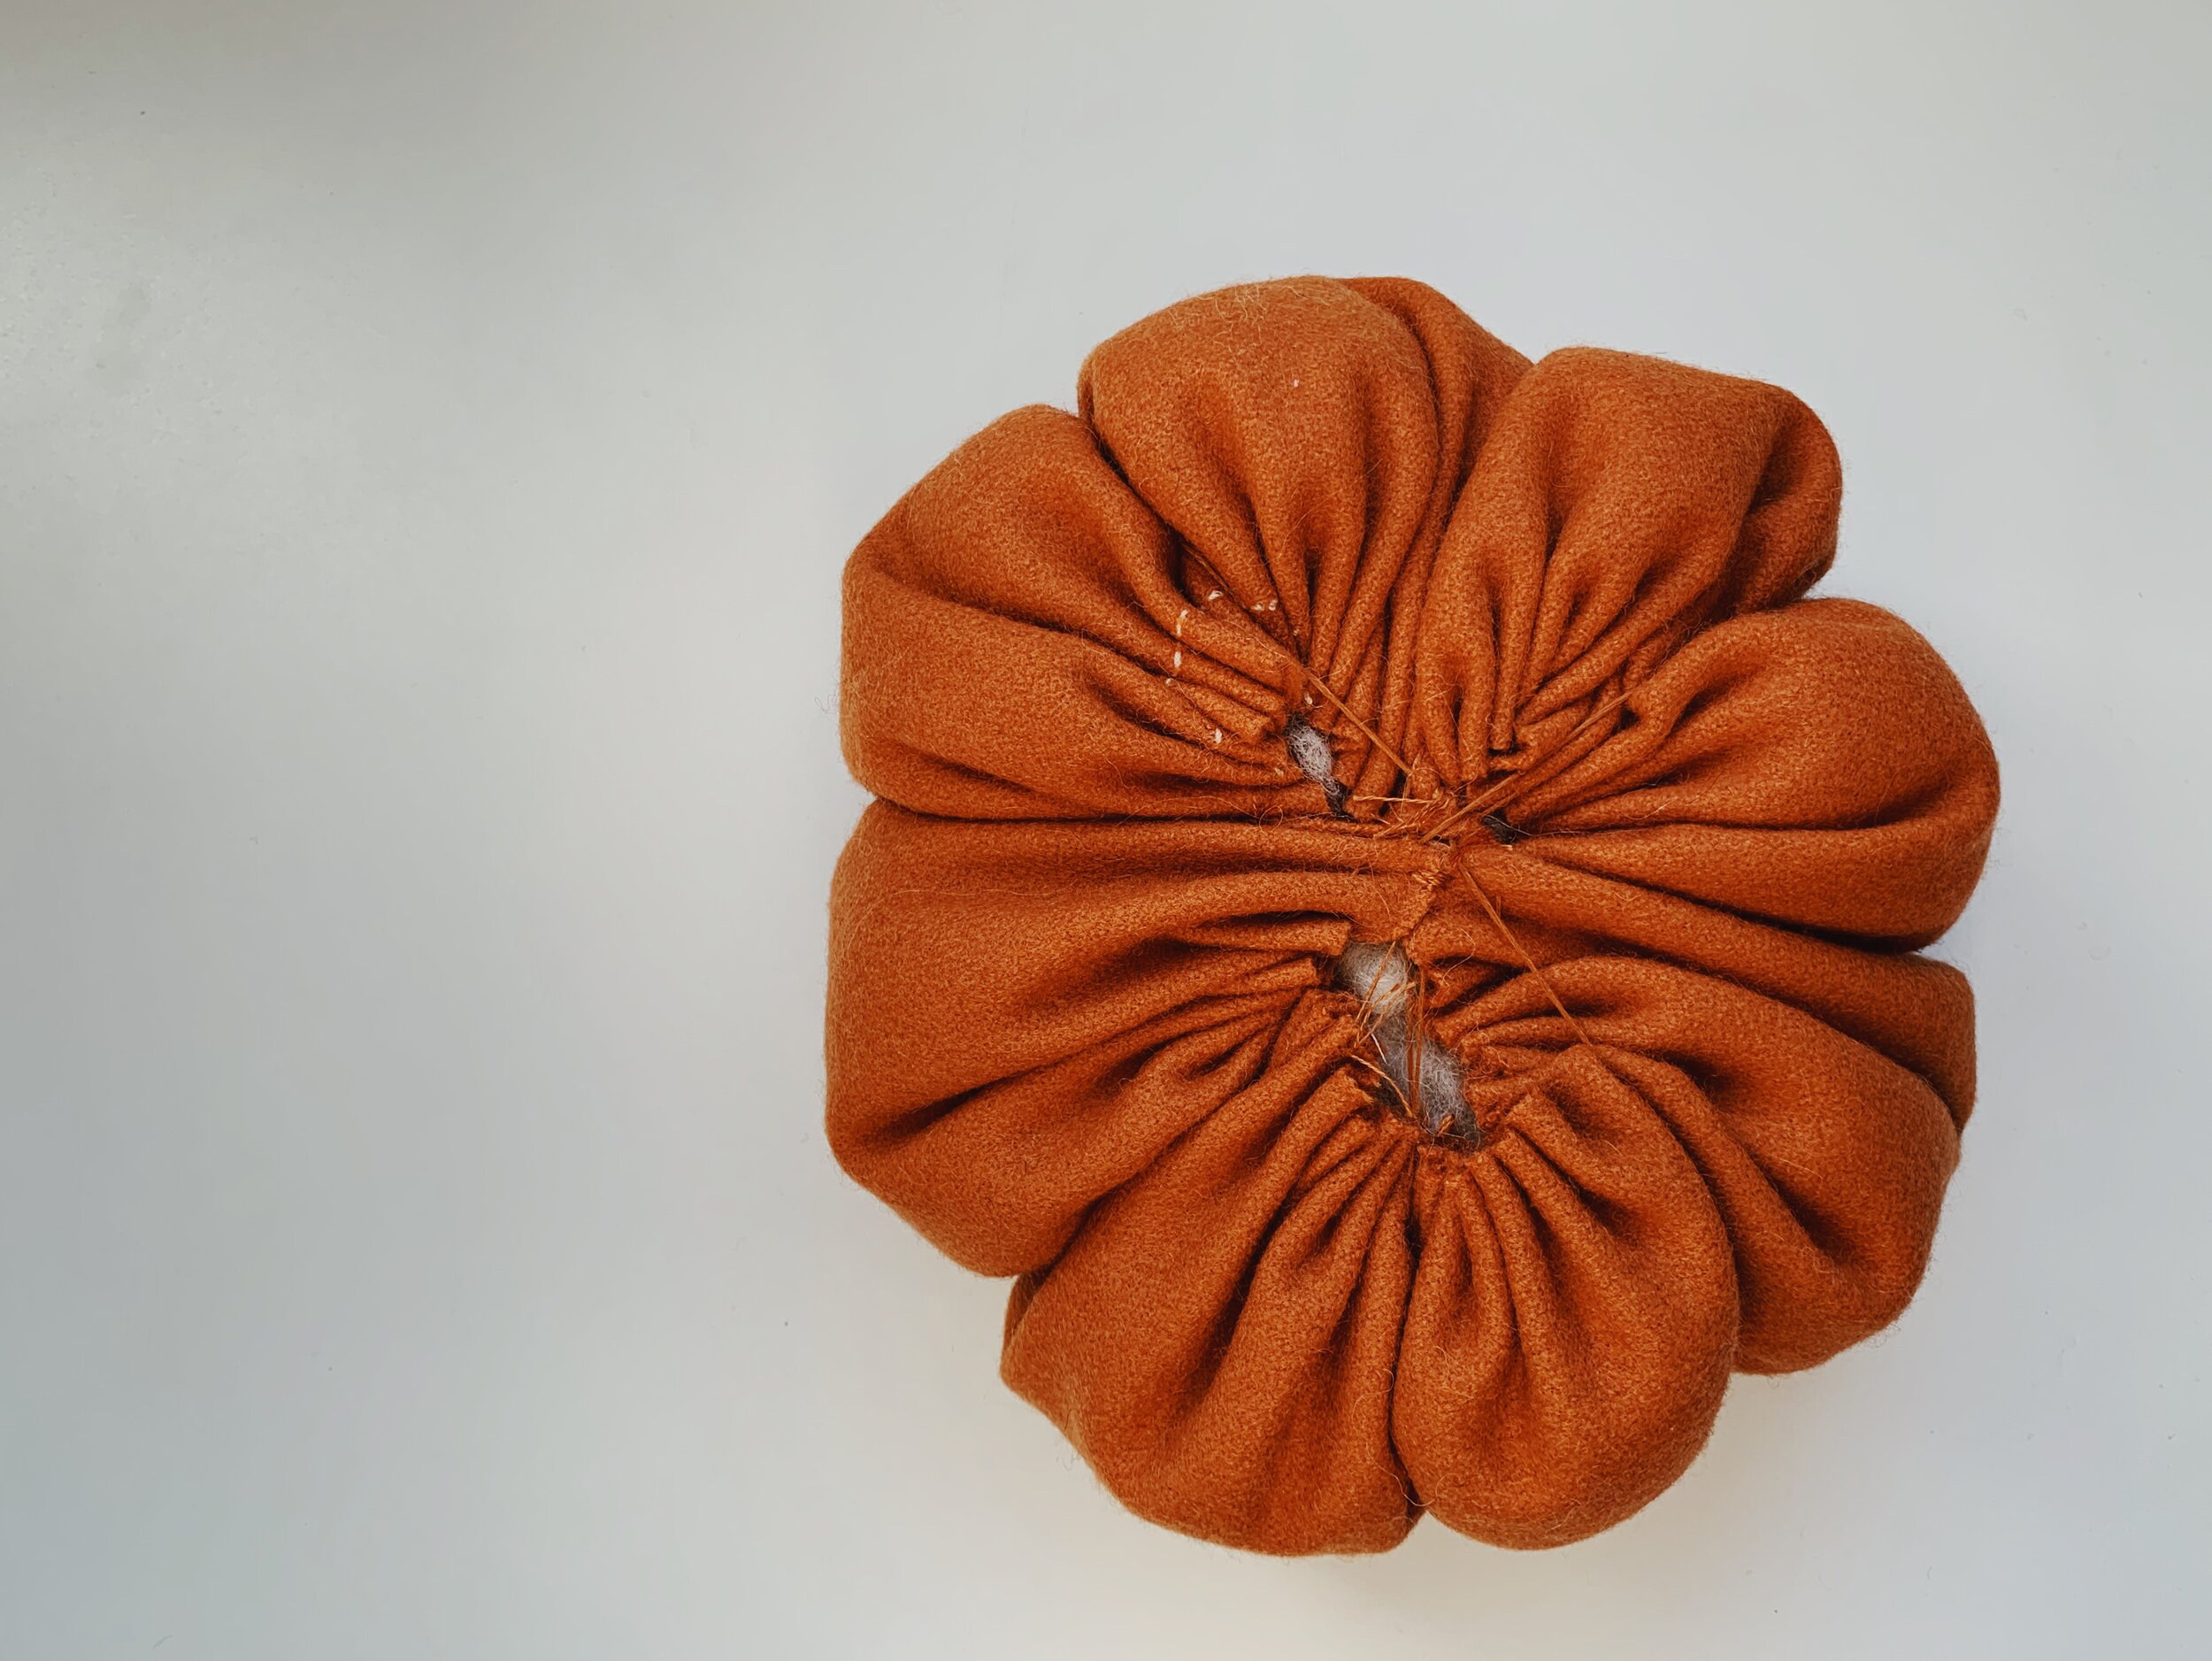
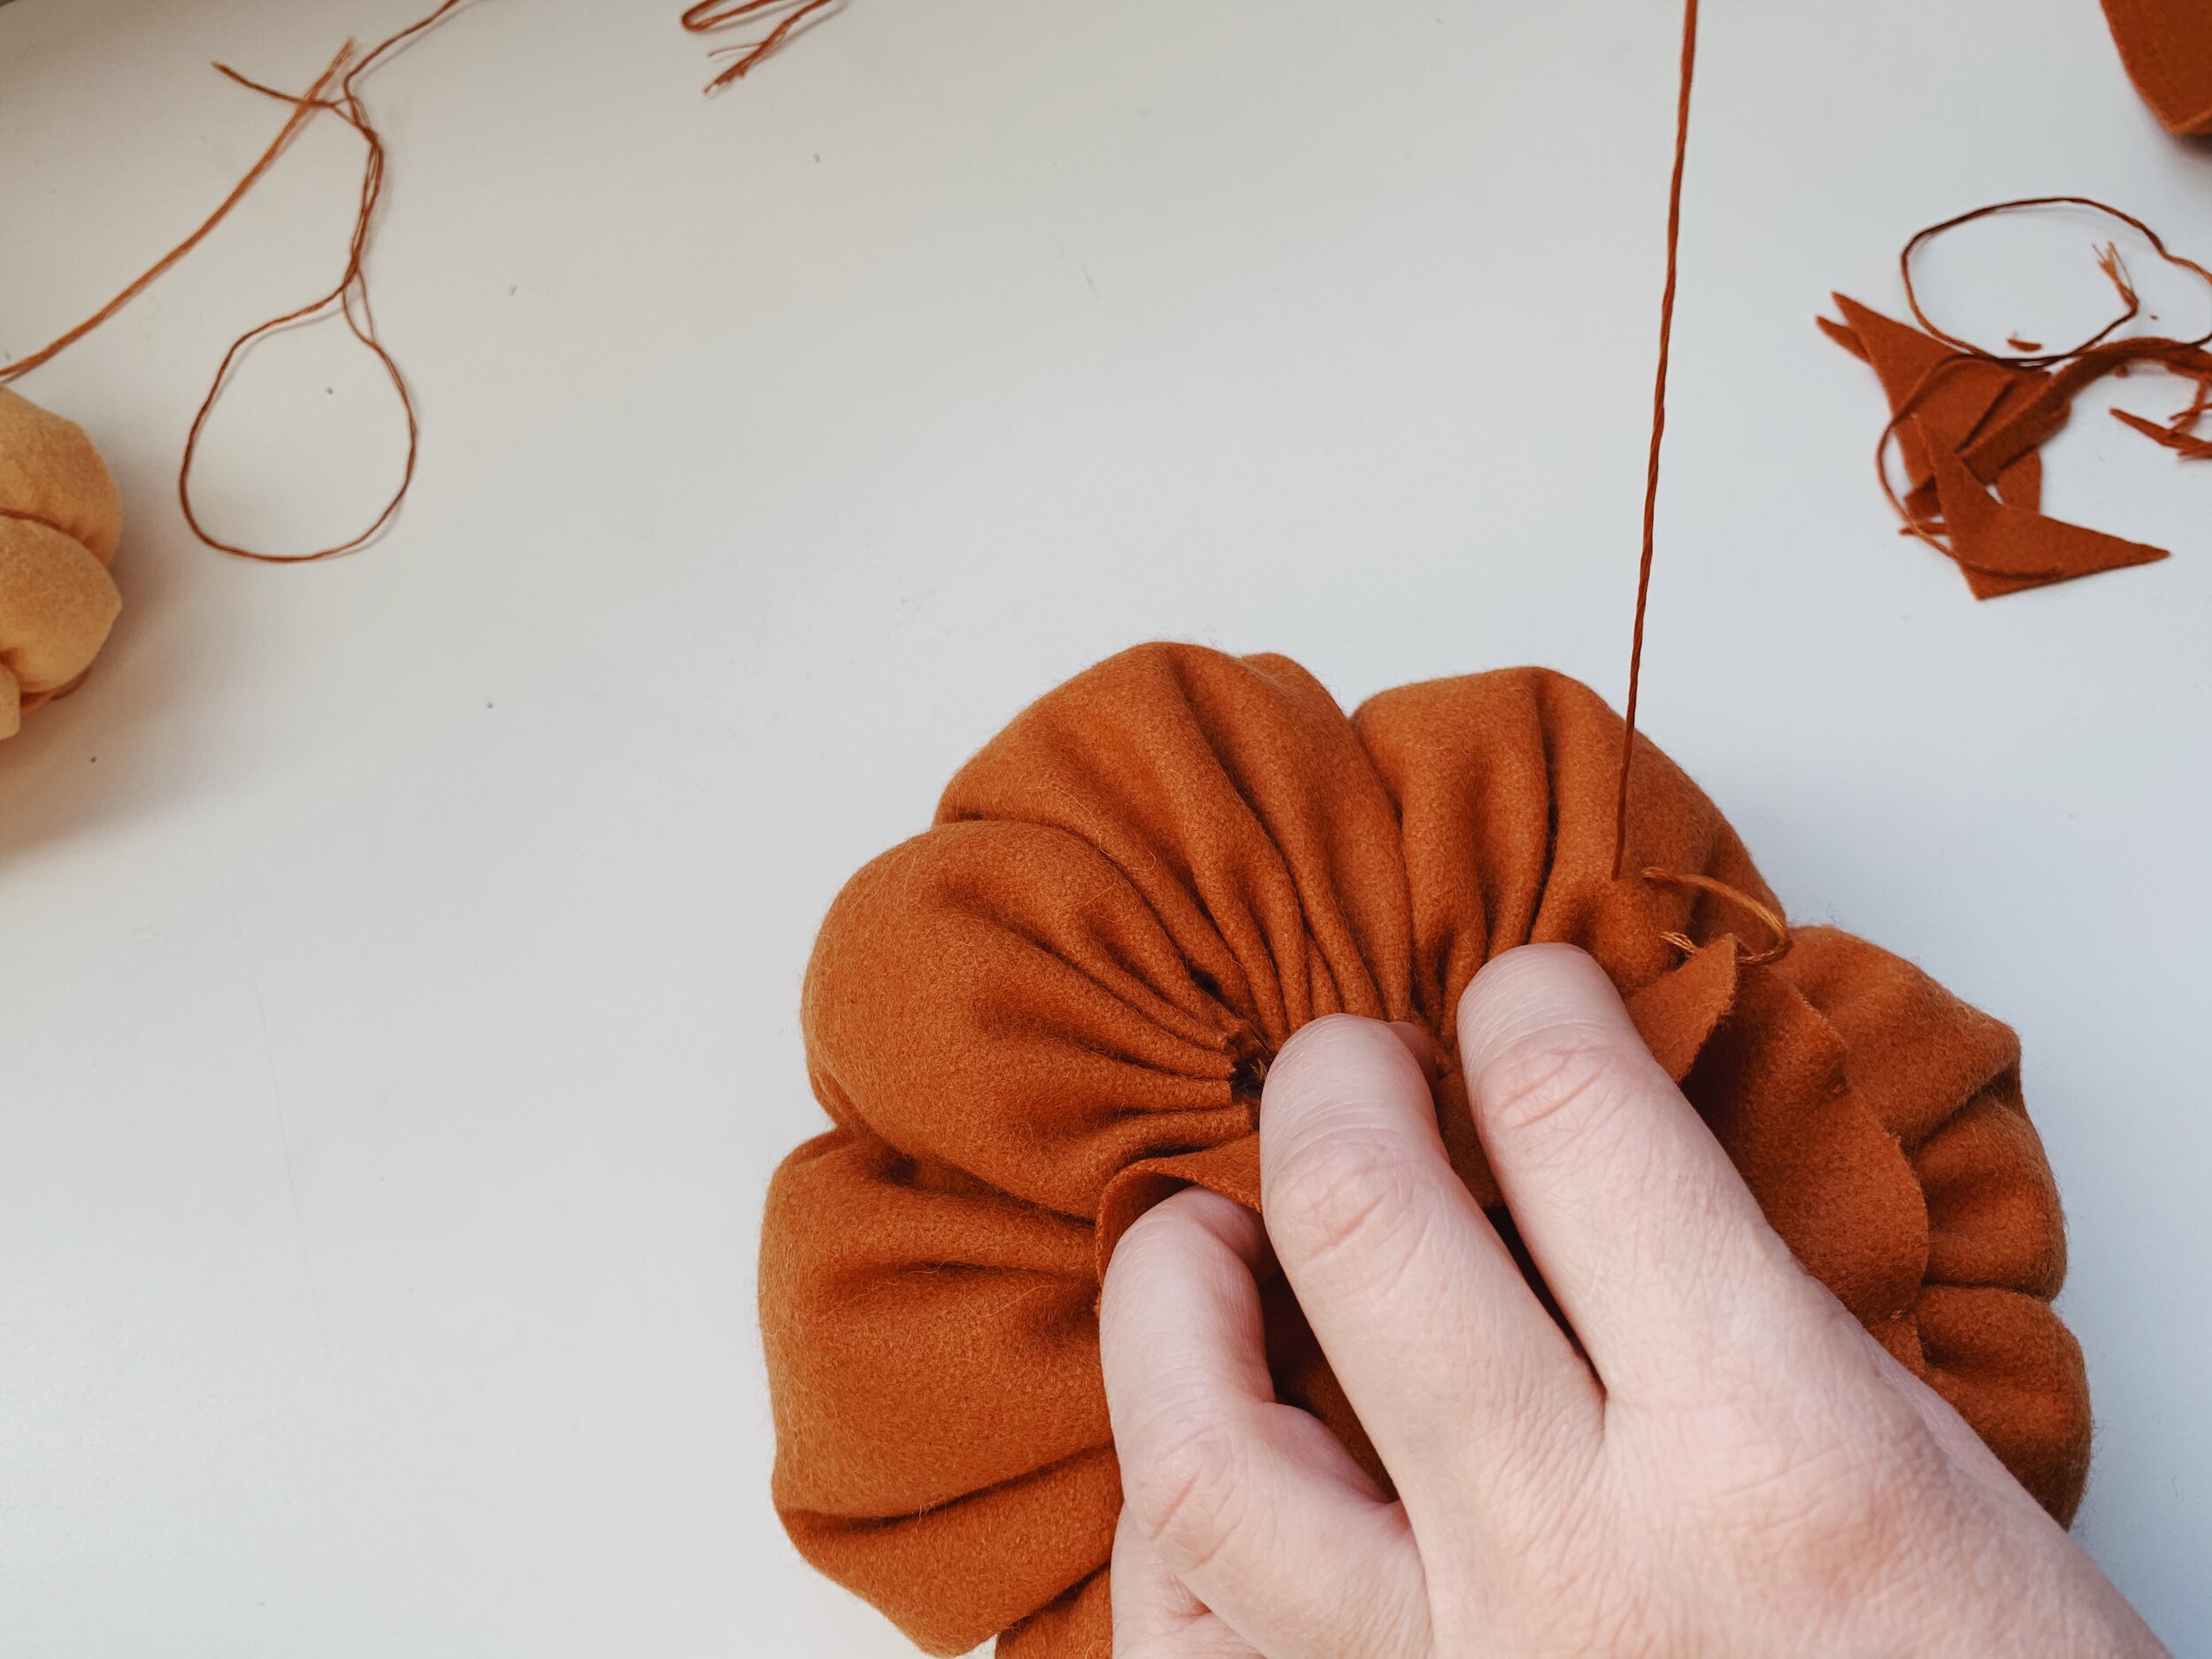
Cut another length of embroidery floss the length from your fingertips to your heart, plus a little extra. Thread the needle and knot the end. Begin by creating a small stitch along the bottom center of the pumpkin and wrap the thread up to the top center. Your needle should dive down into the felt and come up about an inch or so away, as if there is a quarter sitting on the top center of your pumpkin that you are avoiding. Bring the thread down the opposite side of the pumpkin and pull taut to create your first set of ridges (as shown). Repeat to create as many ridges as you’d like. Secure the thread by sewing into the bottom of your pumpkin and knotting off.
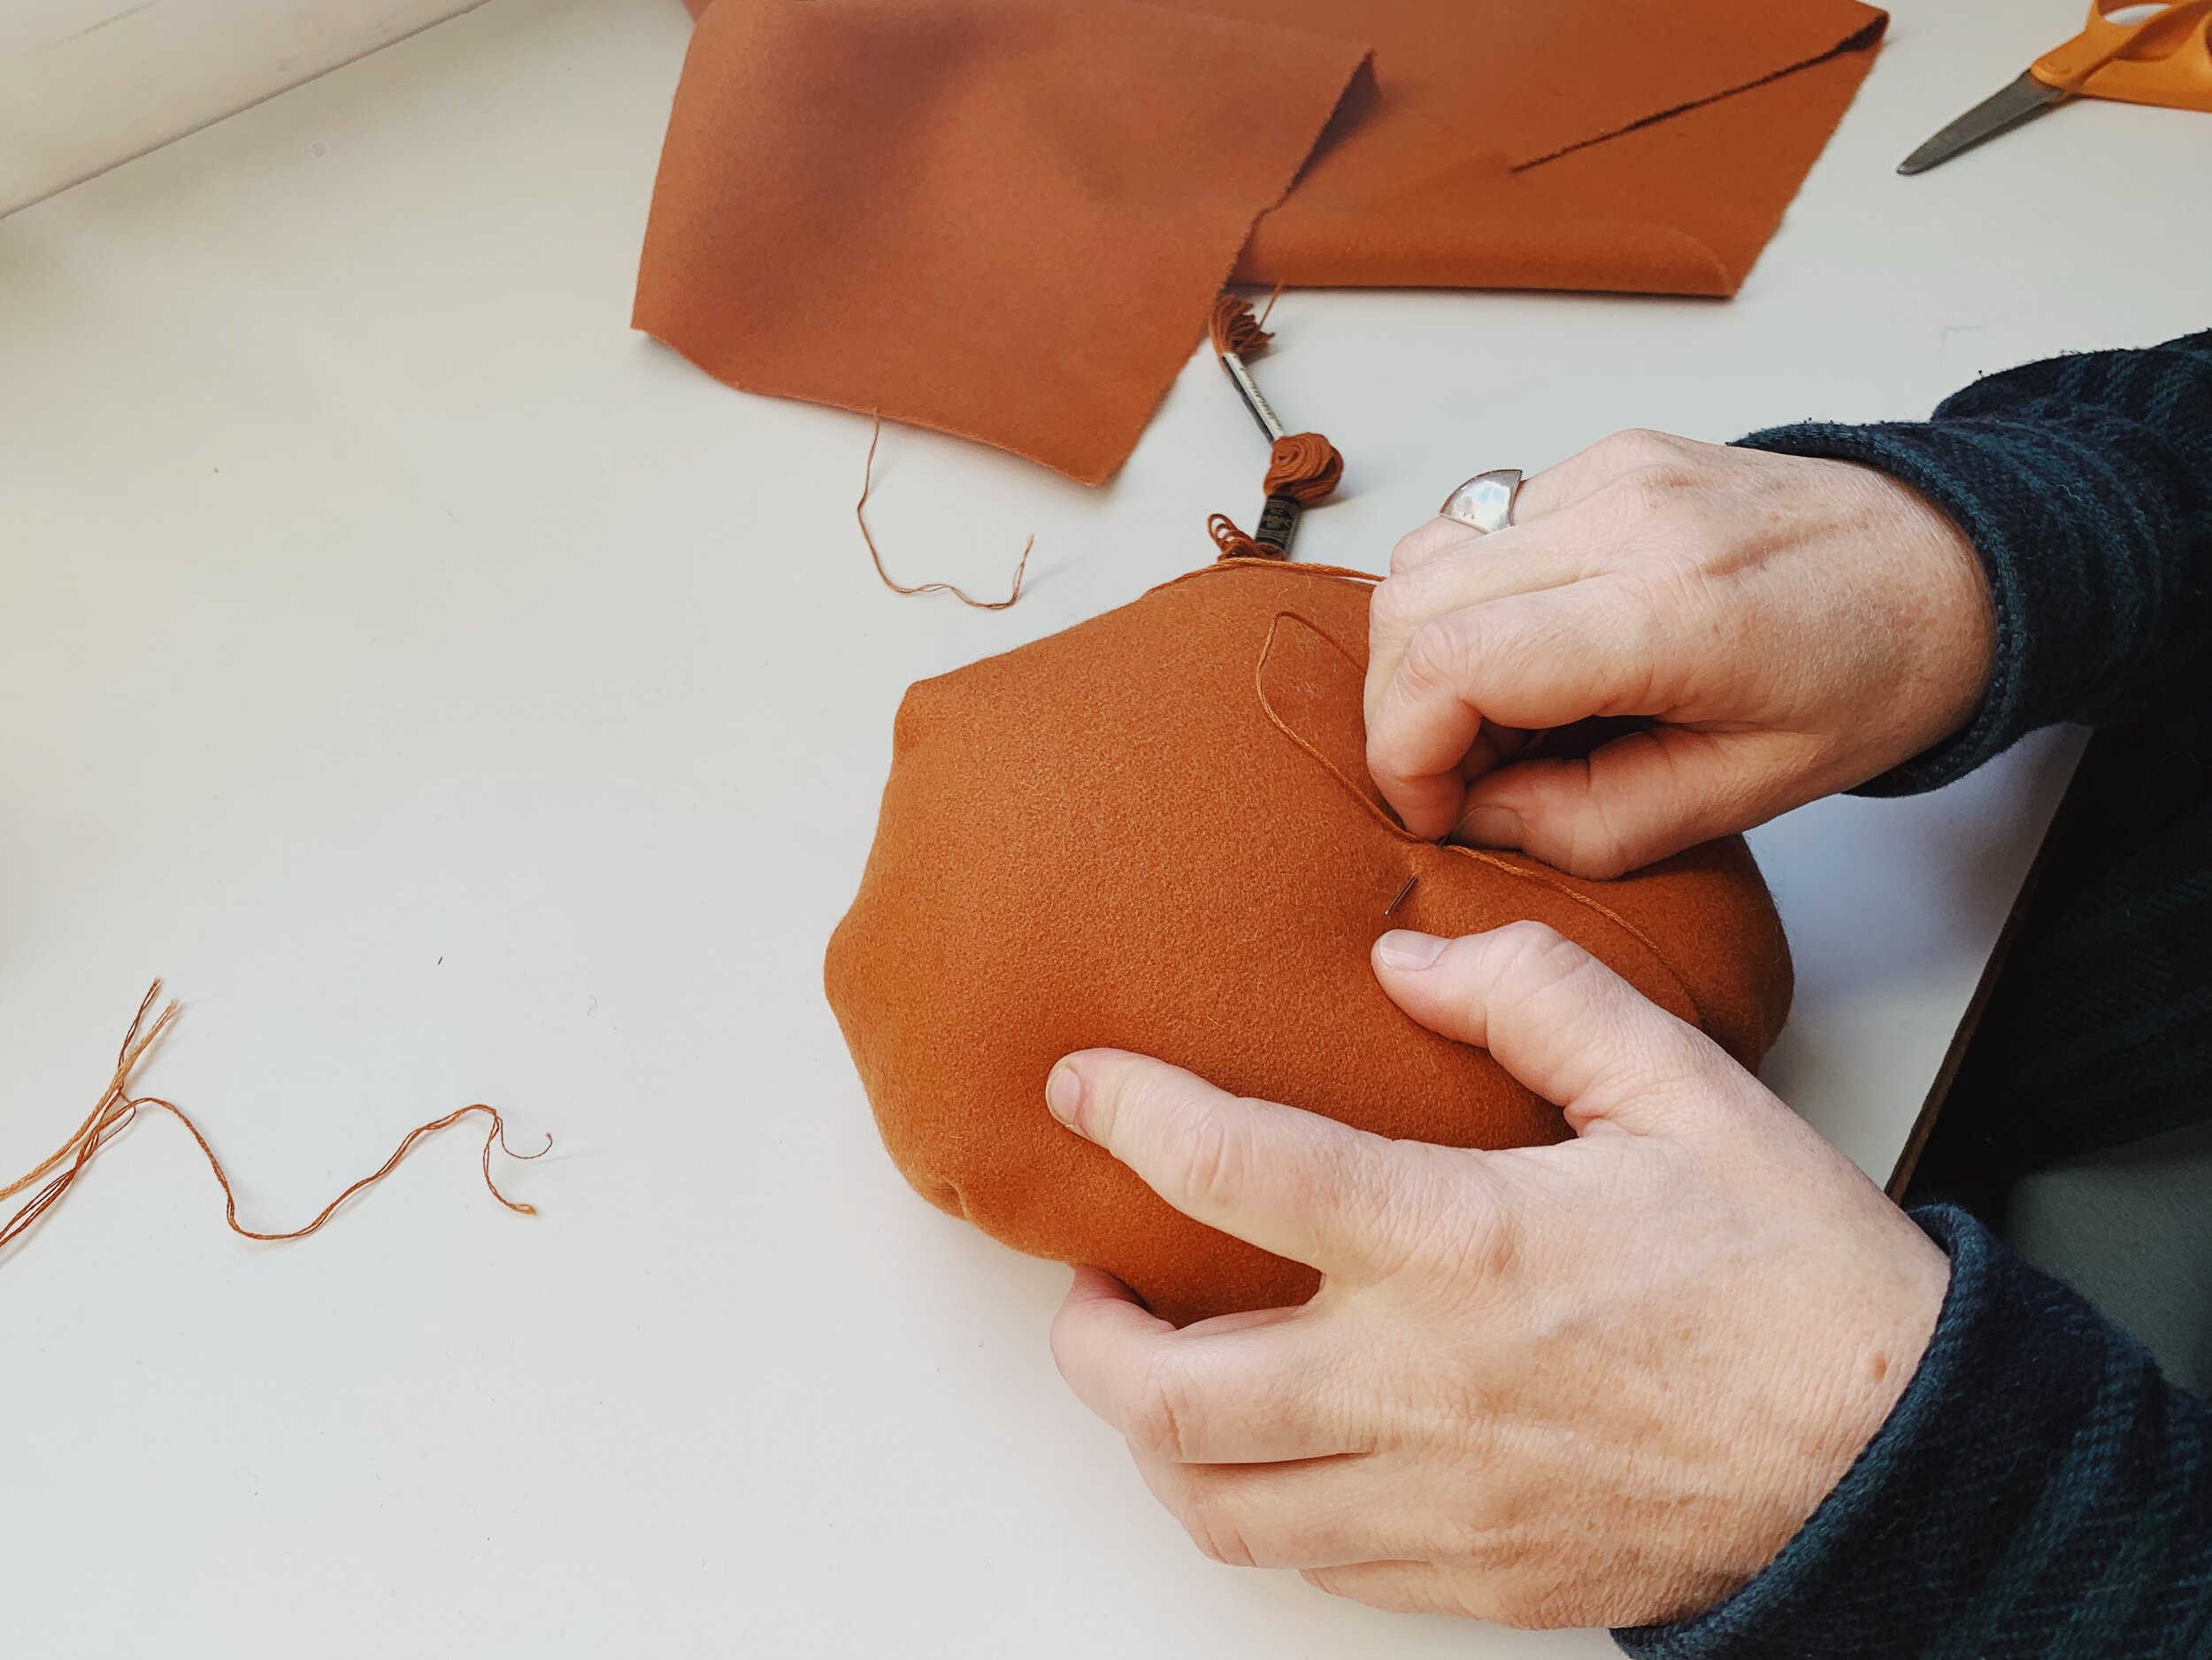
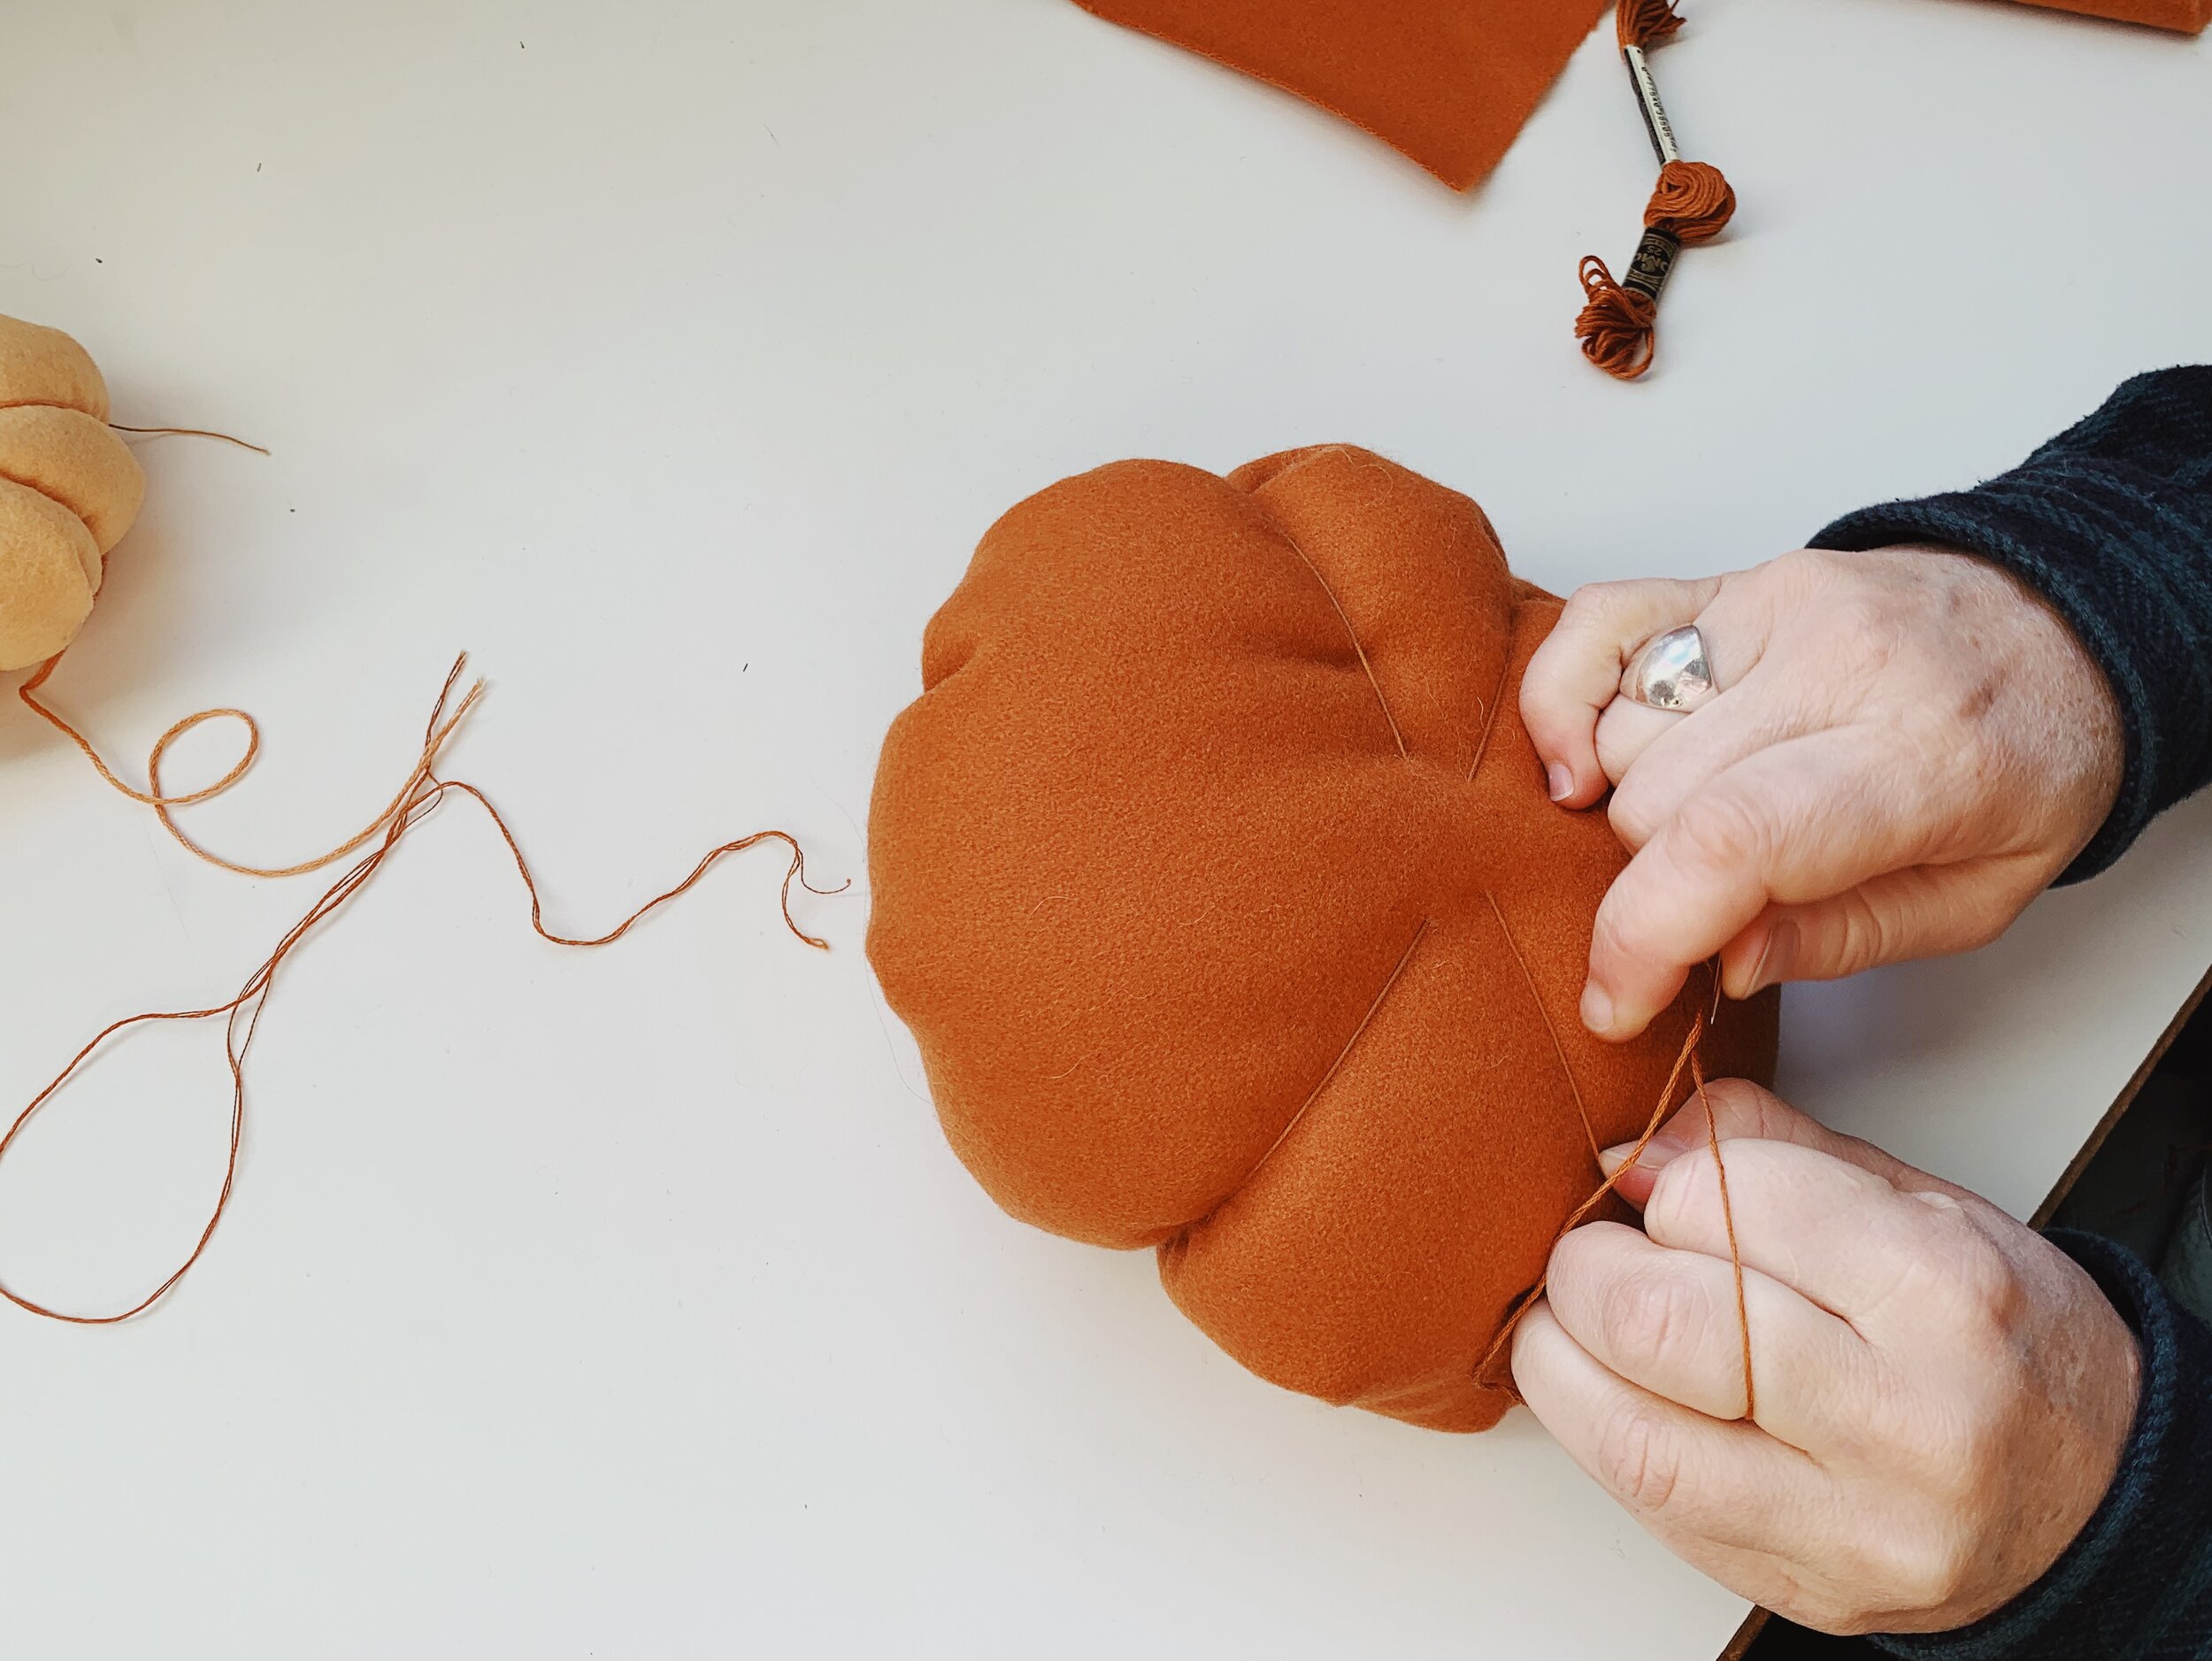
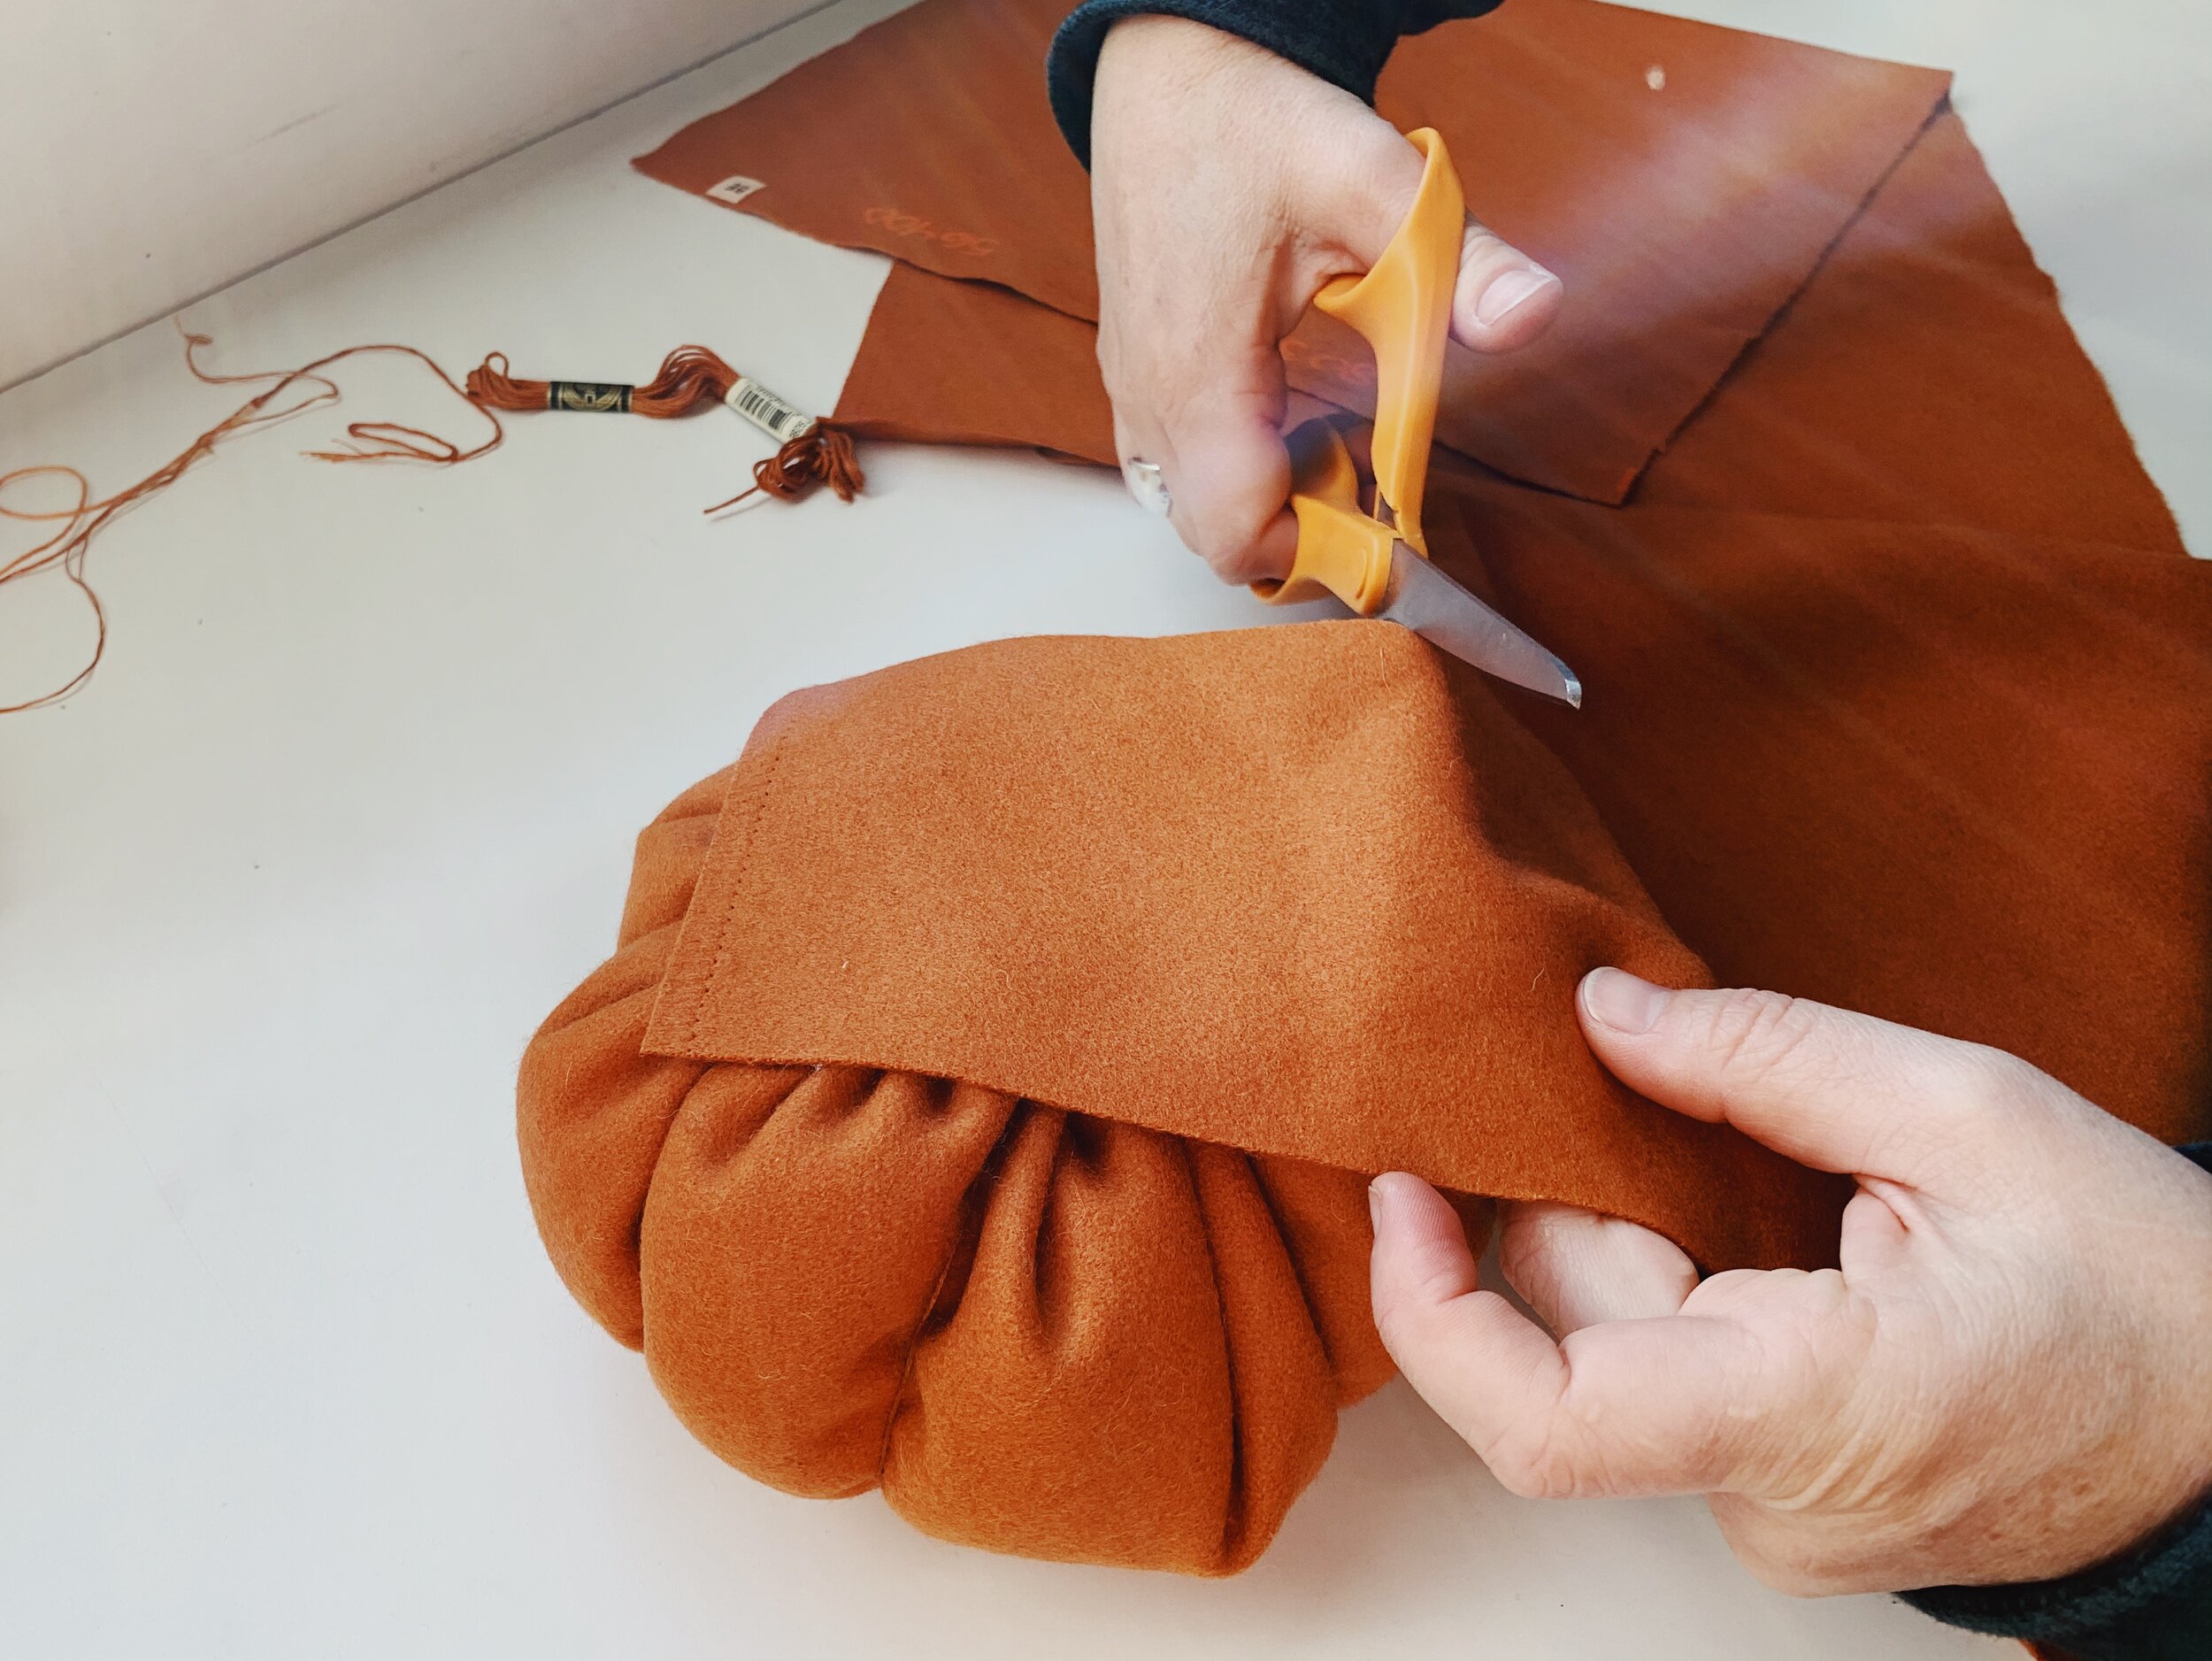
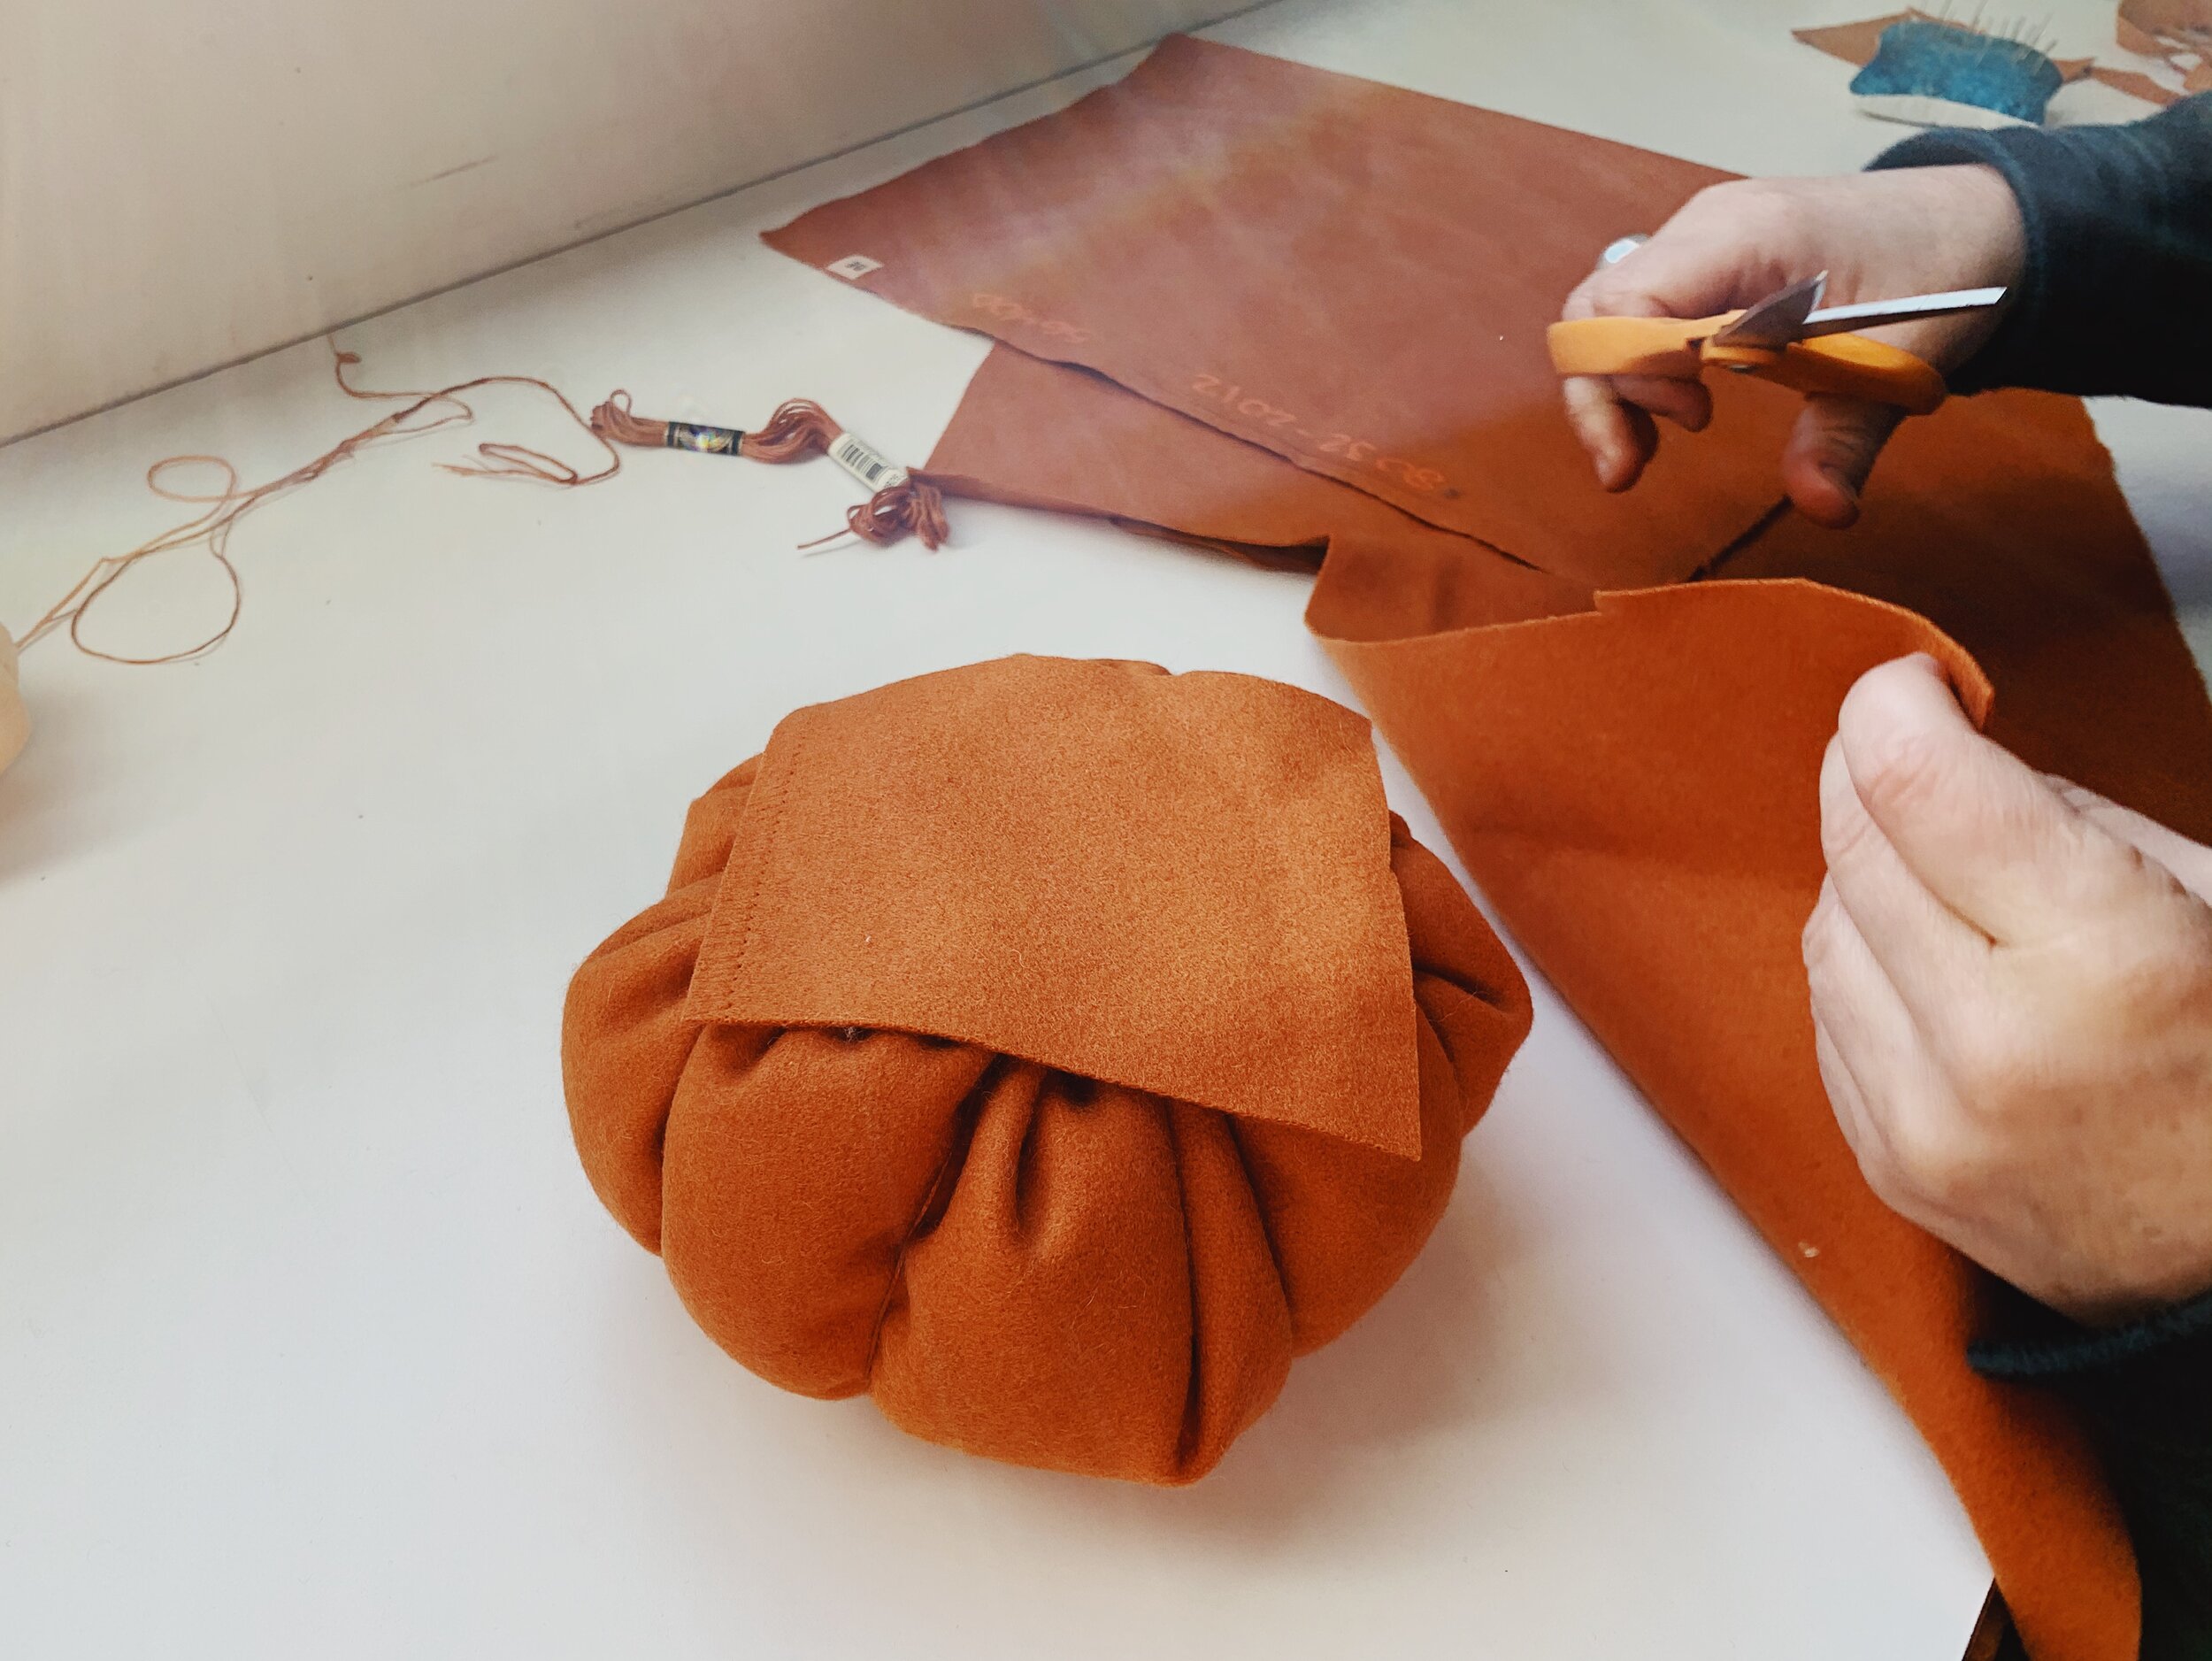
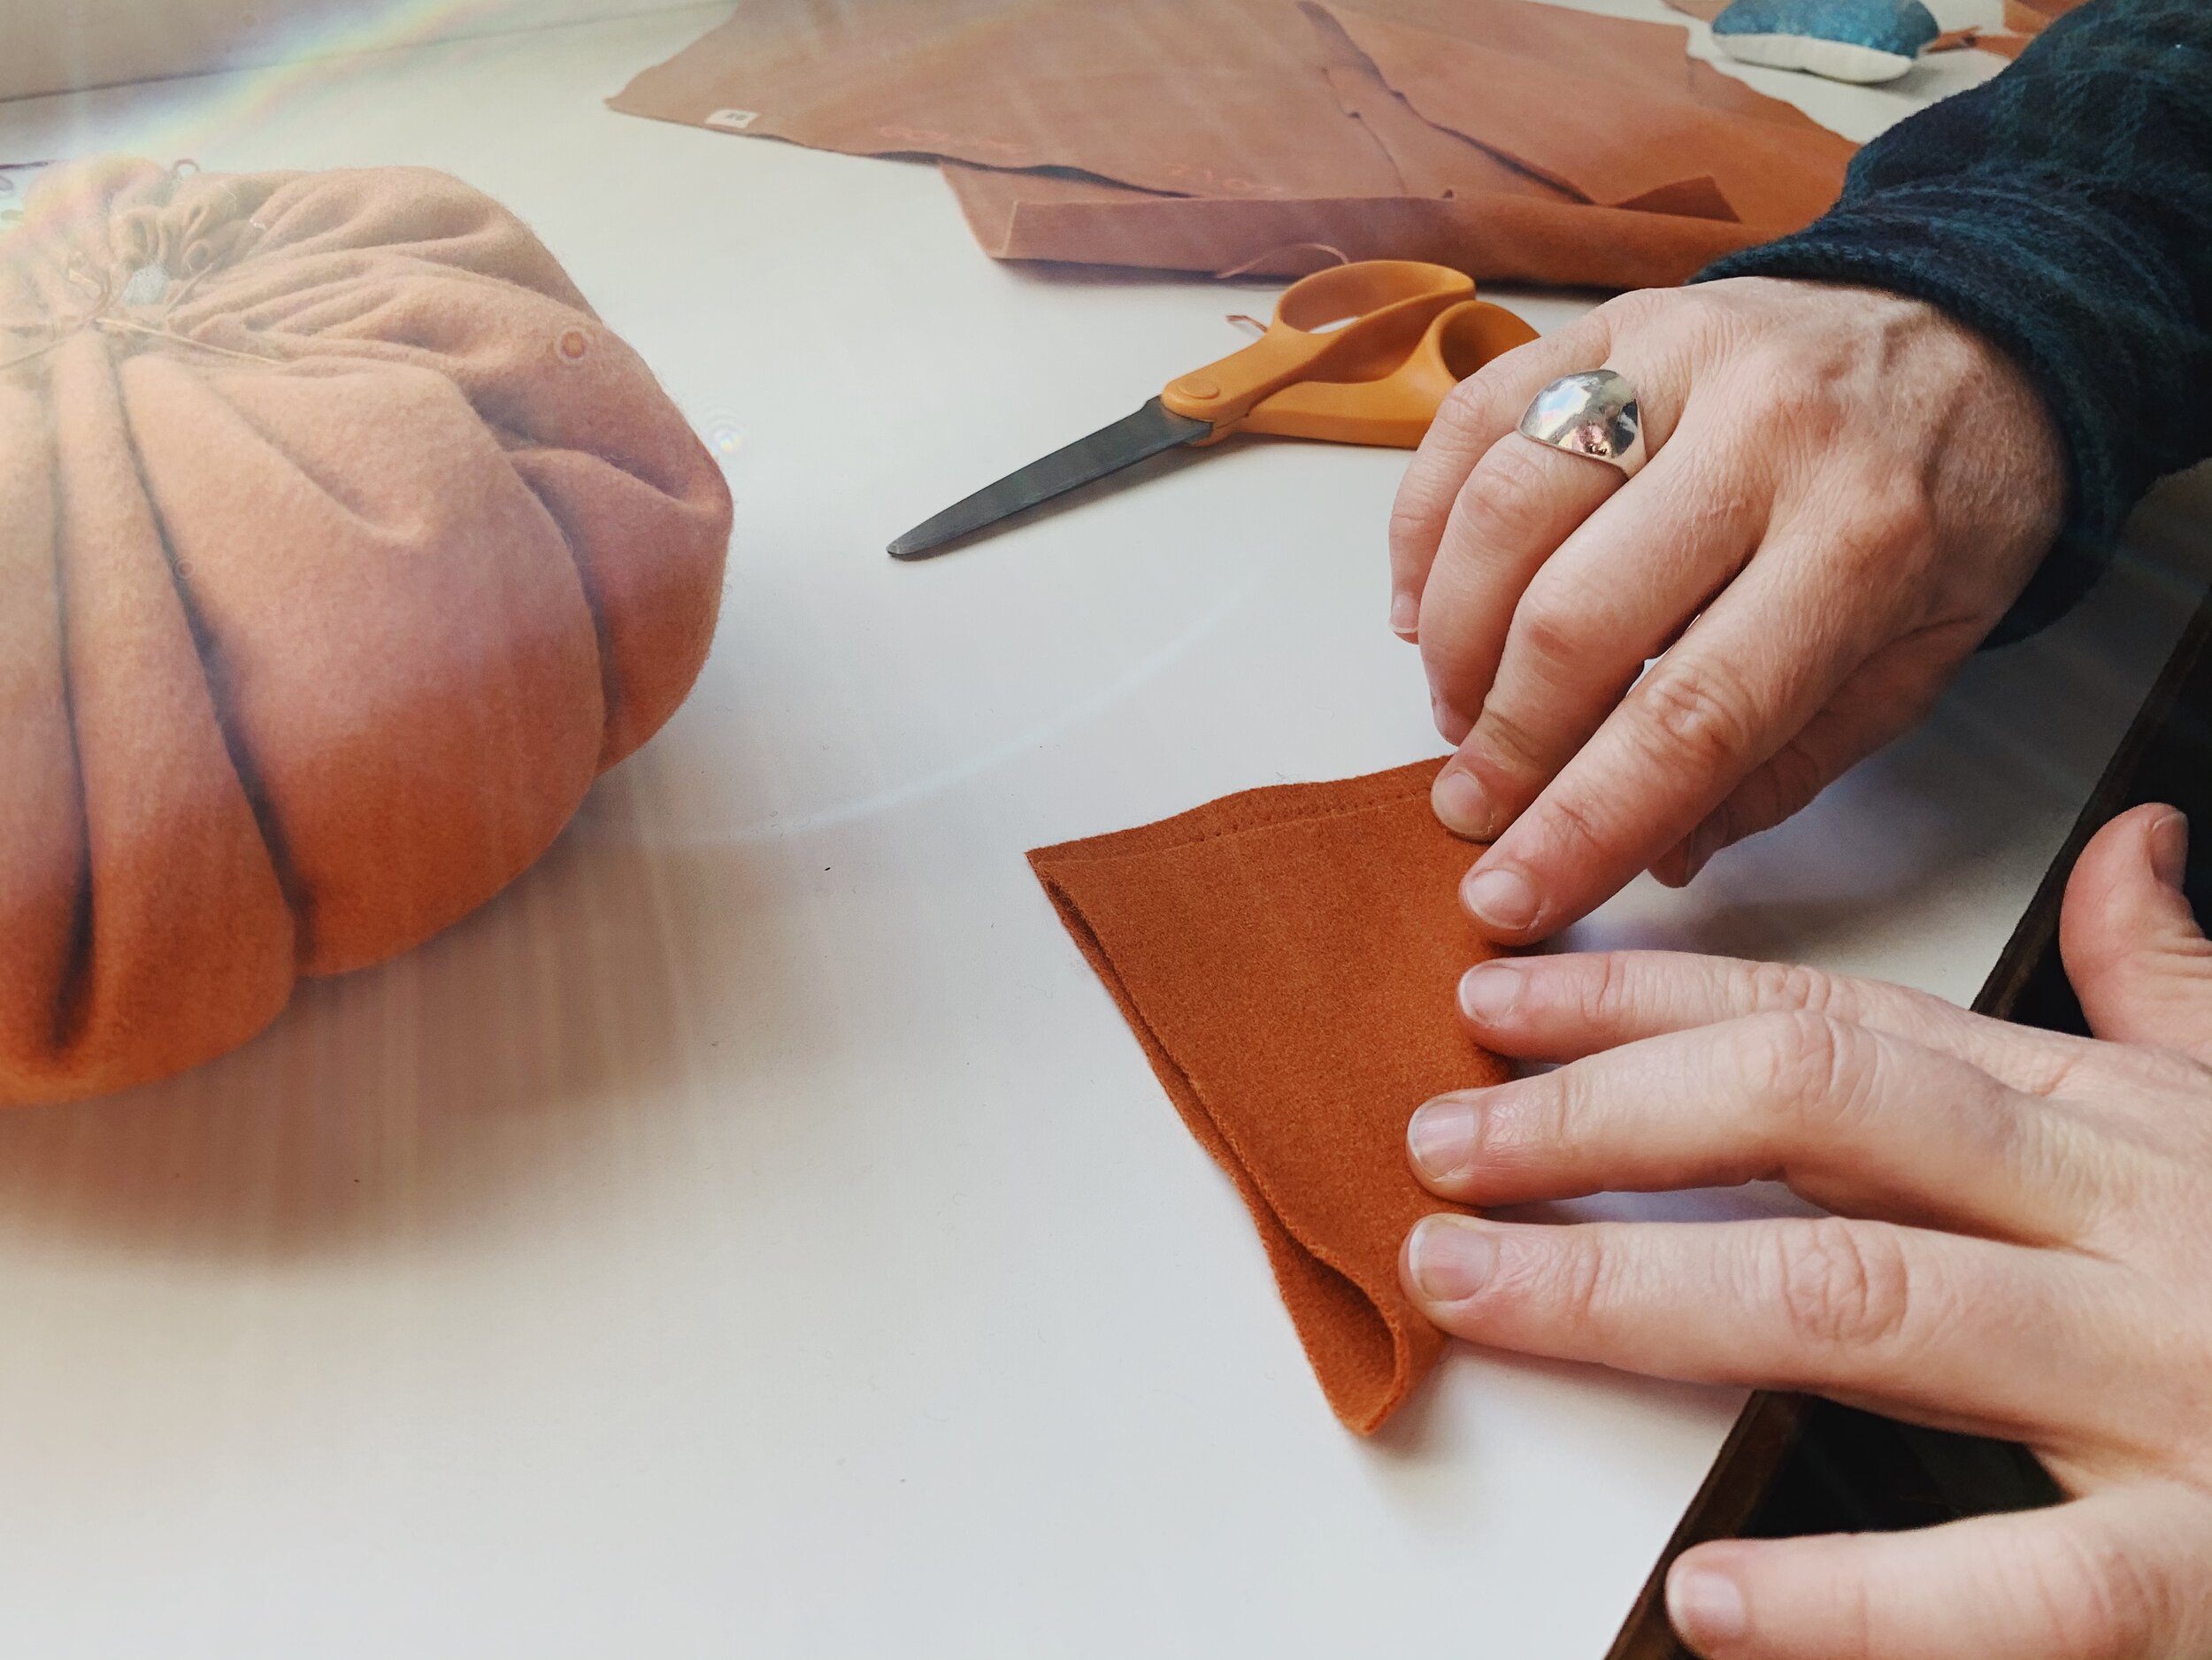
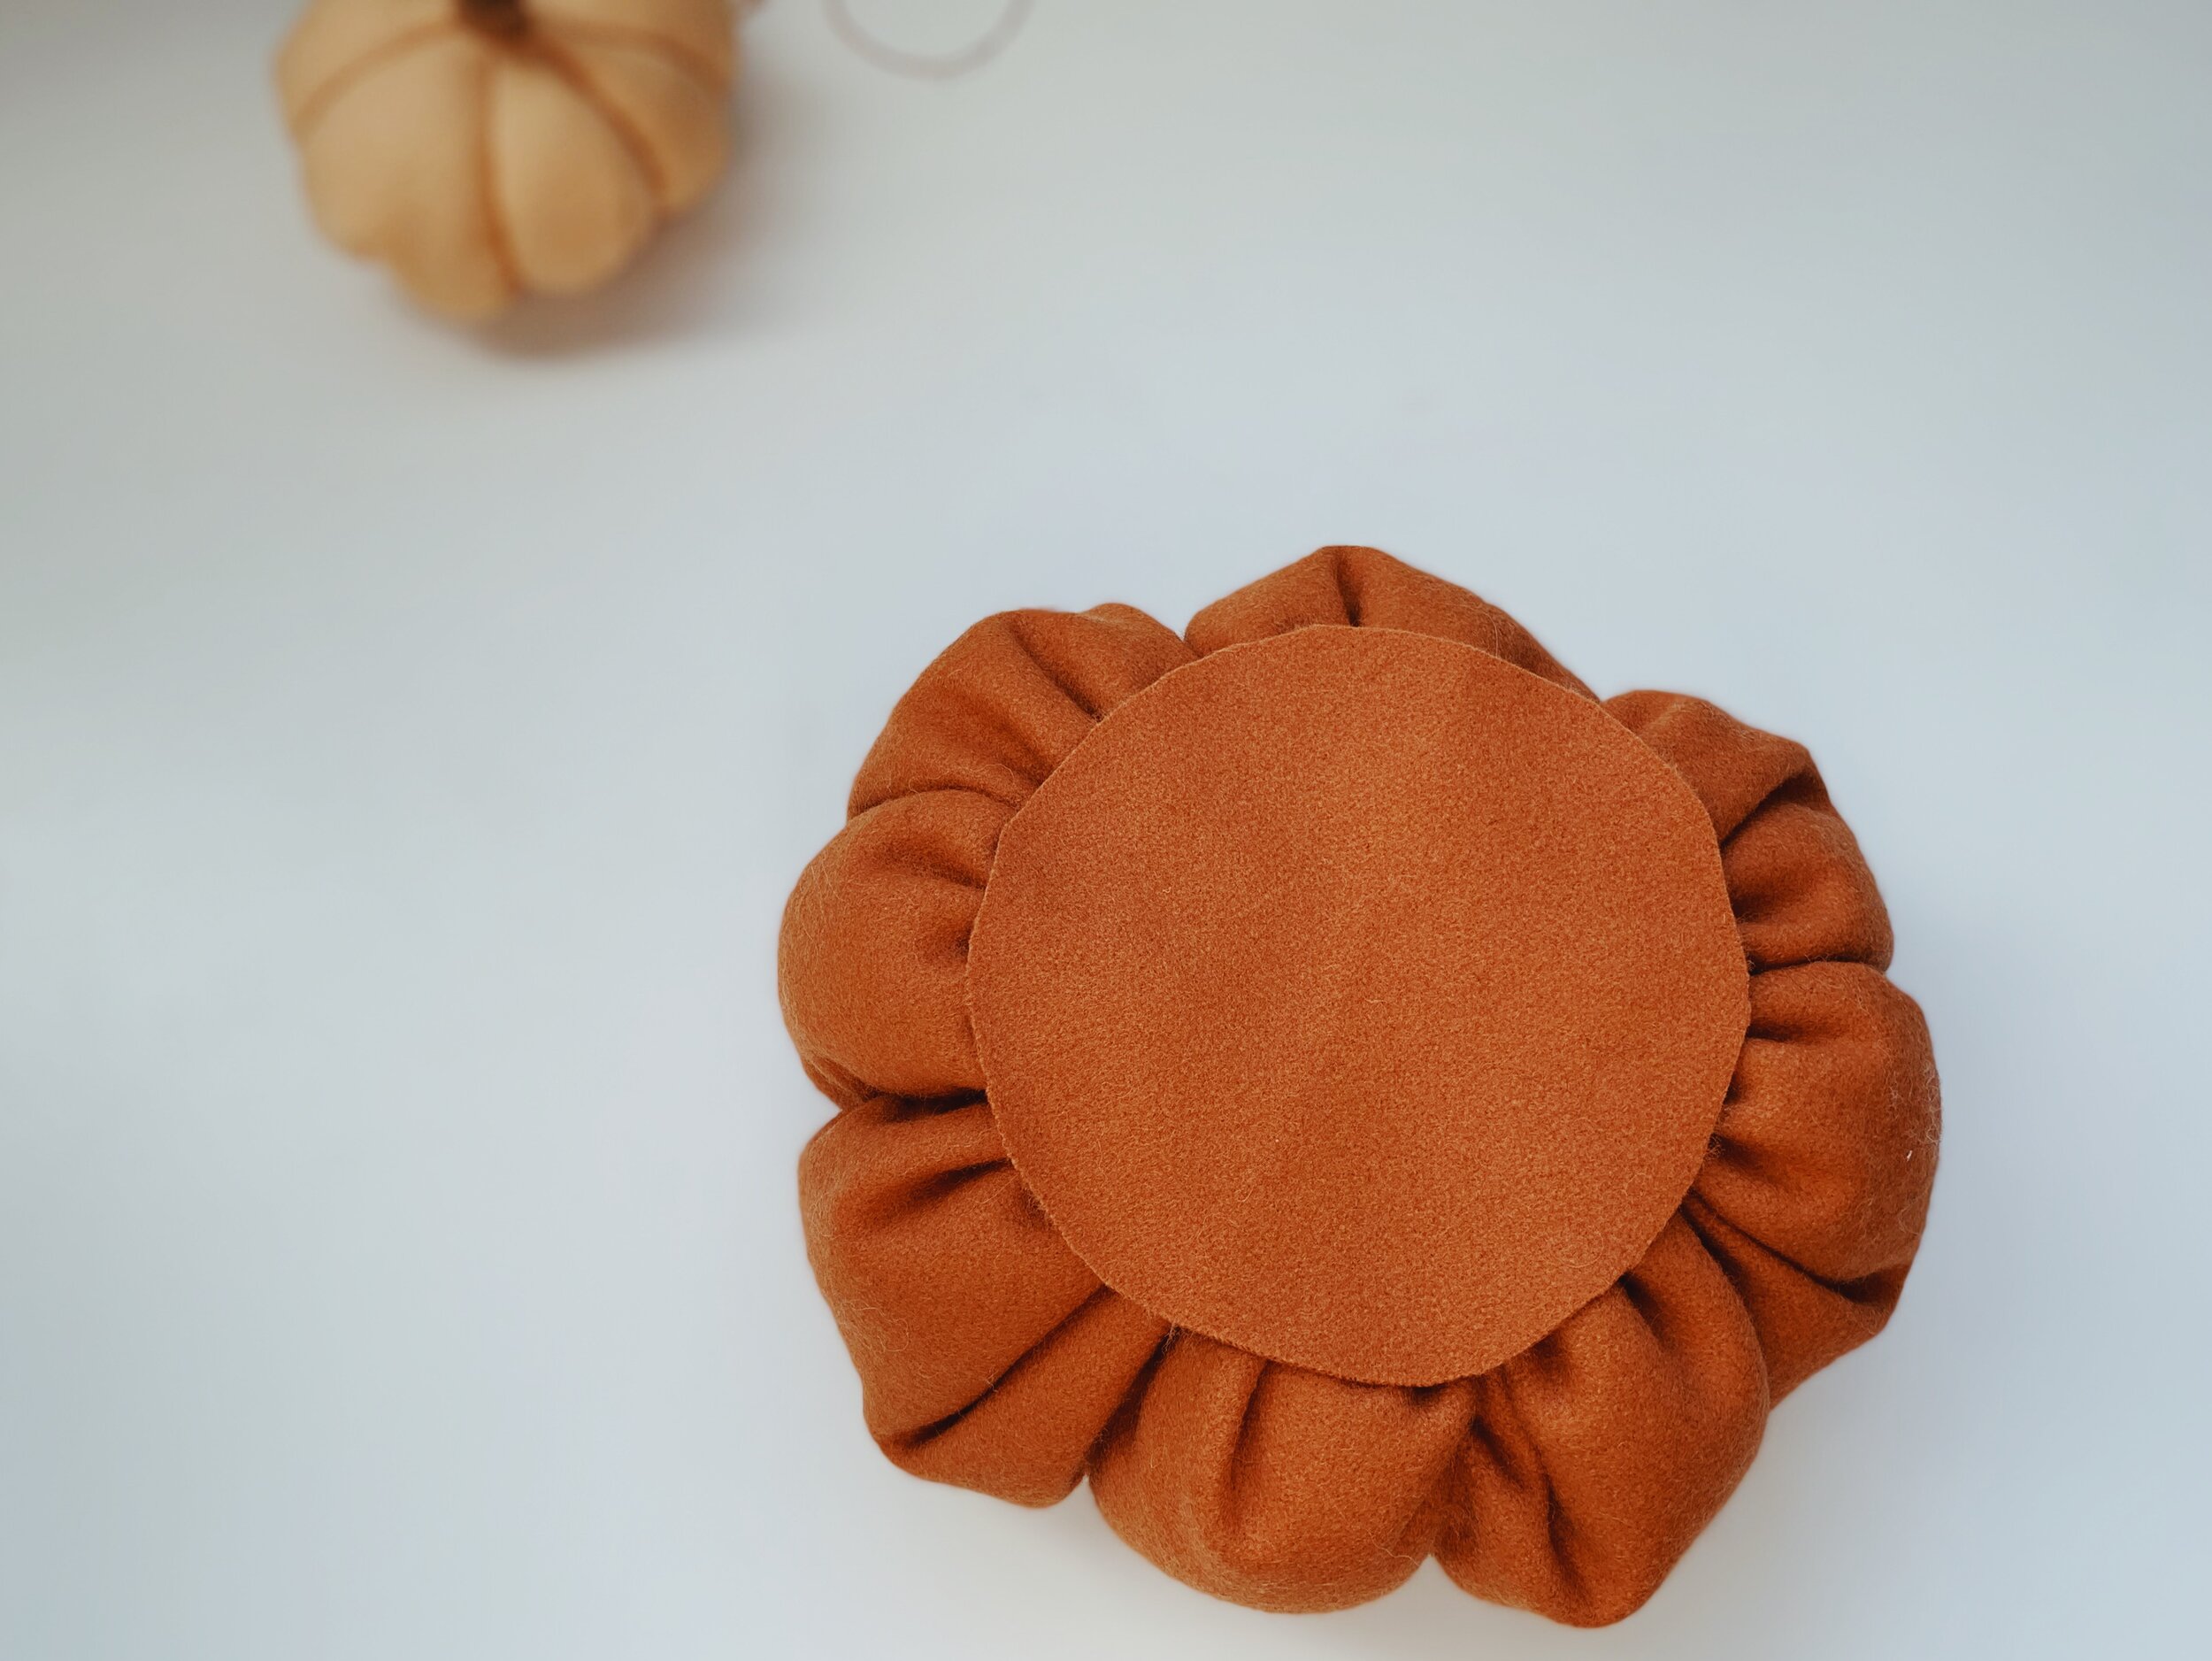
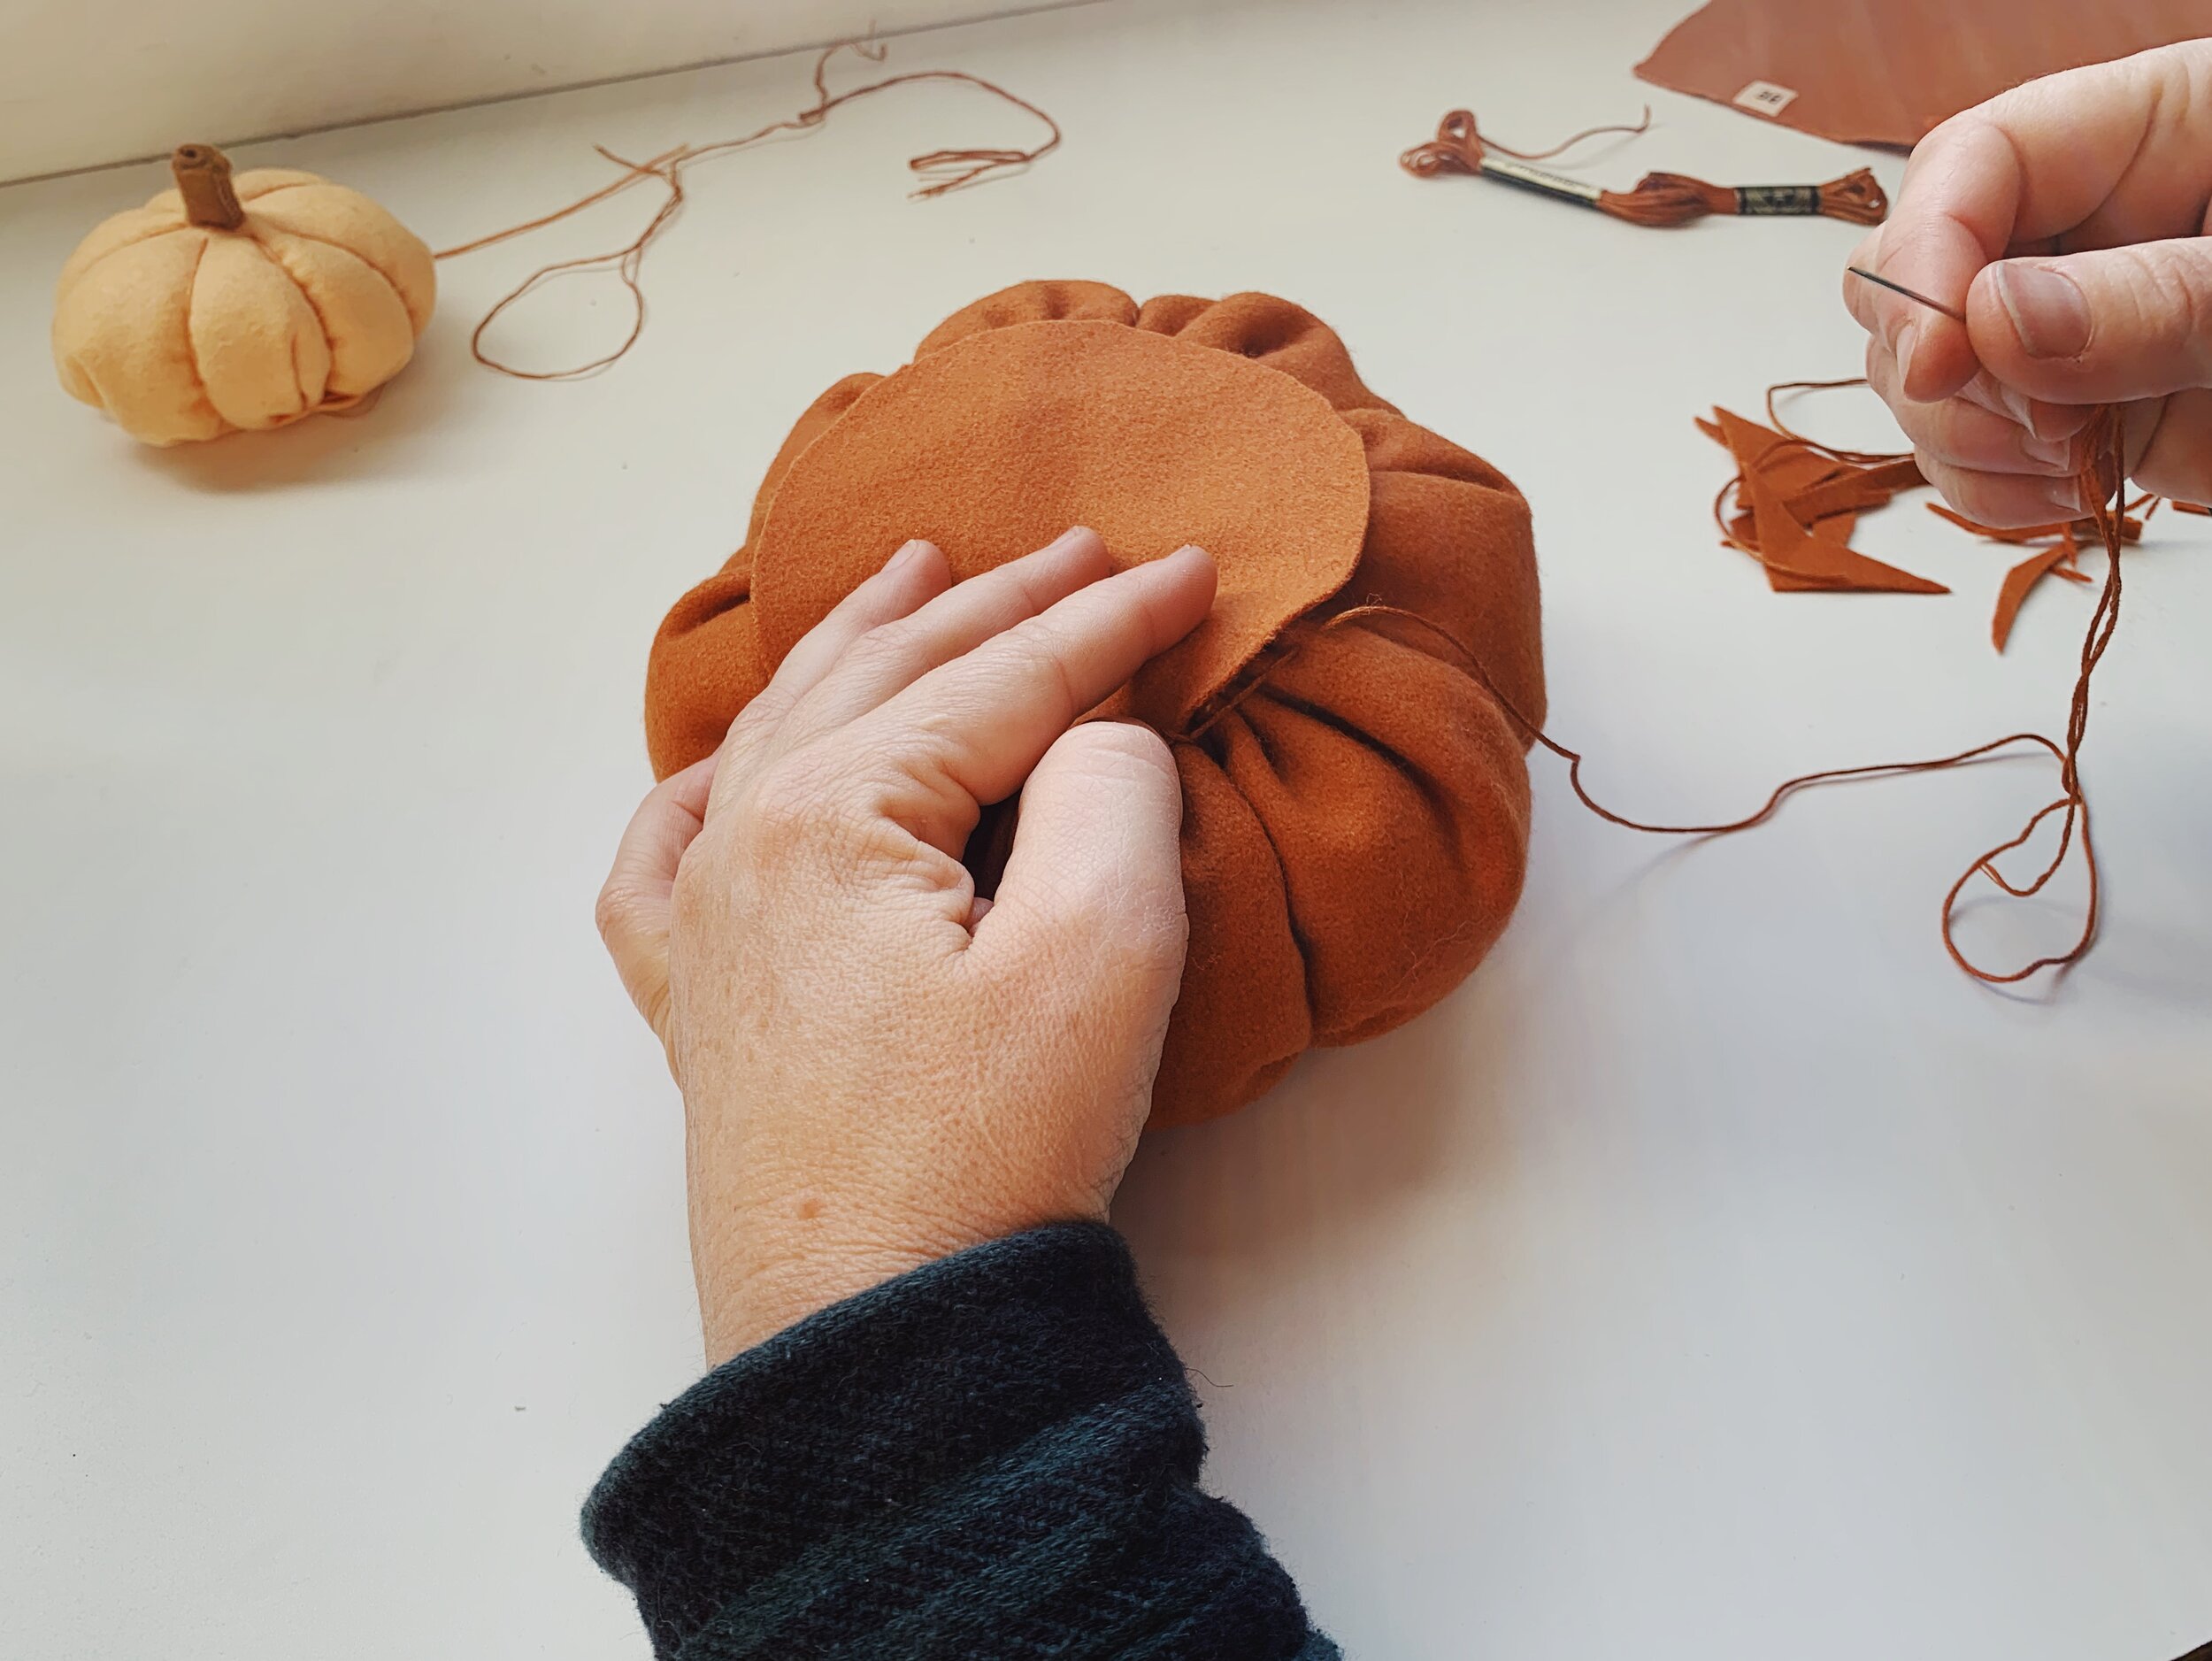
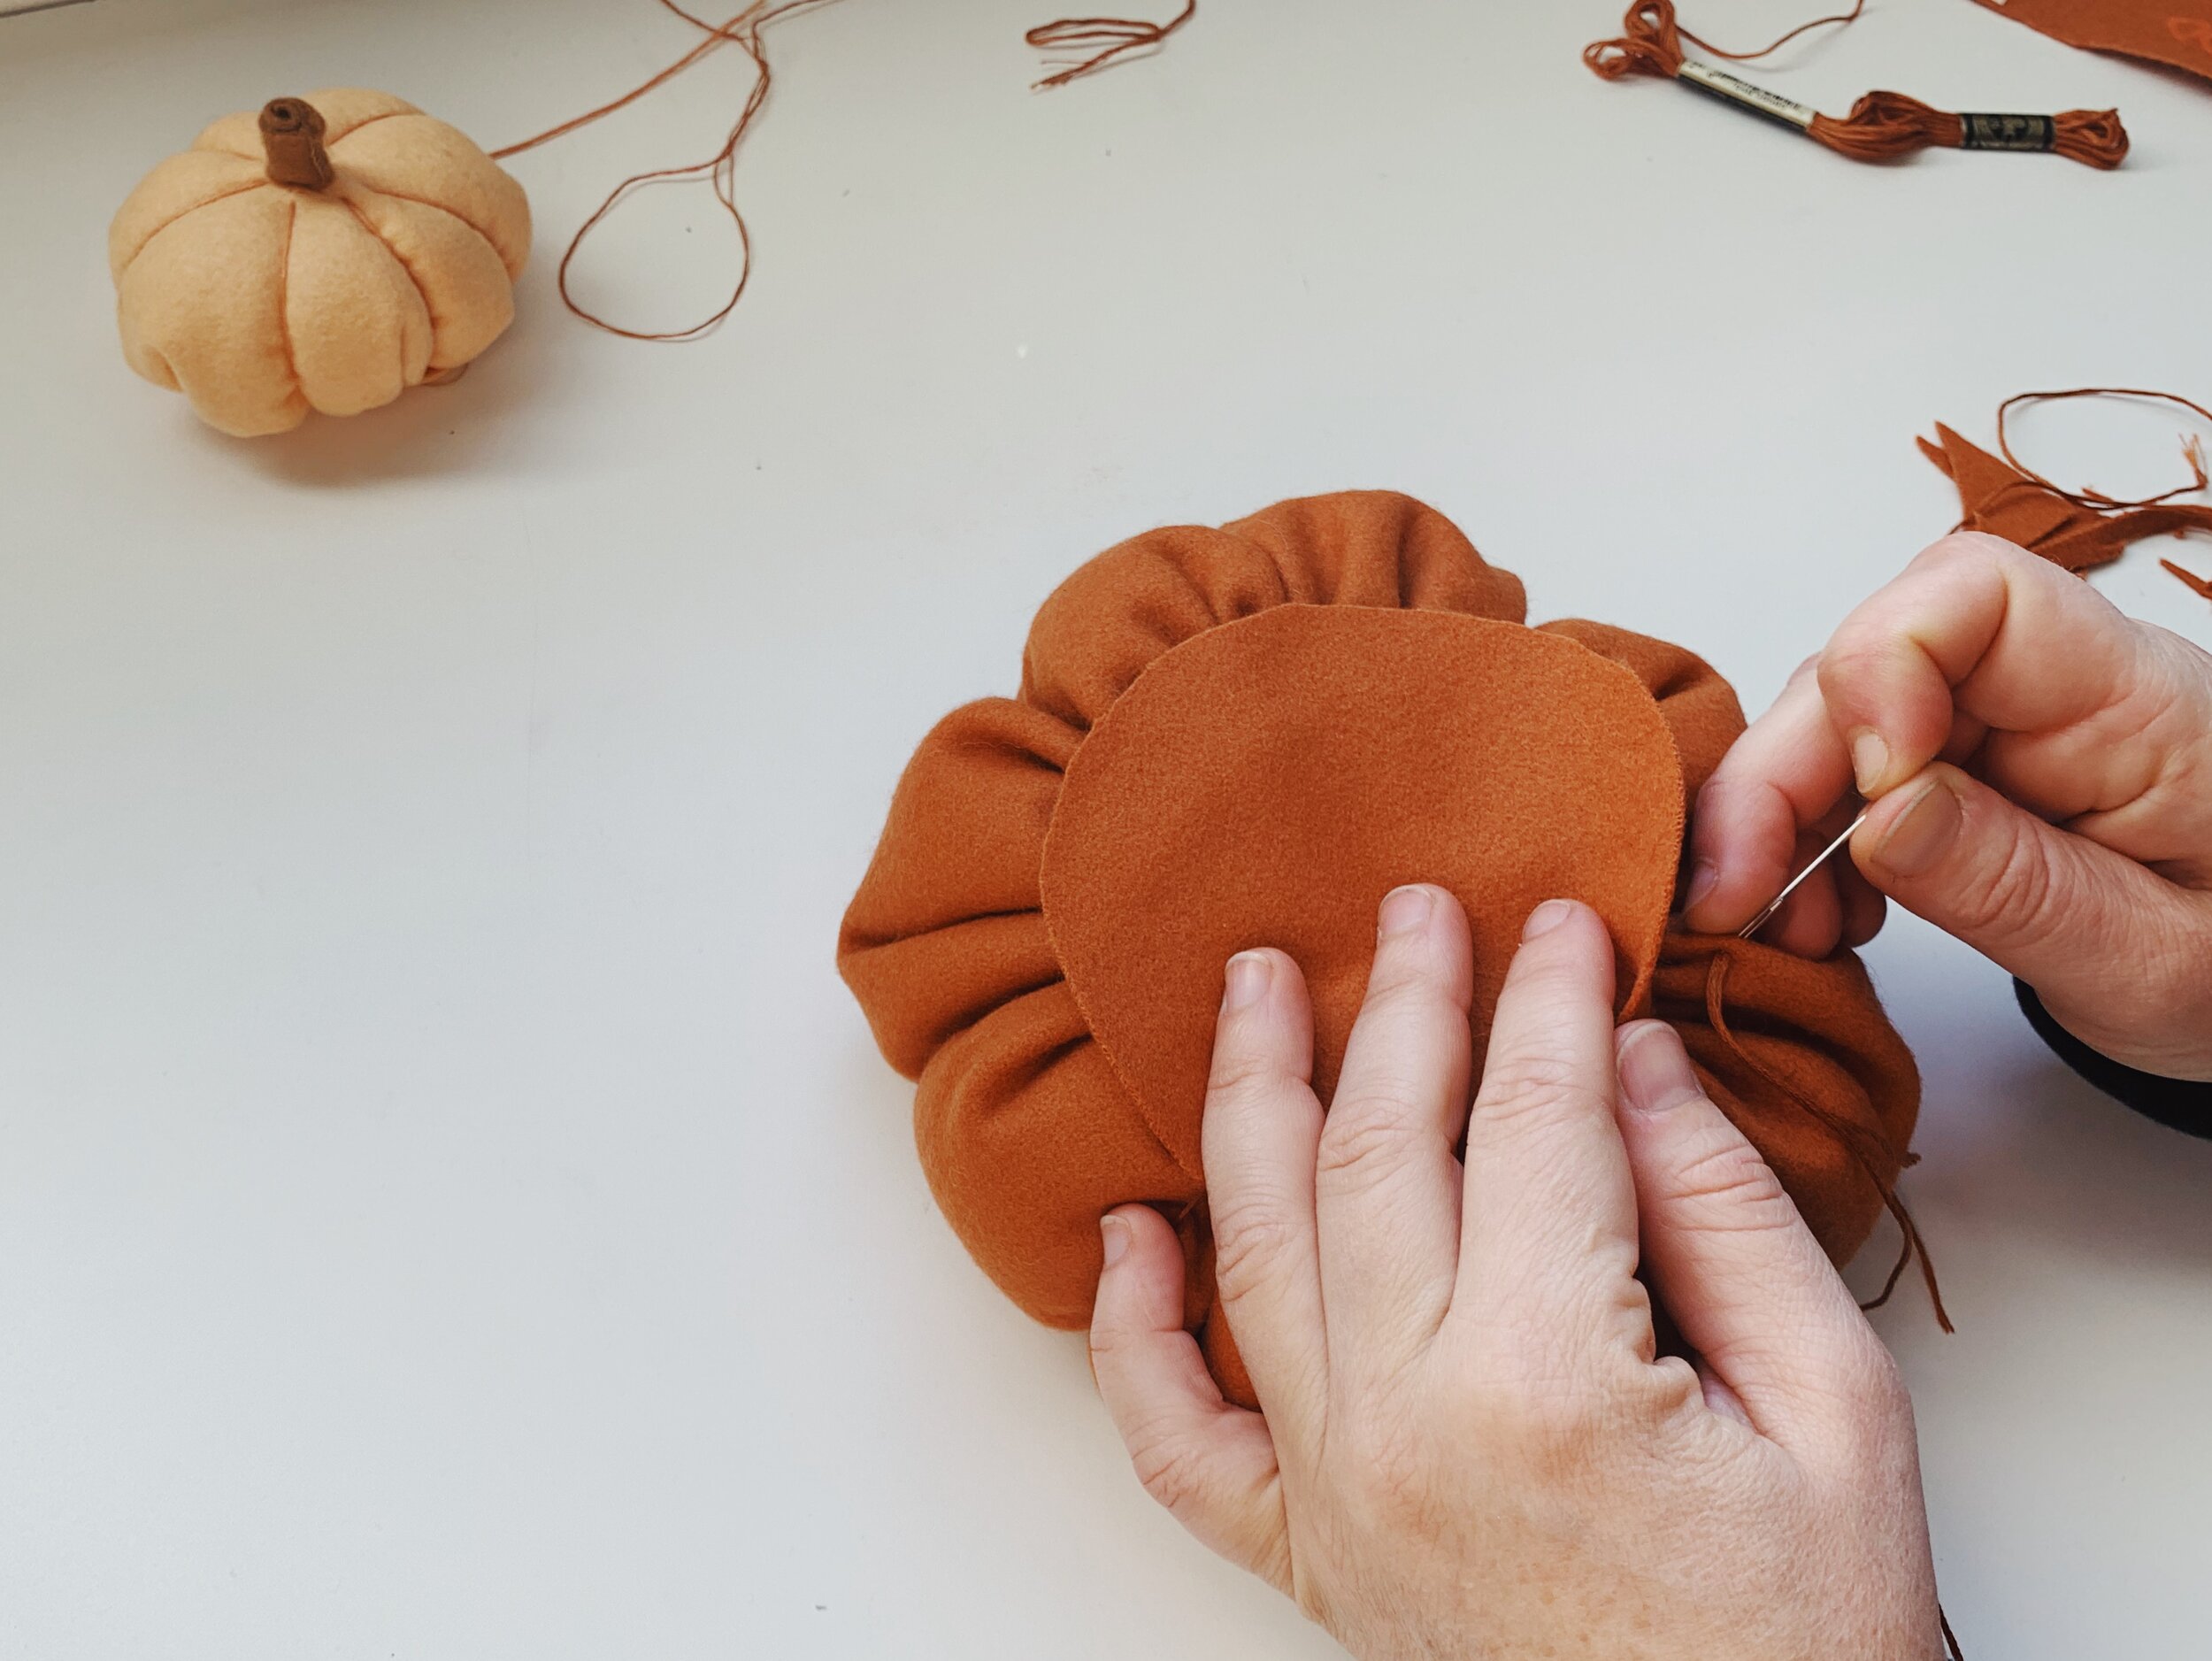
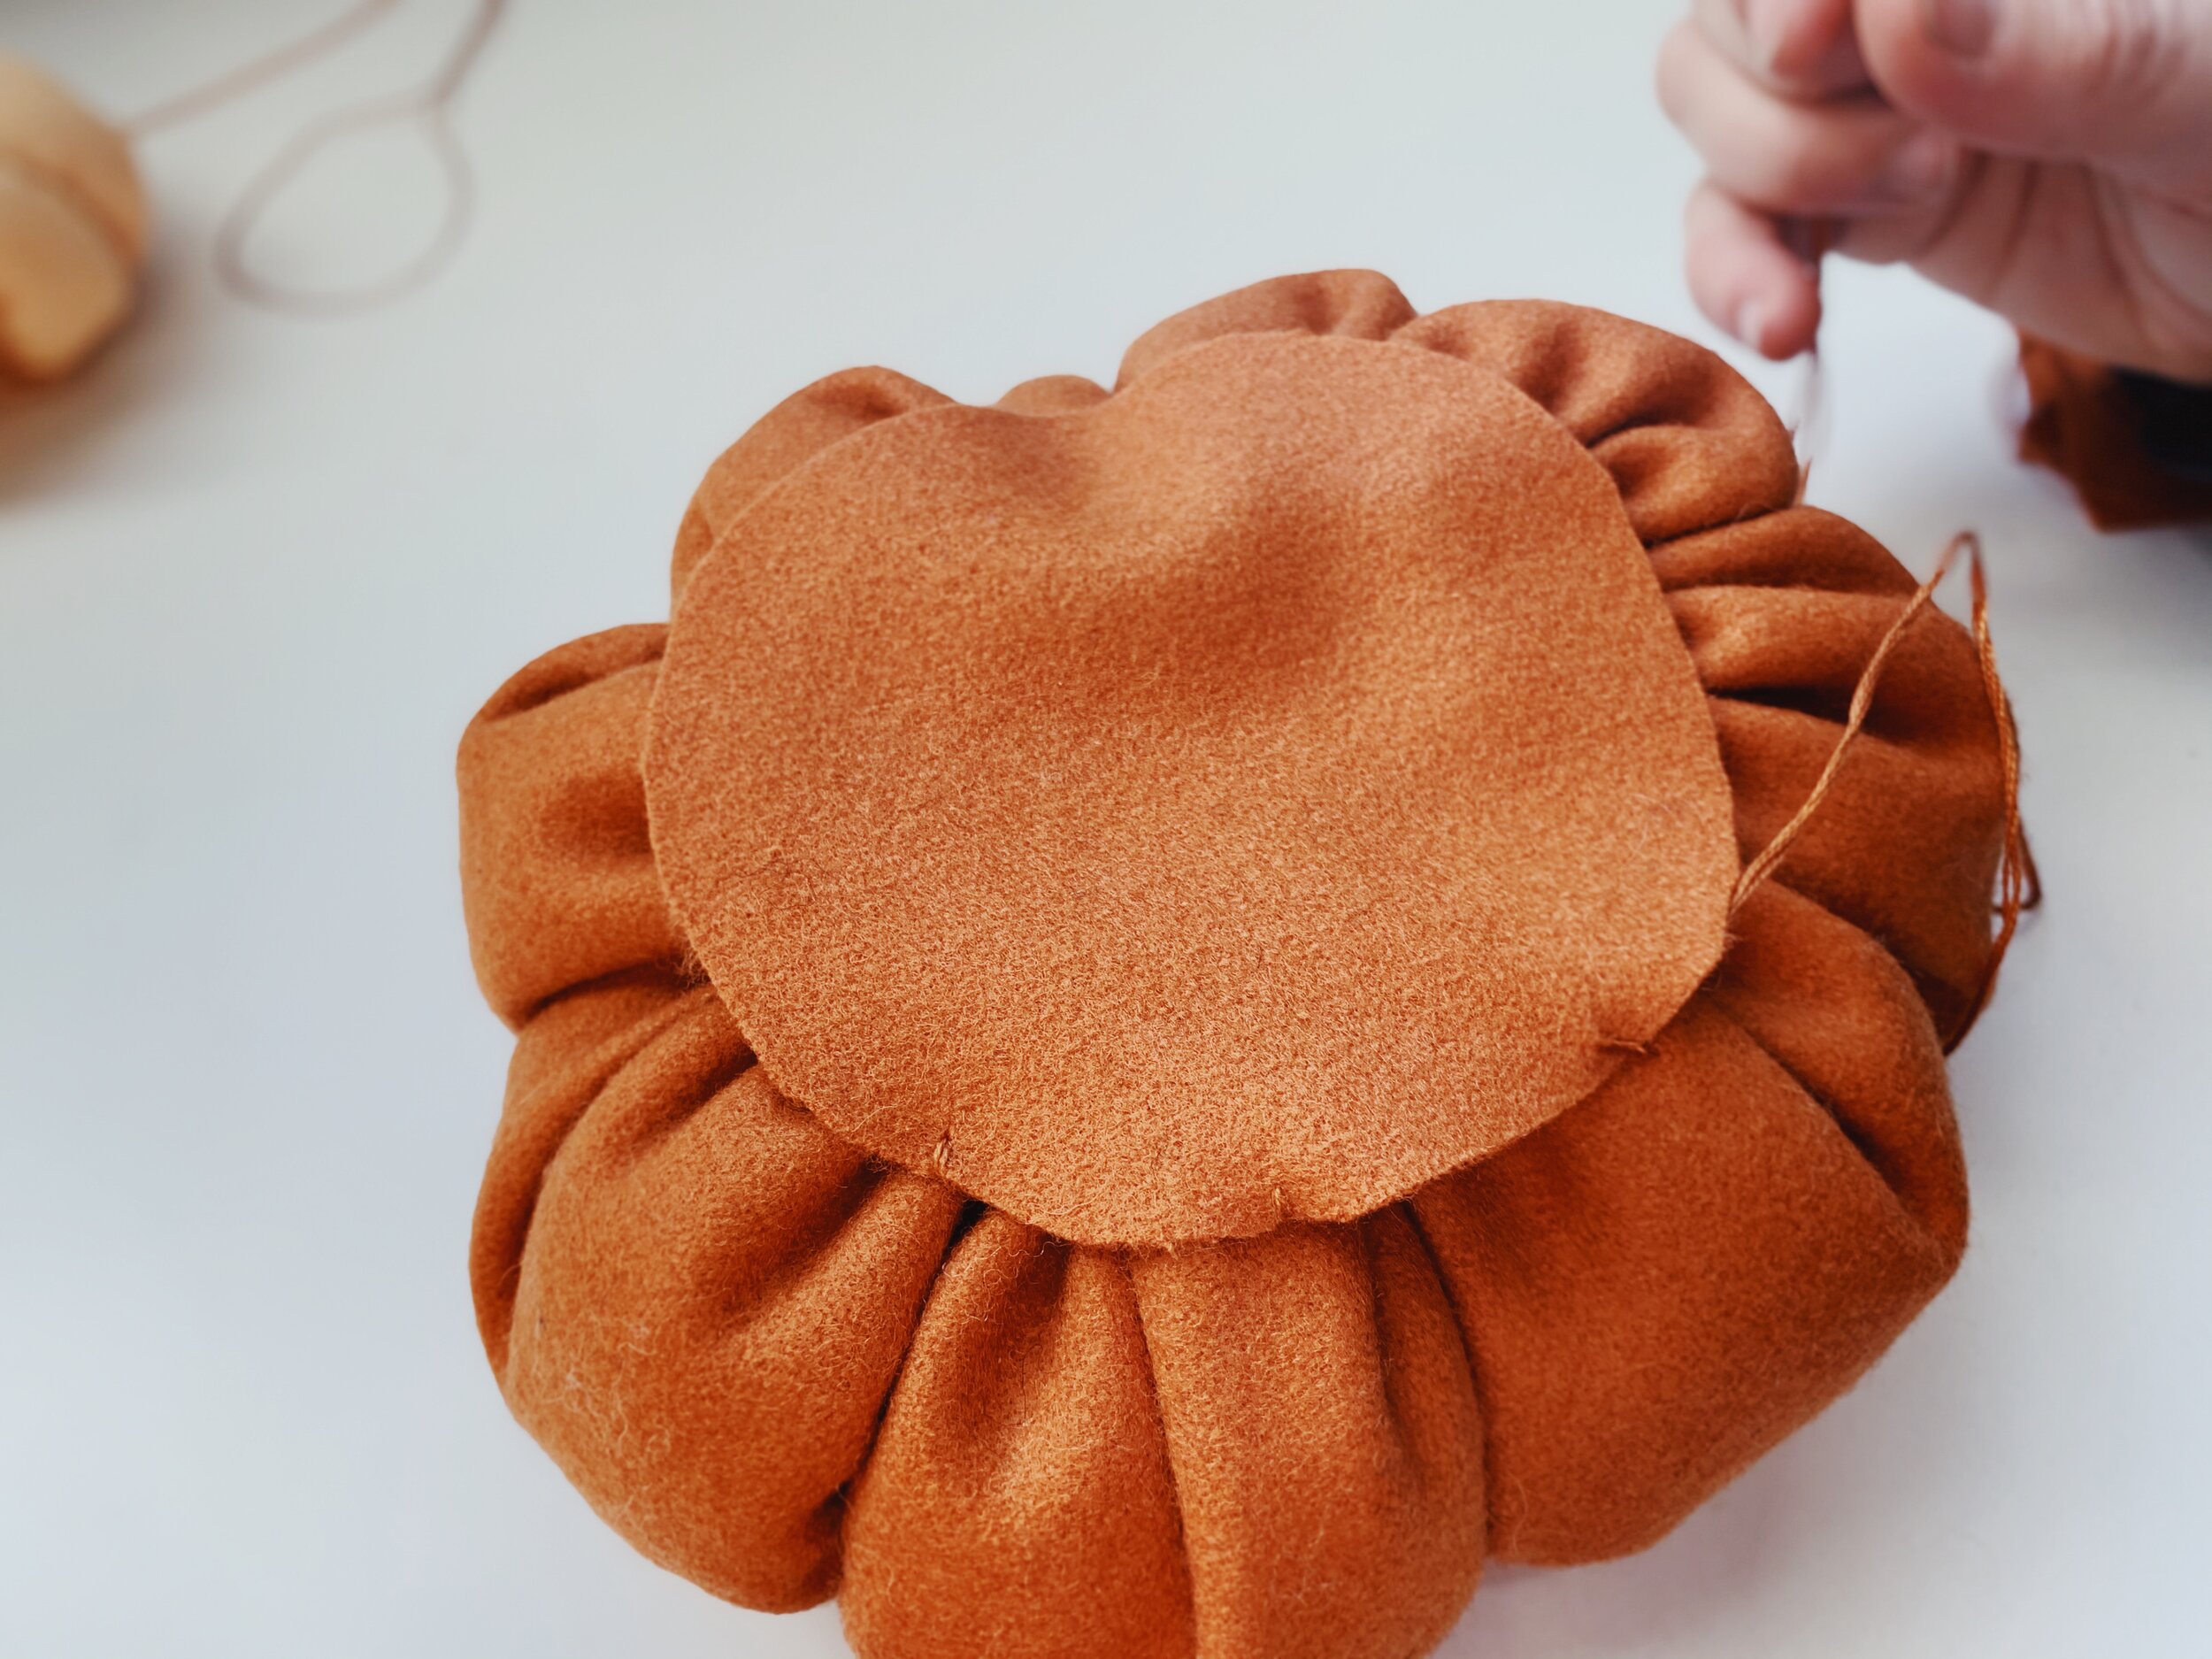
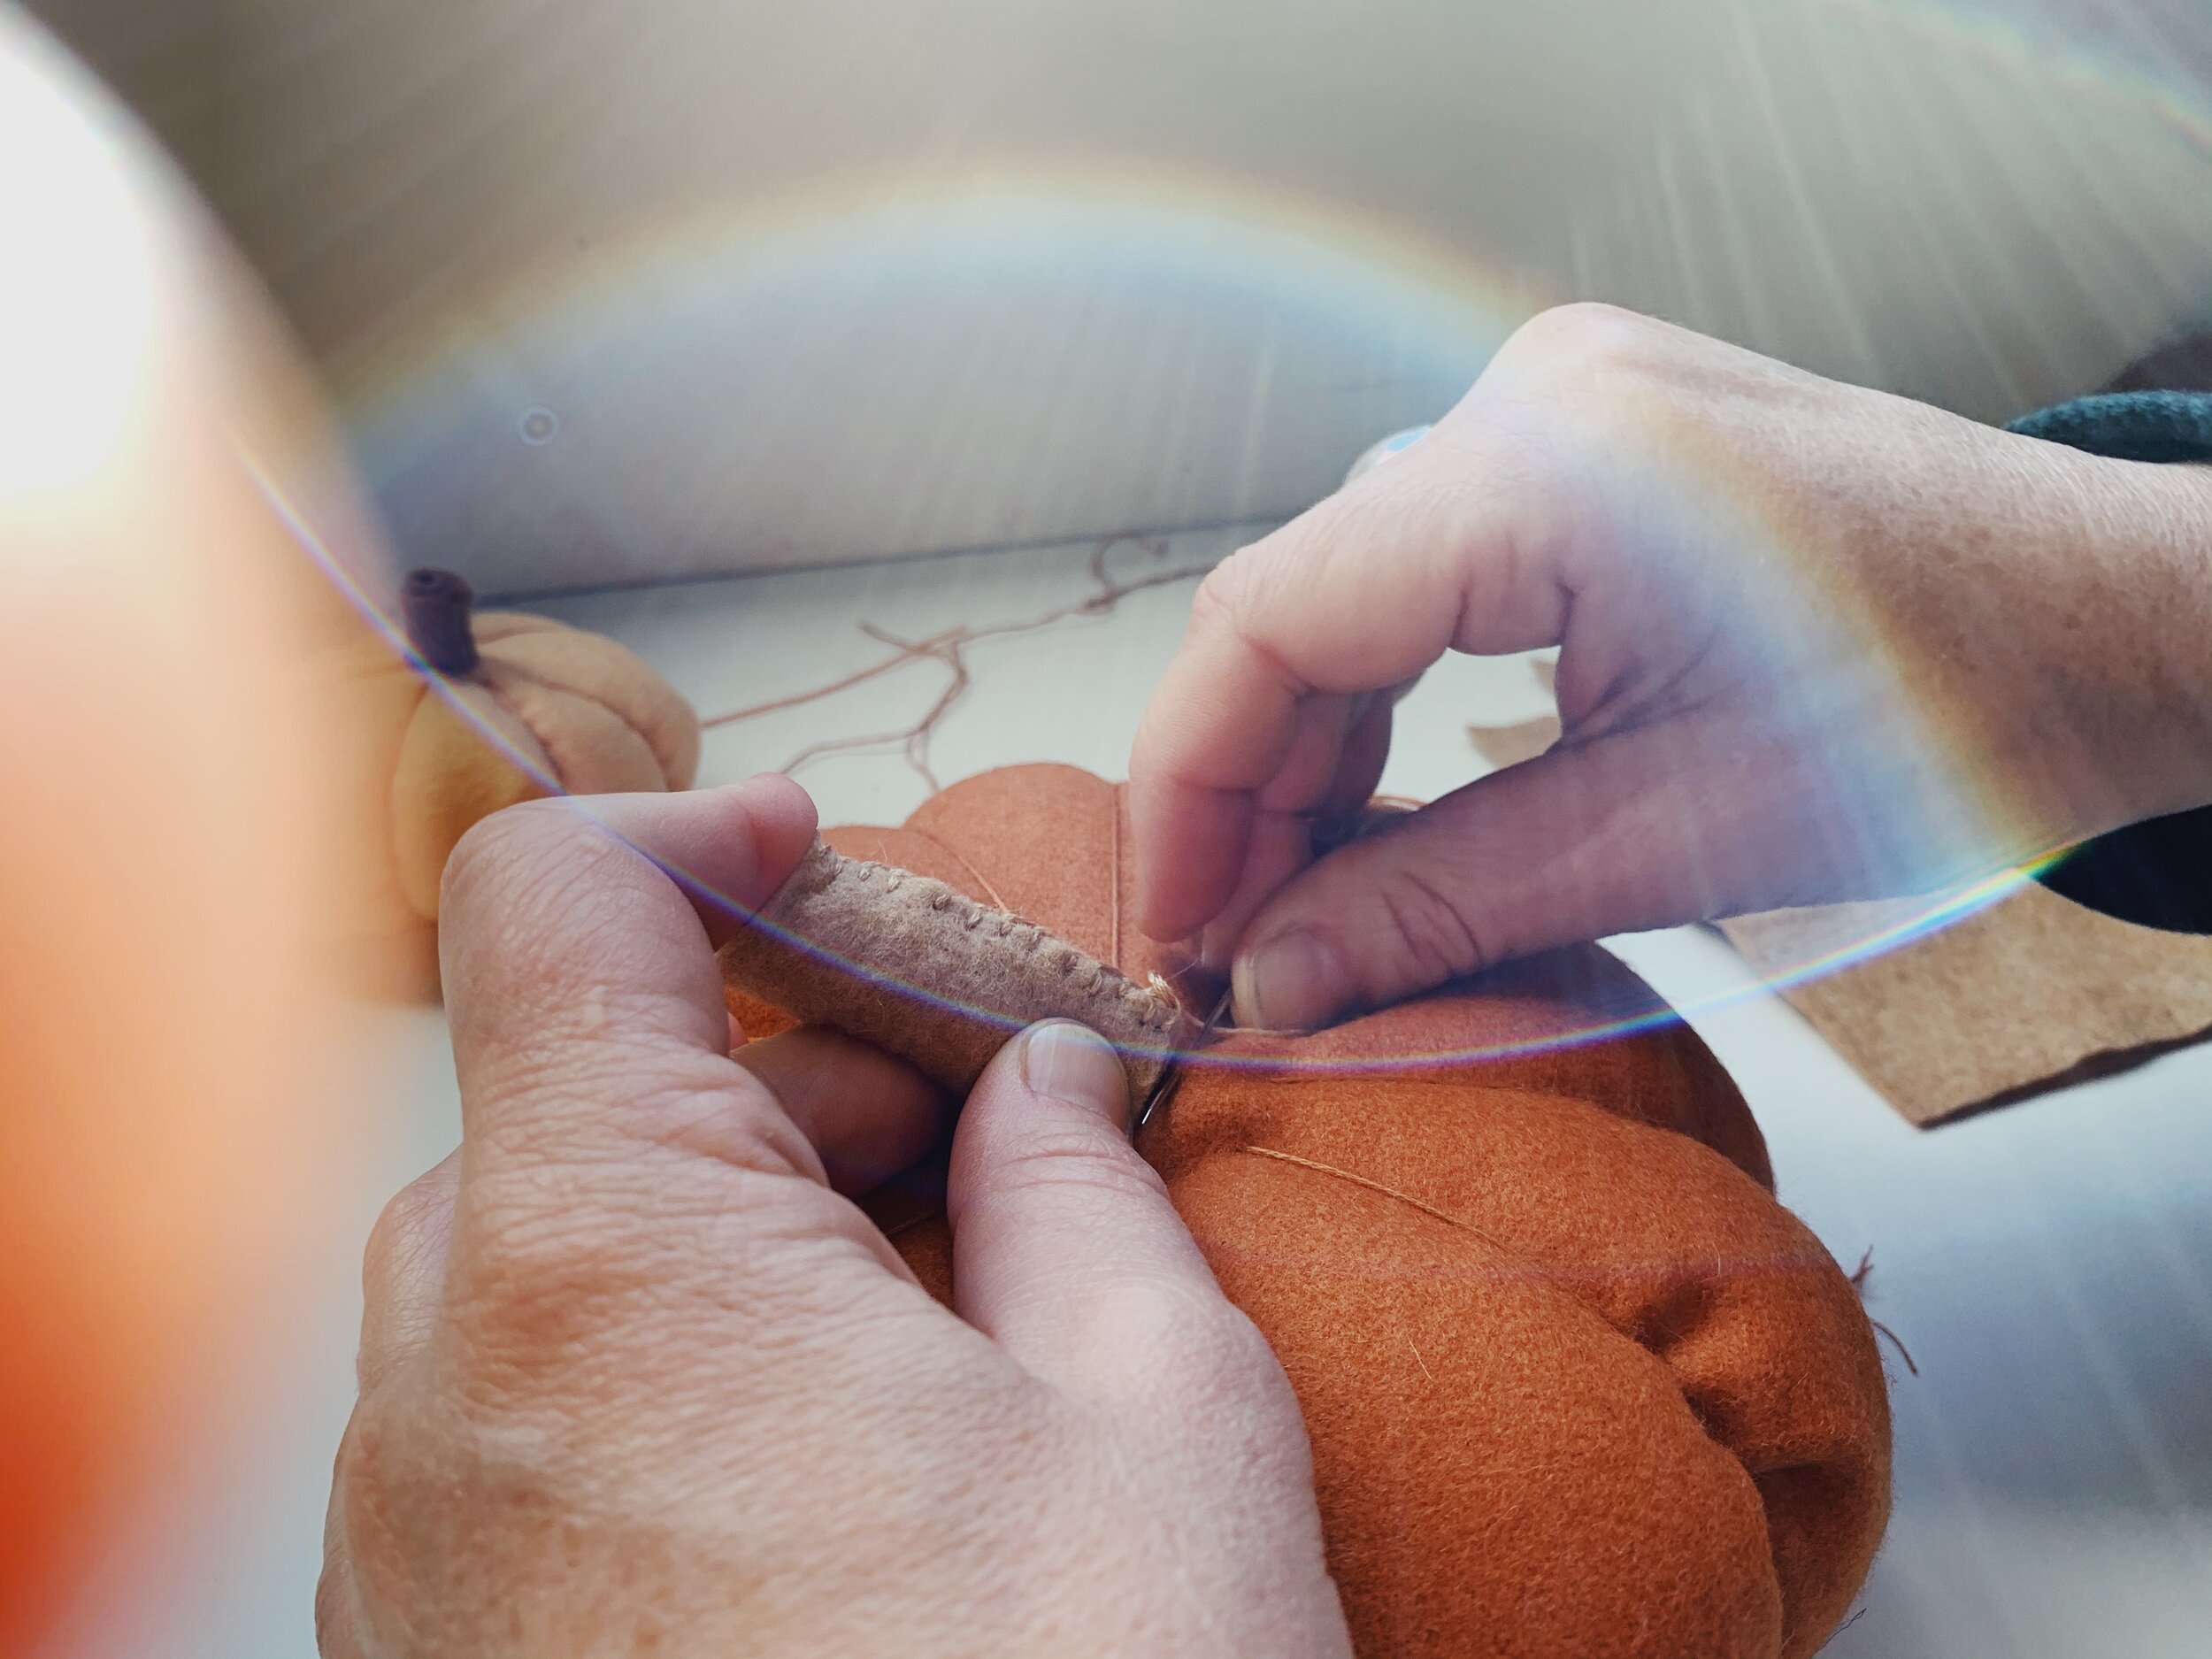
Cut a smaller square of felt to cover the bottom of your pumpkin. Fold into a triangle, then a triangle again, and cut around the edges to round. Trim to even out your circle so that it covers the bottom opening but doesn’t extend out past the sides of the pumpkin. Use a simple stitch every inch or so to connect the pumpkin to the base cover (as shown).
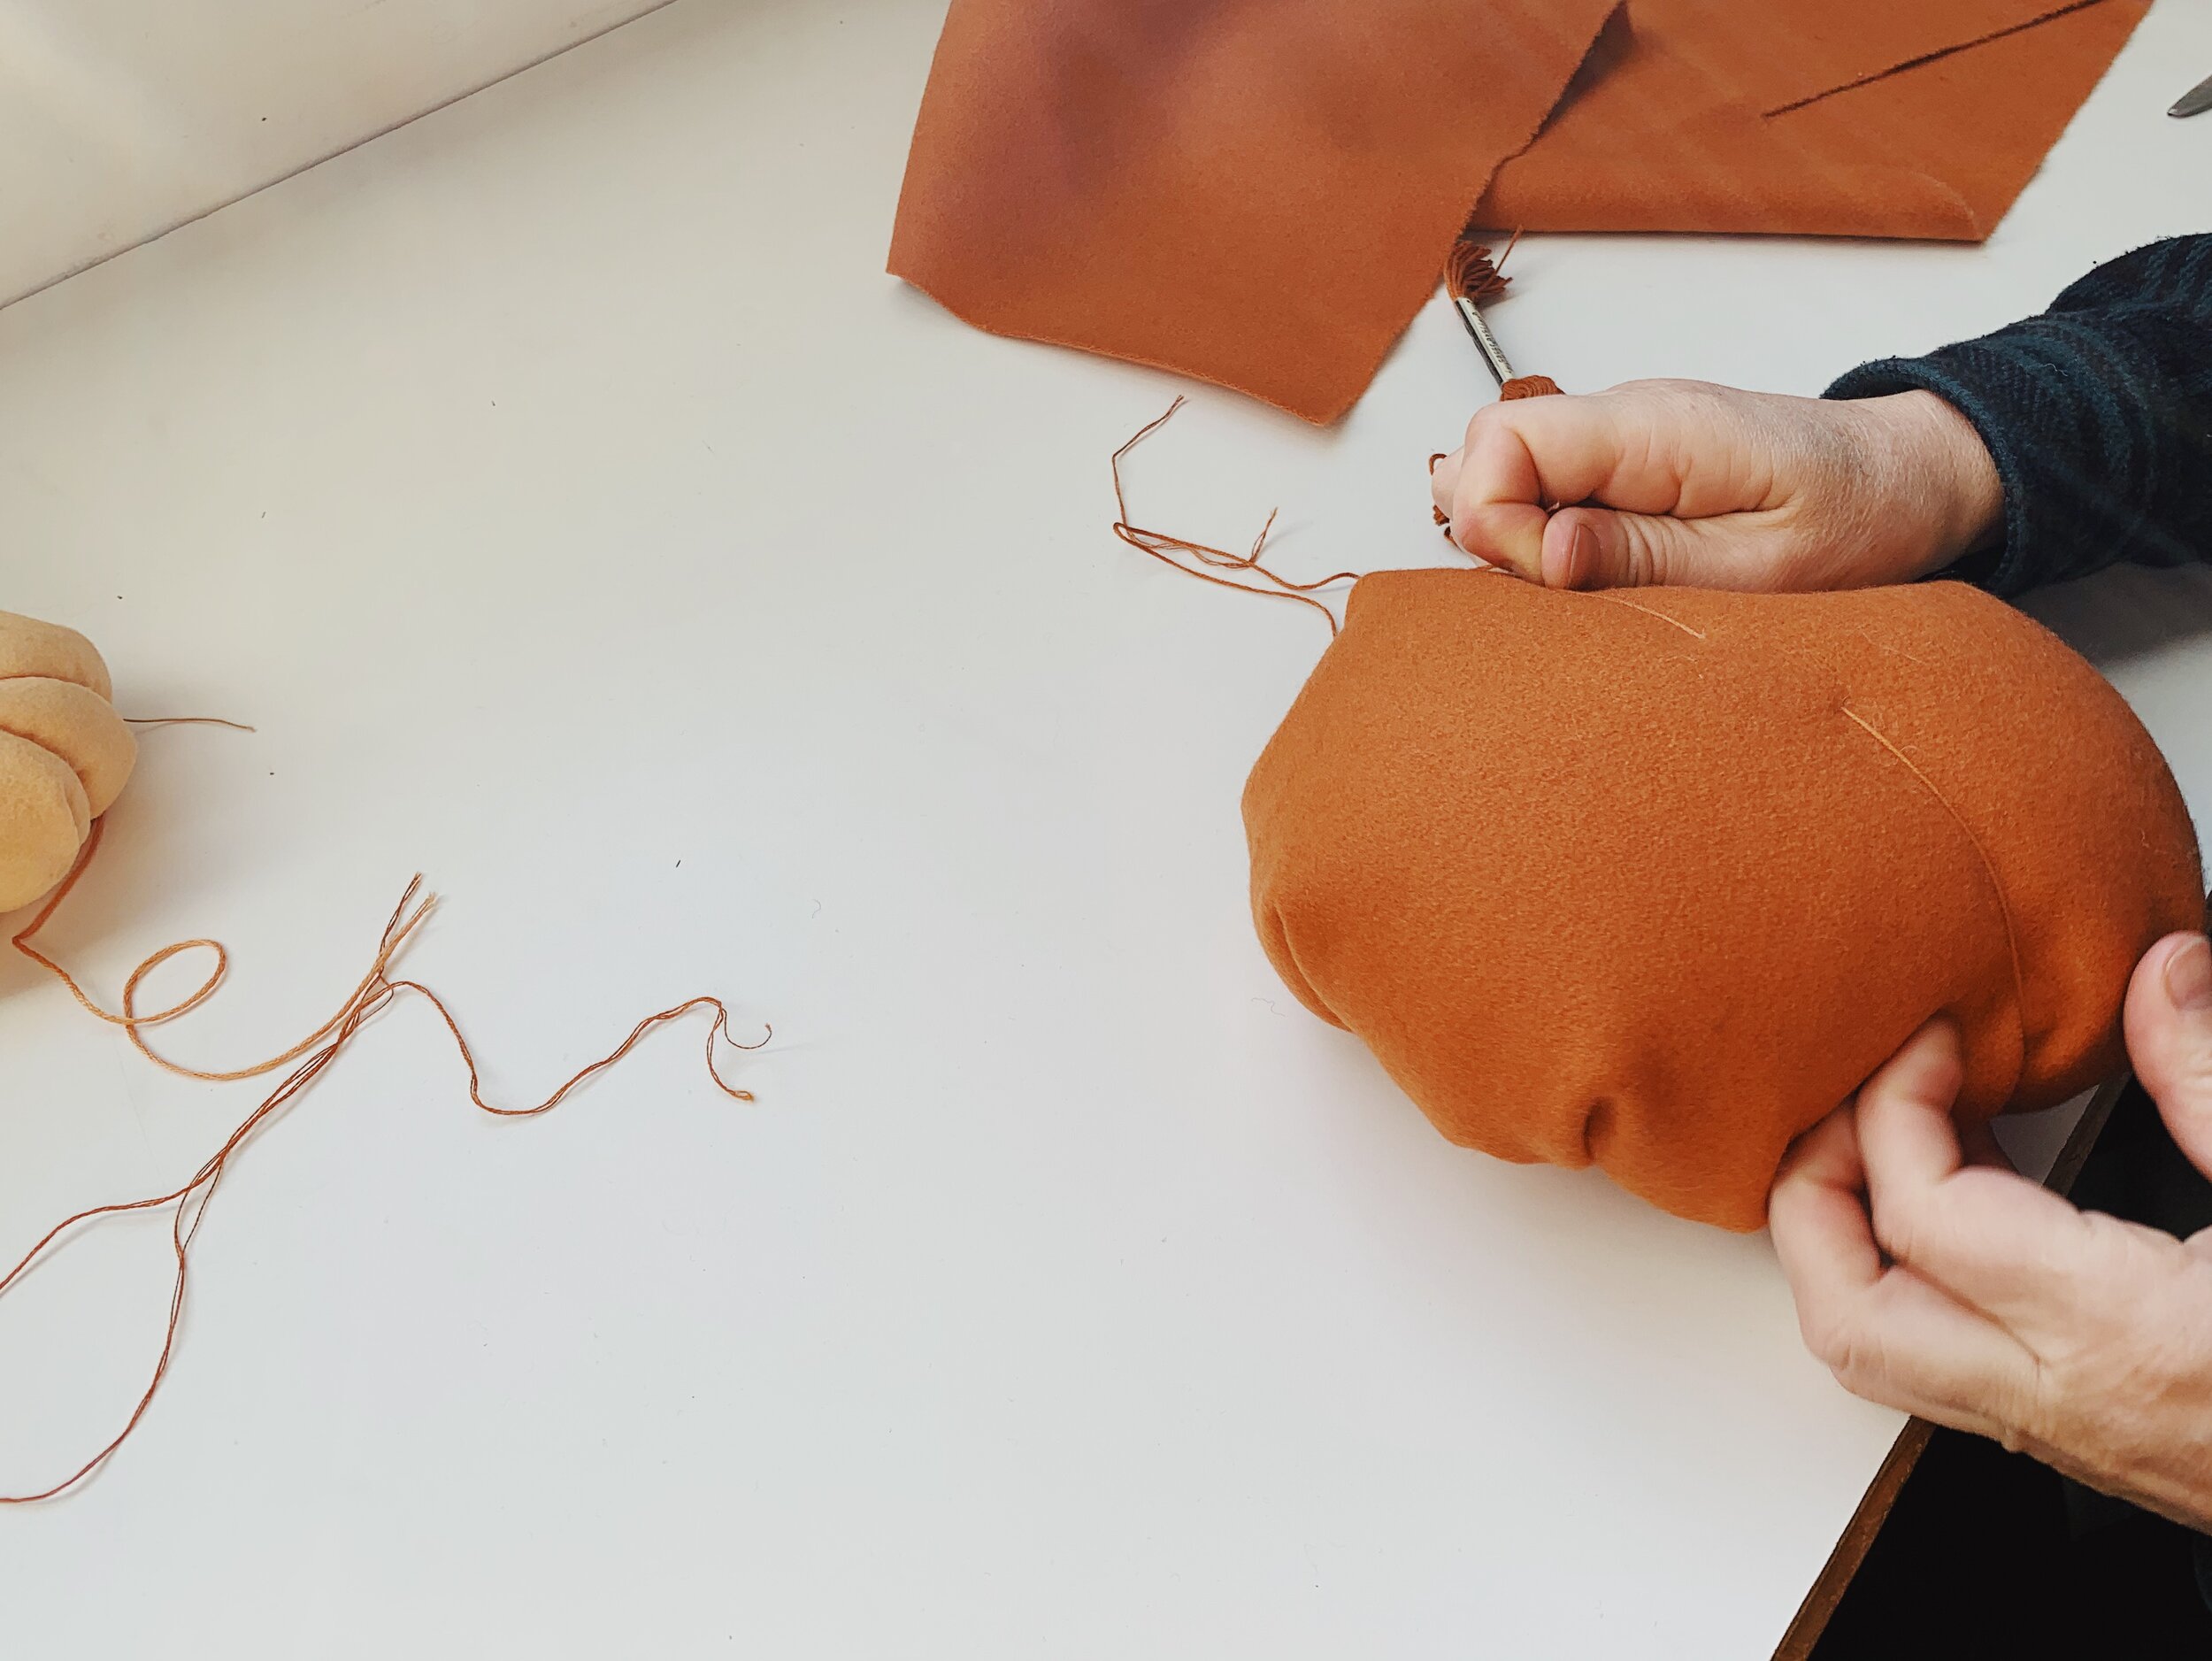
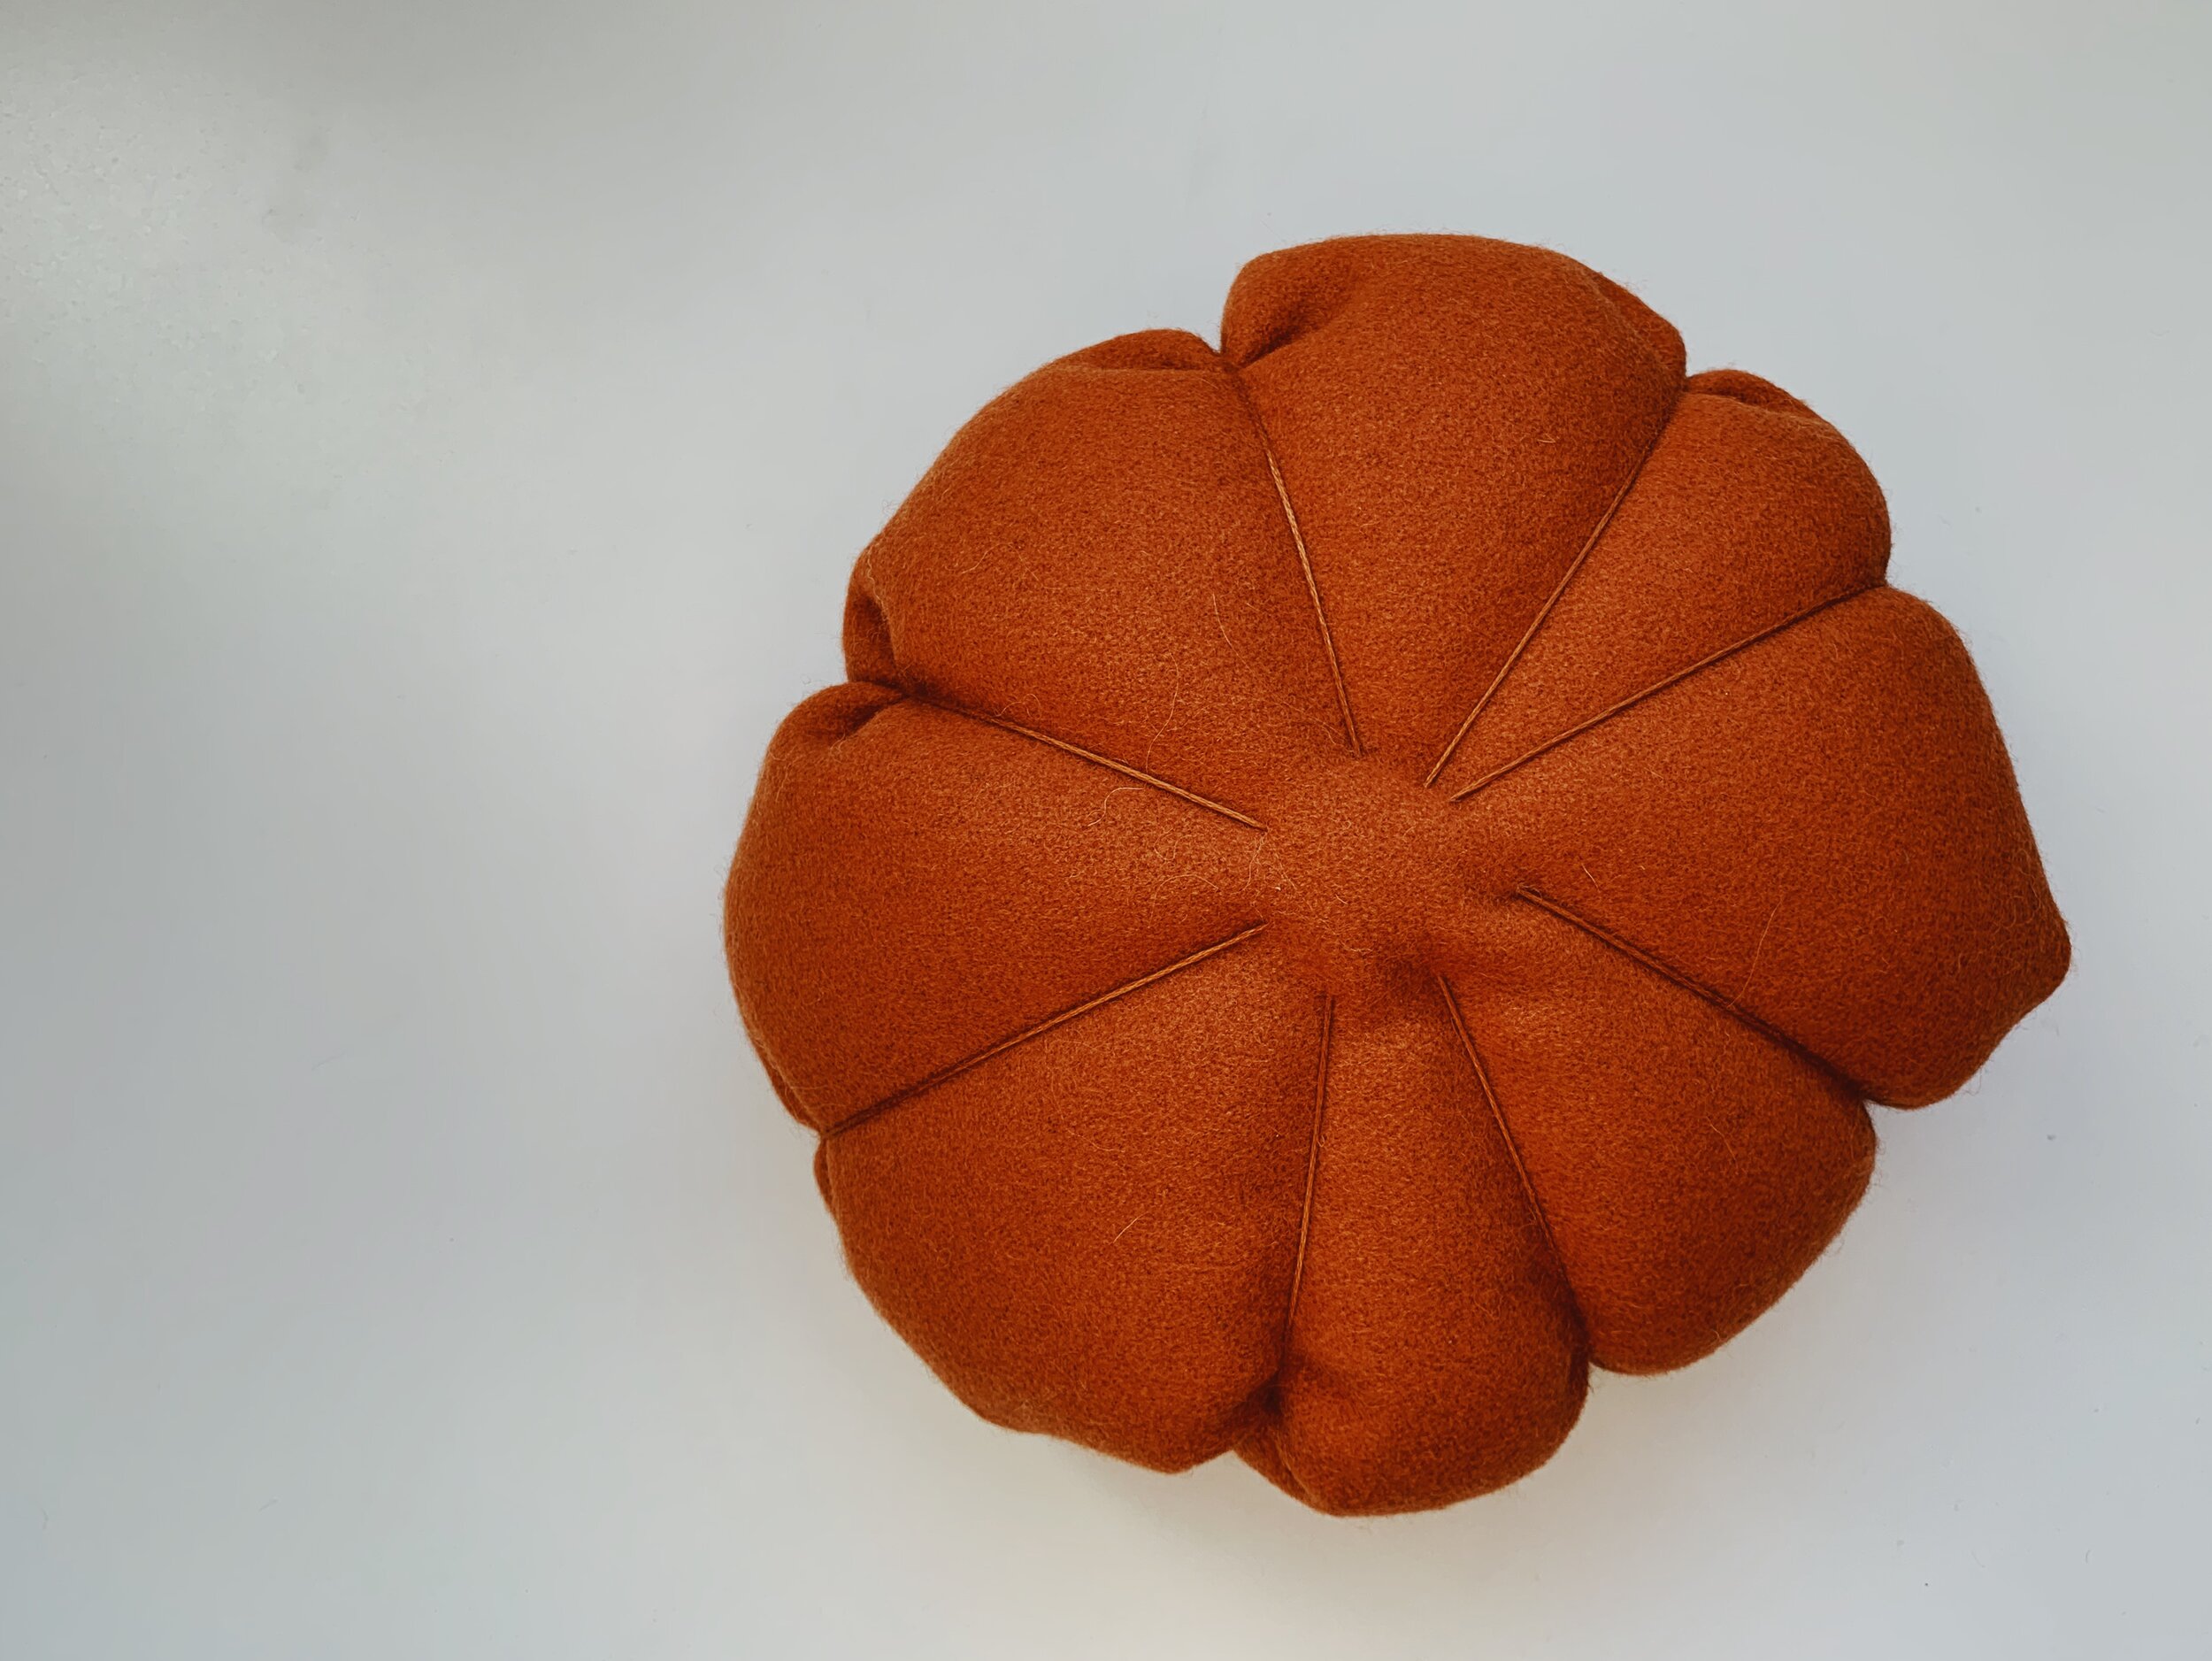
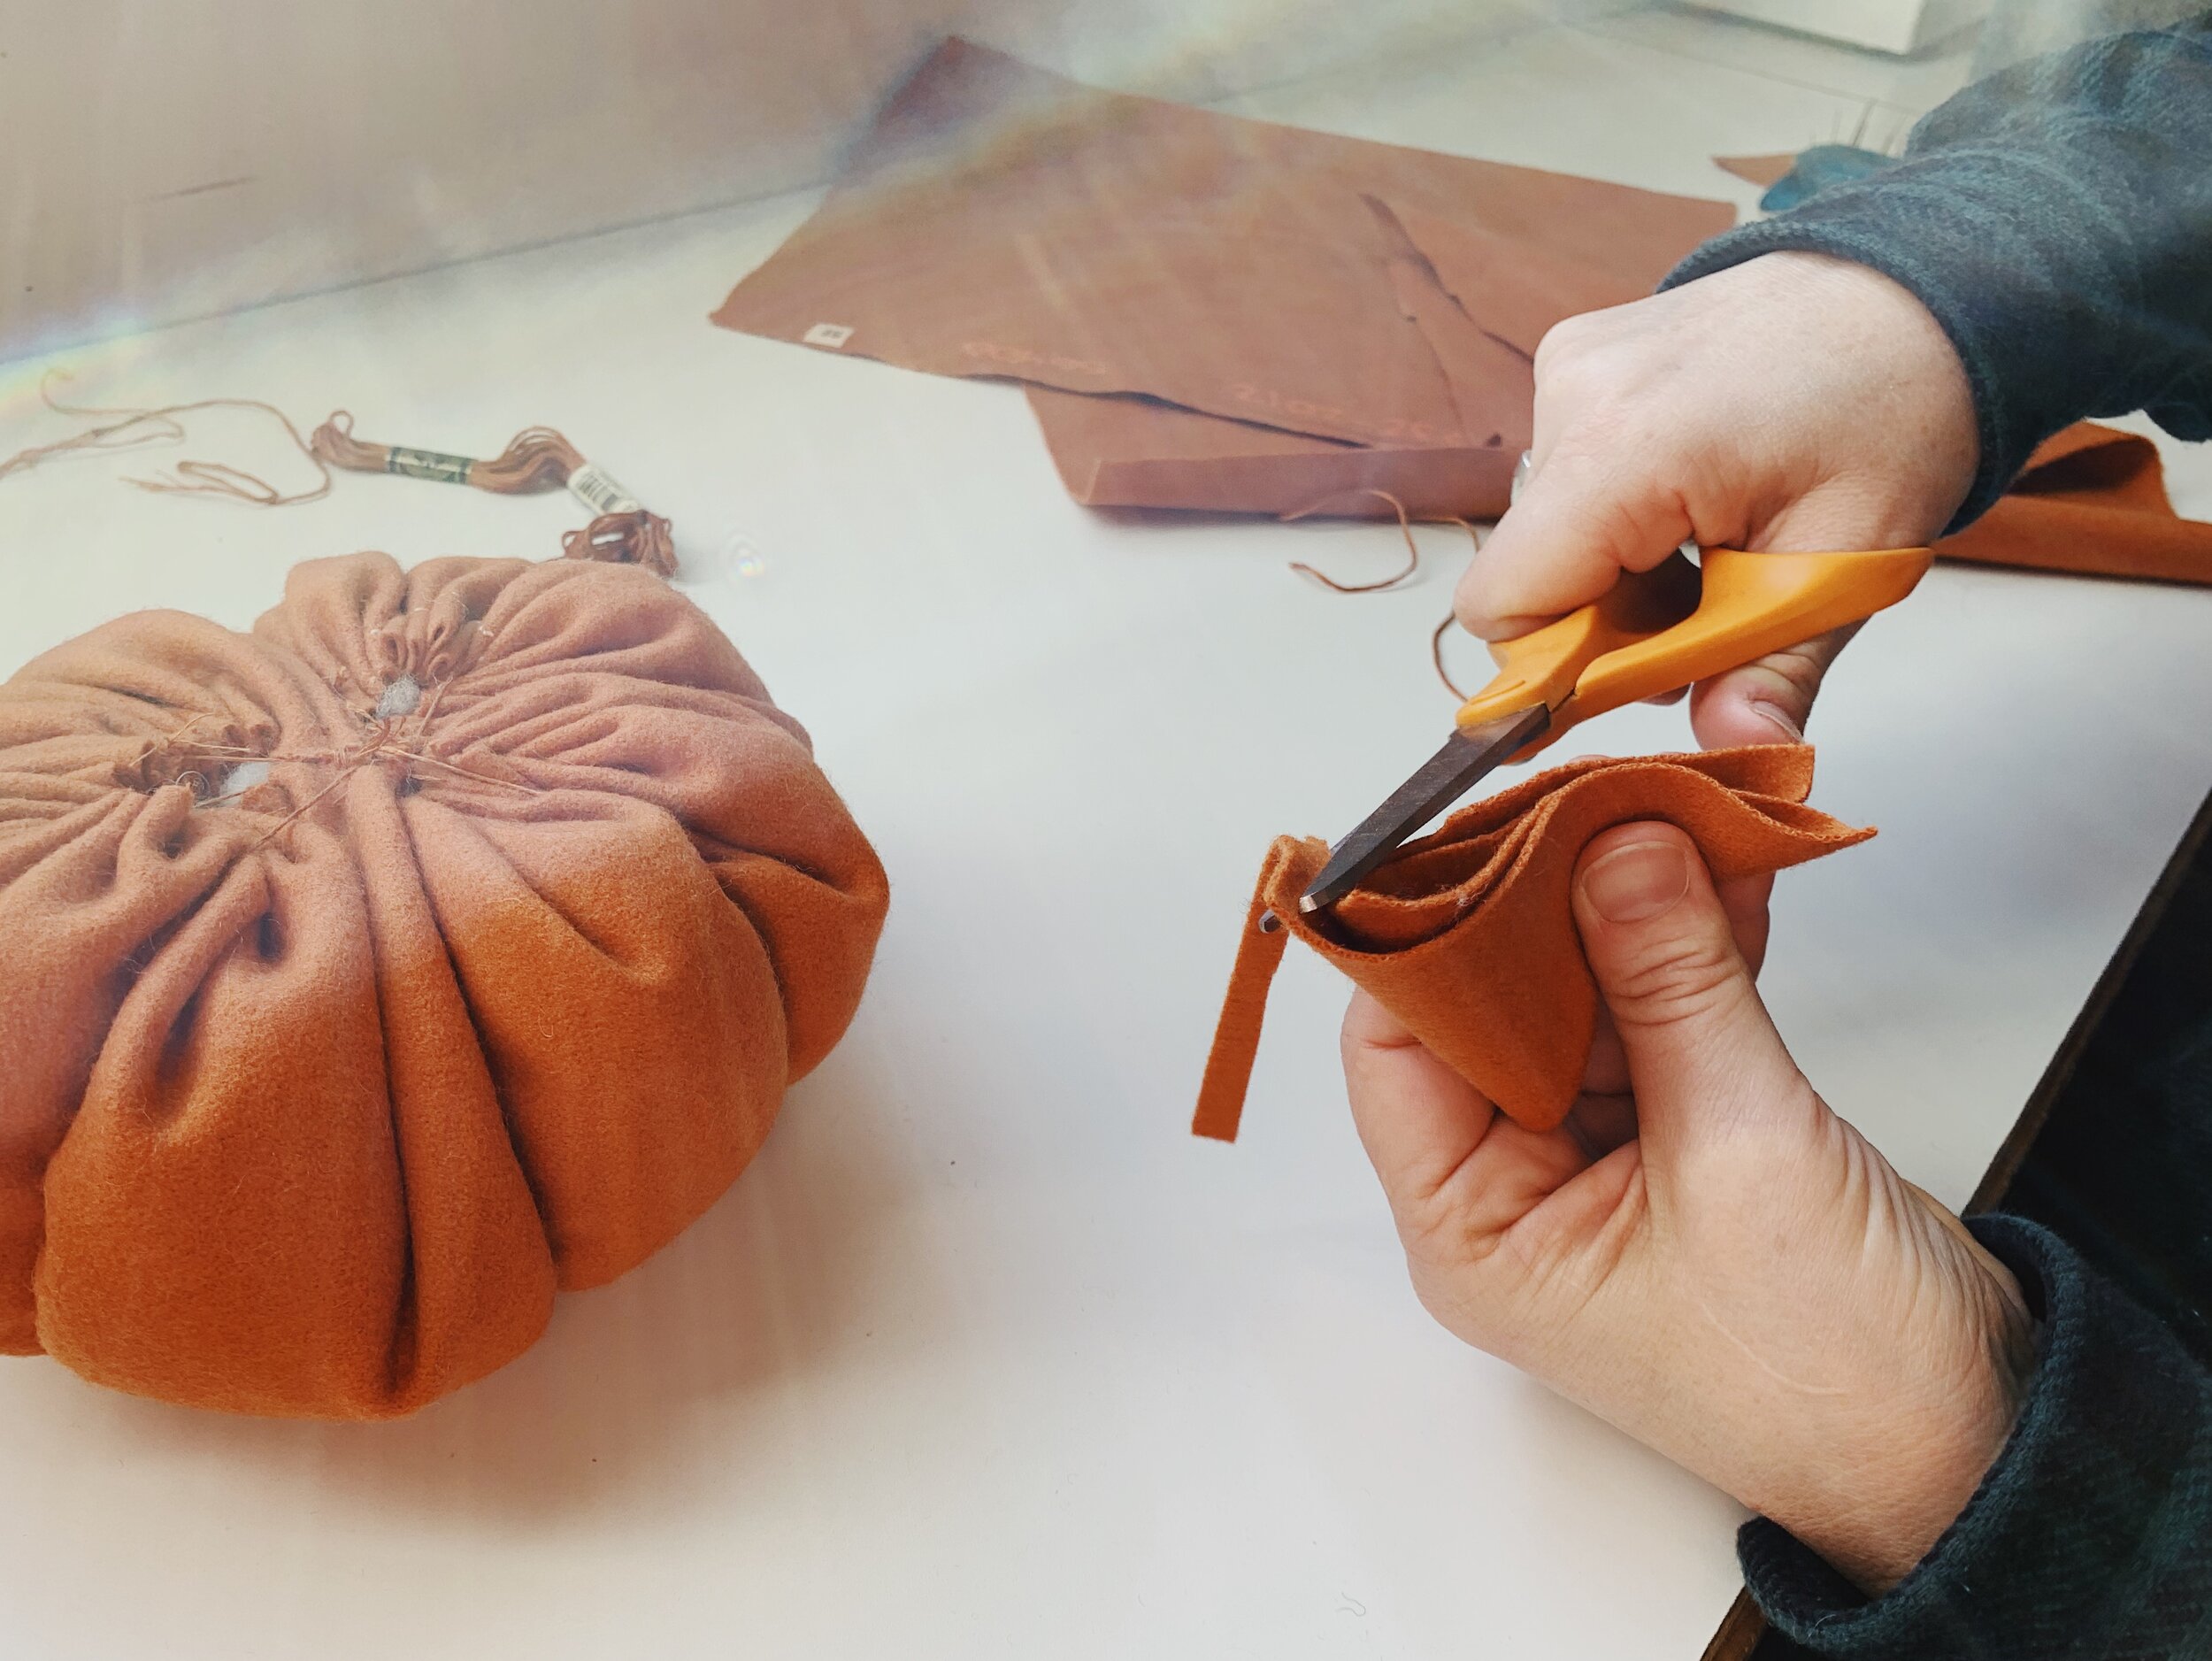
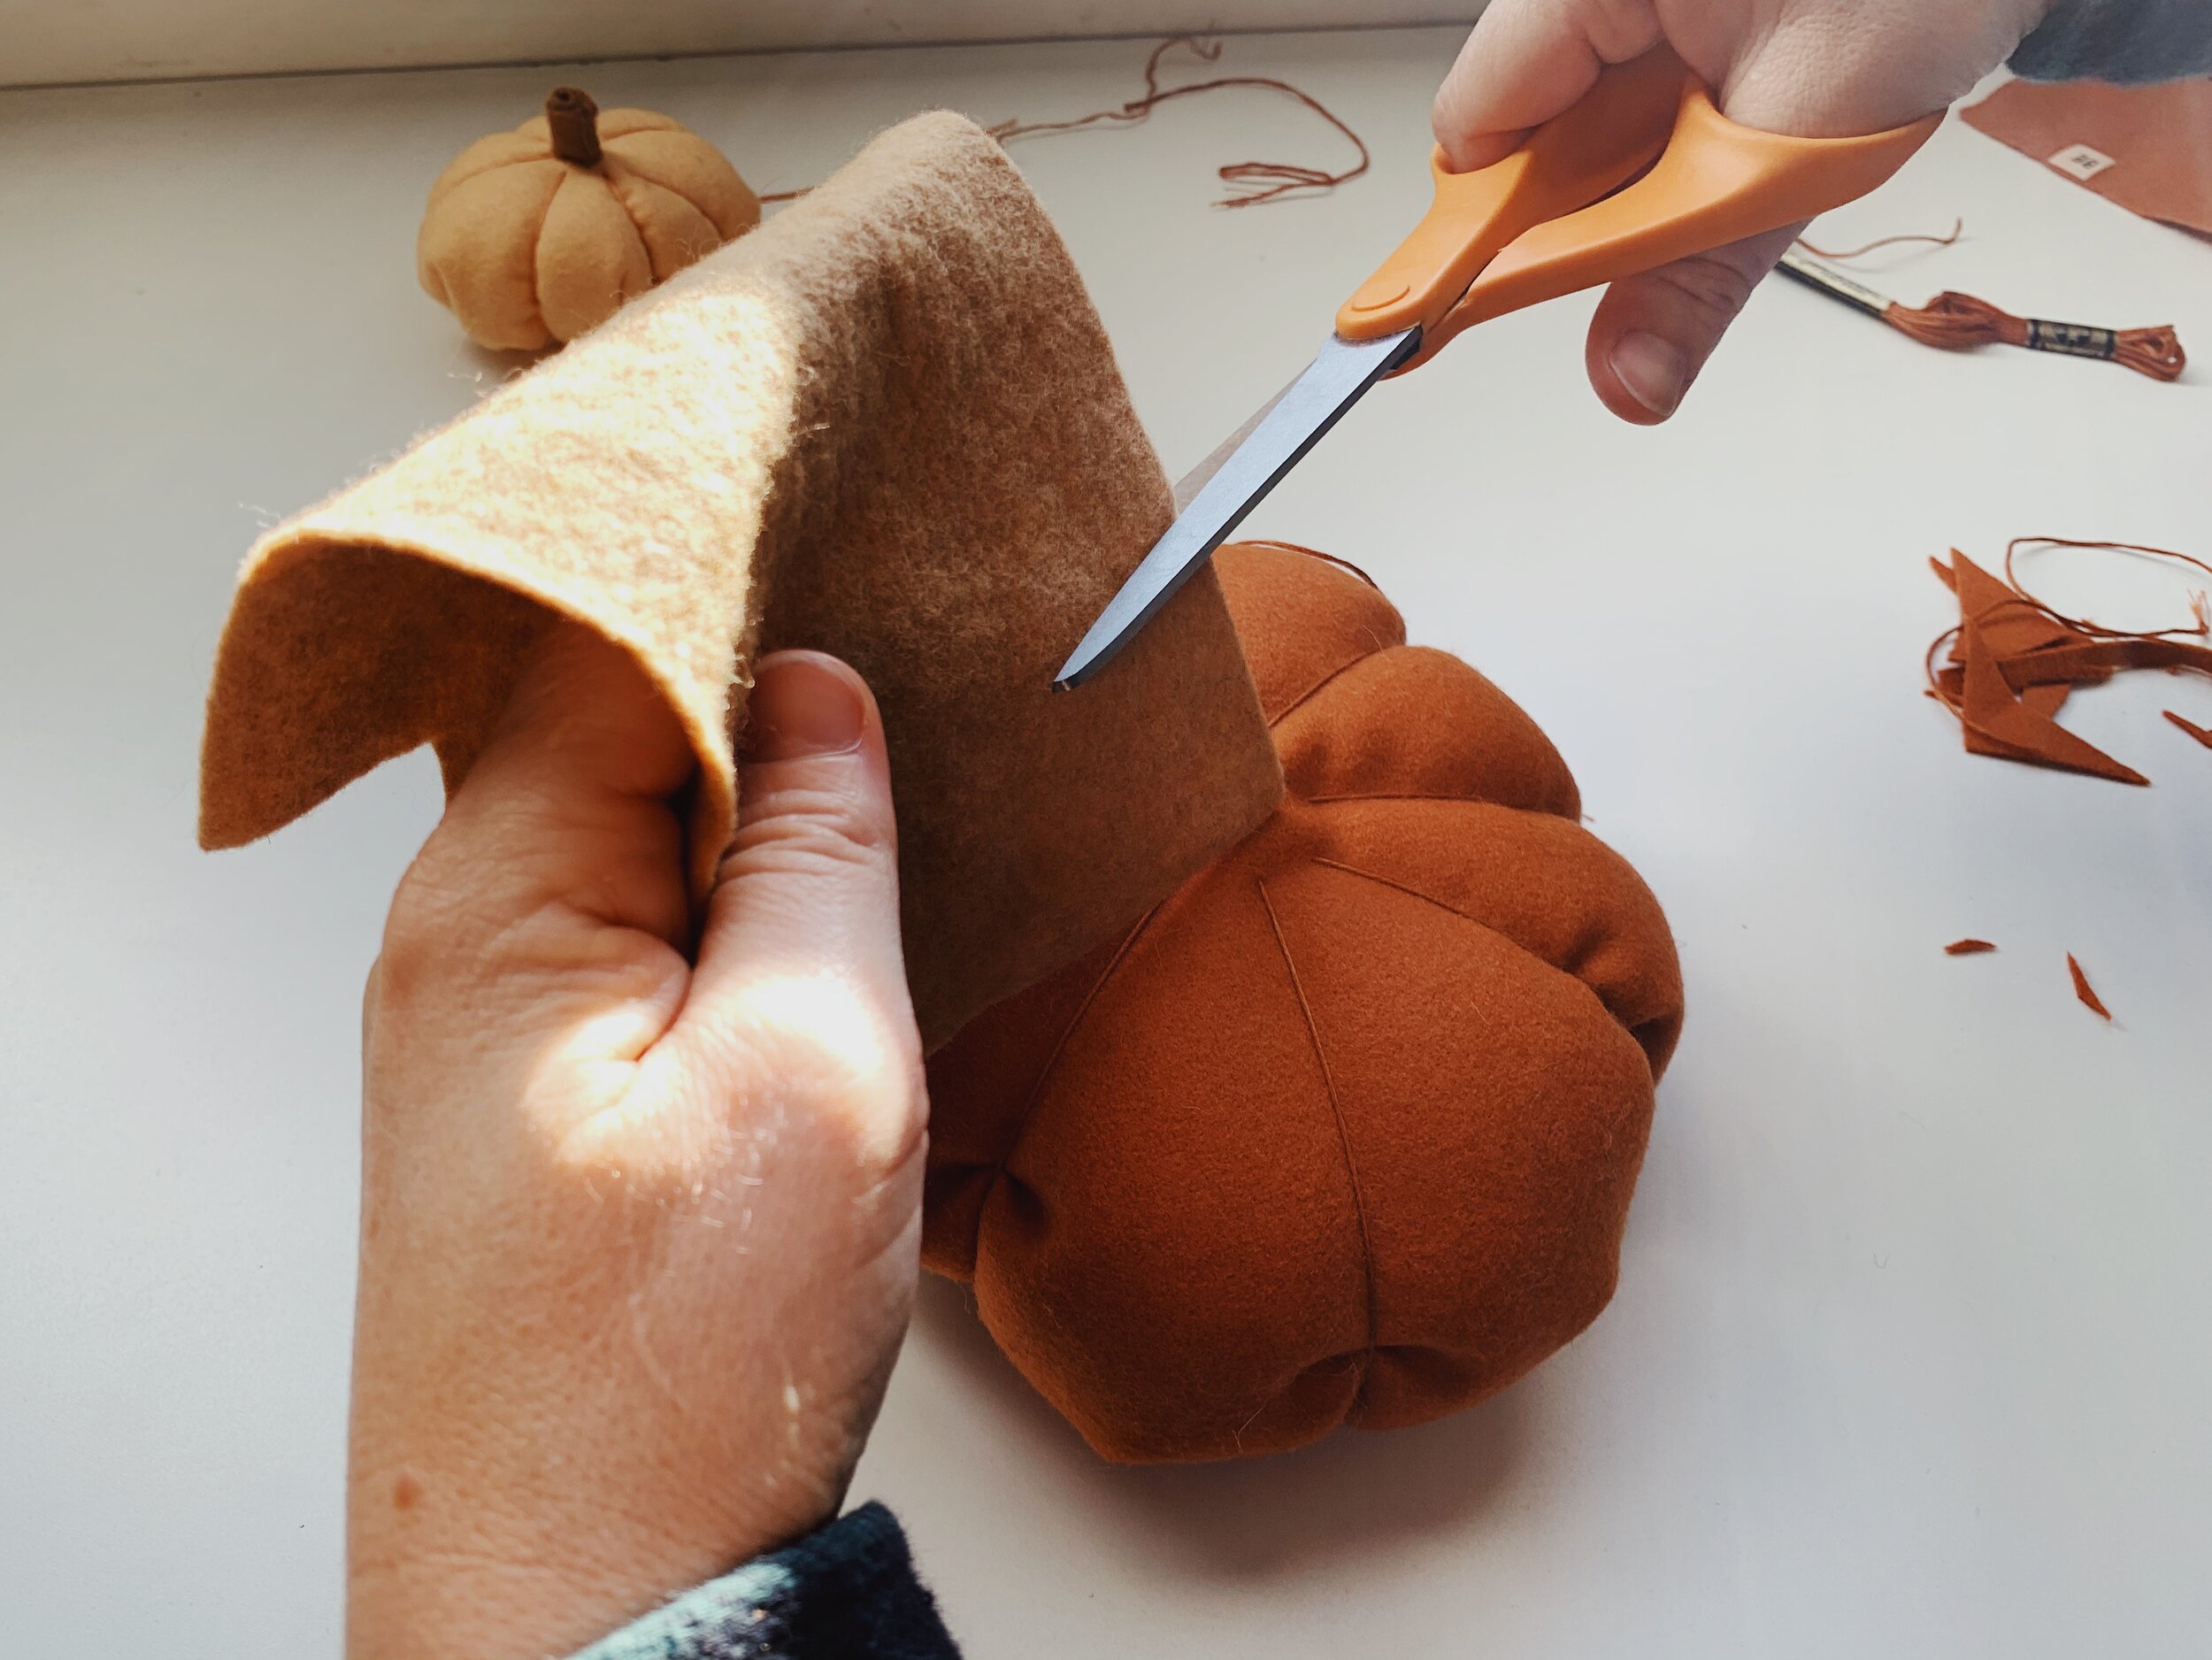
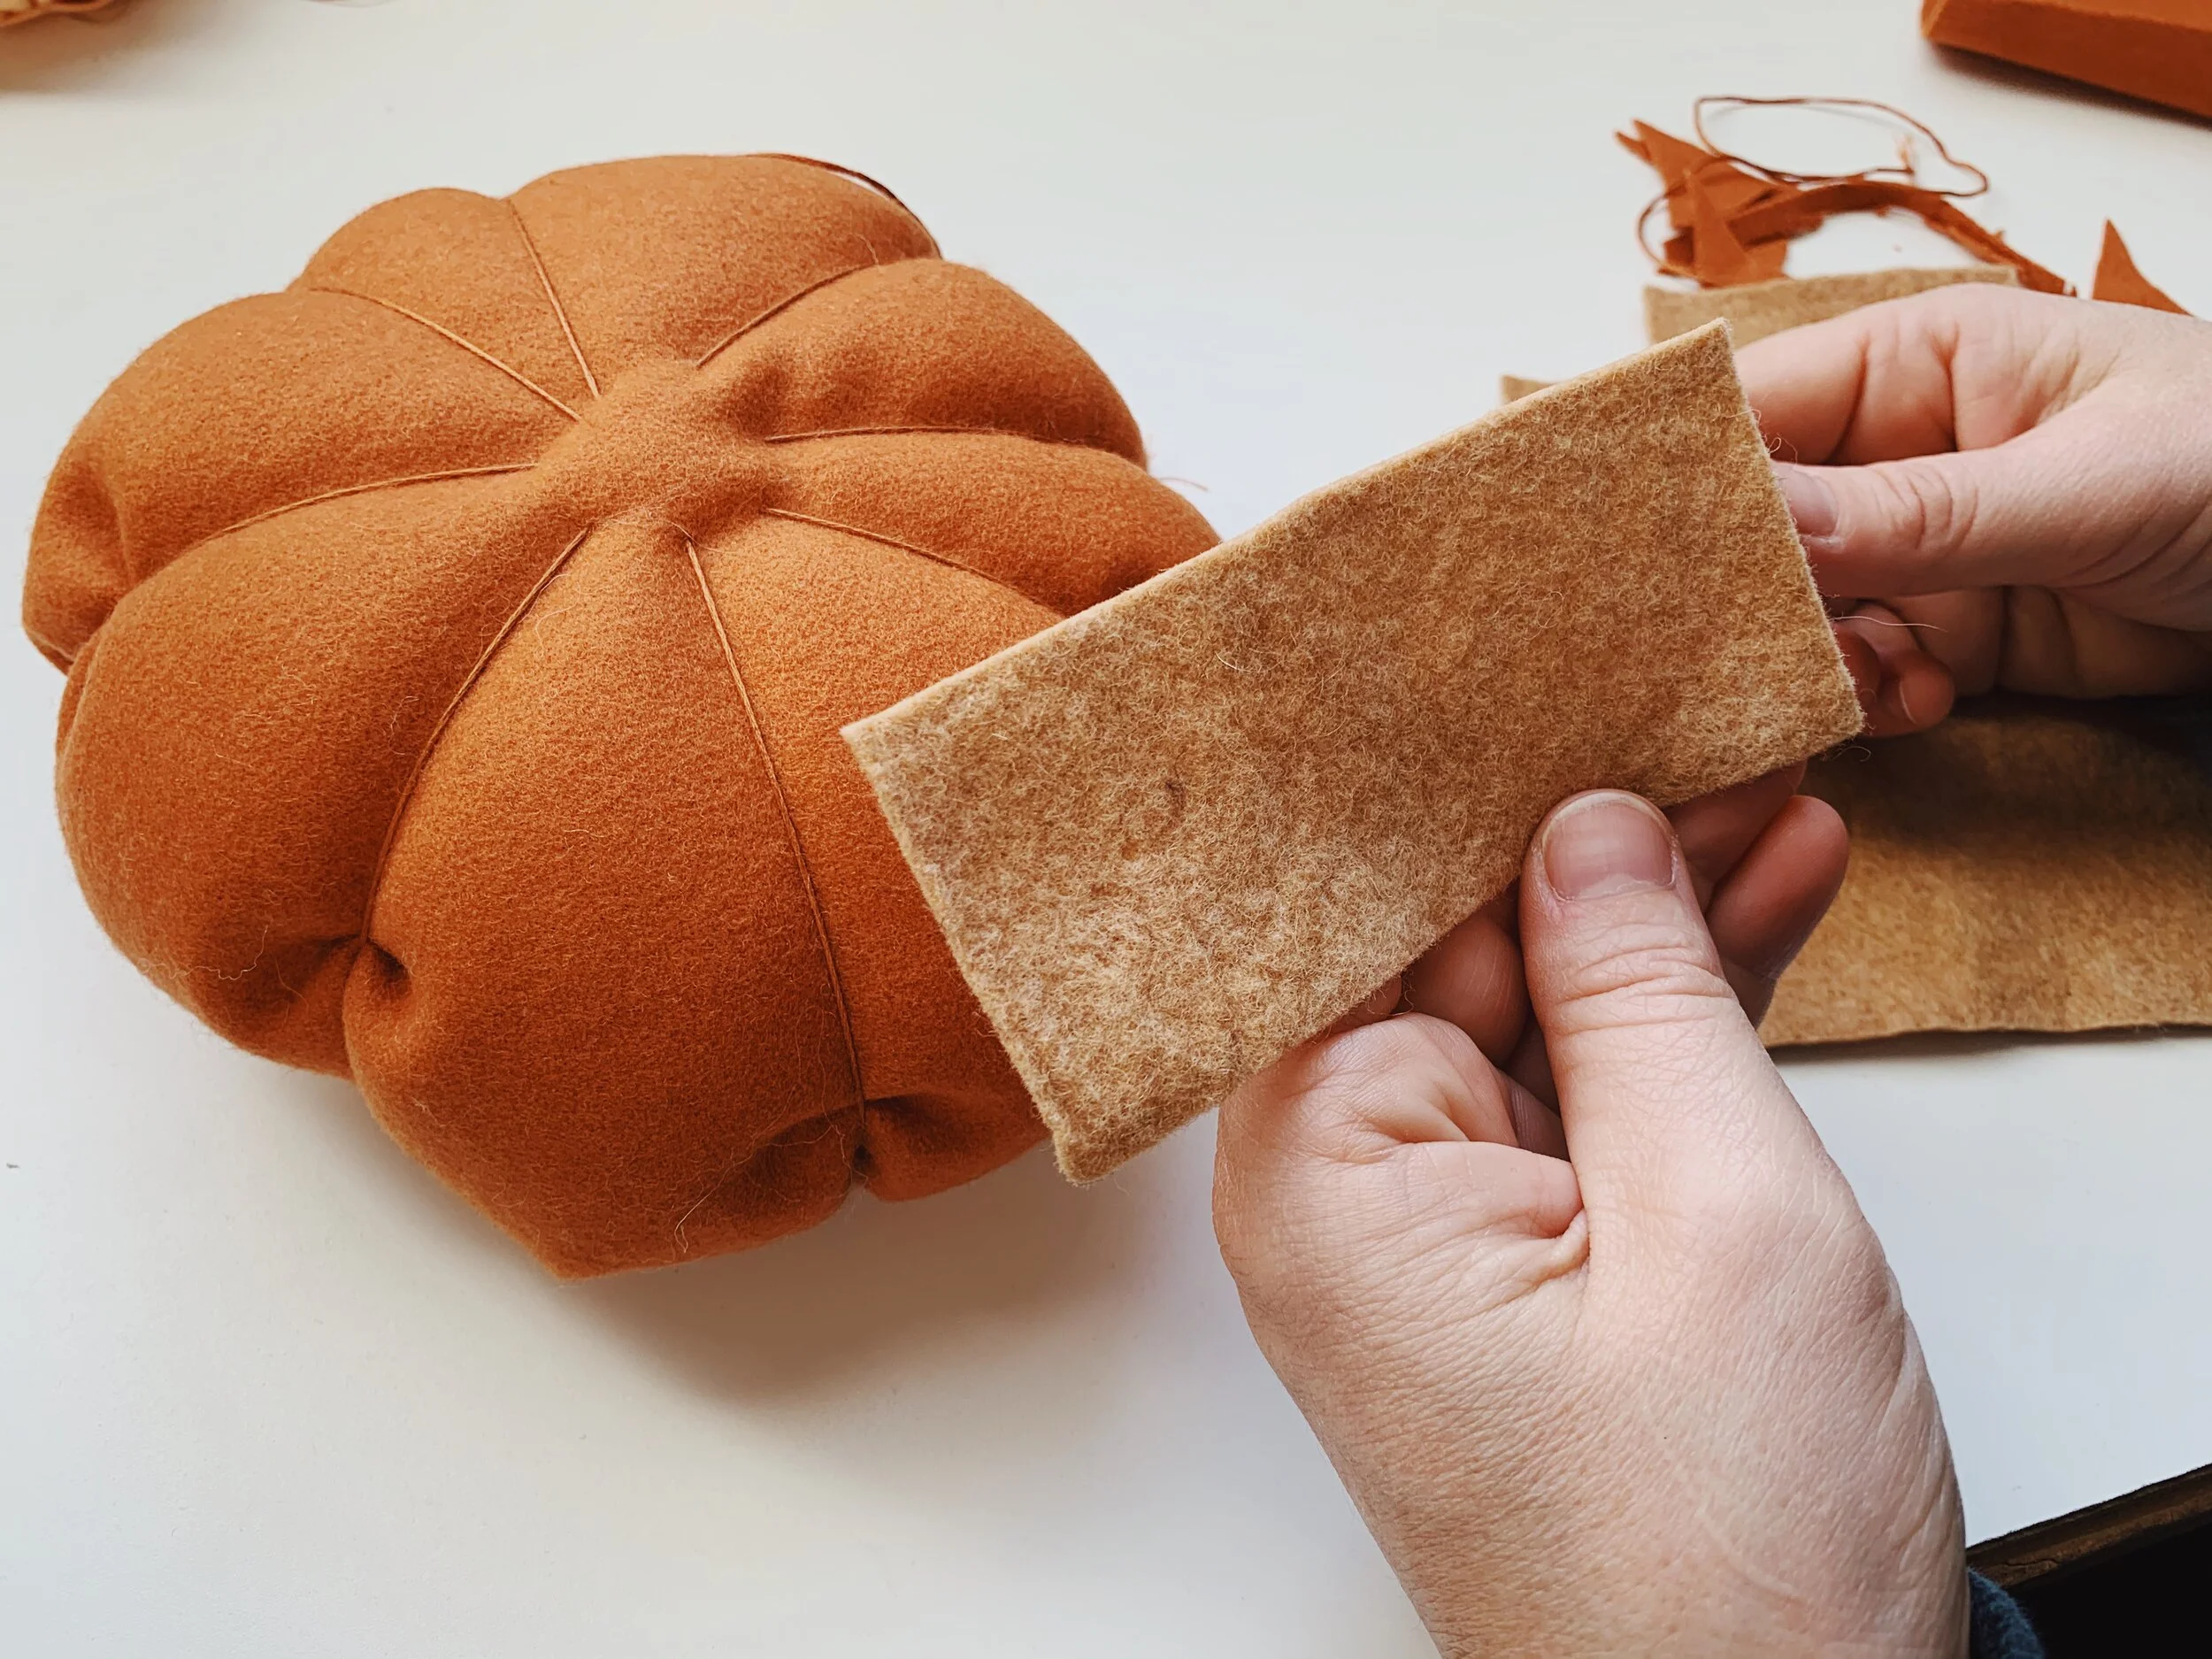
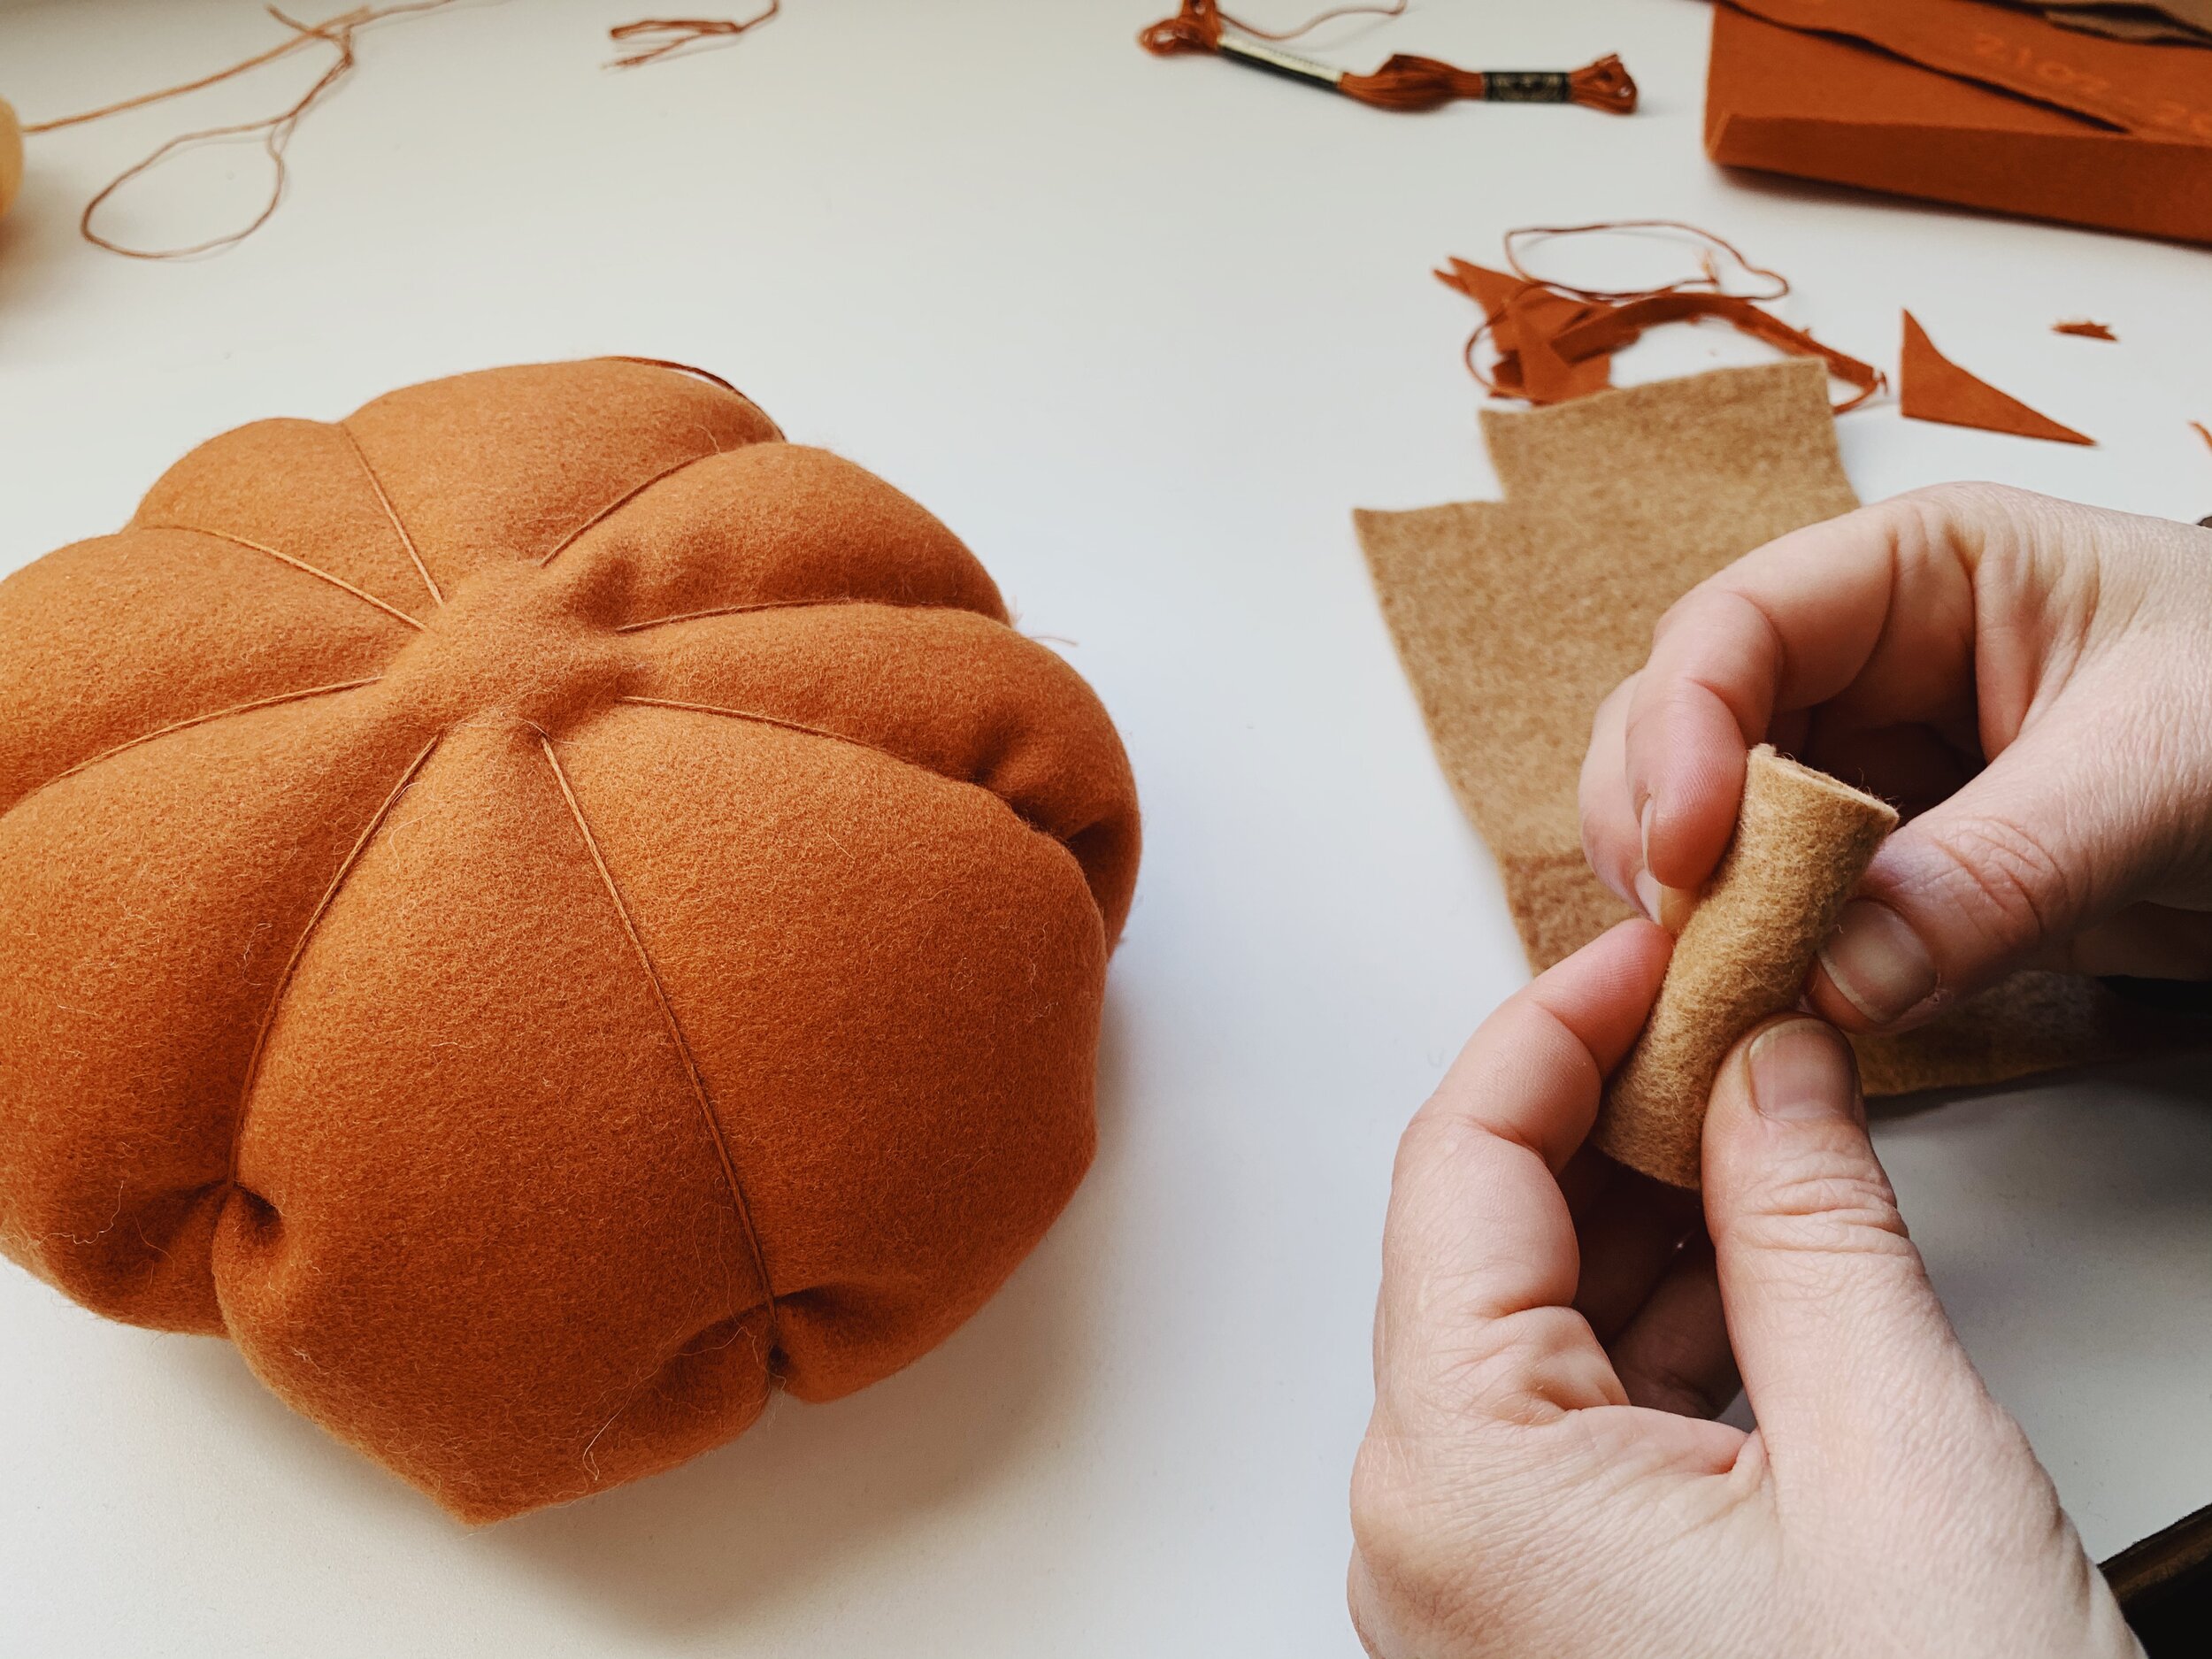
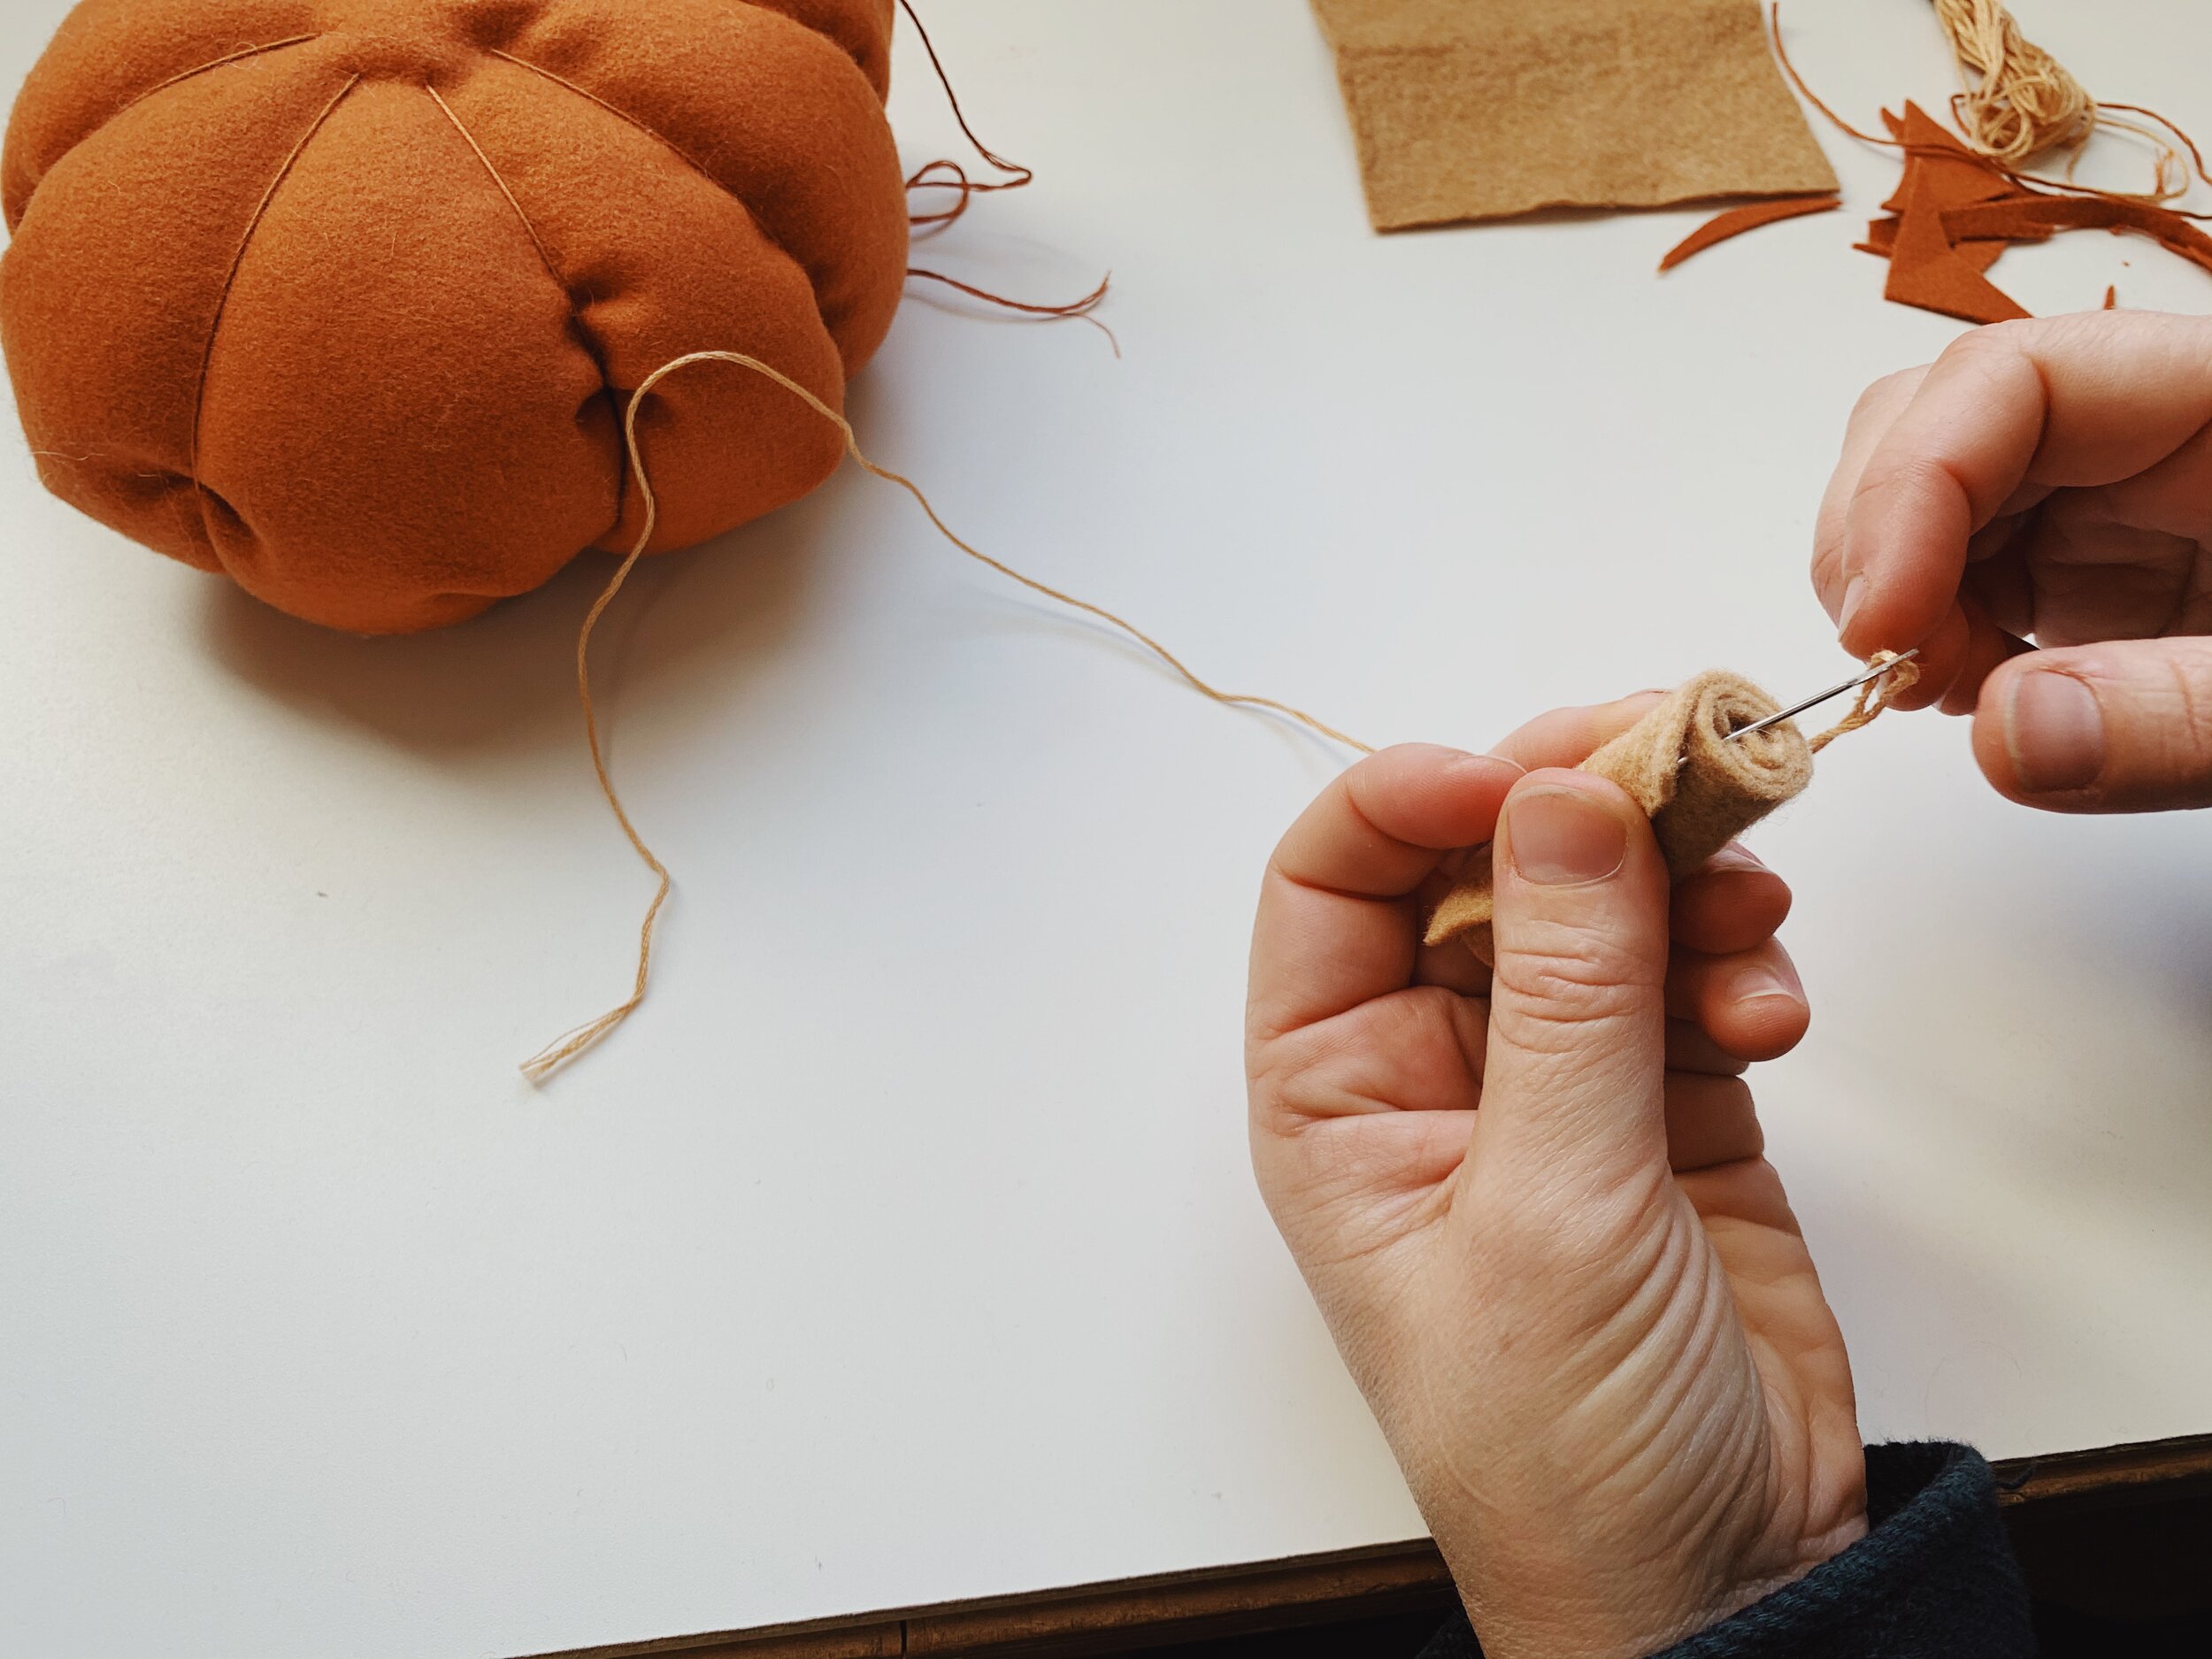
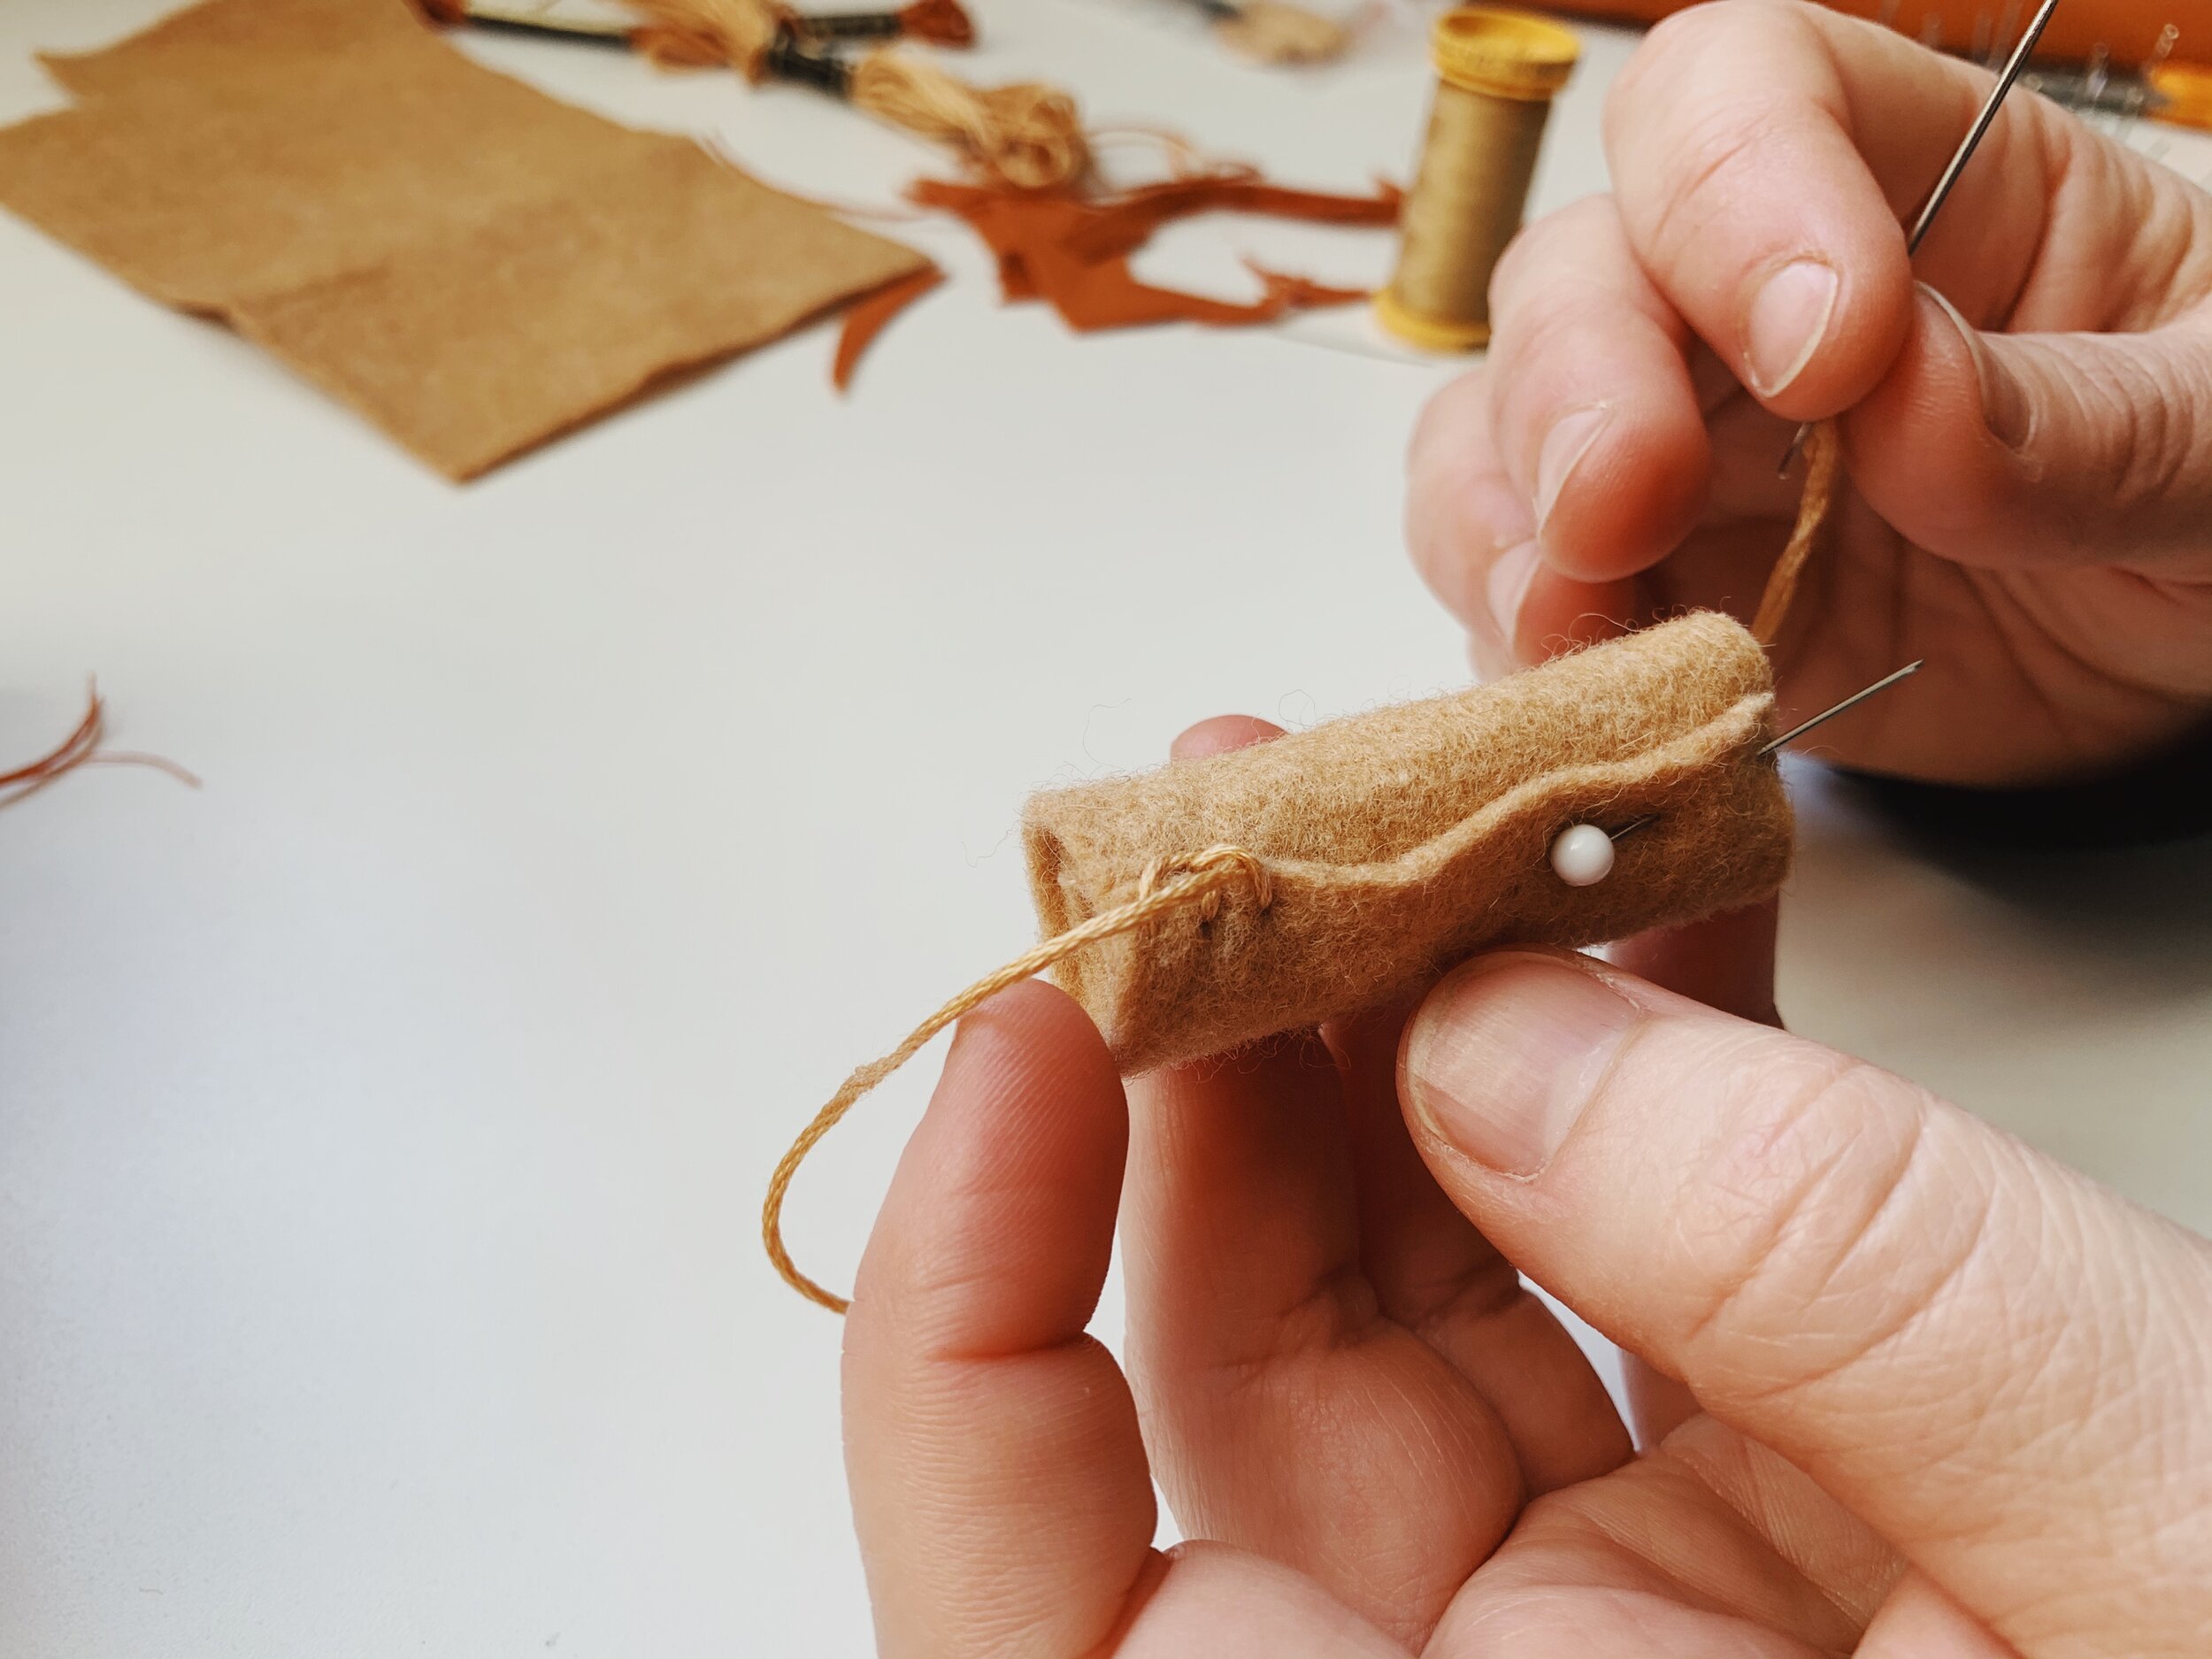
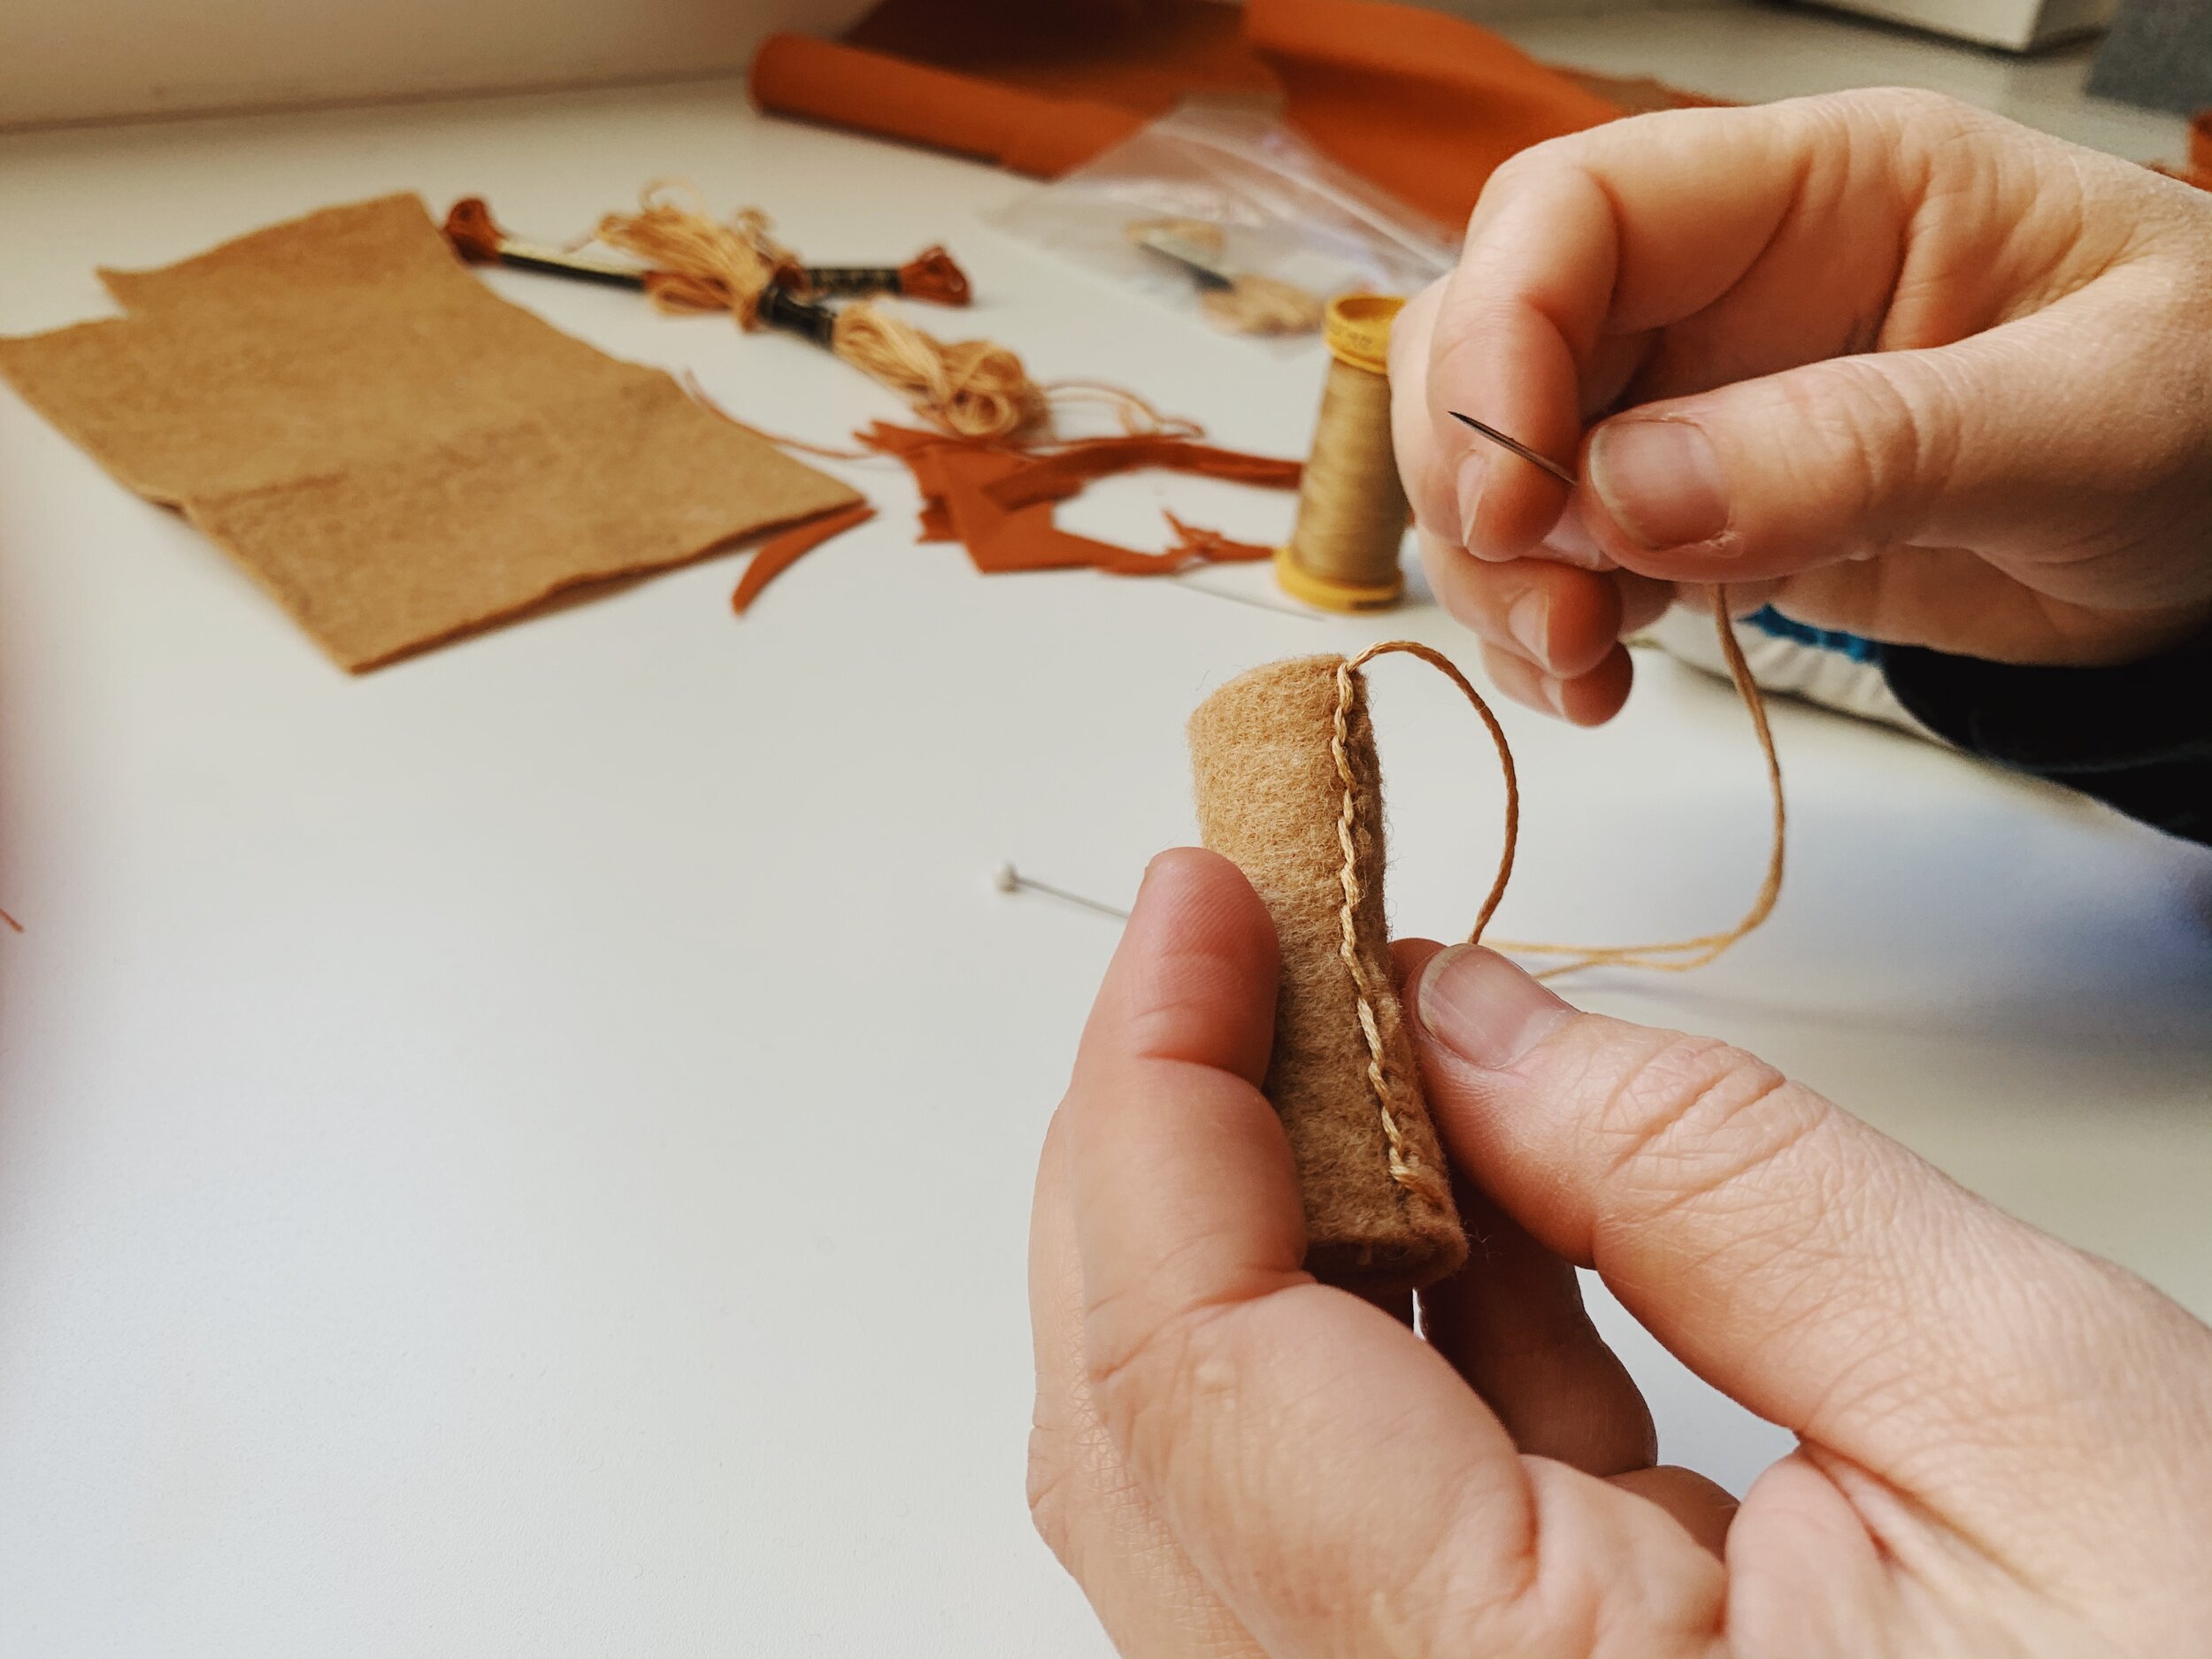
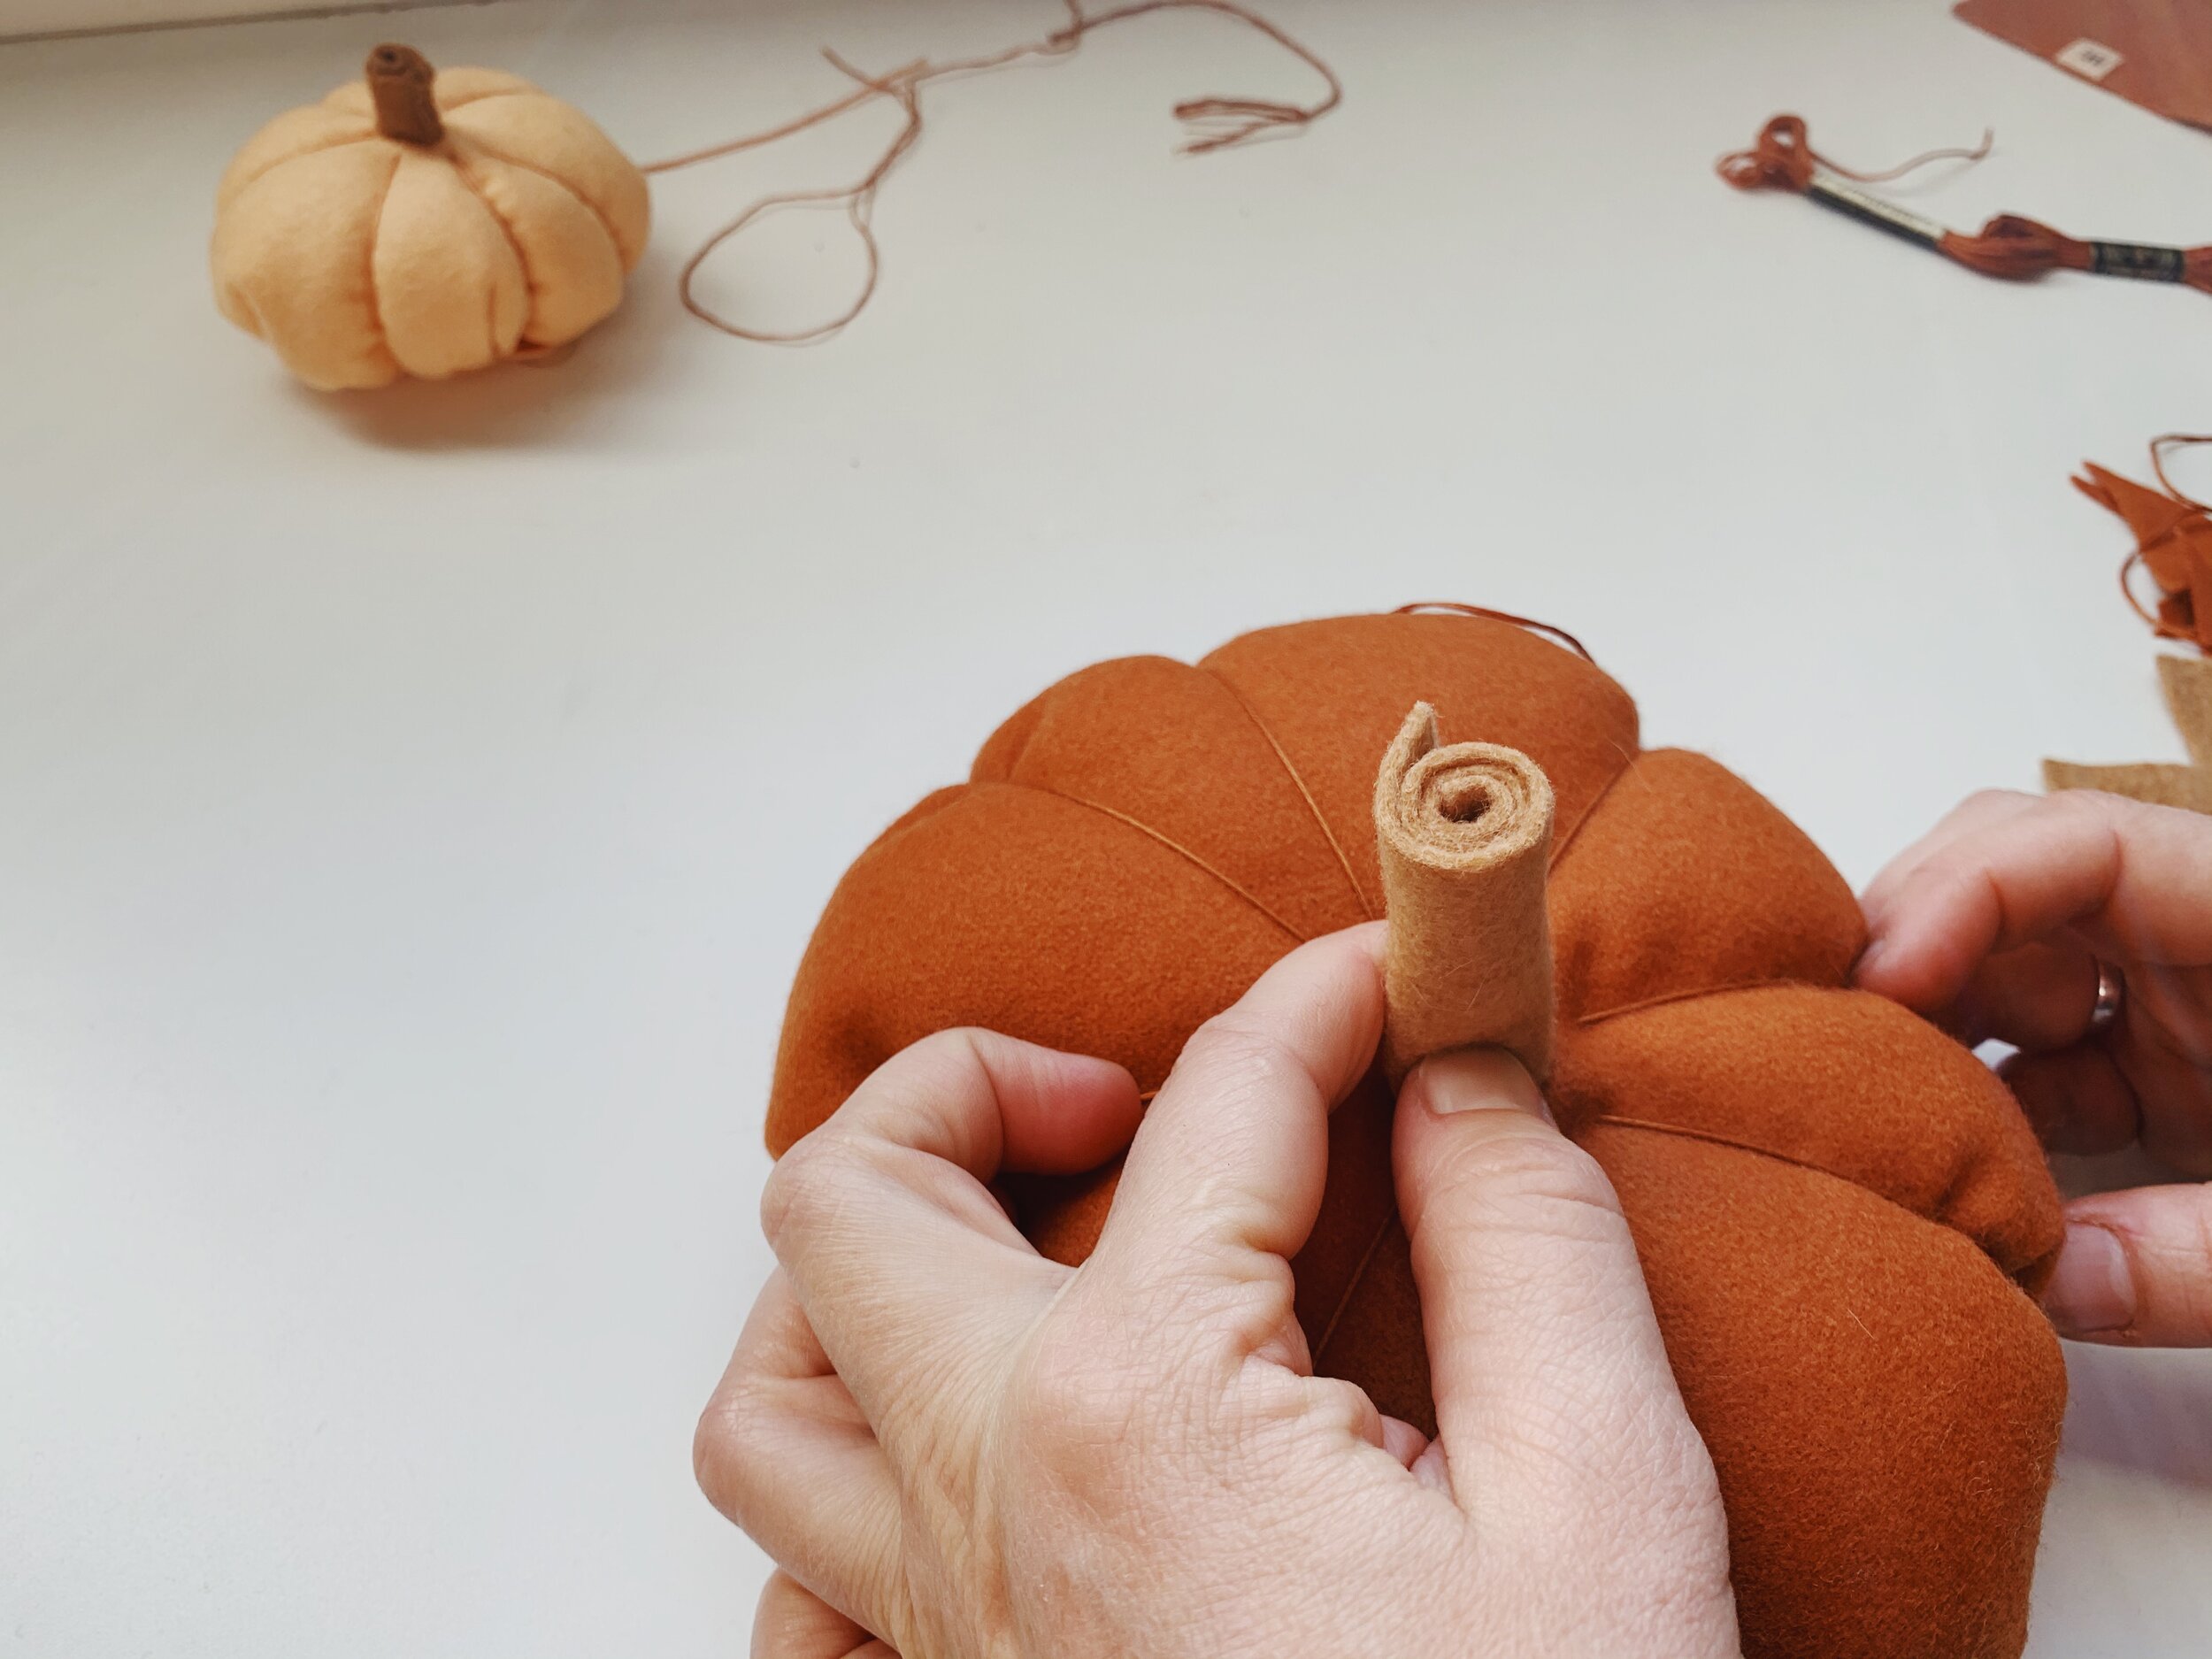
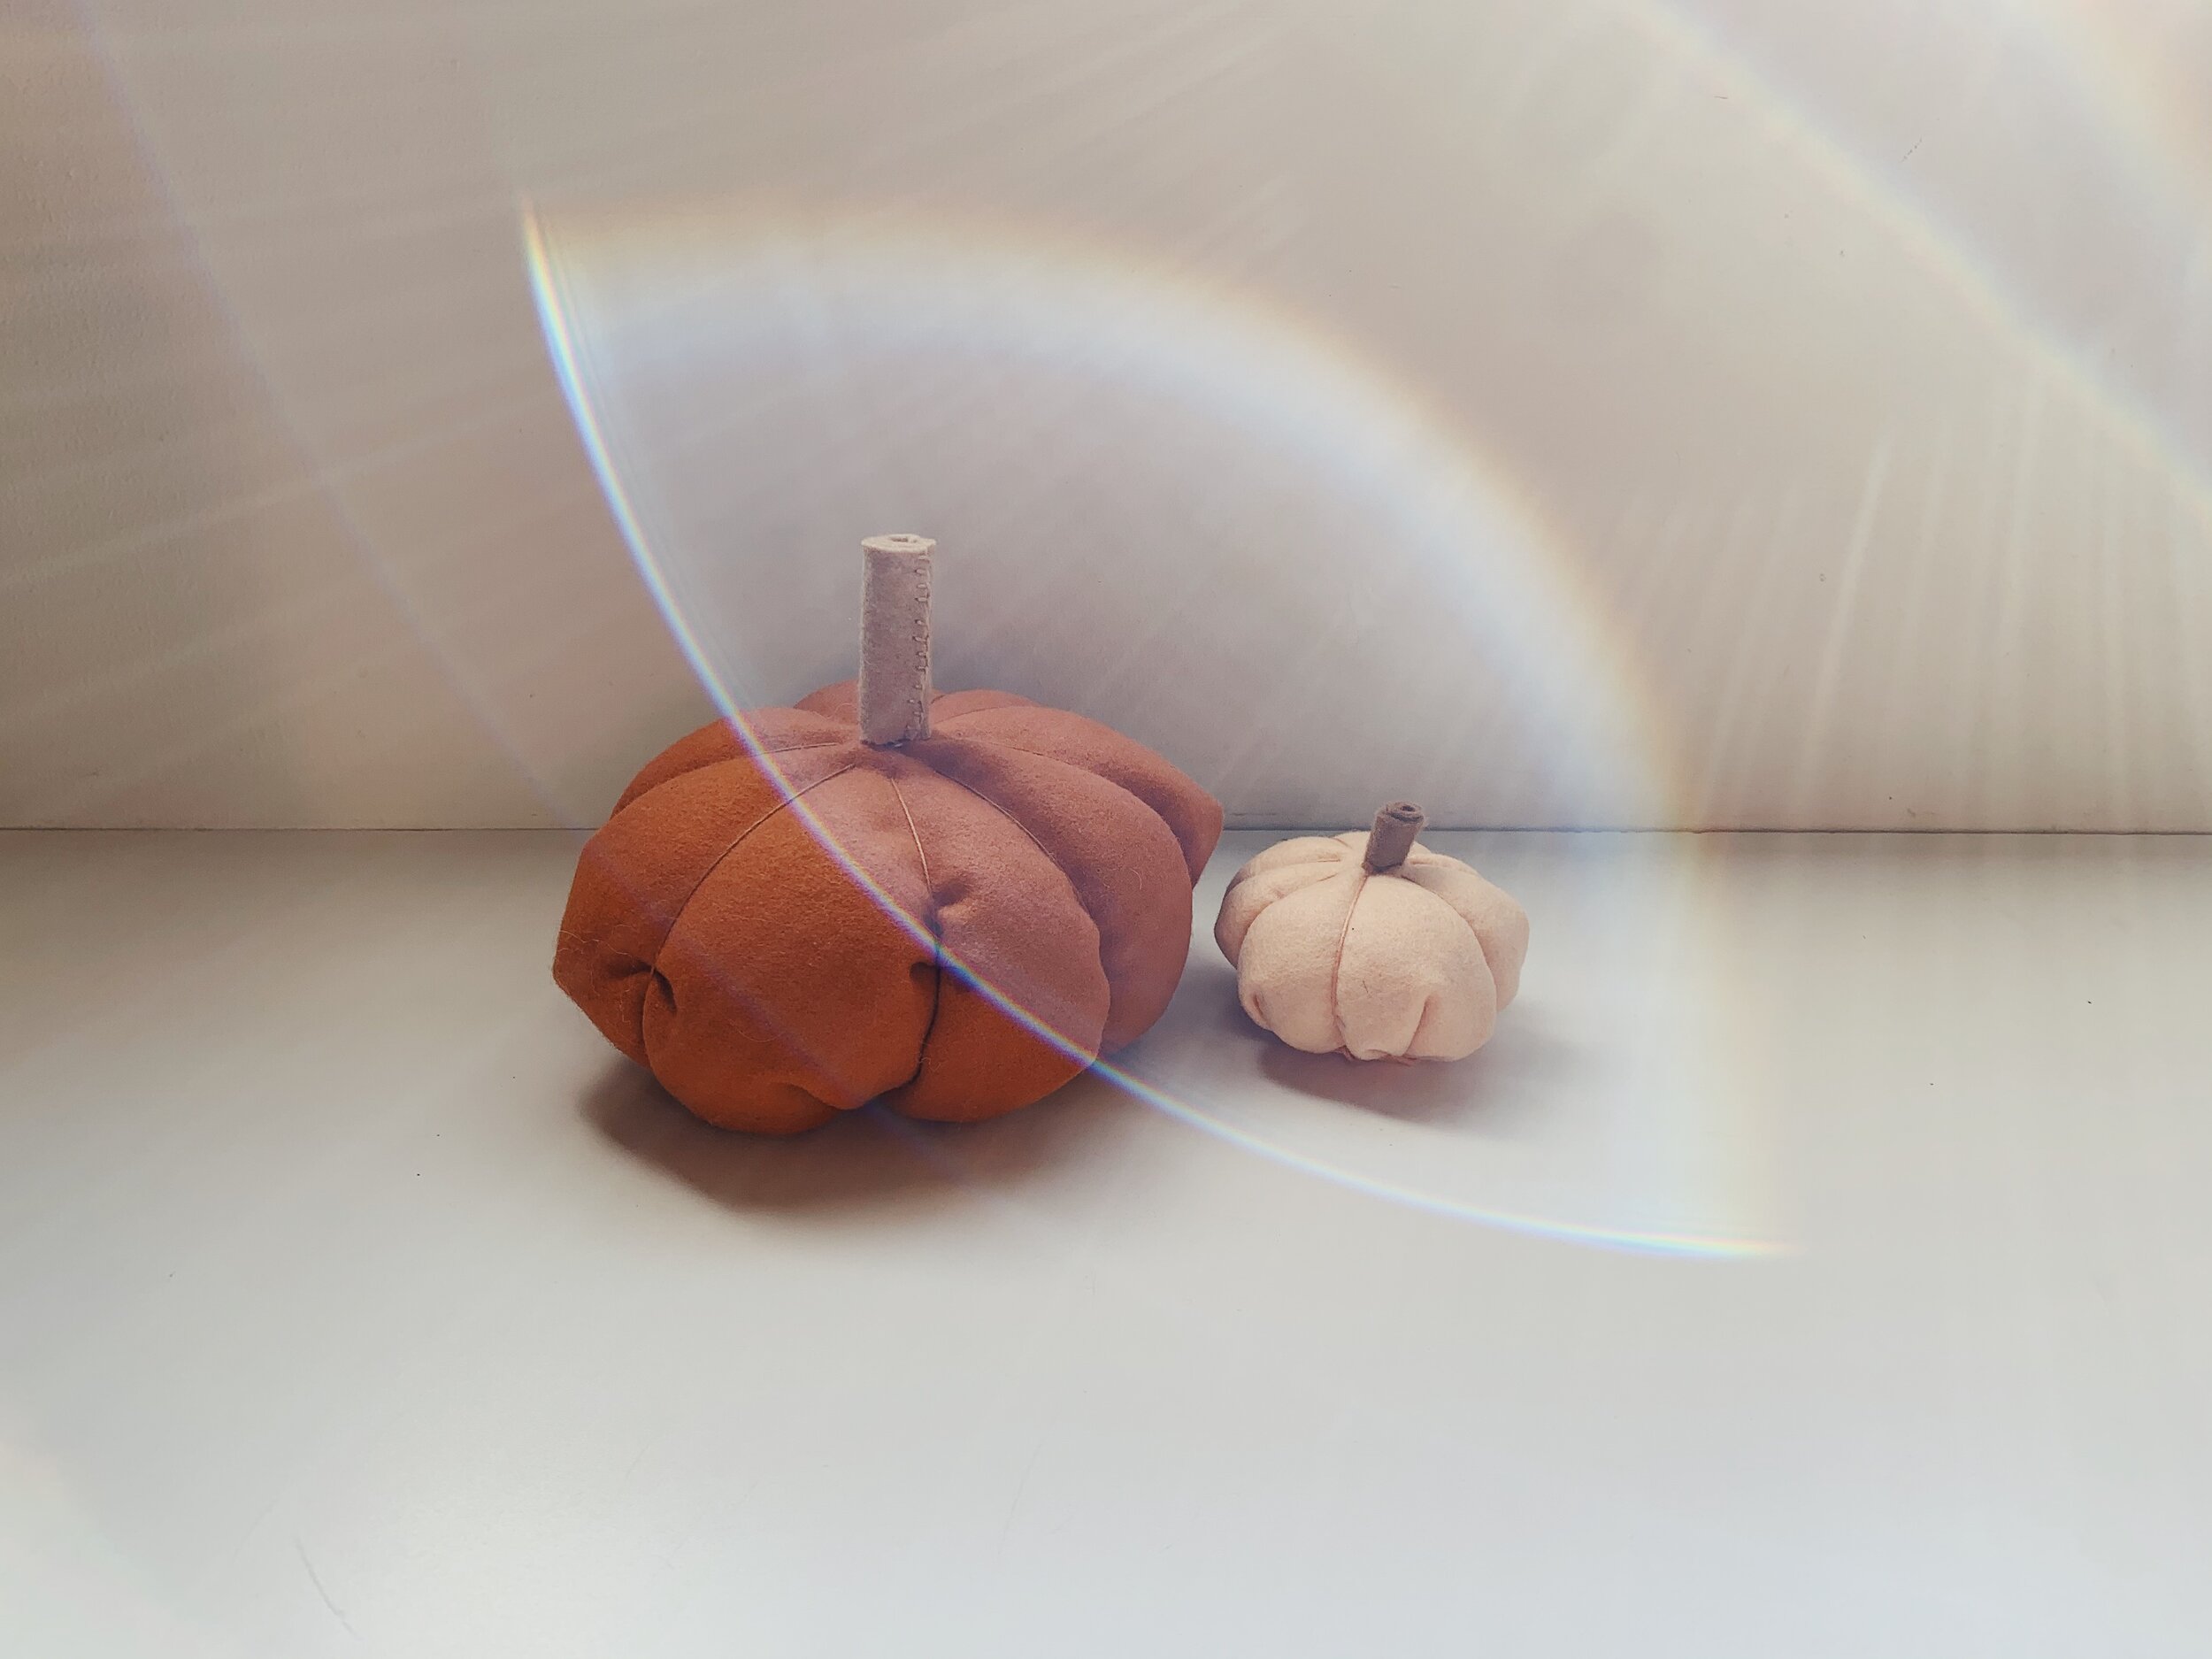
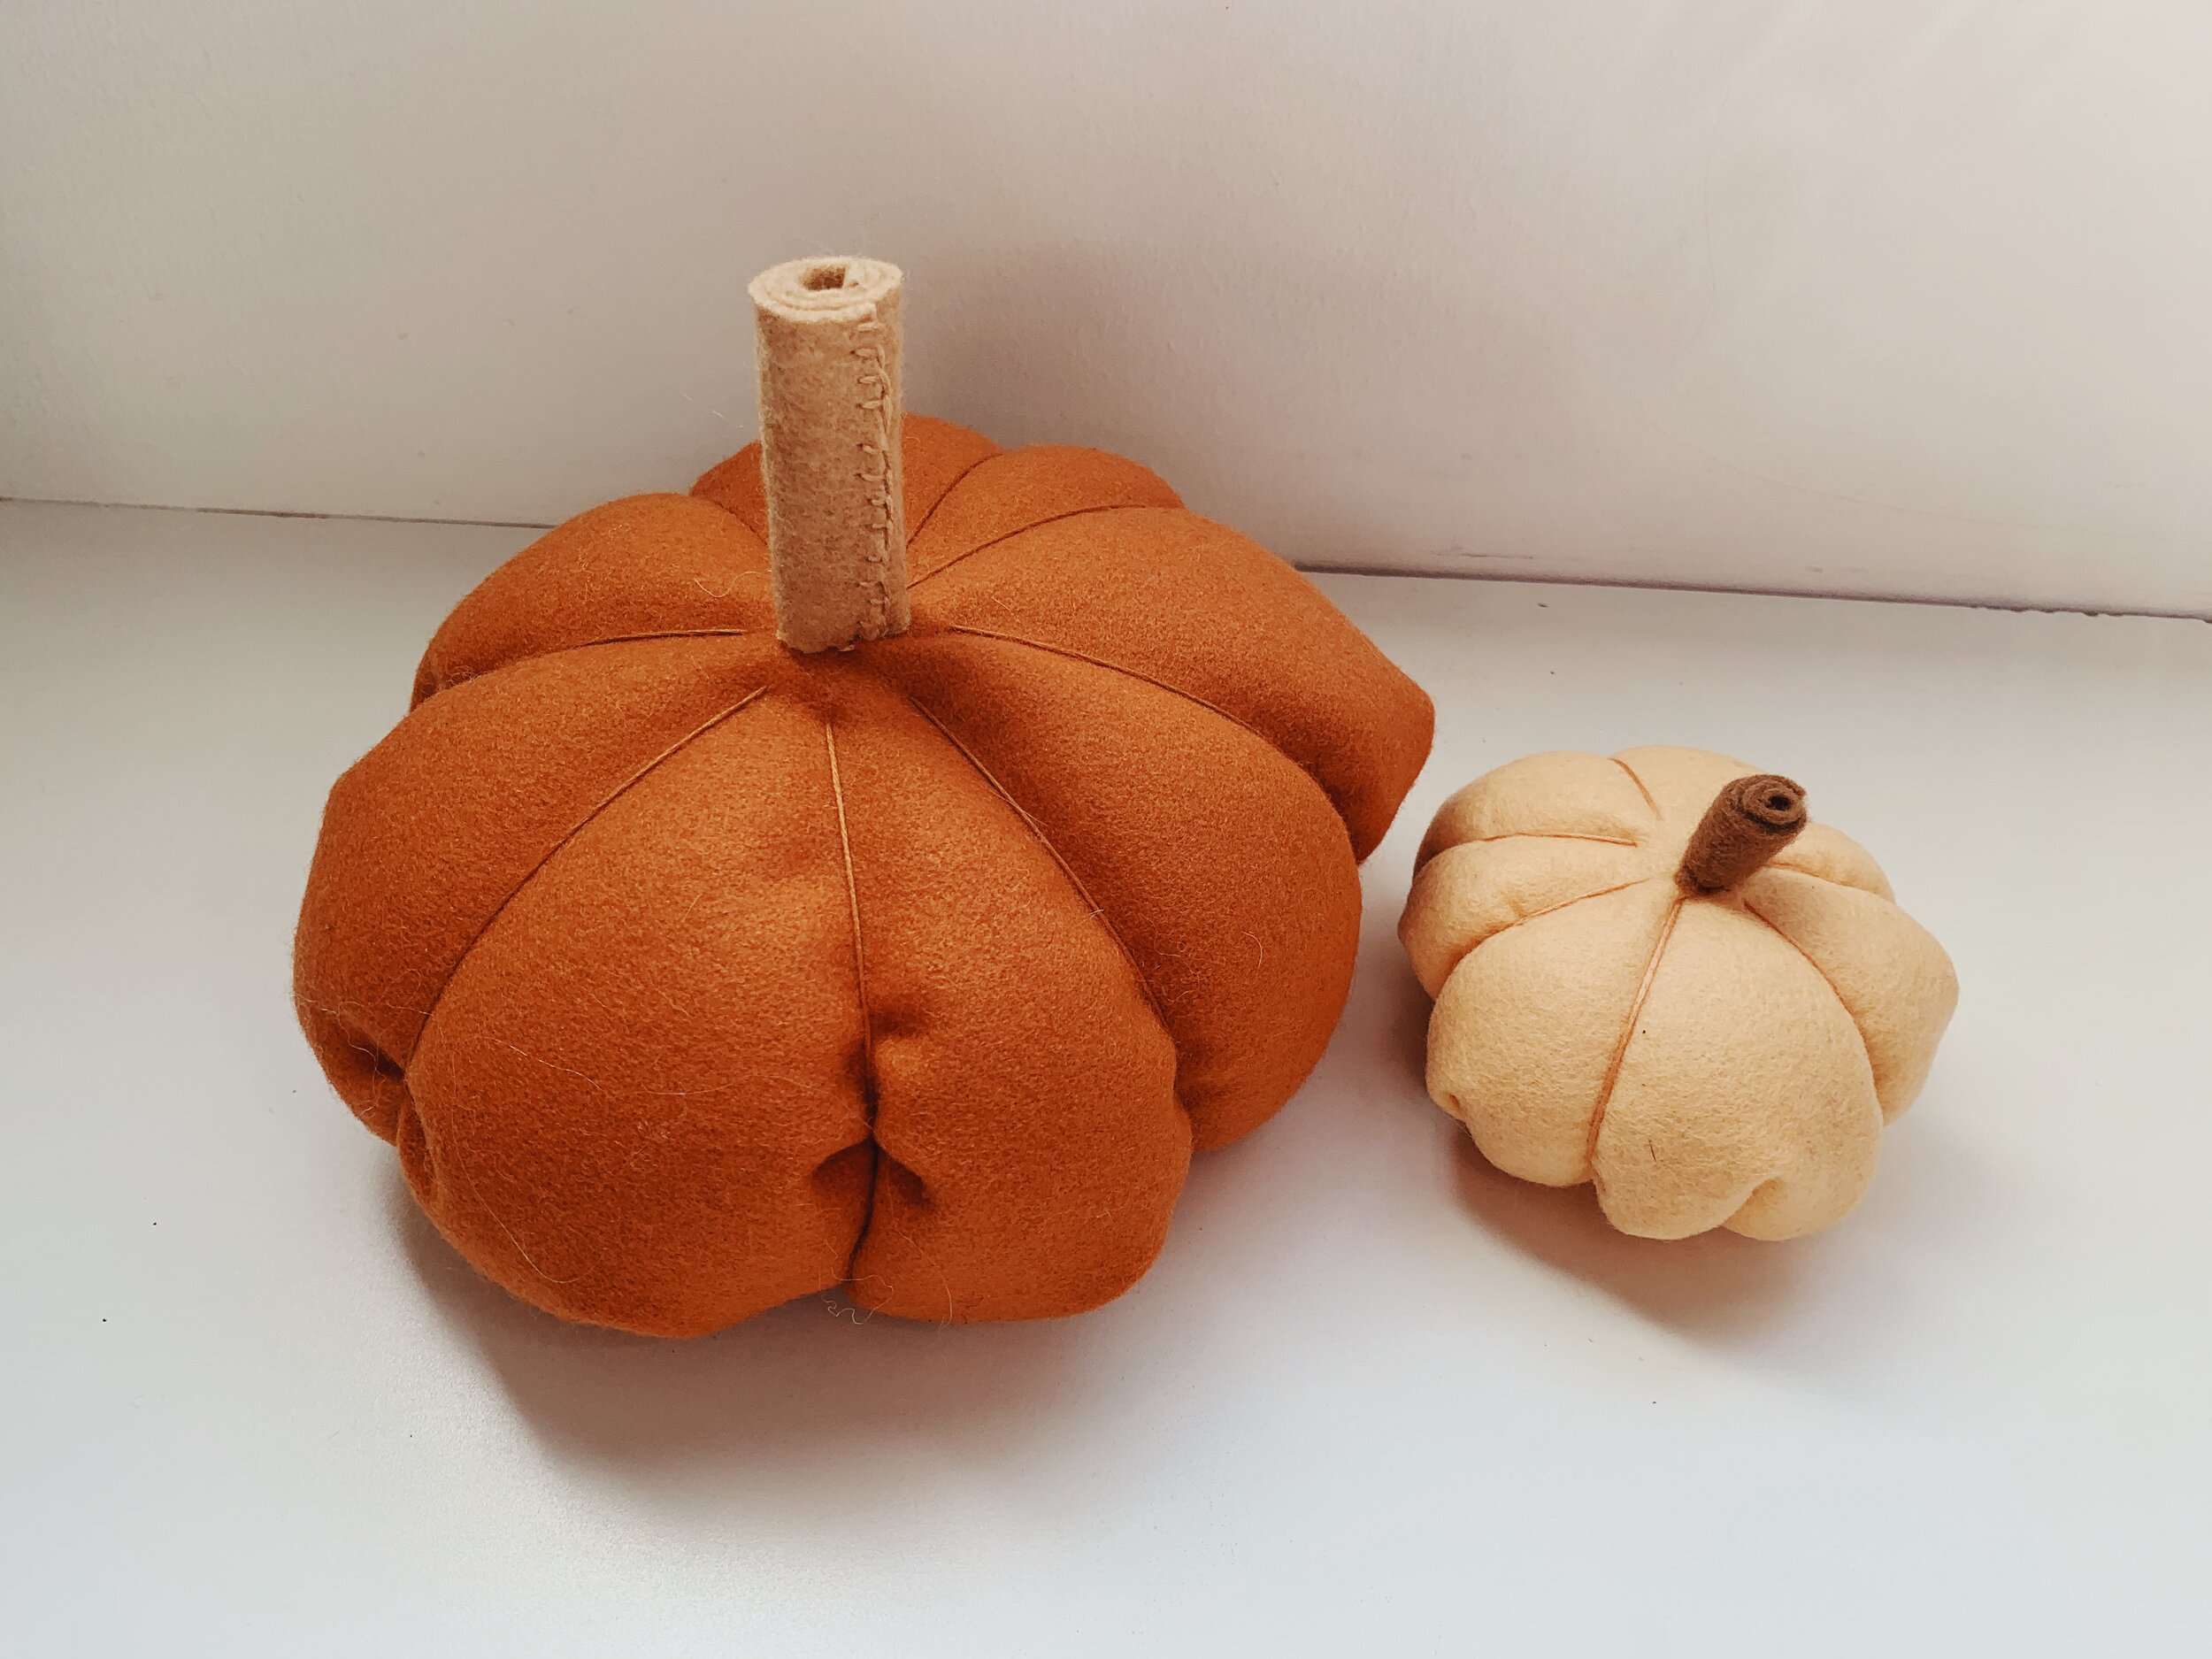
Cut a small rectangle of stem-colored felt (around 1-2 in. x 5 in.). Roll the generous width like a yoga mat and pin to hold while you use matching embroidery thread and blanket stitch to sew the edge secure. Stitch the end of the roll to the top of your pumpkin. Be careful to keep the stitches in your pumpkin hidden under your stem.
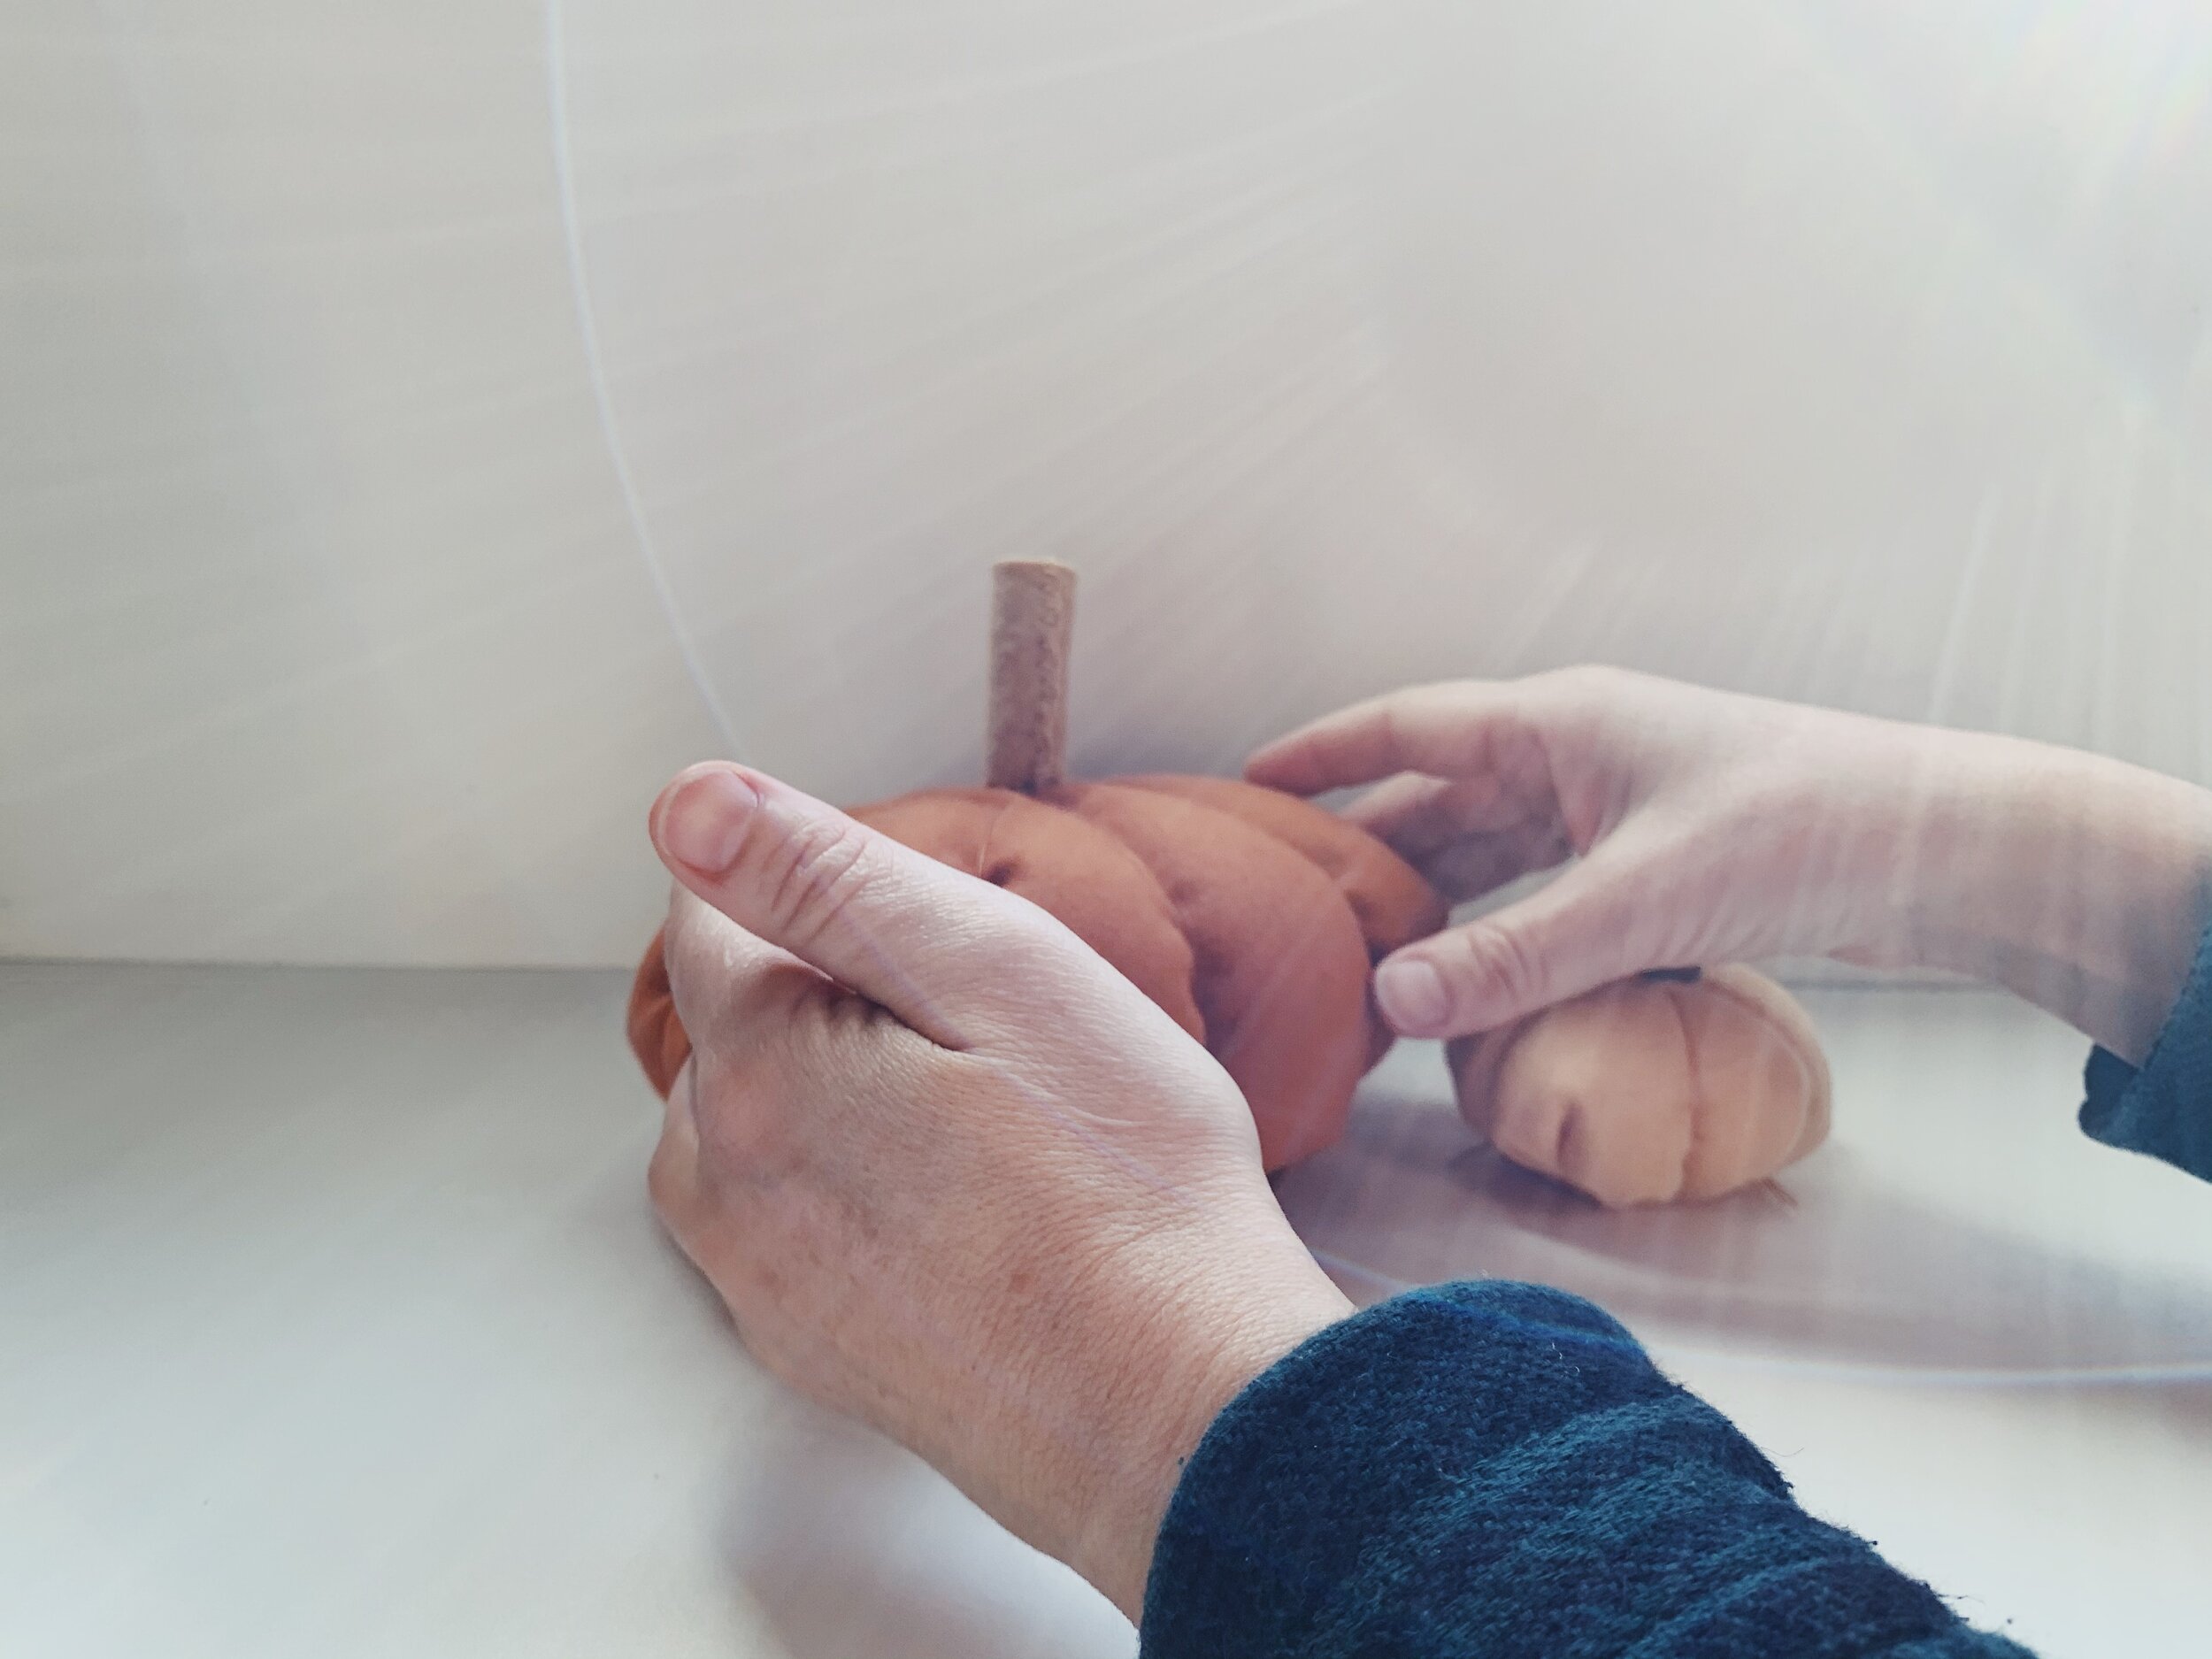
Display and appreciate!
Born and raised under Montana’s big sky, Emma Maruska discovered her love of handwork helping with her dad’s carpentry projects and mother’s retail greenhouse. She left home to find herself in Portland attaining degrees in Organizational Communication, leading to a 10-year career in fundraising, and Fine Arts (Craft/Fiber Arts), enhancing her love of creative education. Emma is currently finishing her Waldorf Grades Teacher training at the West Coast Institute and has served Cedarwood as a support teacher and after-school program organizer. Emma is currently Cedarwood’s Practical Arts Teacher. When she is not at work, she is probably walking her dog in Forest Park.