Lantern Walk Peg Dolls: A Tutorial
I go with my little lantern,
My lantern goes with me.
In heaven the stars are shining,
On earth are shining we.
The Lantern Walk is one of our favorite school festivals at Cedarwood. In quiet reverence we follow the voices of our teacher and friends, singing familiar songs as our lanterns light the way through the darkness of the forest.
Painting Peg Dolls
By Nora Kobos, Cedarwood Parent to Clara (Grade 6) and Helena (Grade 2)

It started as a pocket treasure craft for the Winter Faire several years ago. Then it became a favorite play date activity for my daughters to do with friends. Now my daughters and I enjoy painting peg dolls together, and then setting up scenes for them using materials we have around the house and yard.
As we all experience our beloved school festivals in different ways this year, recreating some of these rituals and celebrations in peg doll form has been a way for my children to remember the joys of years past, and consider the present in a lighthearted way. We giggle together as we brainstorm ideas for capturing the details of these special moments in our community.
You can create your own peg dolls with inexpensive materials that can be found at most craft stores!
Materials
Wooden peg dolls
Acrylic paint
Jar with water to clean brushes in between colors
Jar lid to use as a palette
Fine-tipped paint brushes
Paper towel or old rag for drying brushes
Old tablecloth or newspaper to protect the working surface
Apron or smock to protect clothing
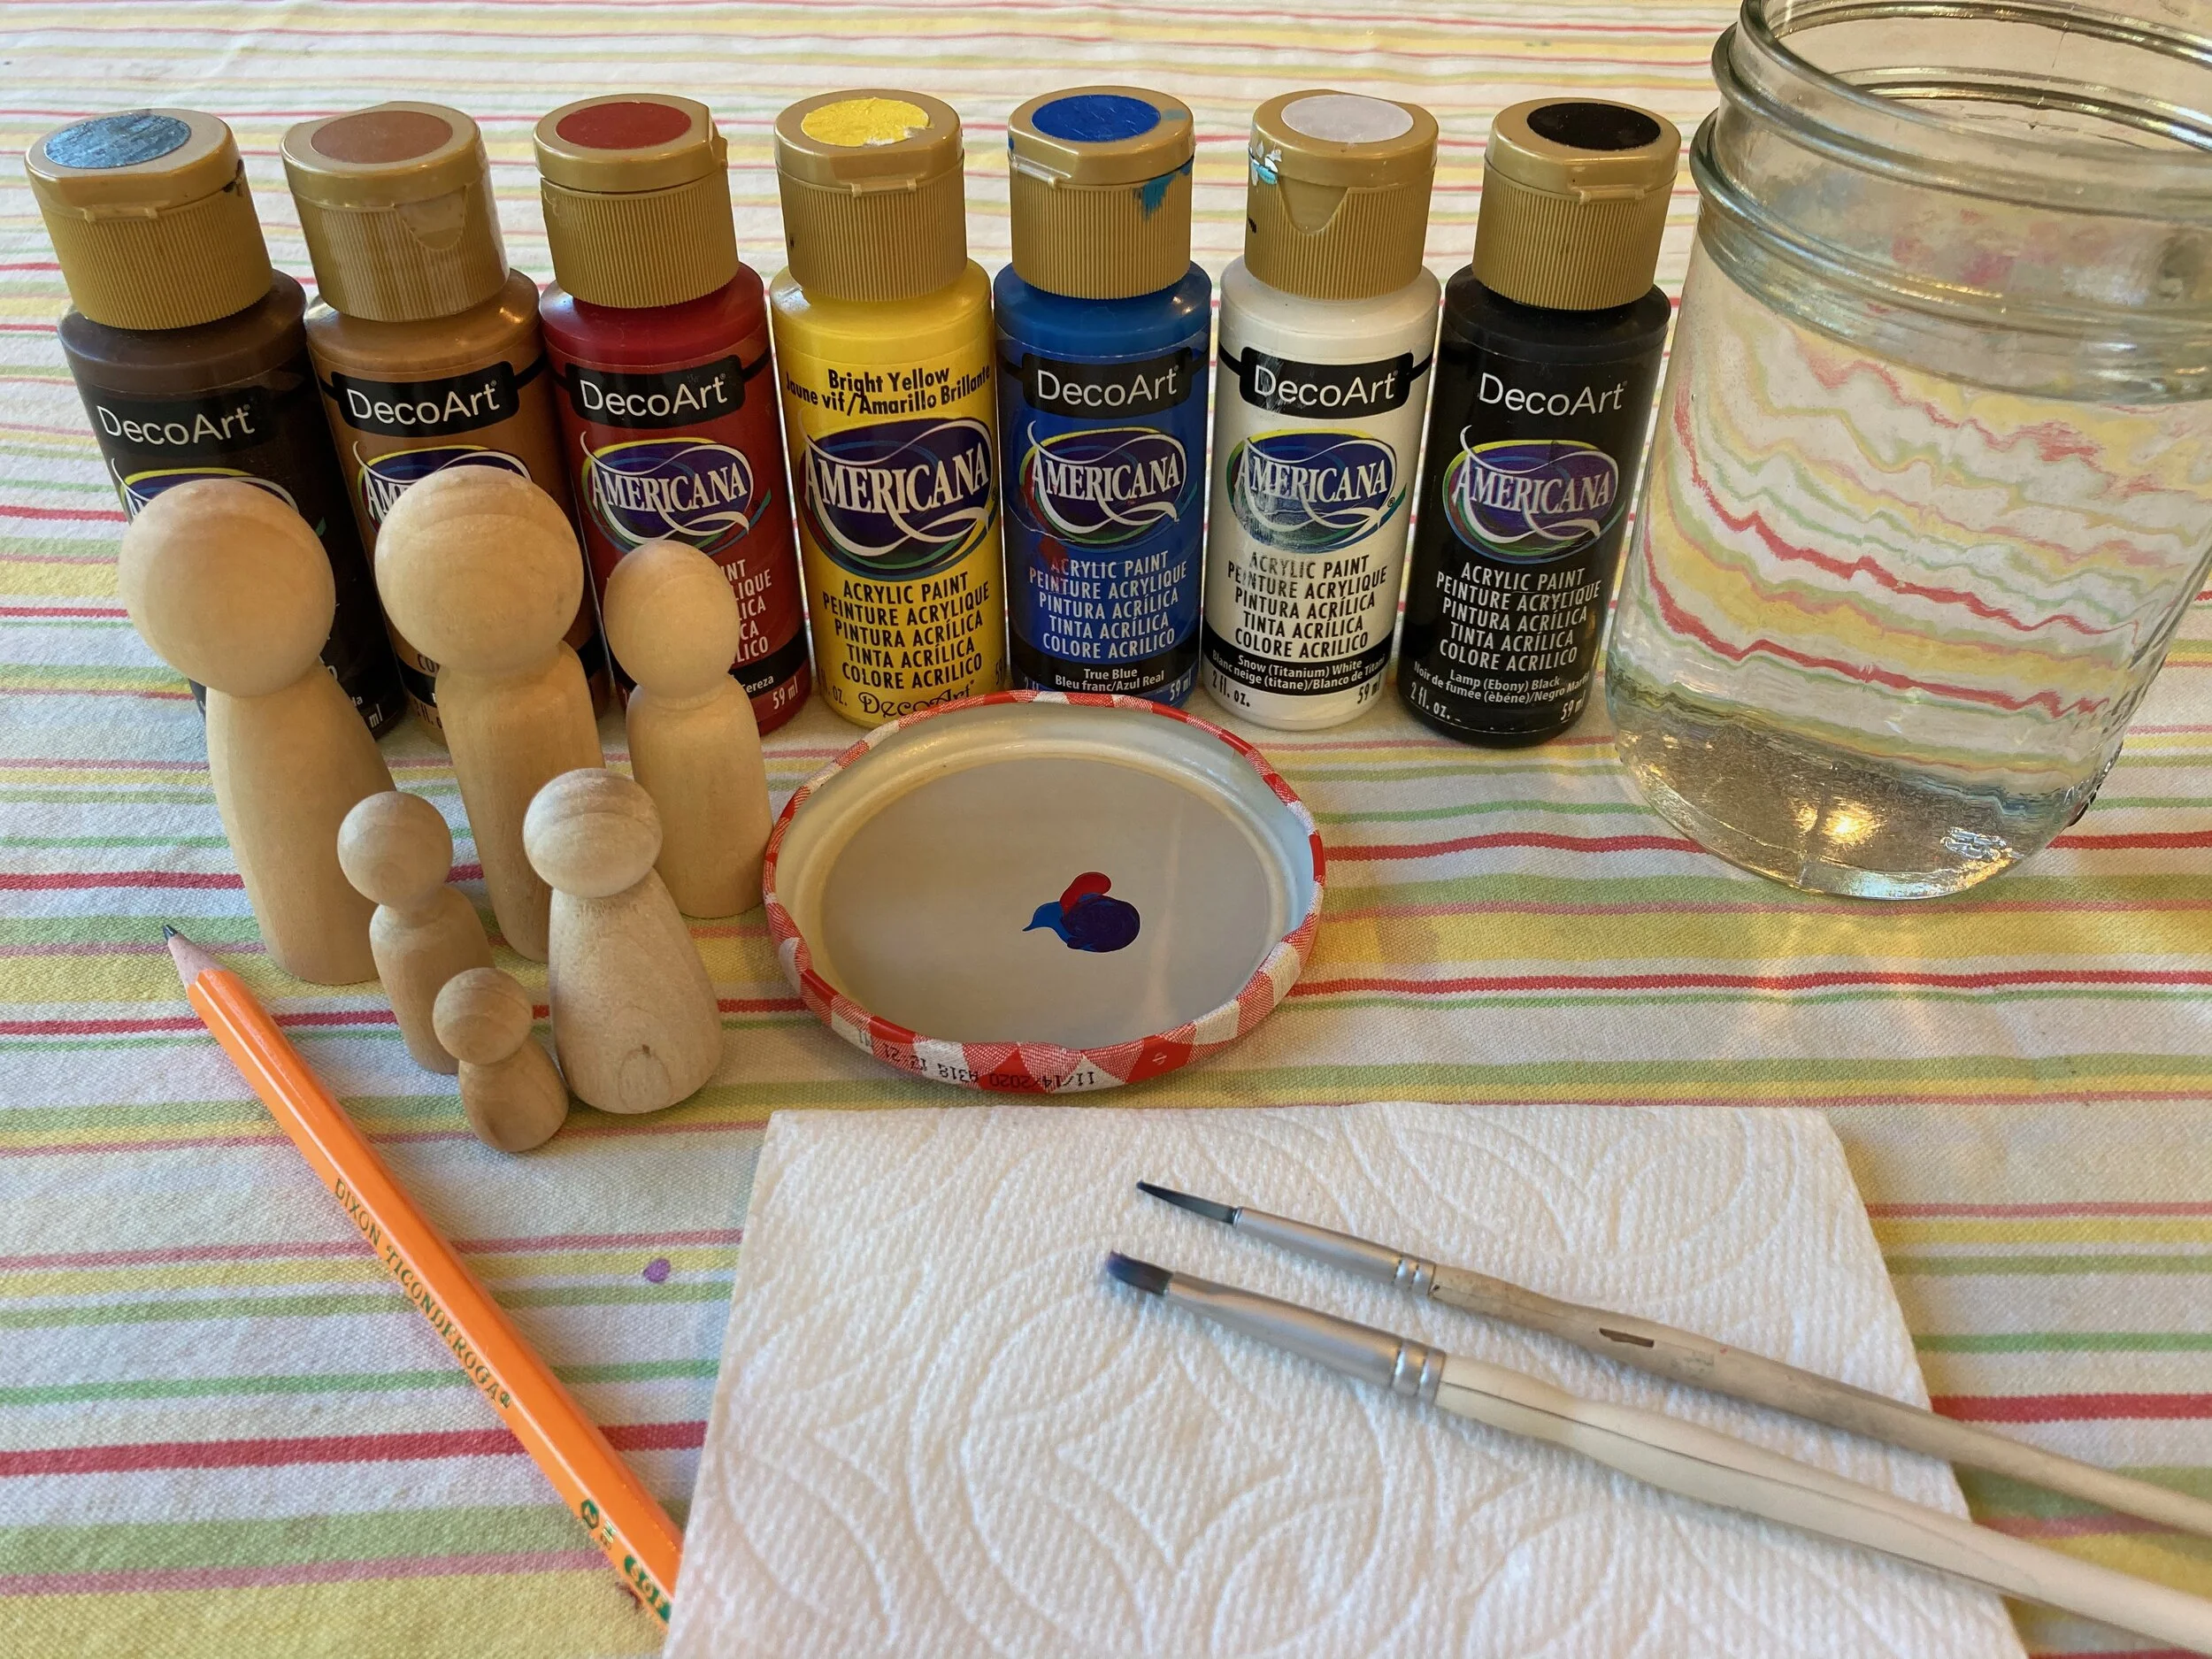
Acrylic paint is inexpensive, and you only need to purchase a few basic paint colors because part of the joy is in mixing the colors! A little bit of paint goes a long way. Young children may need help learning how to squeeze the smallest drop of paint onto the palette.
While you are painting the head of the peg doll, you can hold onto the body. Once the body is dry (acrylic paint dries quickly), you can hold the body while painting the head. It may require more than one coat of paint.
First paint the skin color.
Then, sketch the facial features with a pencil.
Next, paint the facial features. Painting the eyes and mouth can be tricky. If your first try doesn’t work out, fear not! You can either turn it around and try again on the back of the head, or you can paint the skin color over your first attempt and start over.
You can see in this photo my first attempt at painting eyeglasses was unsuccessful, so I tried again on the other side of the peg doll’s head. Once the hair is added, no one will be the wiser.
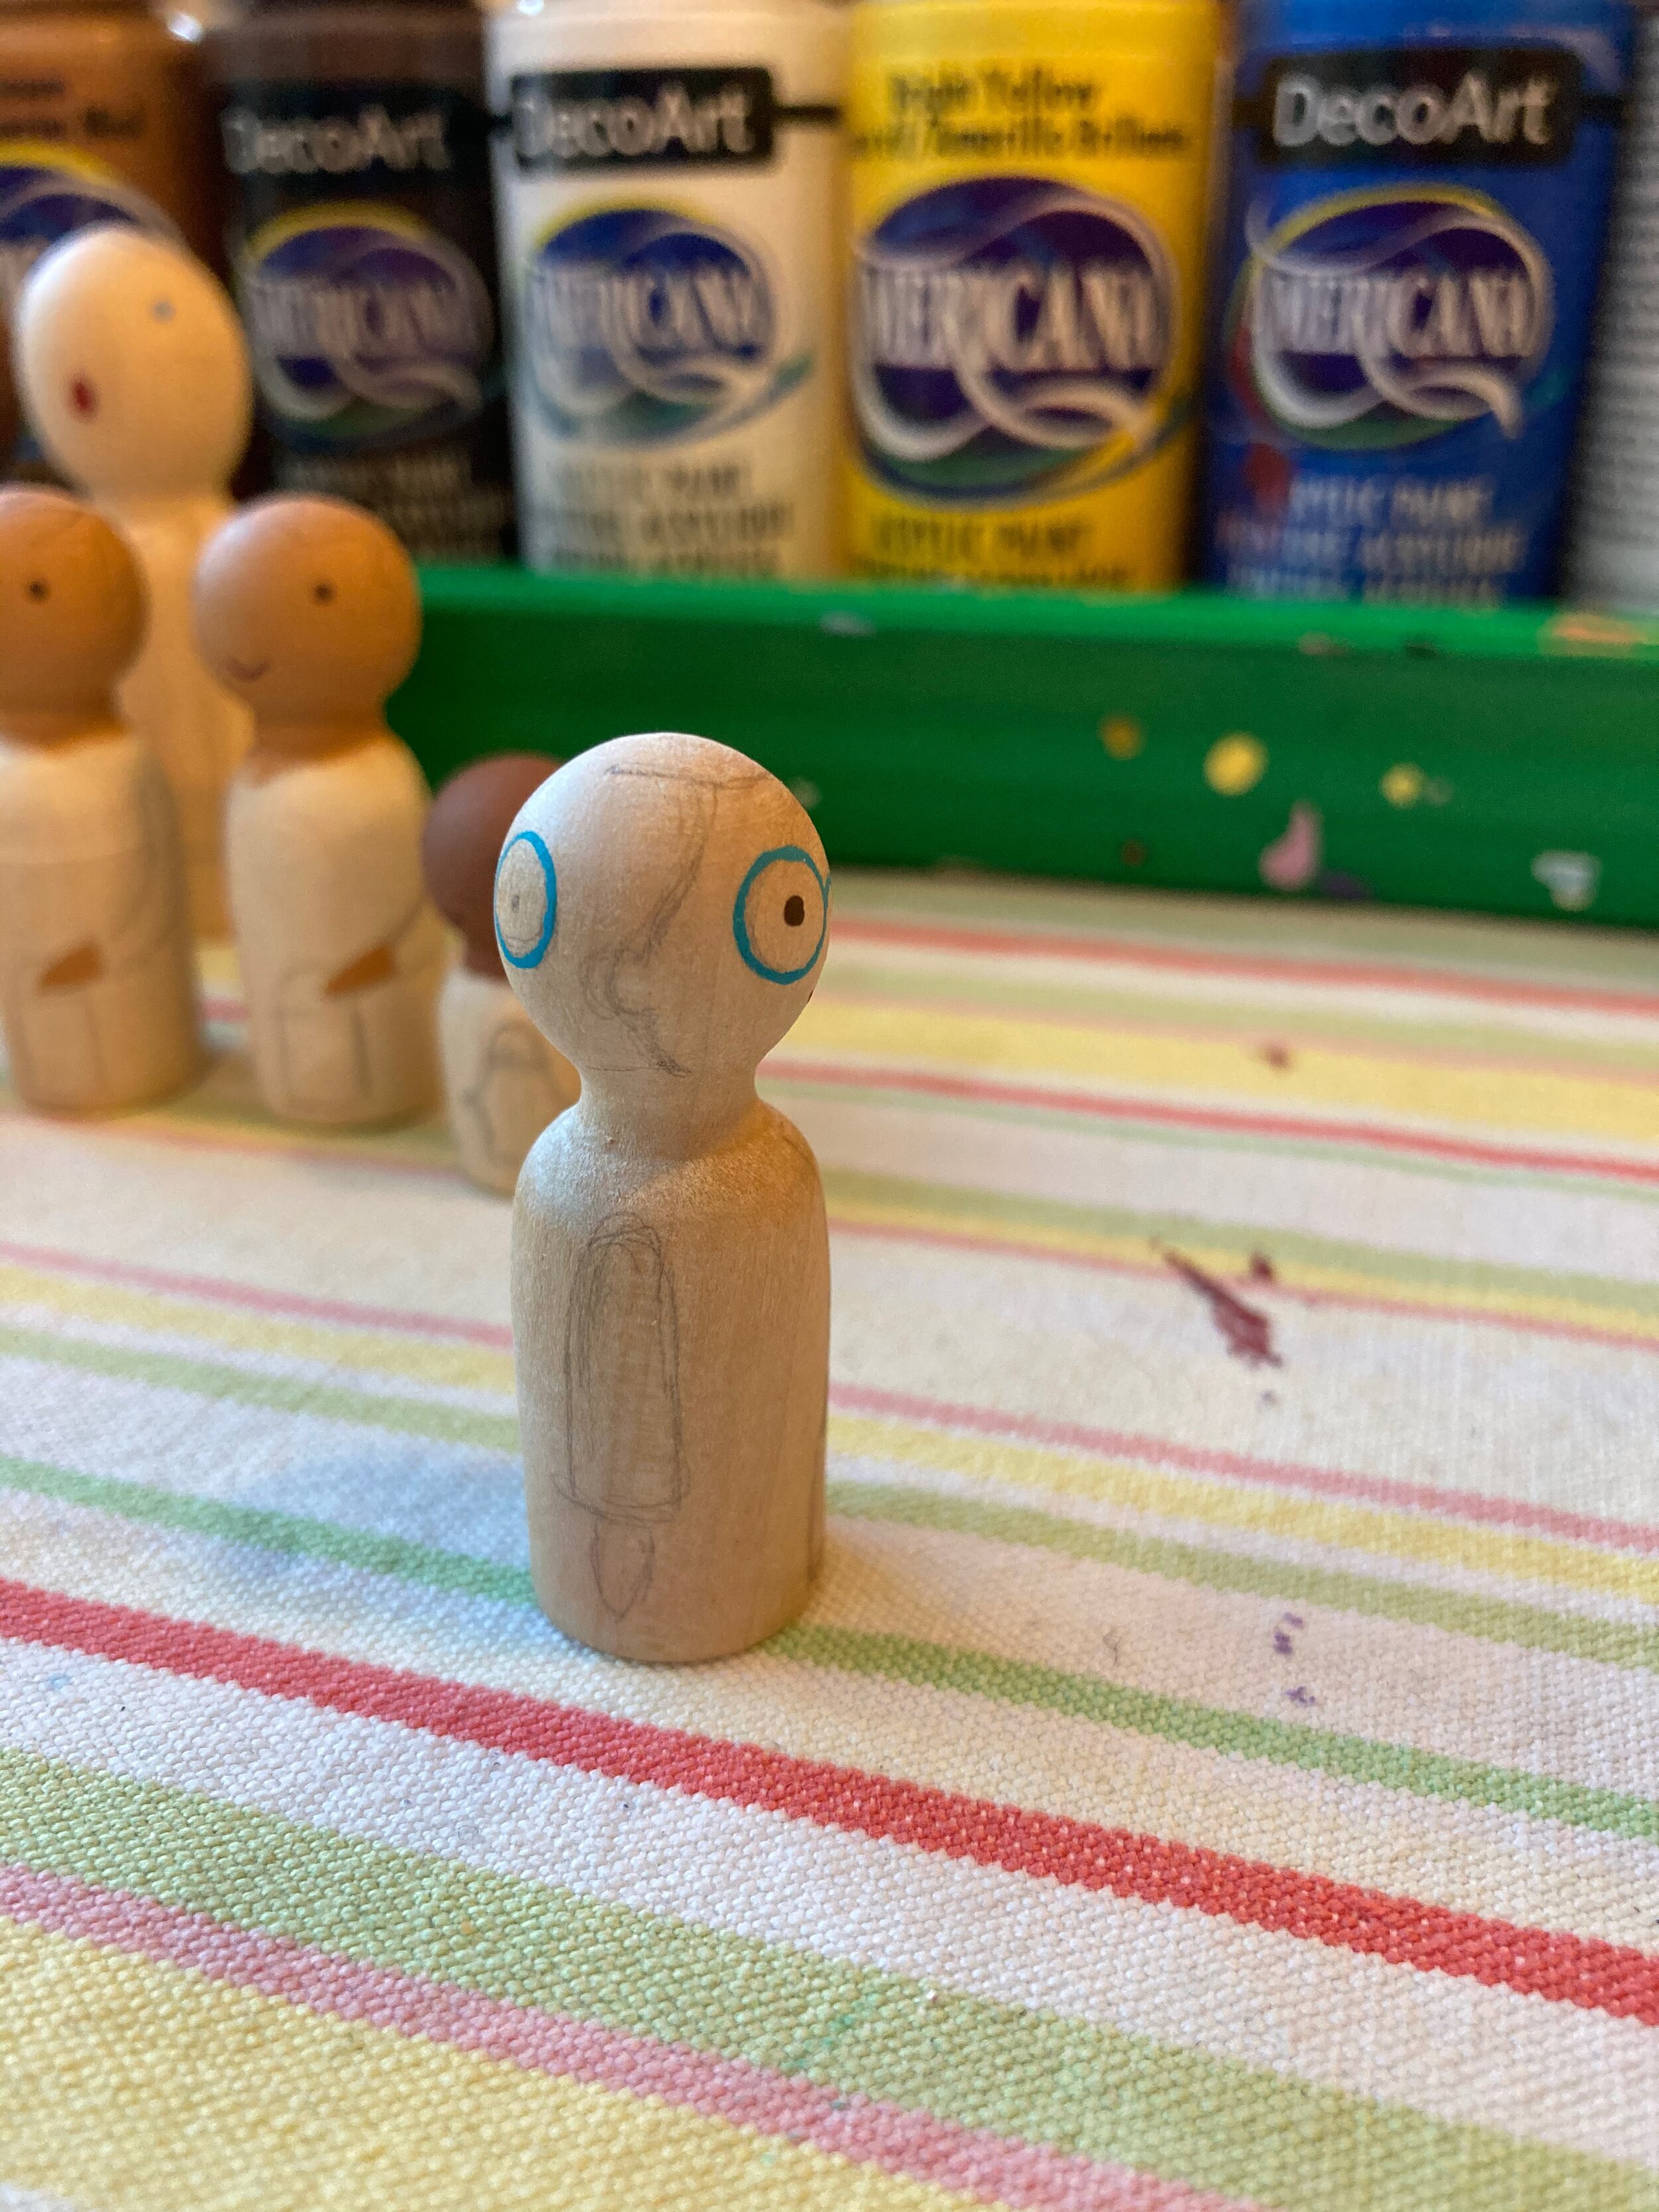
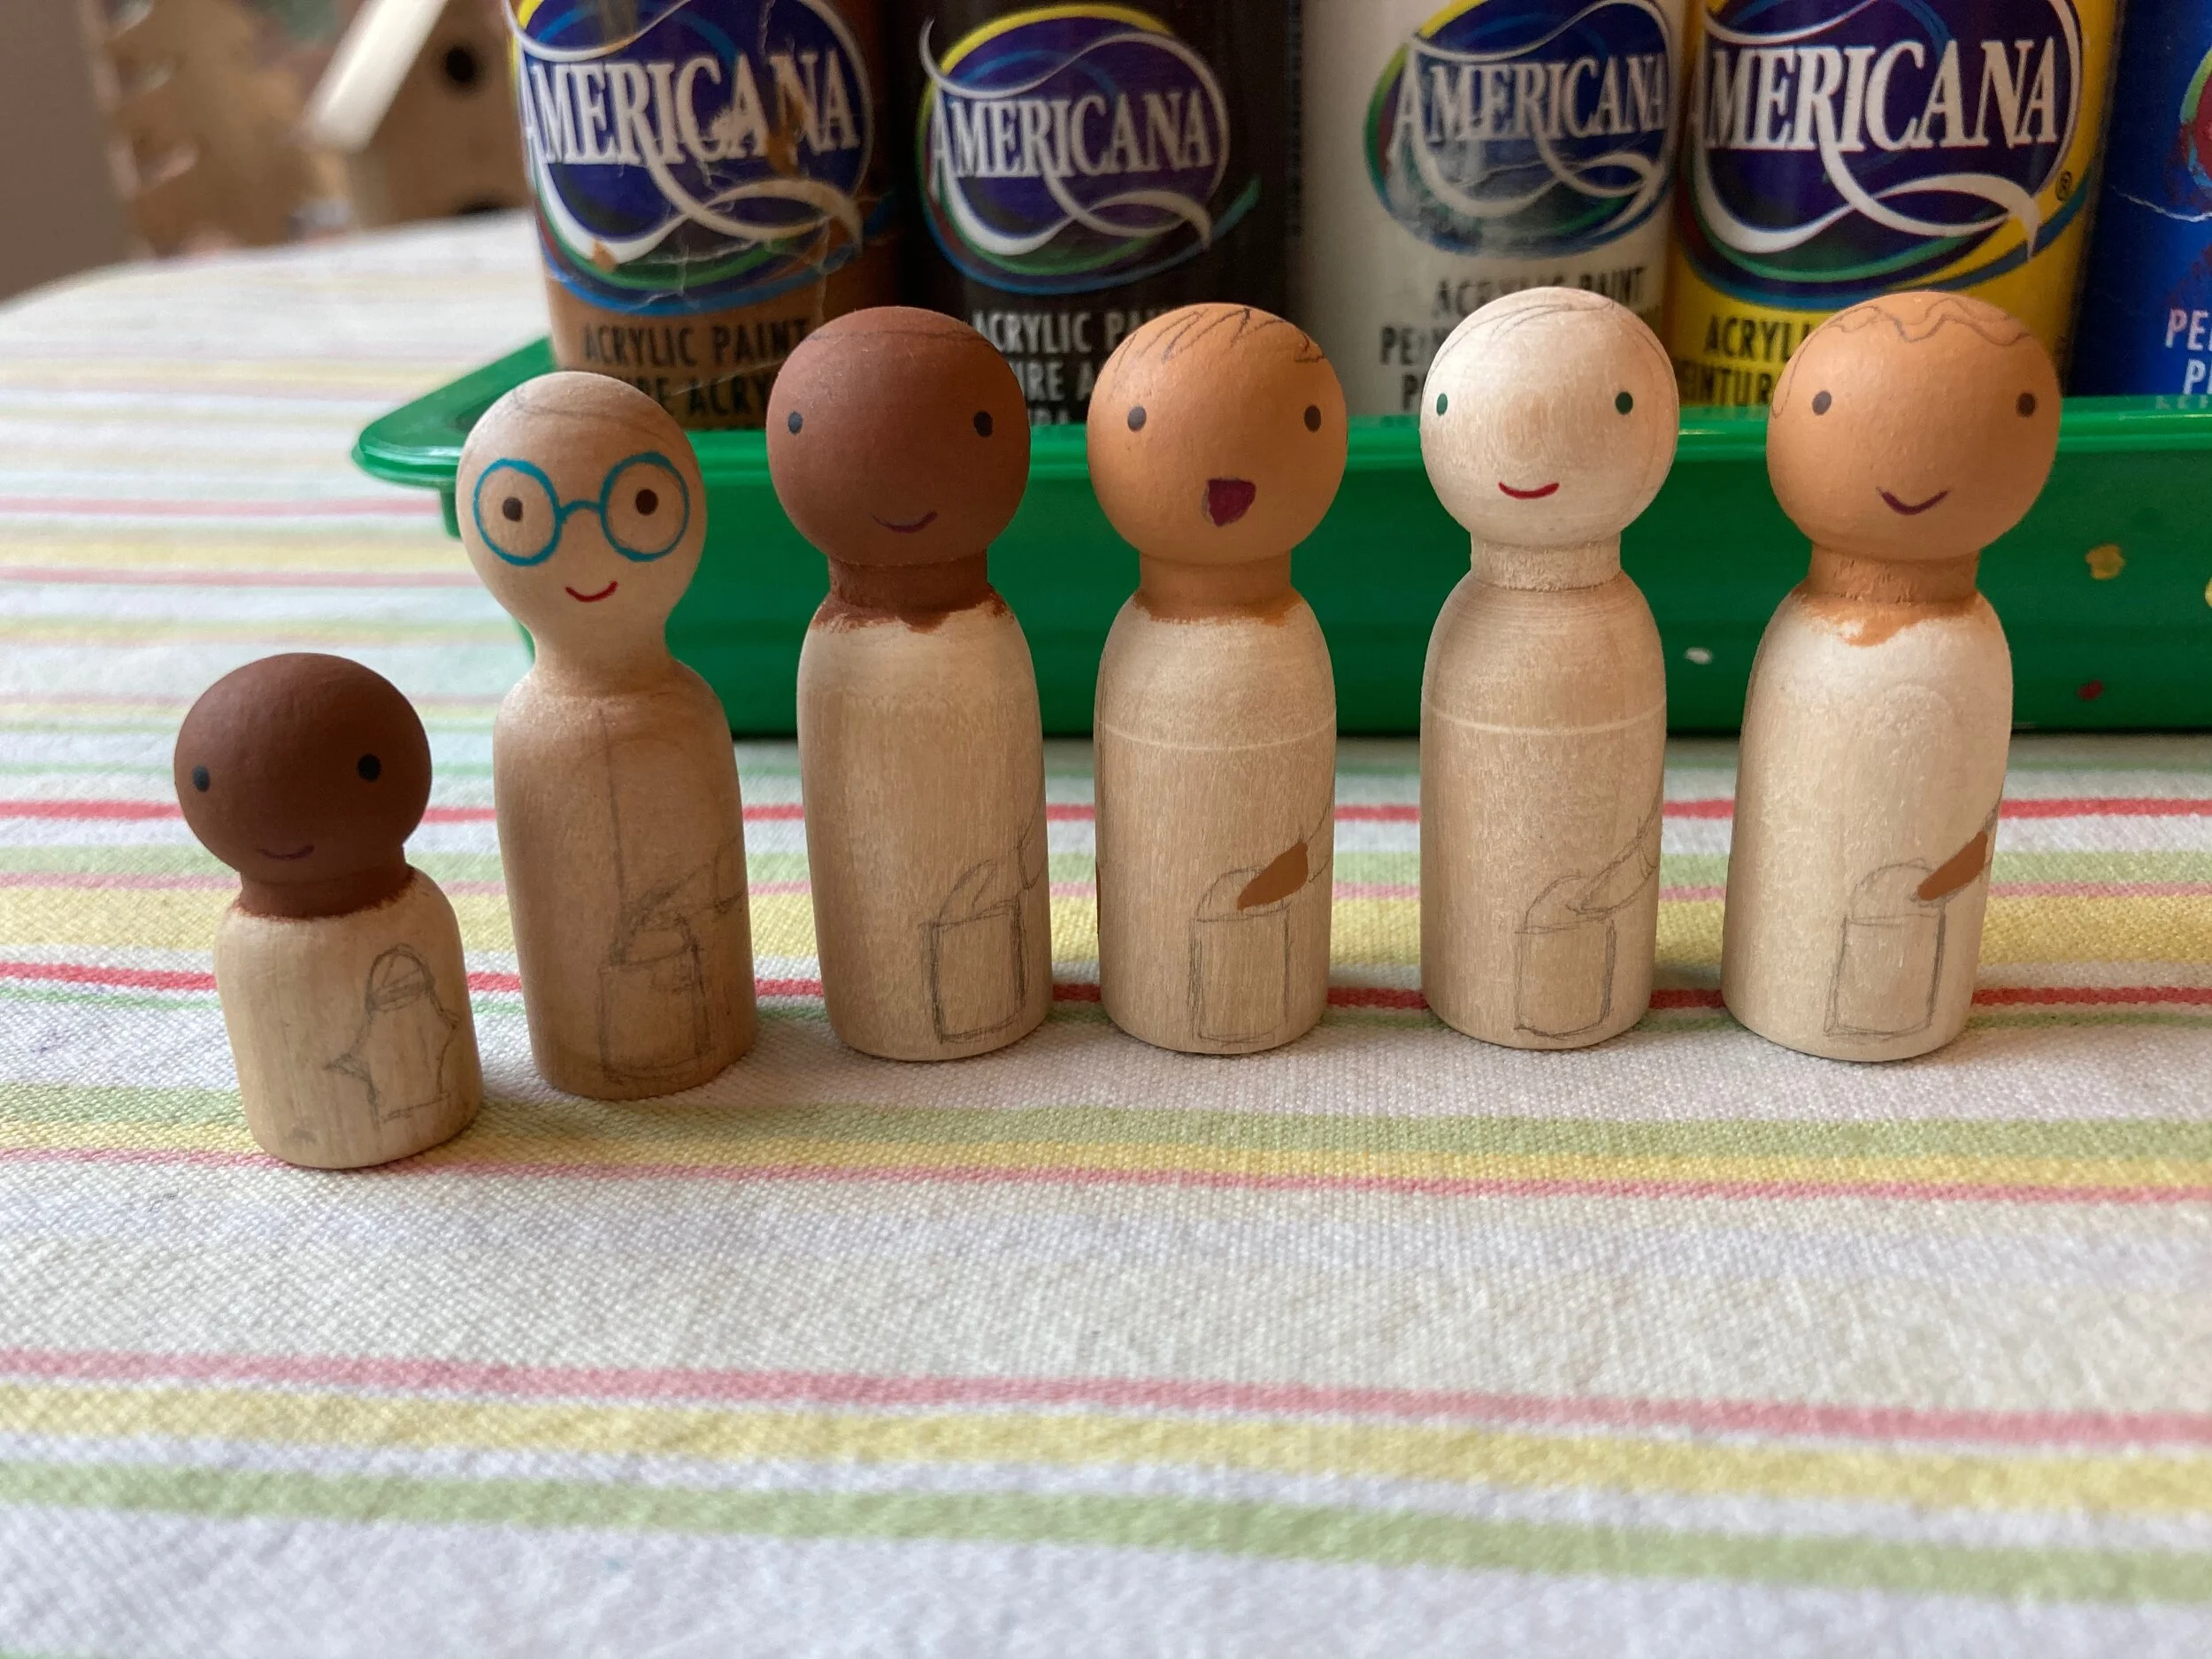
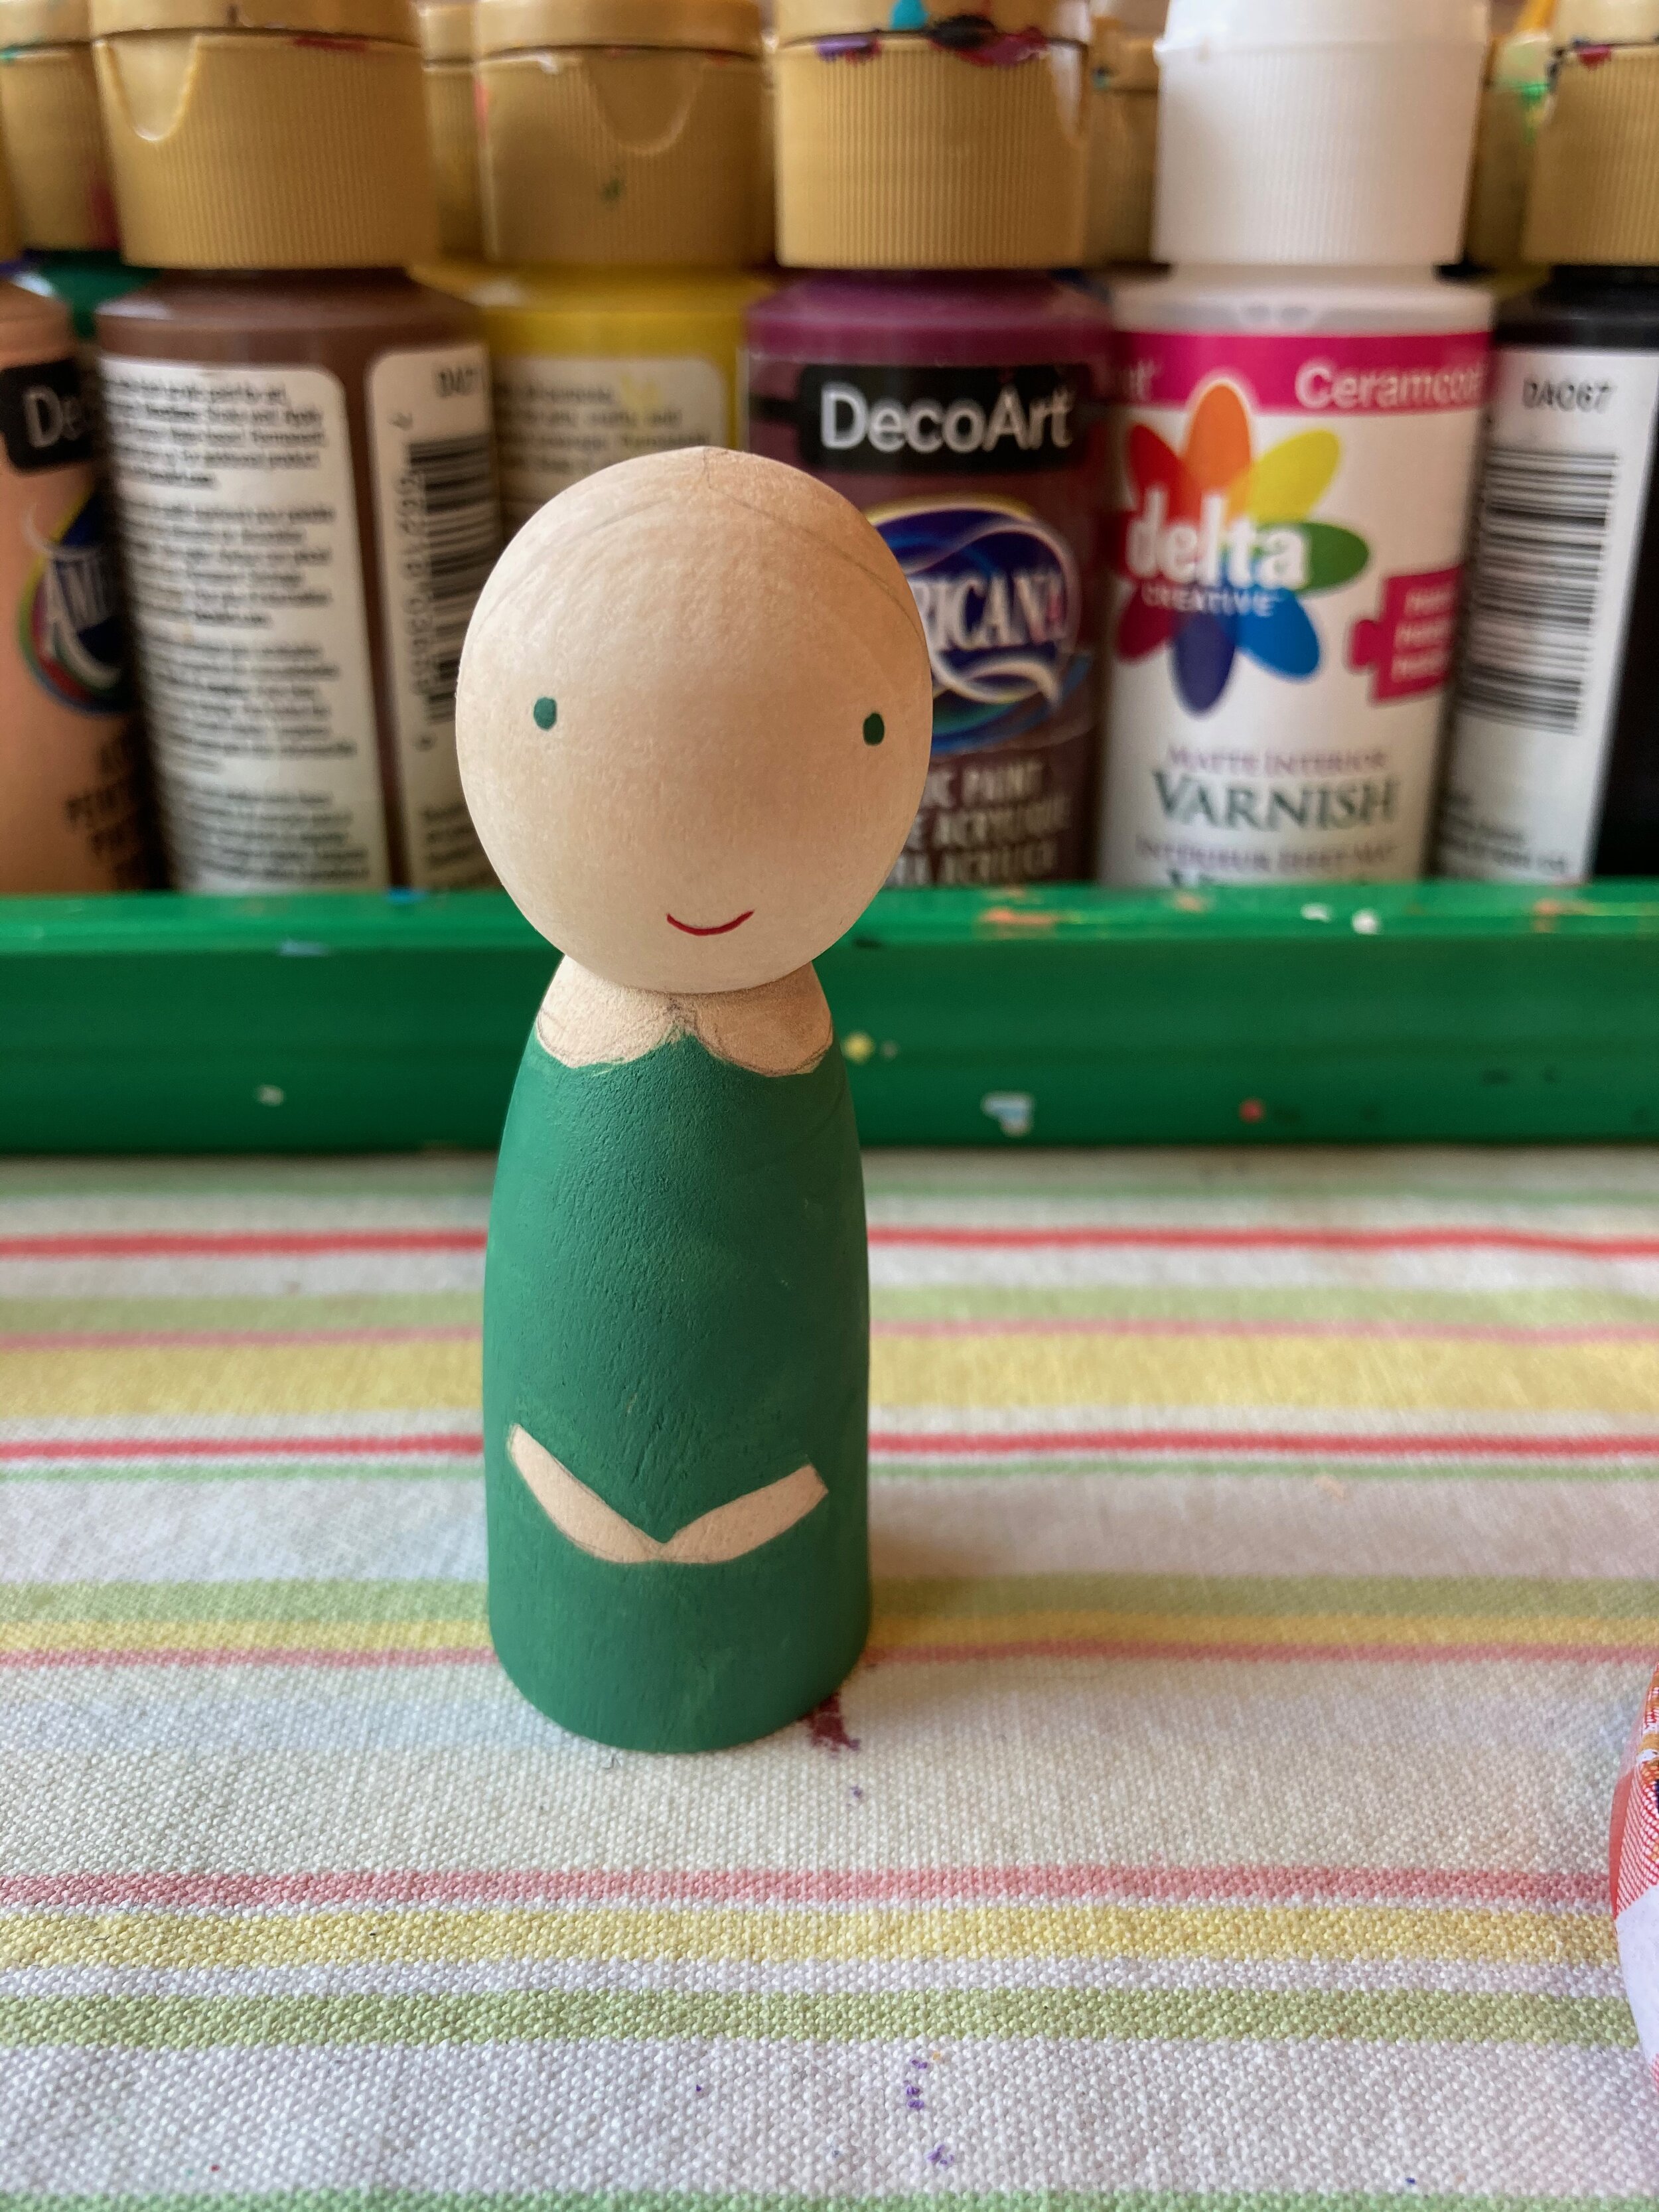
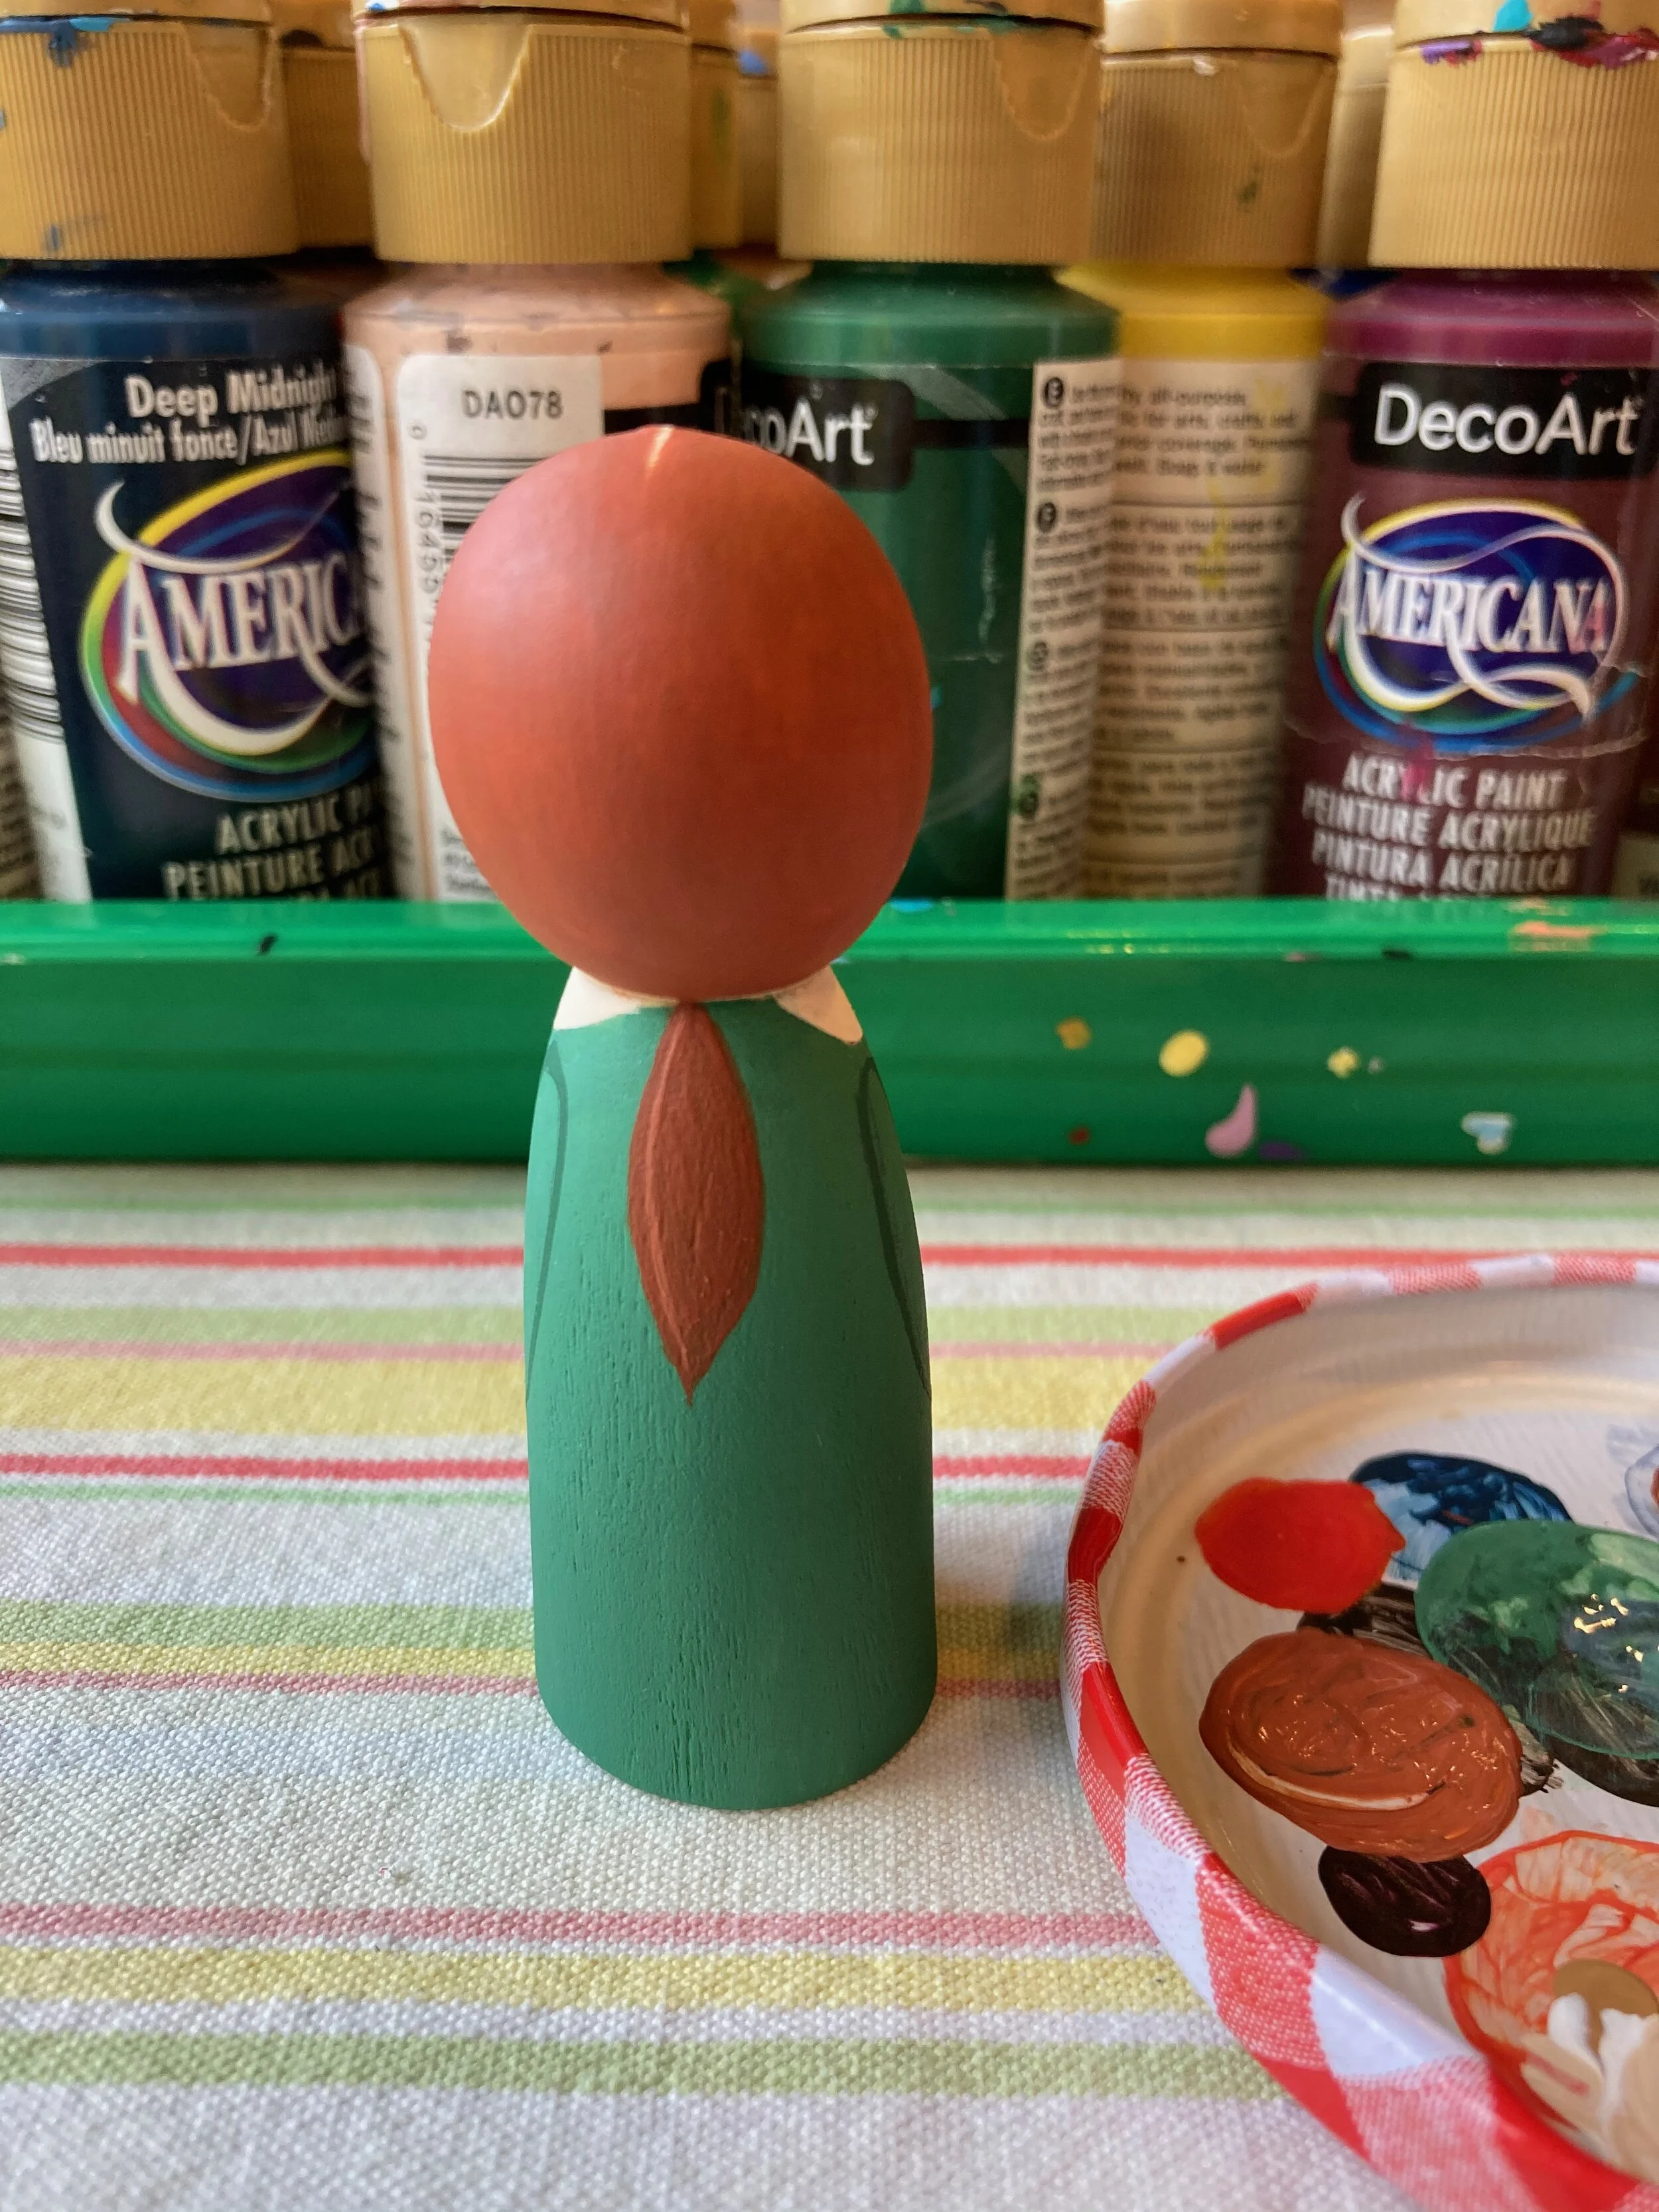
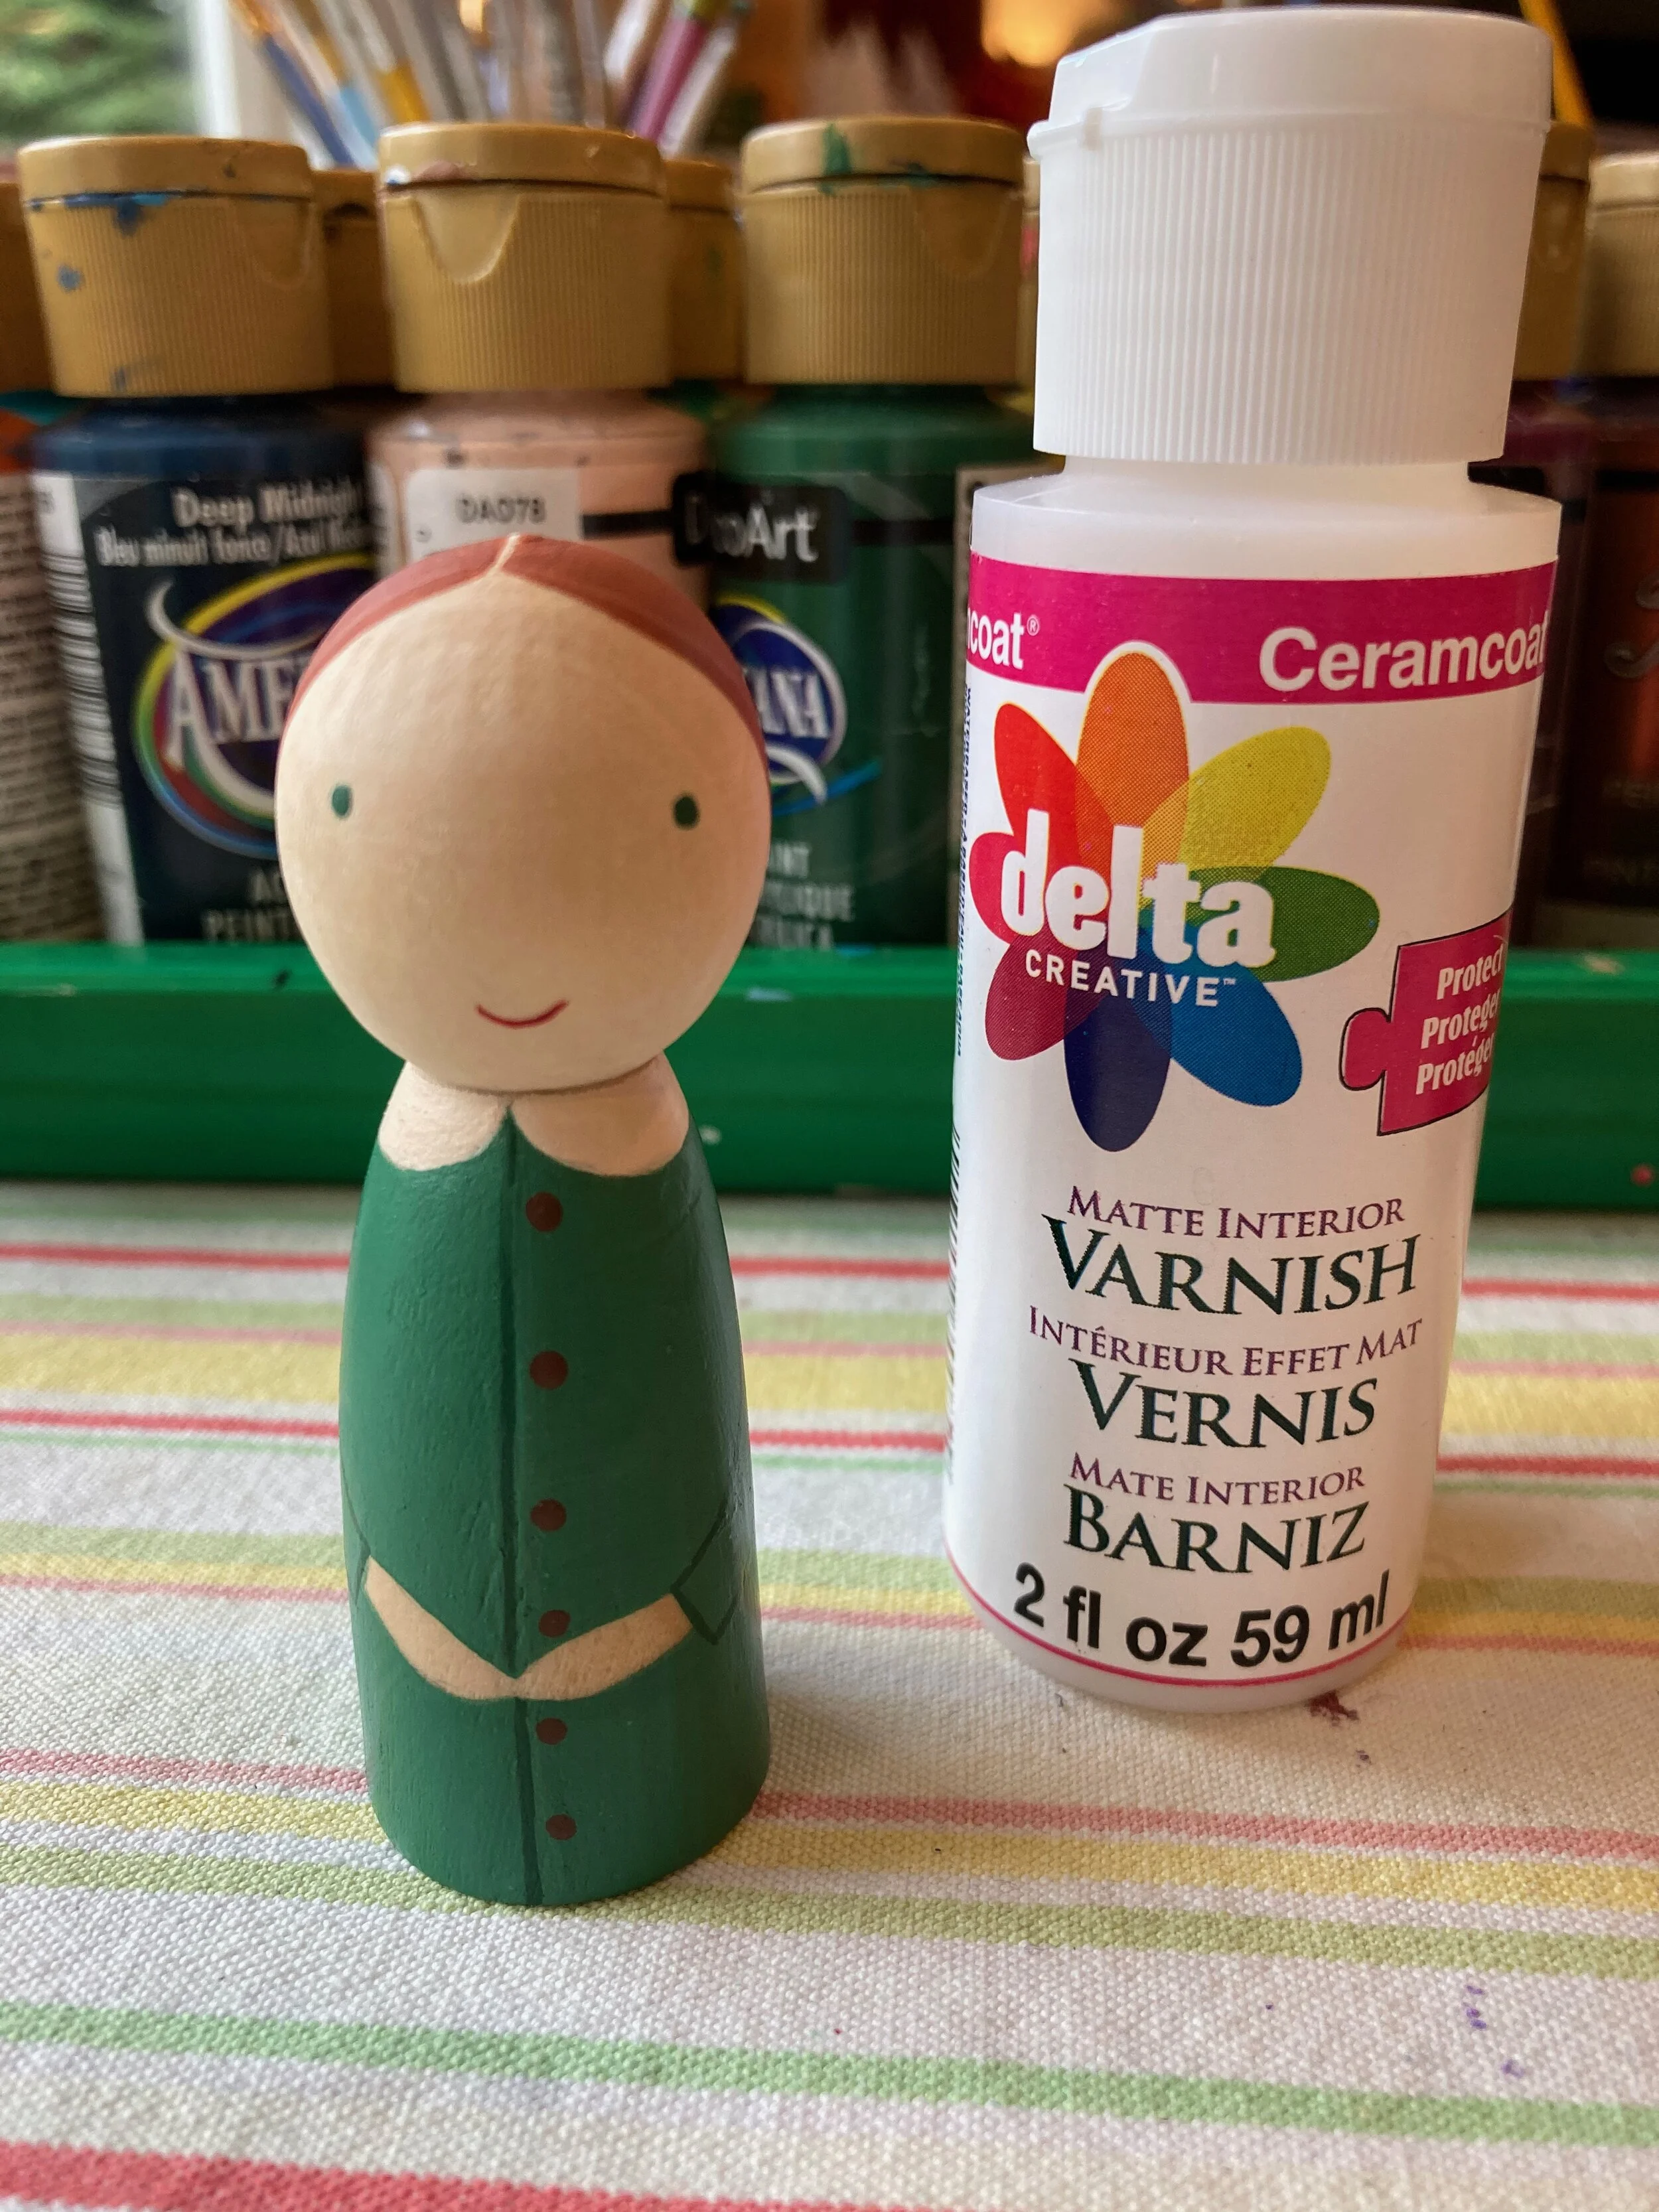
Once the face is painted, move on to painting the body and, finally, the hair.
Erase any visible pencil lines before finishing with glaze. I like to use Ceramicoat matte varnish (all of the products used in this project are nontoxic).
Once you are finished, carefully wash your paintbrushes with mild soap and water. Acrylic paint left on the brush will ruin the bristles. (Don’t worry if that happens. Hardened paintbrush tips are ideal for mixing paint colors on your palette.)
The simplest of peg doll designs can be pleasing, or you can challenge yourself by creating a custom peg doll that emulates the clothing and accessories of your subject. Children enjoy painting their own peg dolls they can then play with.
Here are some of the peg dolls my second grader, Helena, has painted over the past couple of years:

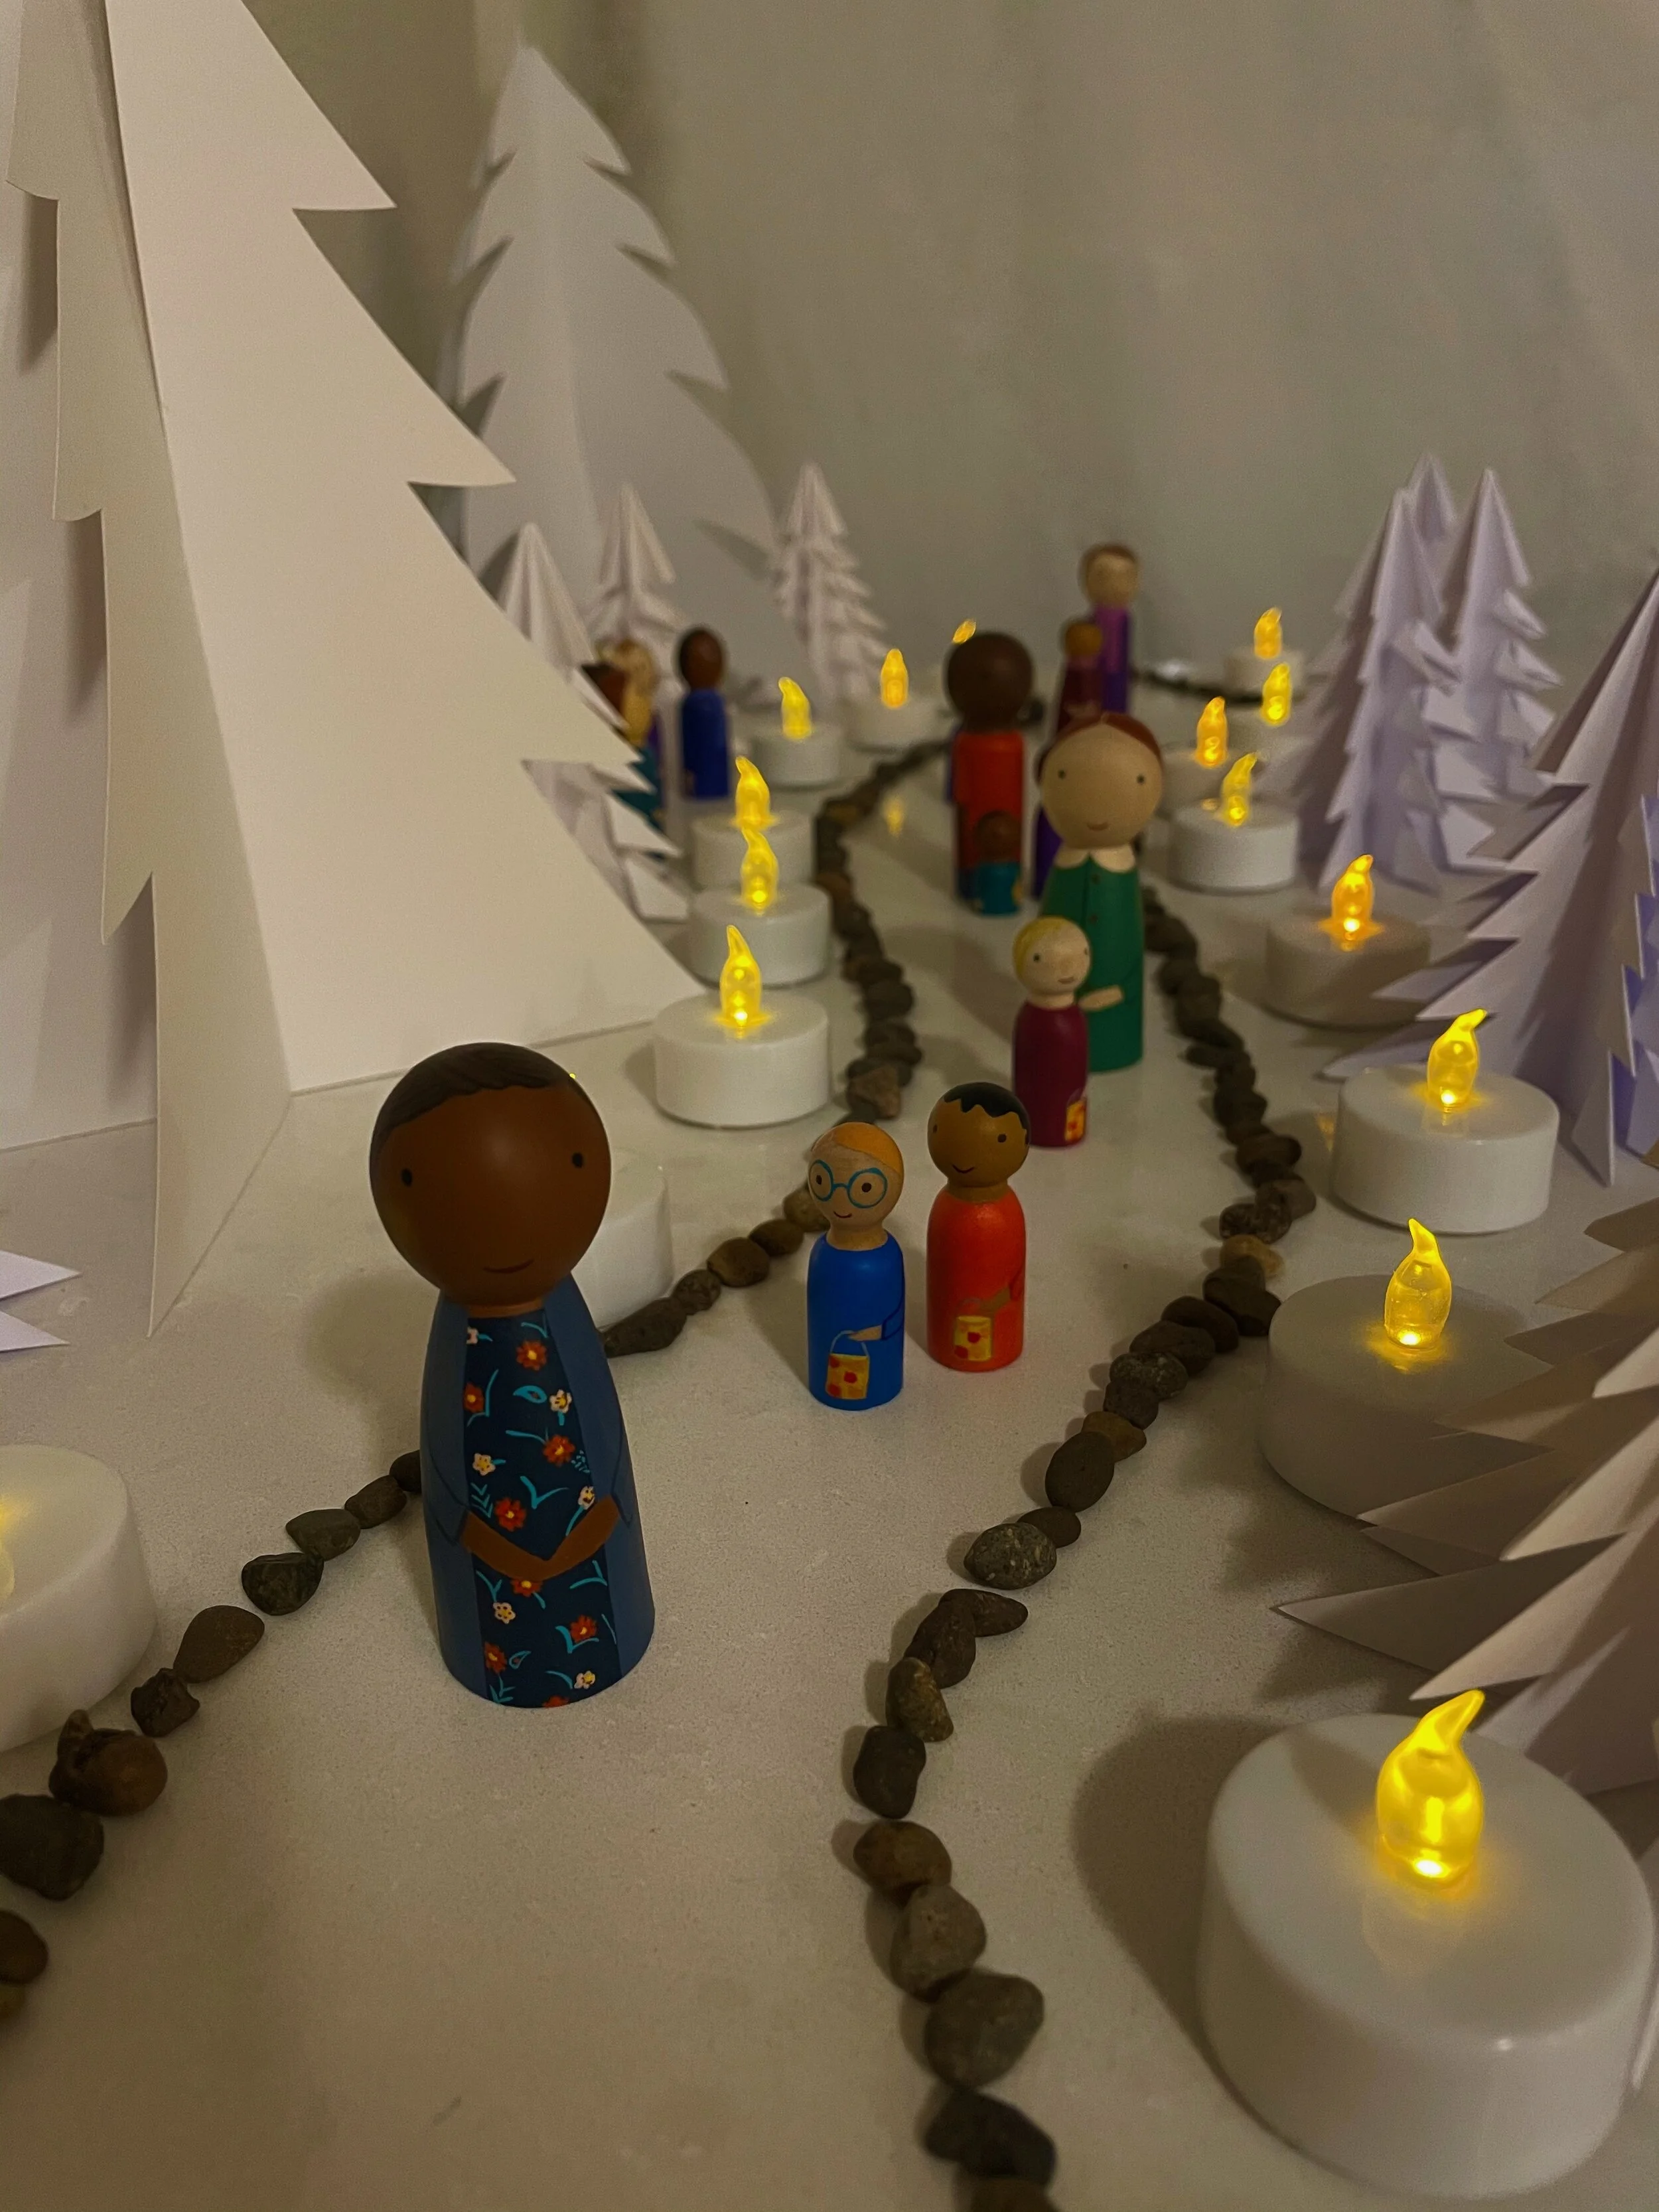
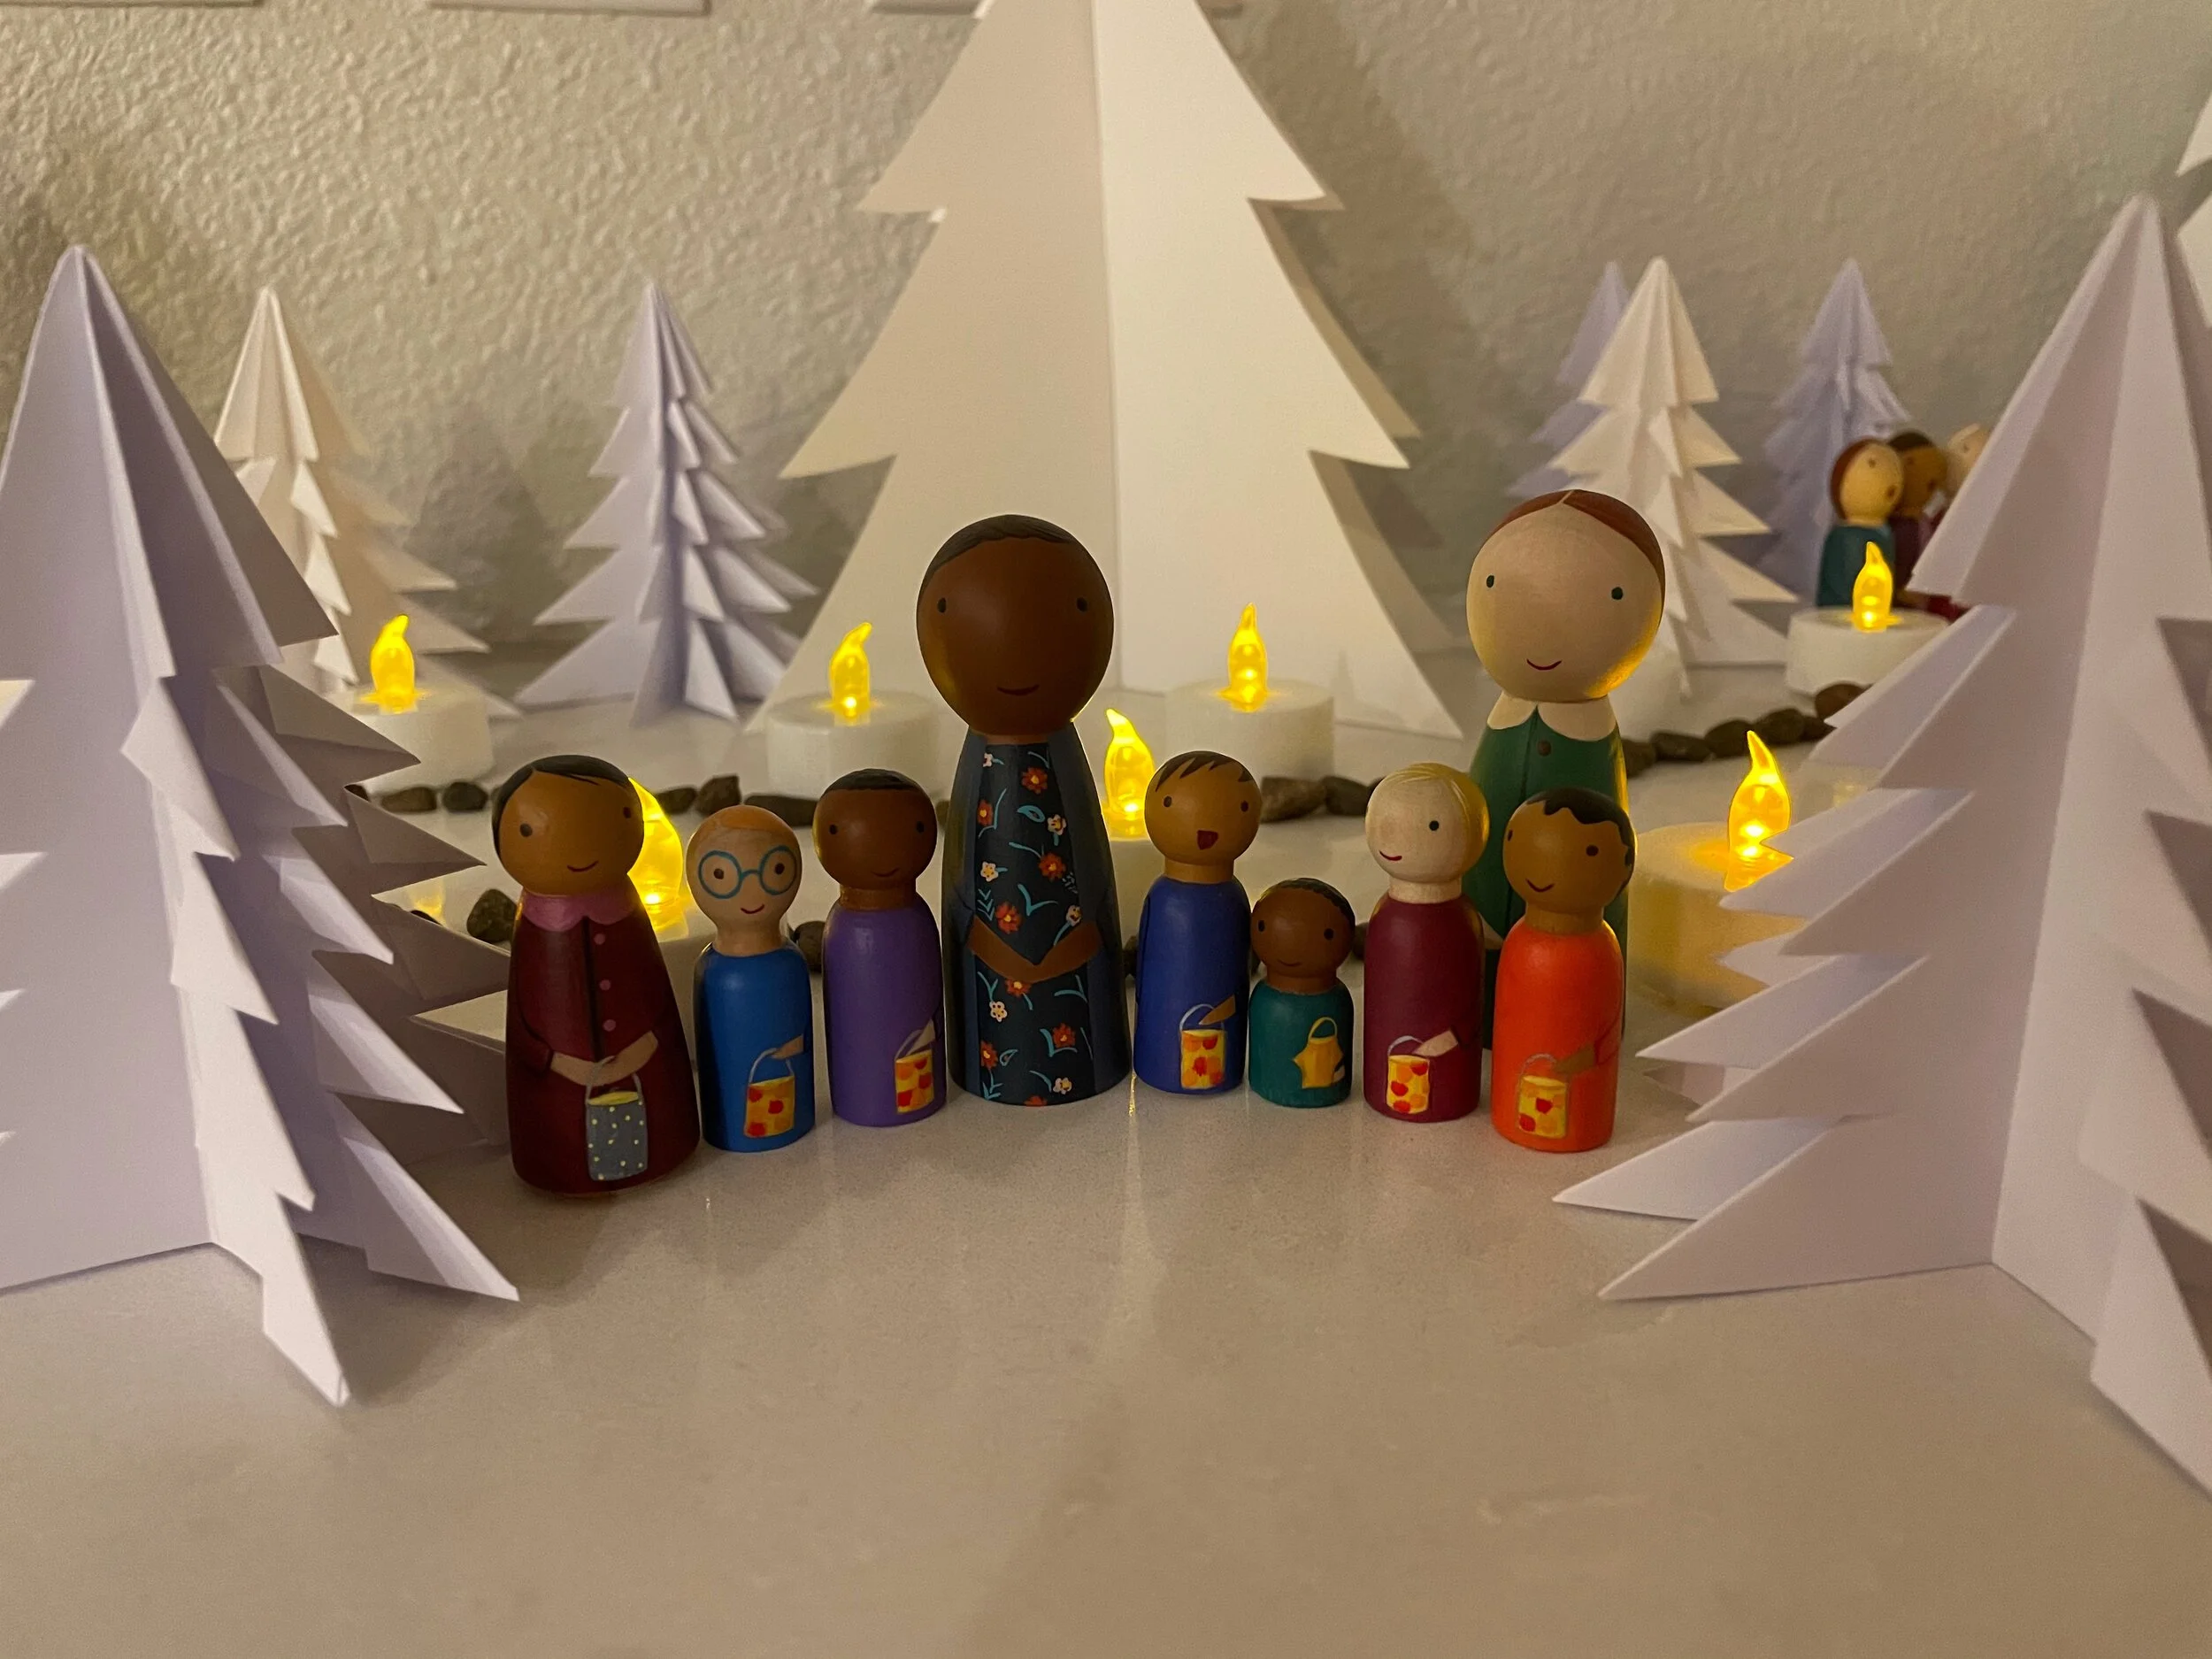
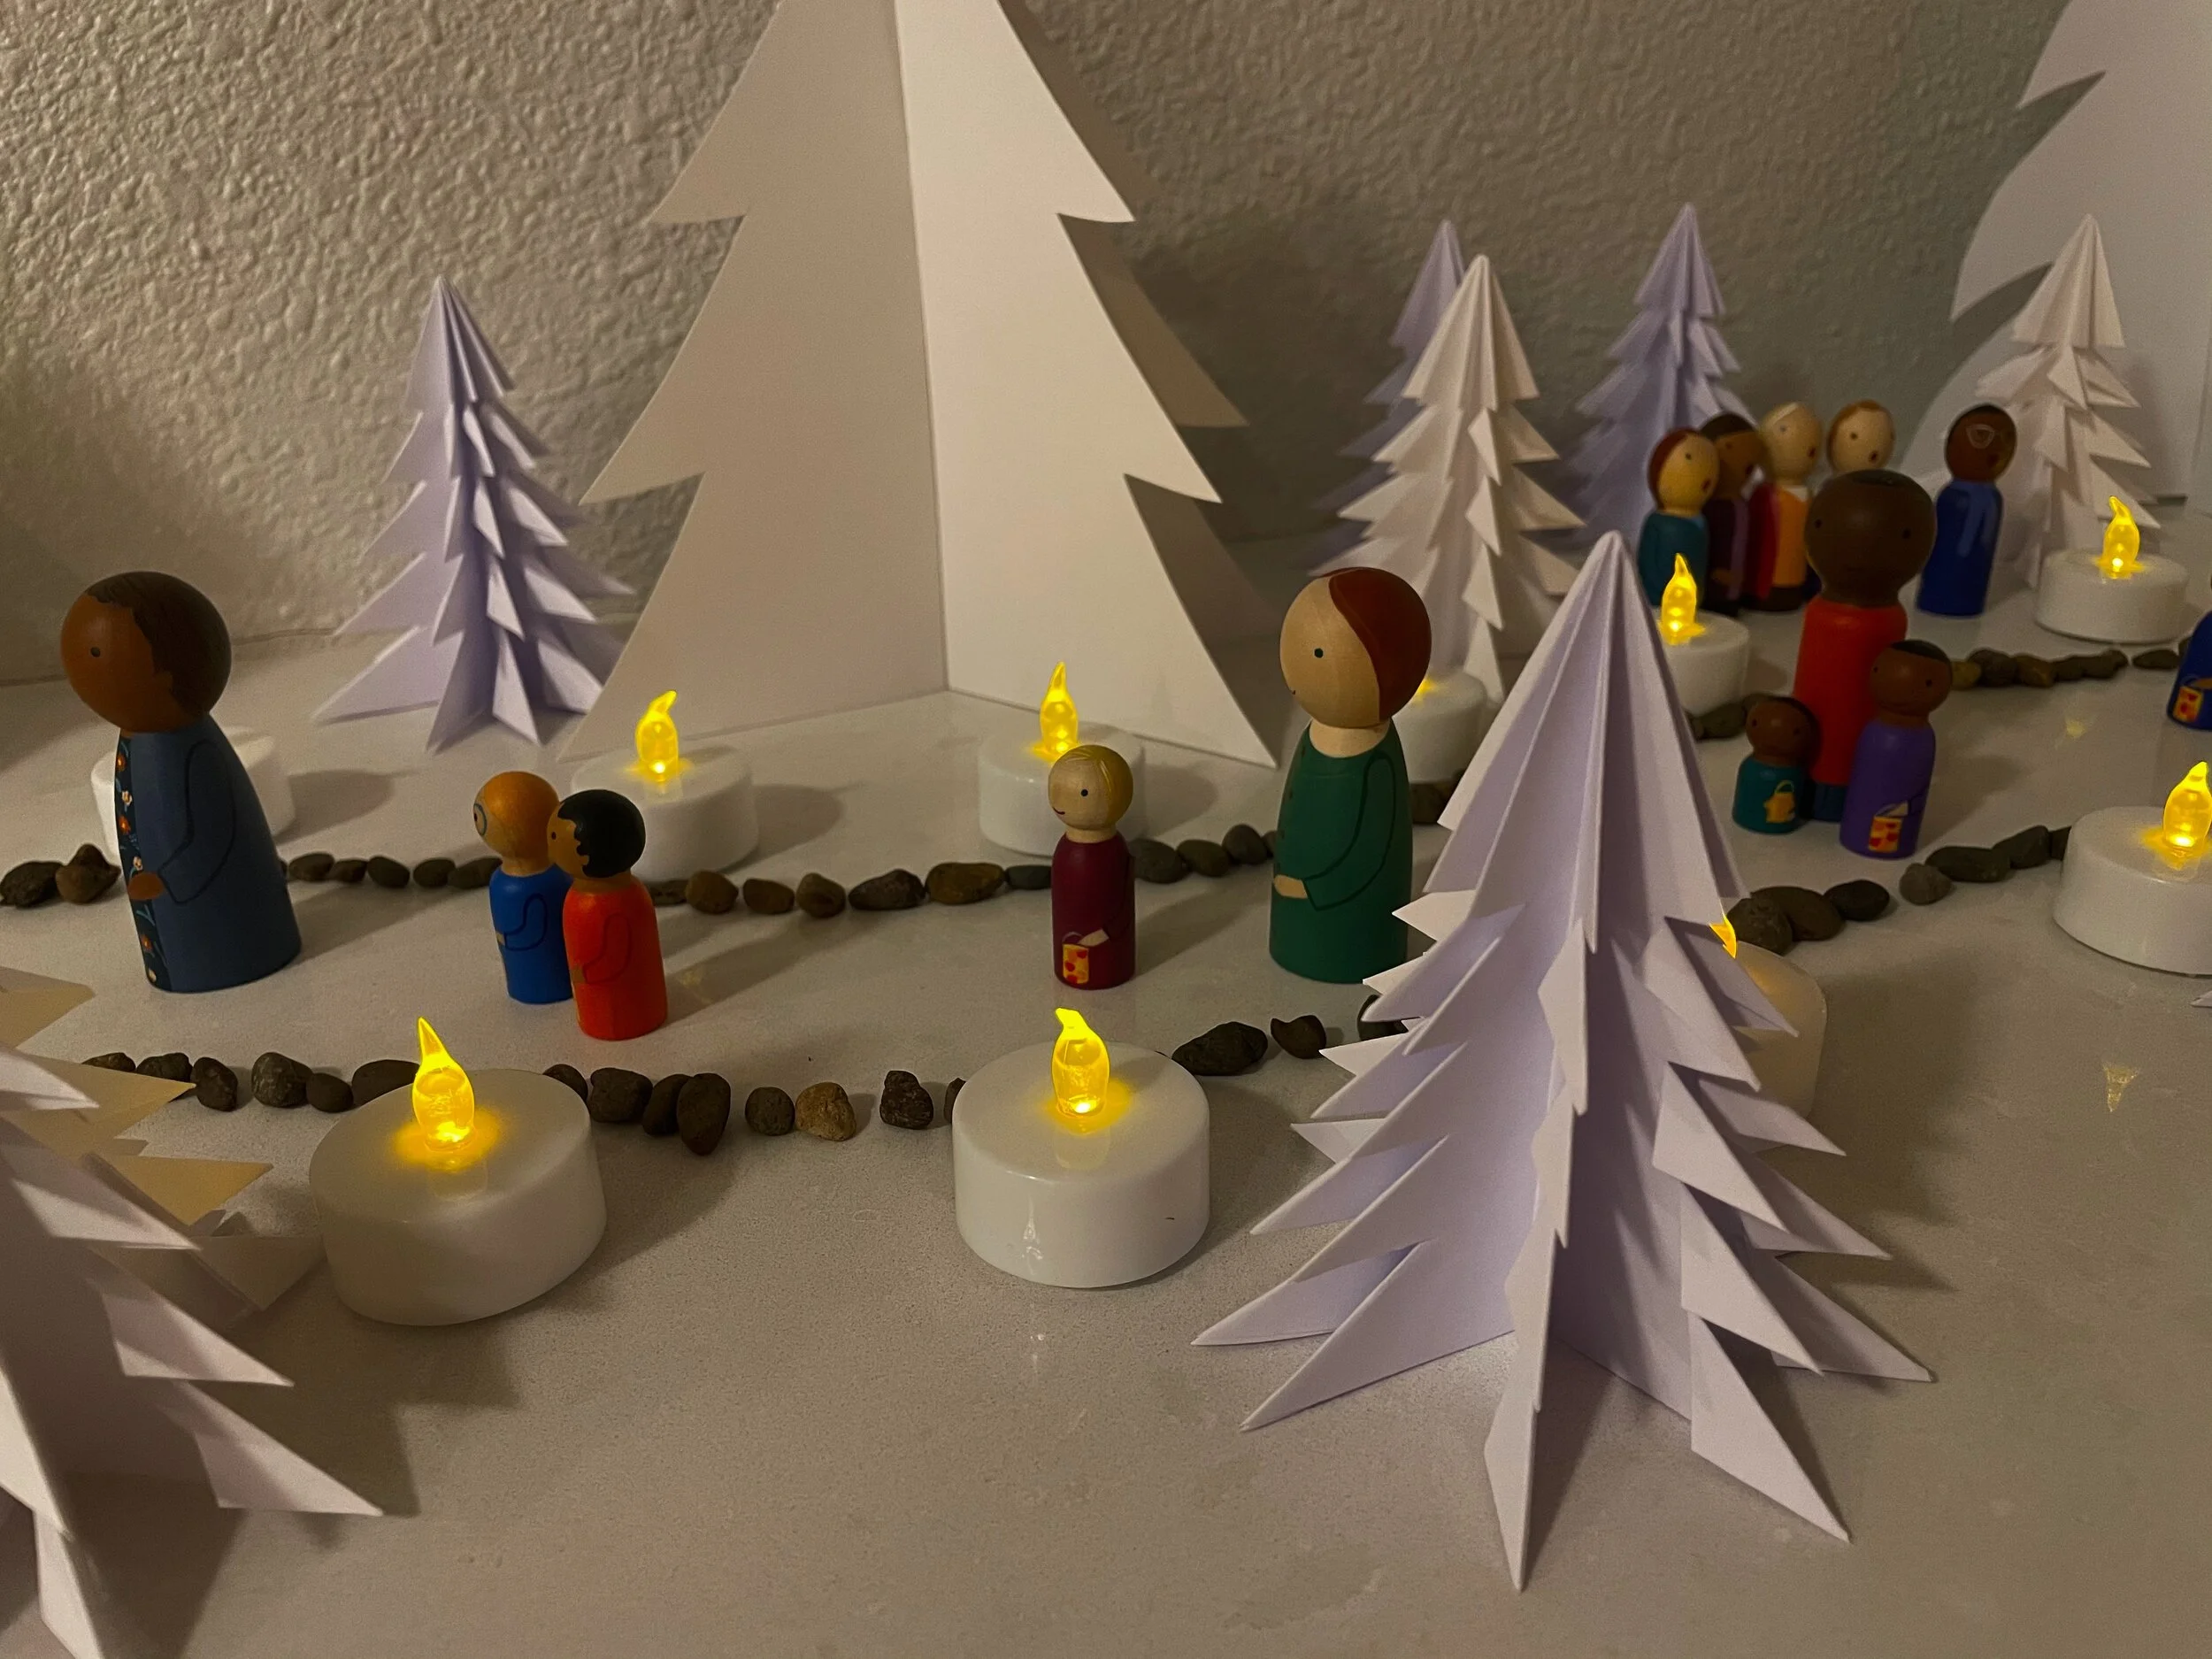
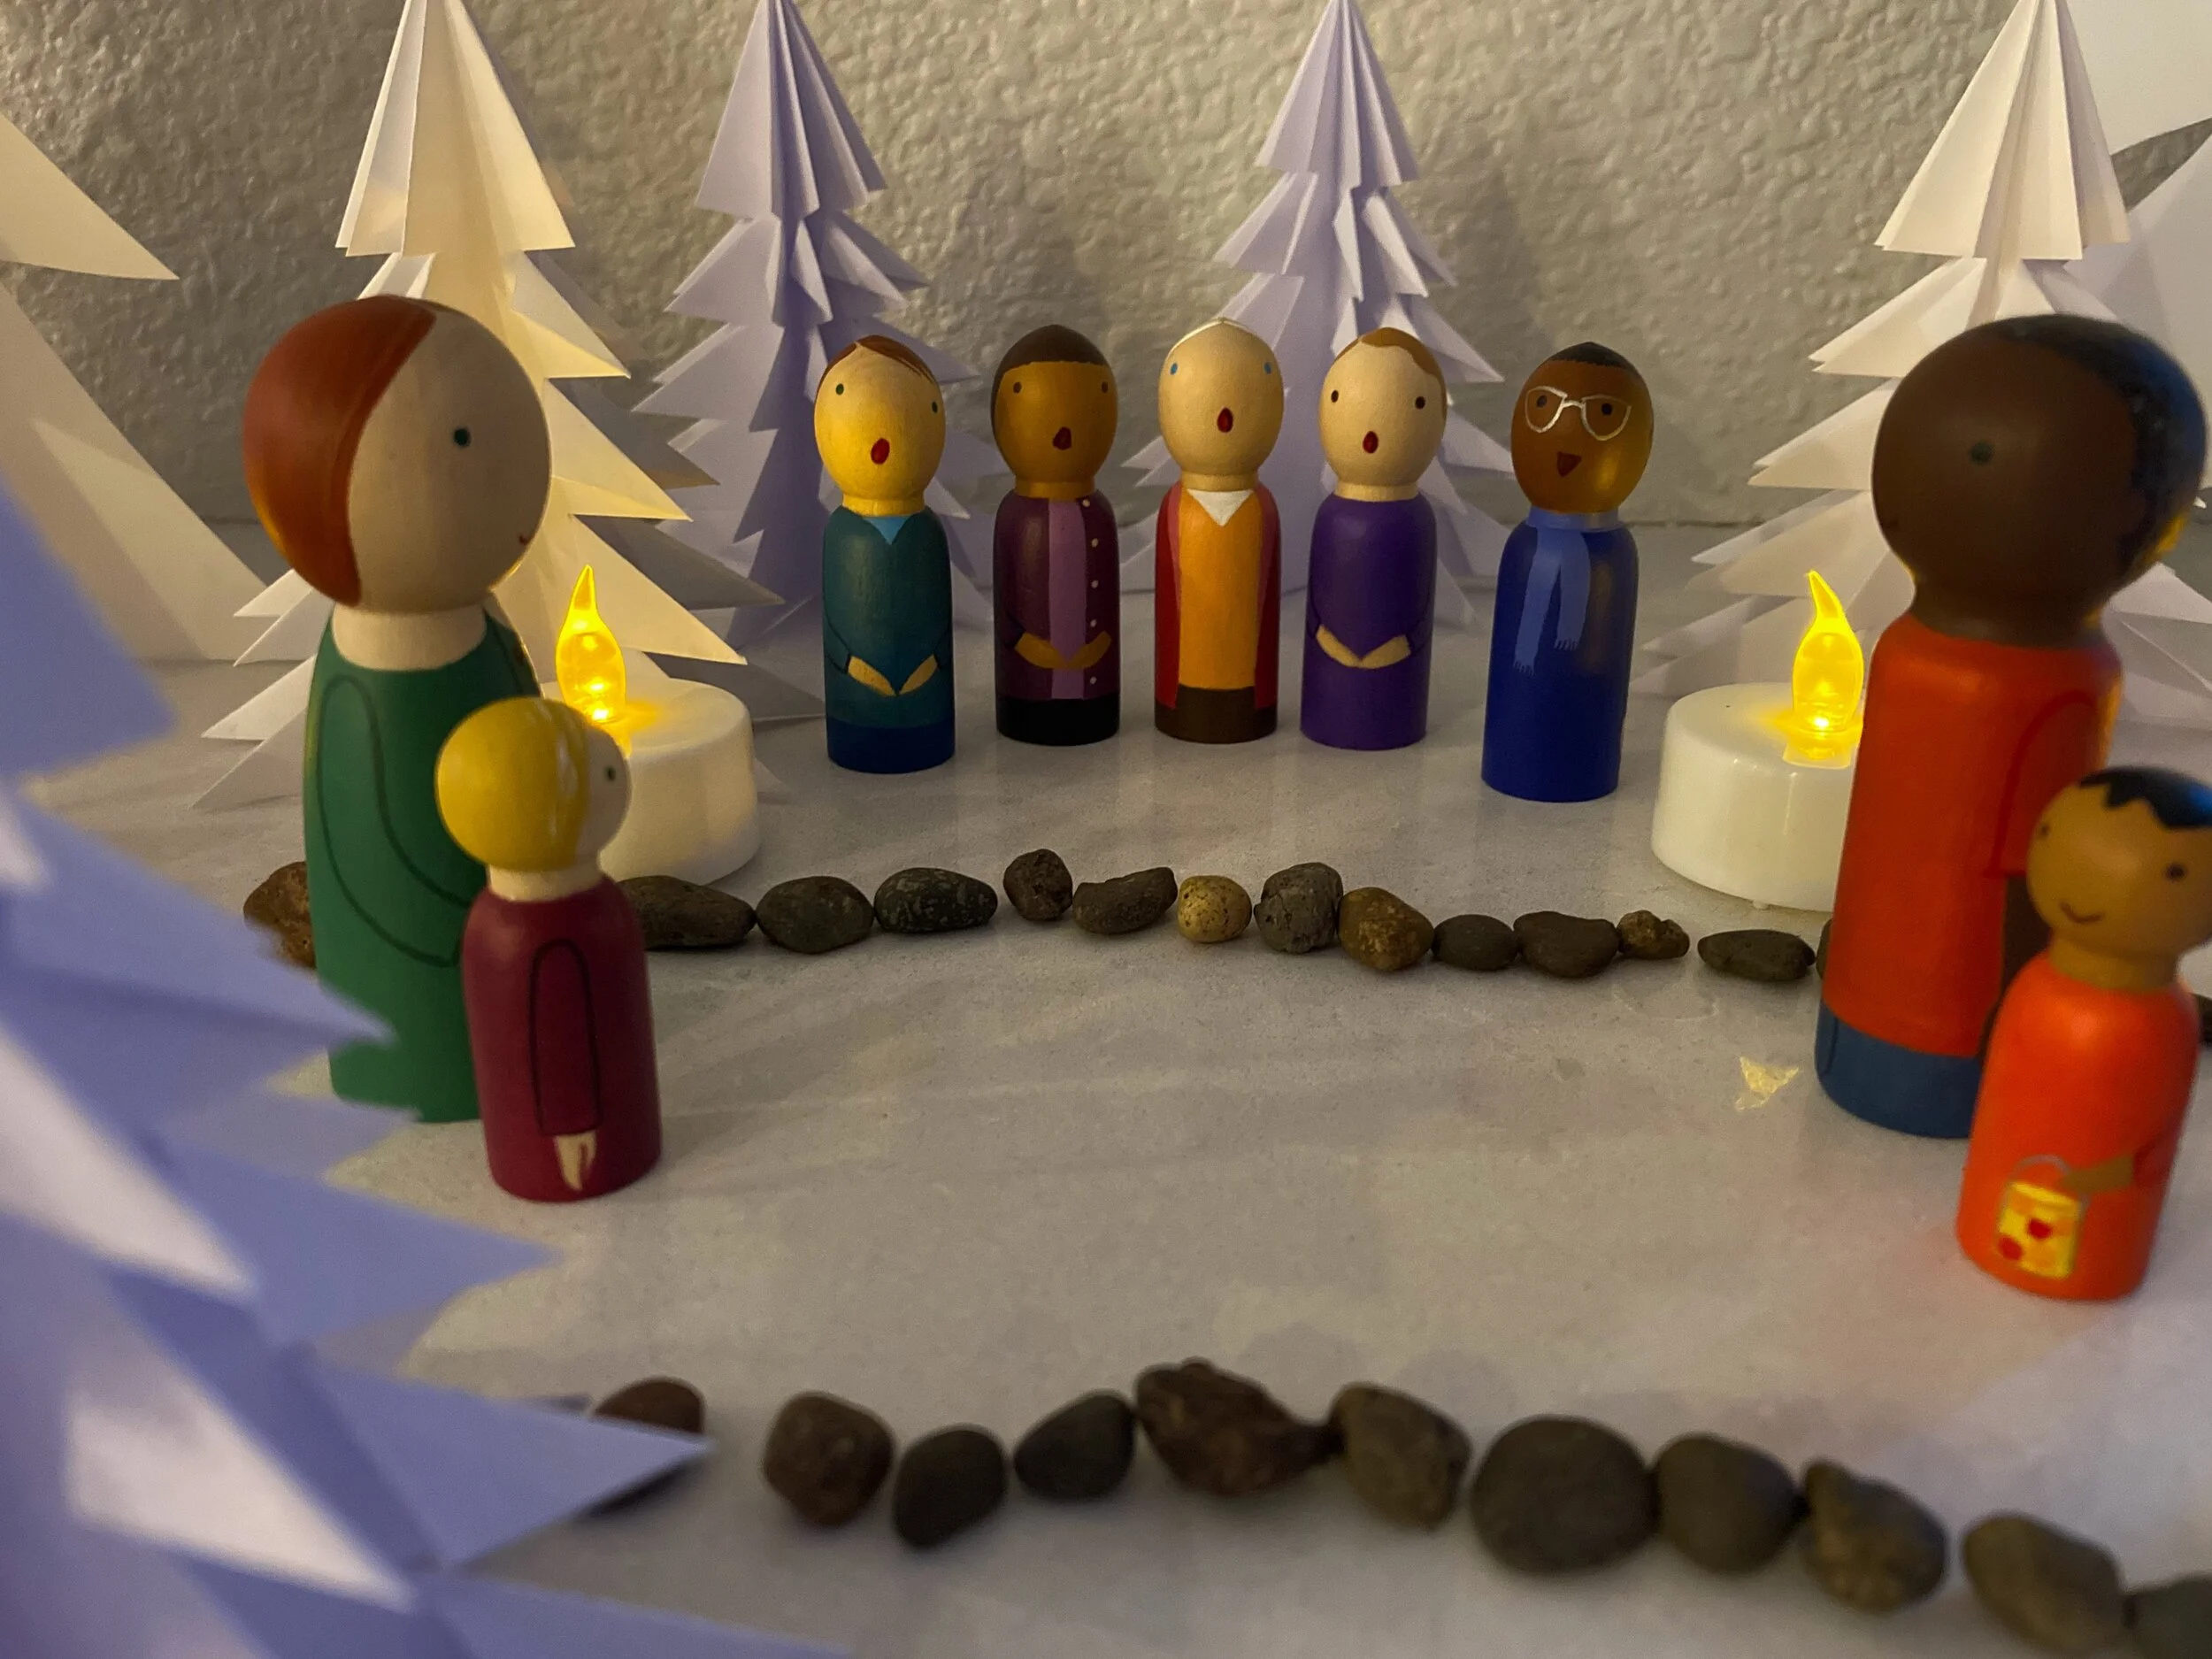
For these Martinmas peg dolls, we have painted lanterns onto the peg dolls. For a three-dimensional effect, you could also sculpt the lantern out of air dry clay and paint it once dry. Zots (glue dots) can be used to affix three-dimensional accessories onto the peg dolls.
To set up this simple Lantern Walk scene, we made trees out of paper, gathered some small rocks from our yard, and lit the scene with tea lights.